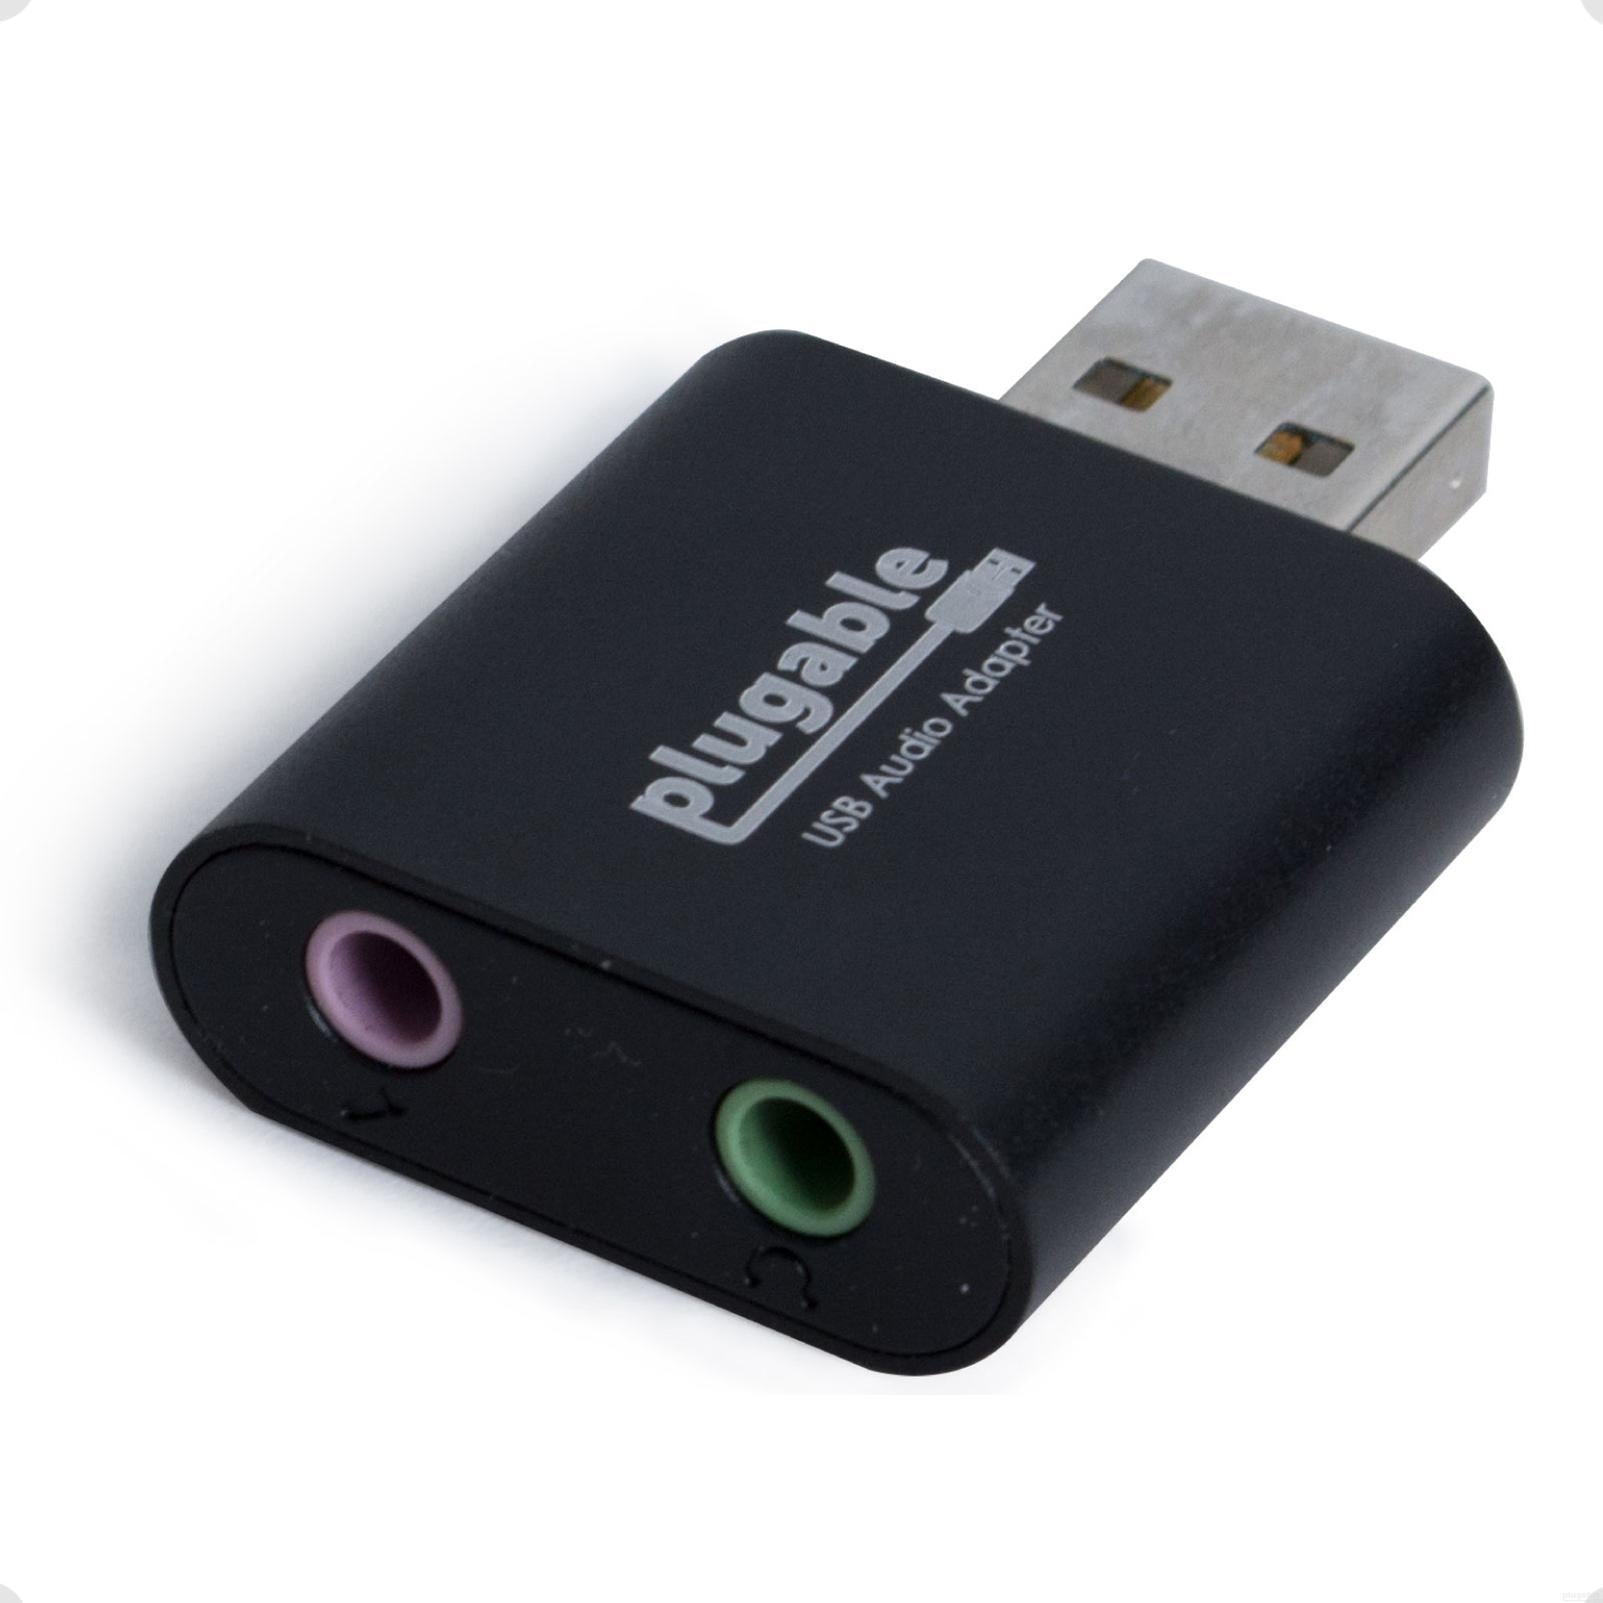


Plugable USB オーディオ アダプター
$9.95 USD
SKU: USB-AUDIOAmazon Rating : (5046 Reviews)
機能
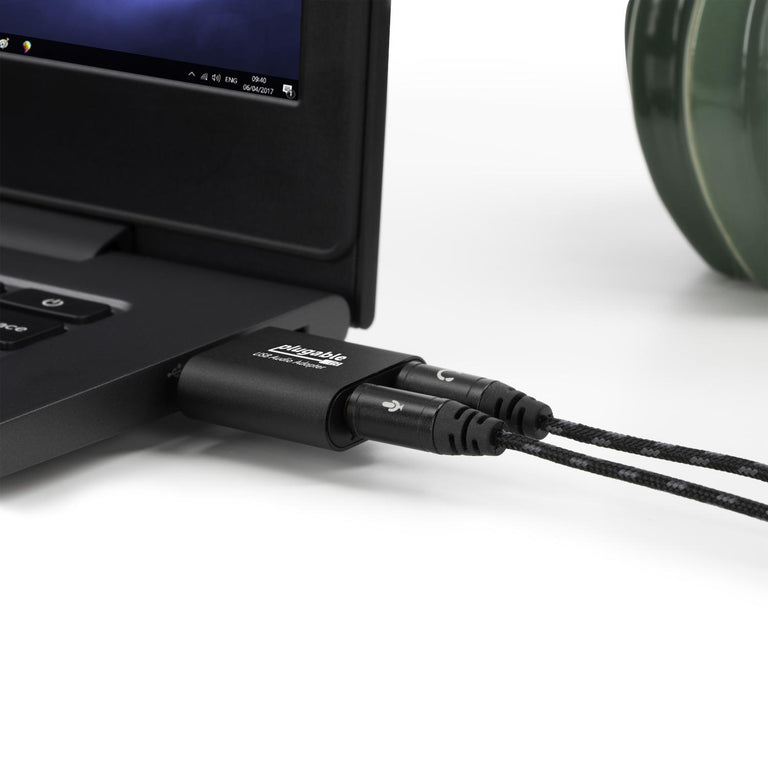
- シンプルな音声ポート - USB ポート経由で、3.5mm(TRS)のオーディオヘッドホン、ヘッドセット、スピーカー、マイクなどを接続できます。
- 音声代替ポートとして機能 - PC上のオーディオ端子やオーディオカードが壊れたり不具合があるときなどに、このアダプターを利用できます。
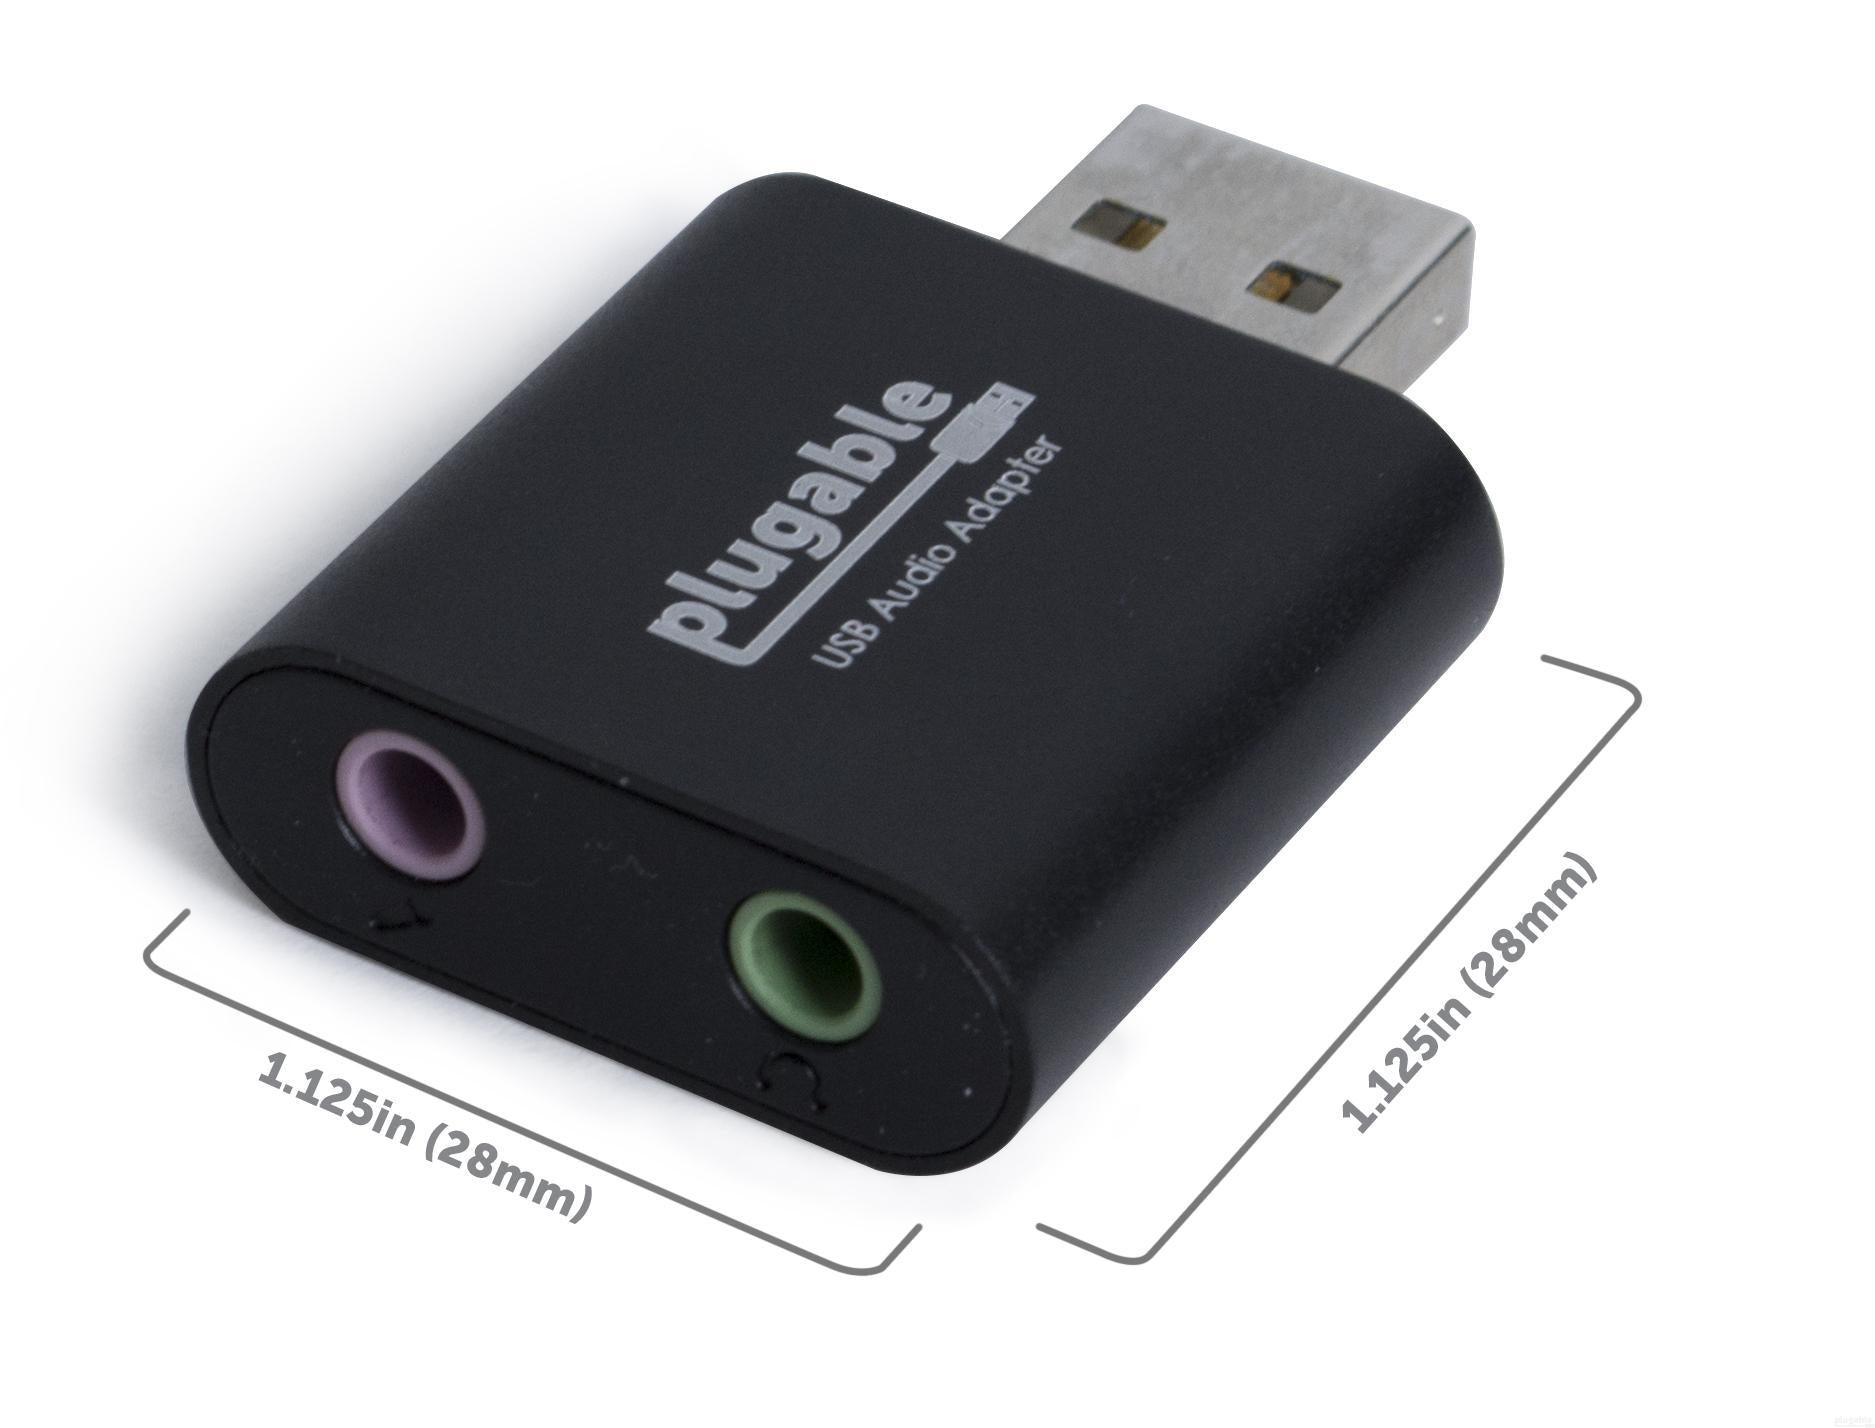
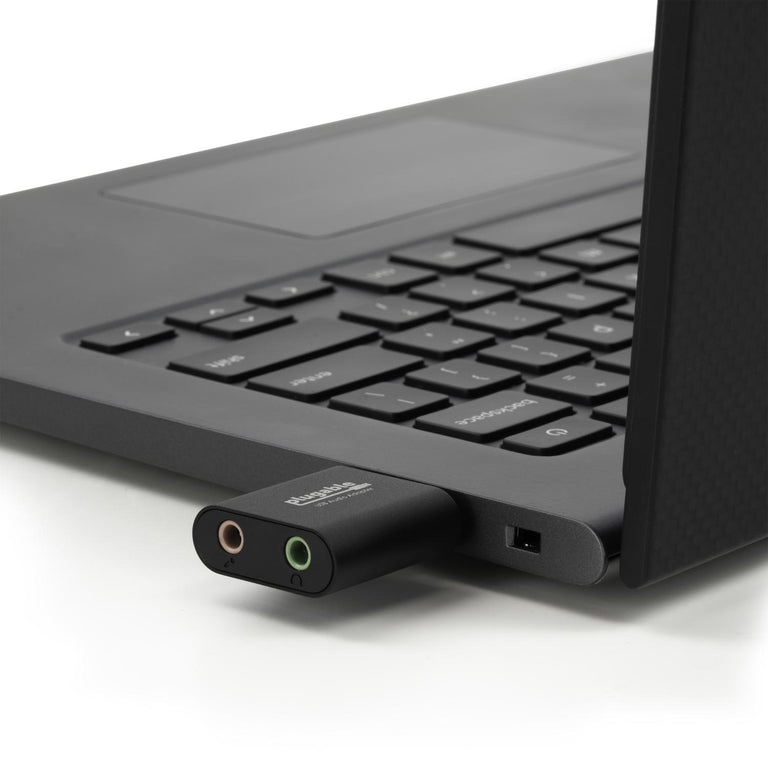
- 常時接続 - USB ハブやドッキングステーションに挿入したままにでき、抜き差しは必要ありません。非常に軽く、丈夫な黒のアルミニウム仕上げです。
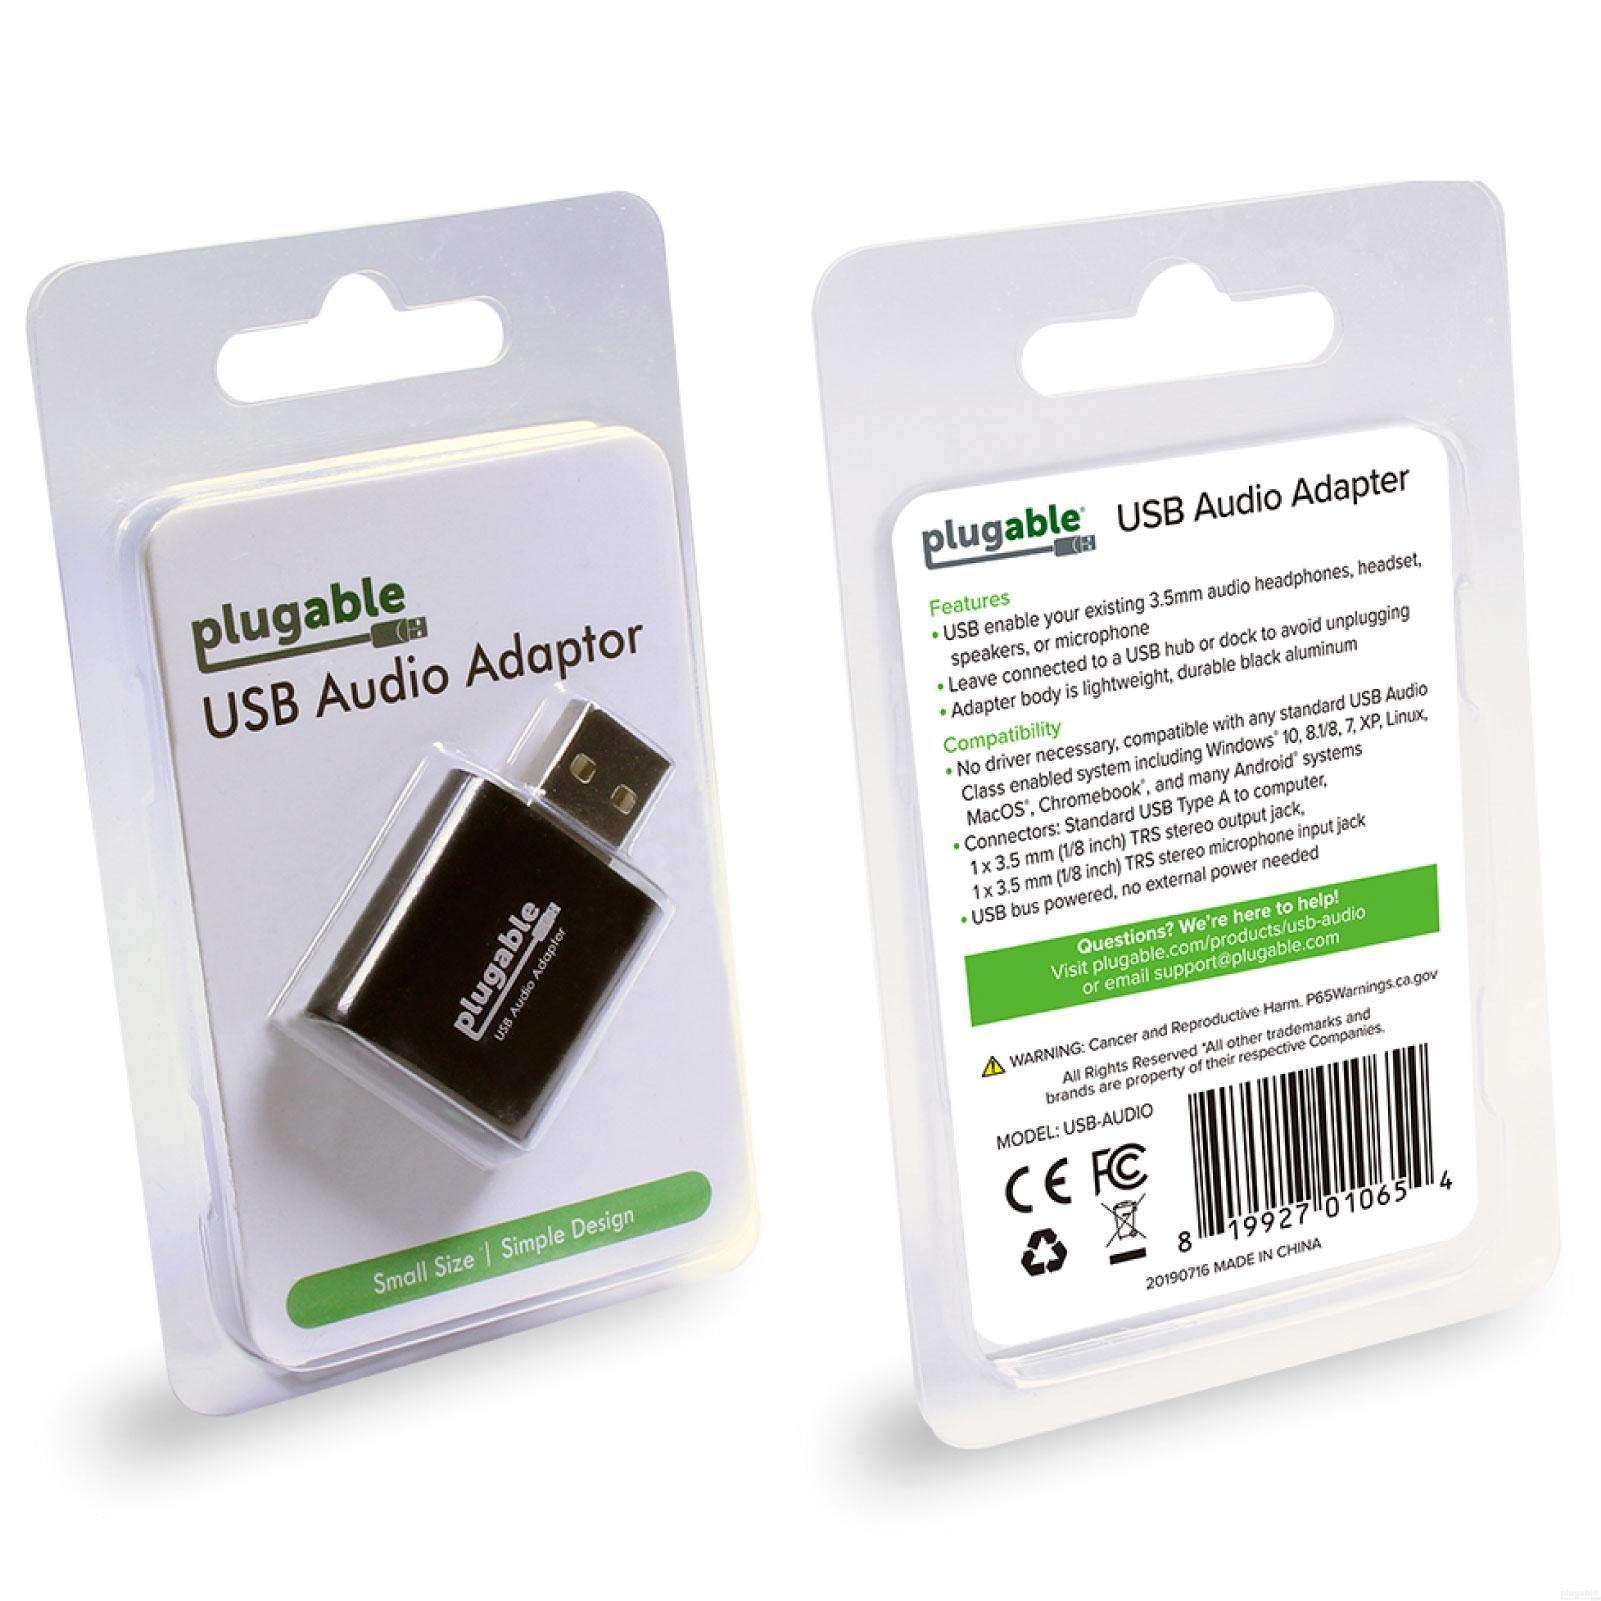
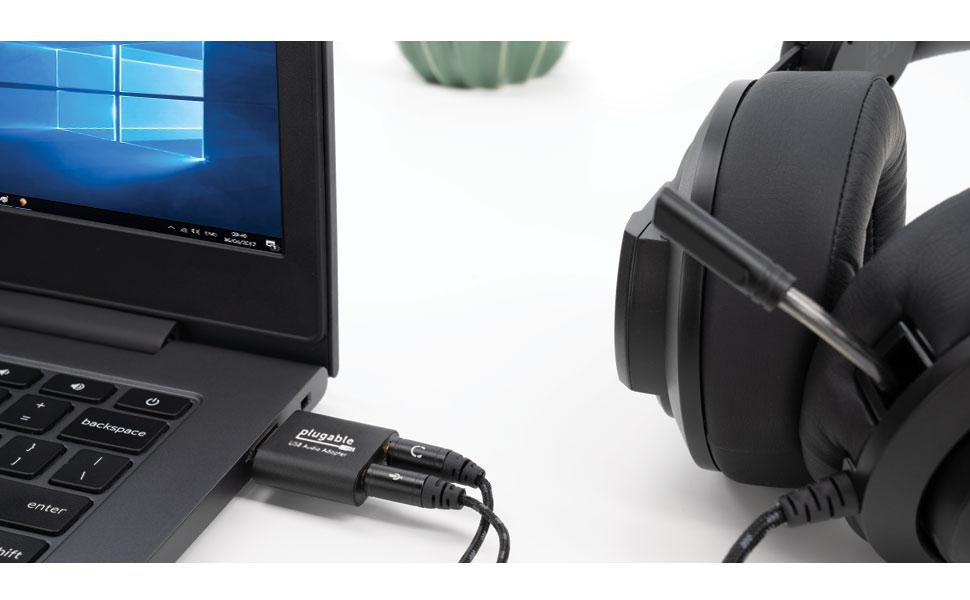
- 簡単に使用可能 - このアダプター用のドライバは一般的なパソコン用 OS に内蔵されており、特別なドライバの導入は必要ありません。標準 USB オーディオ・クラスが有効な Windows、macOS、ChromeOS、Linux、Raspberry Pi OS(Raspberry Pi 5)などのシステムで使用できます。 3.5mm オーディオジャックがないシステムでもヘッドセット使用が可能となります。注意)車搭載のオーディオシステムについている USB ポート、ピンマイクでは使用できません。
- 2 年の品質保証 - Plugable は 2 年間の品質保証およびメールでのサポートをご提供いたします。正規販売元より度購入ください。この製品について何かご質問がございましたら、Plugable Japan サポート nihongo@plugable.com までお気軽にご連絡ください。
Free 3-Day Shipping on Orders Over $35!
Plugable USB オーディオ アダプター
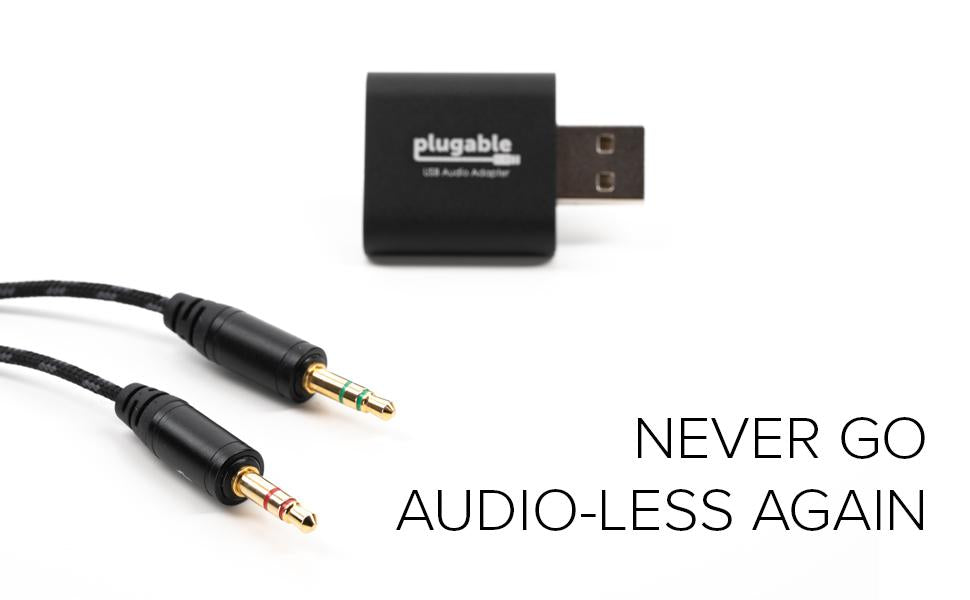
オーディオポートを簡単に追加
この Plugable USB-AUDIO オーディオ変換アダプタを使えば、USB オーディオ・クラスが使用できるどんなシステム上でも、USB ポート経由で簡単にオーディオ機器を接続することができます。すっきりとしてコンパクトな黒い筐体のアダプタは、特別なドライバを導入する必要なく使用できます。通常システムに付属しているオーディオ入出力ポートど同様に、簡単にヘッドフォンやスピーカー、マイクロフォンを接続し音楽を聴いたり音声を録音したりできます。
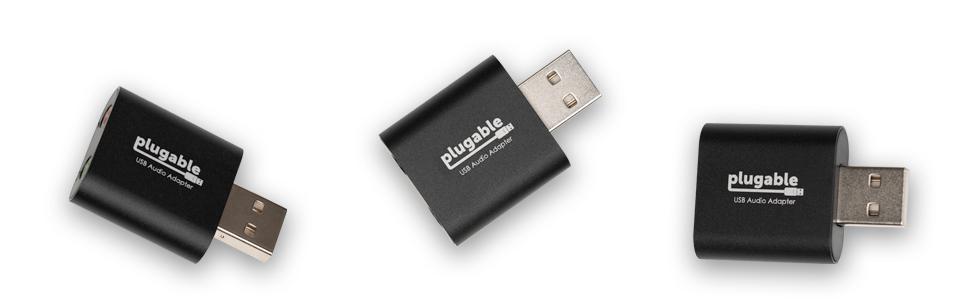
コンパクトで丈夫
このオーディオ変換アダプタは、PC システム搭載のオーディオポートが故障したときの代替として利用できます。高度な技術者に修理を依頼したり、コンピュータパーツを取り替えたり、新しいシステムを購入するよりずっと簡単で安価に、問題を解決できます。 さらに、Raspberry Pi や Beaglebone Black、その他独自の Linux ベースの開発・研究用システムのように、オンボードの音声装置用の Mac ドライバ が用意されていない場合にも利用できす。
簡単なセットアップ
このオーディオアダプタ用の特別なドライバの導入は必要ありません。標準 USB オーディオ・クラスが有効な Windows、macOS、Linux、Chromebook など、どのシステムでも使用できます。
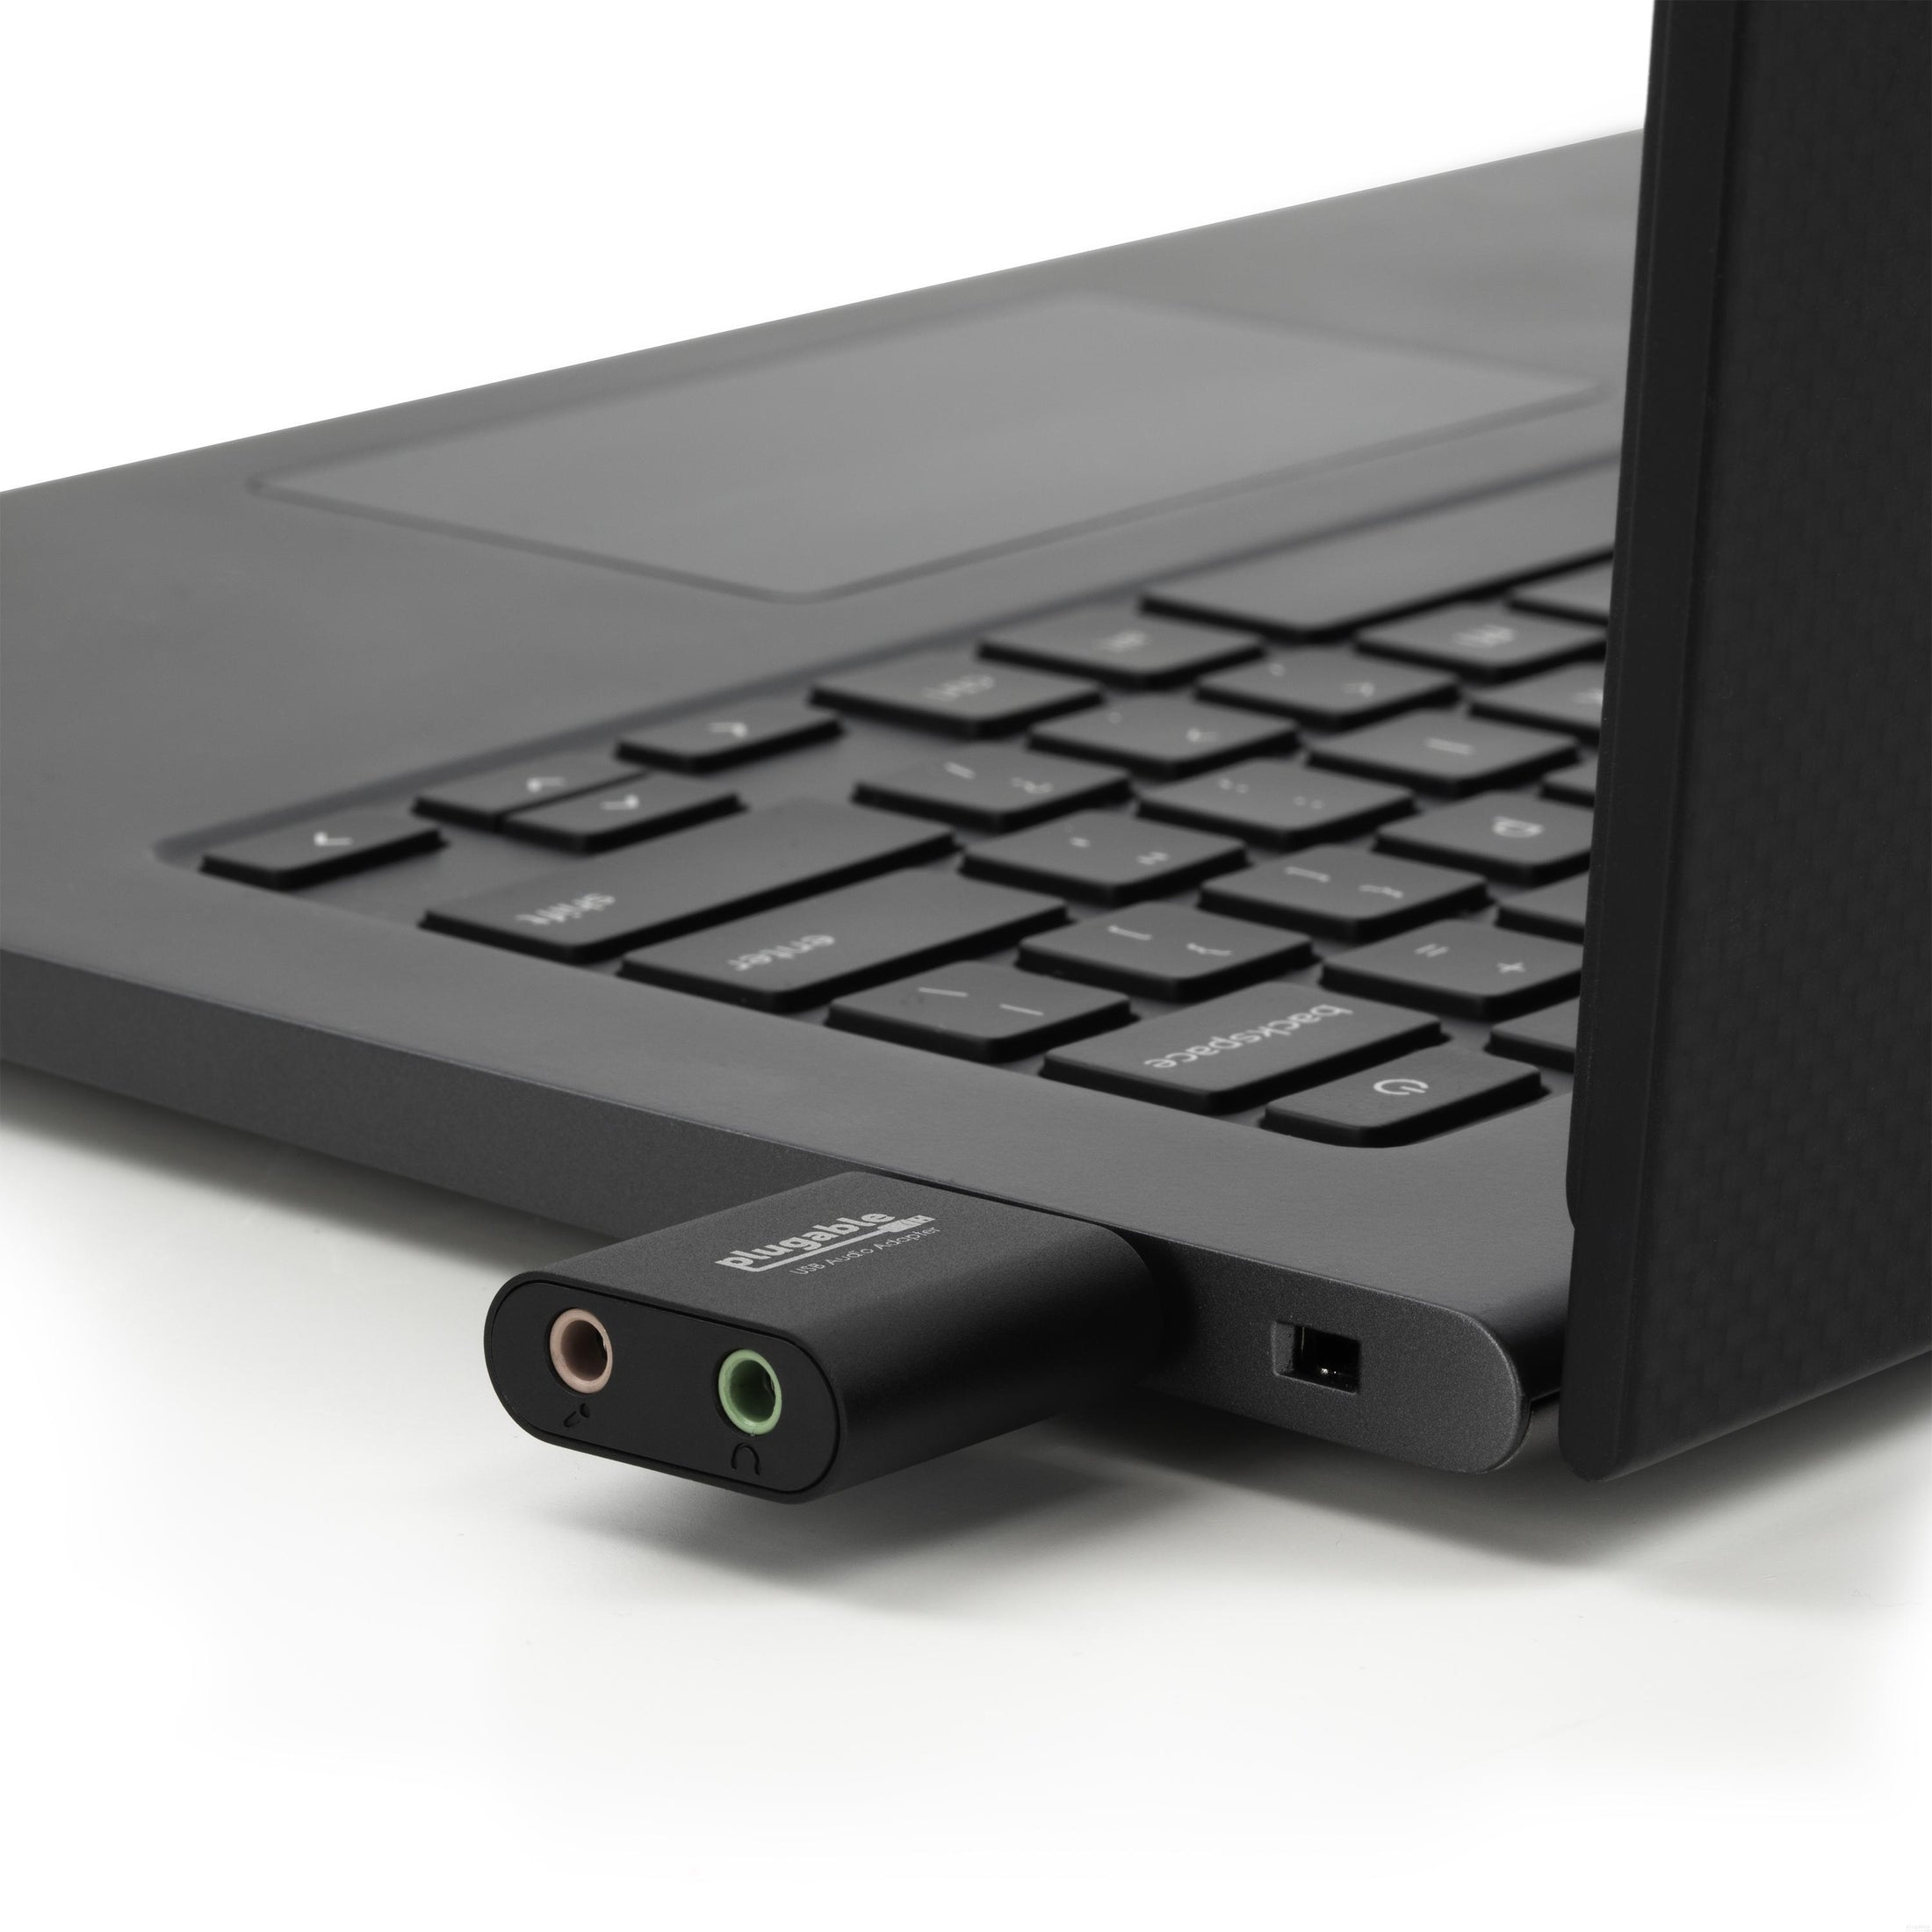
このアダプタの USB タイプ A のプラグをコンピュータの USB ポートにさしこみ、設定パネルの中のオーディオ設定で、当アダプタを入力または出力、あるいは両方の既定のデバイスとして設定します。また、Discord、Skype、Audacity などの一部のアプリケーションでは、アプリケーション内の設定でさらに当オーディオアダプタを既定デバイスに設定する必要があることがあります。
当 USB-AUDIO アダプタは音声出力機能を提供します。しかし使っているシステムによりますが、マイクロフォンによる入力に関しては使用できる時とできないことがあります。ほとんどの PC 用 OS は複数の音声入力デバイス構成に対応しますが、一時点では音声入力または出力のいずれかしか許さないからです。 注意点)このアダプタは、車搭載やテレビについている USB ポートとは互換性がありません。もし機能するとしても音声出力(スピーカーやヘッドフォンなど)で、入力(マイクロフォン)用の入力ポートにはなりません。
機能
- 1x USB Type-A のコネクタ
- 1x 3.5mm TRS ステレオ出力ポート
- 1x 3.5mm TRS ステレオ入力ポート
- Solid State System 社製 SSS1629 チップを採用しています。
- PC やドッキングステーション、ハブなどの USB ポートに接続したままにできます。 バスパワーで稼働し、プラグ&プレイで使用できるため電源コード当は必要ありません。

マイクとの互換性
- このアダプタは、多くのマイクロフォンやヘッドセットで採用されているTRS(ティップ・リング・スリーブ)ジャック用です。
- モノラル・ジャックやTS(ティップ&スリーブ)タイプのジャックのついた機器は、 3.5 mm の TRS ジャックに変換するアダプタを使用する必要があります。
- XRL ベースのマイクロフォンや 1/4 インチの楽器用プラグのついた機器は、たとえ変換アダプタを使ったとしてもこのアダプタでは使用することができません。
- ピンマイクでは使用できません。
- 互換性についての質問がある場合は、Plugable 社サポート nihongo@plugable.com までご連絡ください。
システム互換性
標準 USB オーディオ・クラスが有効な Windows、macOS、Linux、Chromebook などのシステムで使用できます。ドライバの導入は必要ありません。
Raspberry Pi OS とも互換性があります。
互換性のあるシステム:
- Windows 11、10、8.x
- macOS
- Chrome OS
- Linux および Raspberry Pi OS
- 一部の Android 機器
互換性がないシステム:
- カー・オーディオ
- ゲーム機器
Filter Help Articles and Frequent Questions by Category
Choose one or more filters within each category to narrow down the articles. Each selection will result in only displaying articles that include all of your choices.
Selected filters:
Articles
Well how about that, it looks like we don't have any articles matching your filters! Try removing one of your choices or clear the filters to show all articles.
You can always contact support if you need help too!
No Sound? How to Change Your Default Audio Device to Your Plugable Product
Open Article in New Tab
Whether you're on Windows, macOS, or Linux, it's common to add new audio devices to your computer.
Some examples of additional audio devices you may want to switch to include:
- Bluetooth headsets, headphones, and speakers
- Speakers built into a display, such as a TV or monitor
- A USB sound card, digital audio converter (DAC), or analog to digital converter (ADC)
- USB microphones
- Audio jacks on a docking station
These steps don't apply to the Plugable Performance NIX HDMI Capture Card (USBC-CAP60).
Here are the steps that you need to set a new default audio recording or output device on different operating systems.
Set Audio Output Device
Set Audio Recording Device
Set Default Playback Device in Windows
- Check that your device is properly connected, and that any necessary drivers are installed
- It is also a good idea to make sure that your sound device is turned on, and that the device's volume control is not at the absolute minimum setting
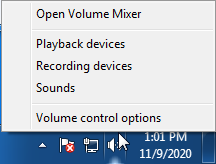
- Right-click on the speaker symbol in the Windows taskbar/system tray
-
Windows 7/8.x—Select Playback Devices. The Sound window will open with the Playback tab highlighted
-
Windows 10/11—Select Open Sound Settings then click the link under 'Related Settings' for Sound Control Panel, then click the Playback tab
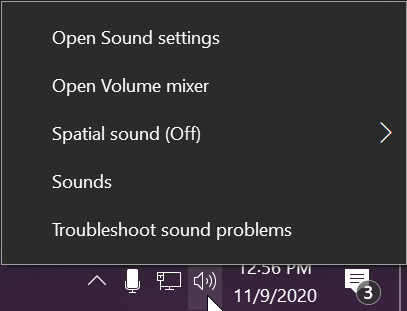
- Alternatively, after selecting Open Sound Settings, use the dropdowns under the Output header
-
Windows 7/8.x—Select Playback Devices. The Sound window will open with the Playback tab highlighted
- Find your device in the window
- A Plugable USB 3.0 docking station or sound-enabled display adapter will appear as Plugable Audio
- A Plugable USB 3.0 Silicon Motion docking station or sound-enabled display adapter will appear as SMI USB Audio
- A Plugable USB 2.0 docking station will appear as USB Multimedia Audio Device
- A Plugable USB Audio adapter will appear as USB Audio Device
- Right-click on the device you found in step 3 and select Set as Default Device. A check mark should appear next to your device, and sound should now play through it
- Click OK to exit the window
Additional Configuration for Bluetooth
Please see our pairing and configuration guide for Bluetooth devices.
Set Default Playback Device in macOS
- Open System Preferences
- Click Sound
- Select Output
- Select the most appropriate device
- A Plugable USB Audio adapter will appear as USB Audio Device
Set Default Playback Device in Linux
- Ensure that you audio device is connected to the PC
- If the audio device is self-powered, it is a good idea to make sure that it is powered on, and that the device's volume control is not at the absolute minimum setting
- Launch the 'Settings' application in your distro
- Go to the 'Sound' option
- Find the dropdown for your 'Output Device', and change it to your preferred output device
- For additional sound device controls, you may want to consider using Pulseaudio Volume Controls (package name pavucontrol)
Set Default Recording Device in Windows
- Check that your device is properly connected, and that any necessary drivers are installed
- It is also a good idea to make sure that your sound device is turned on, and that the device's volume control is not at the absolute minimum setting
- Right-click on the speaker symbol in the Windows taskbar/system tray
-
Windows 7/8.x—Select Recording Devices. The Sound window will open with the Recording tab highlighted
-
Windows 10/11—Select Open Sound Settings then click the link under 'Related Settings' for Sound Control Panel, then click the Recording tab
- Alternatively, after selecting Open Sound Settings, use the dropdowns under the Input header
-
Windows 7/8.x—Select Recording Devices. The Sound window will open with the Recording tab highlighted
- Find your device in the window
- A Plugable USB 3.0 DisplayLink docking station or sound-enabled display adapter will appear as Plugable Audio
- A Plugable USB 2.0 docking station will appear as USB Multimedia Audio Device
- A Plugable USB Audio adapter will appear as USB Audio Device
- Right-click on the device you found in step 3 and select Set as Default Device. A check mark should appear next to your device, and sound should now play through it
- Click OK to exit the window
Additional Configuration for Bluetooth
Please see our pairing and configuration guide for Bluetooth devices.
Set Default Recording Device in macOS
- Open System Preferences
- Click Sound
- Select Input
- Select the most appropriate device
- A Plugable USB Audio adapter will appear as USB Audio Device
Set Default Recording Device in Linux
- Ensure that you audio device is connected to the PC
- If the audio device is self-powered, it is a good idea to make sure that it is powered on, and that the device's volume control is not at the absolute minimum setting
- Launch the 'Settings' application in your distro
- Go to the 'Sound' option
- Find the dropdown for your 'Input Device', and change it to your preferred input device
- For additional sound device controls, you may want to consider using Pulseaudio Volume Controls (package name pavucontrol)
How do I use the Plugable USB Audio Adapter with my meeting app?
Open Article in New Tab
Background
We can help you with that! Whether you're having a fun conversation with family and friends, or an important call such as a virtual doctor appointment or a tele-presentation, you need to be sure that your audio is setup and ready to go.
No matter what your goal is, this guide will help you get your Plugable USB Audio Adapter set up to use in your meeting app so you don't miss those important calls. Our Plugable USB Audio Adapter is a great fit for apps like:
Setup Overview
First, you'll need to set the adapter as the Default Device for both the Microphone and Speaker devices in your operating system. If you need help getting that set up, click here, to find steps for your operating system.
Now that you've set the adapter as the default device in your operating system, you'll also need to set it as the default device in your meeting apps using the steps in the sections below.
Google Meet
- Open Google Meet, and click Check your audio and video

- Click the dropdown menus for both Microphone, and Speaker and set the Plugable USB Audio Device as the default
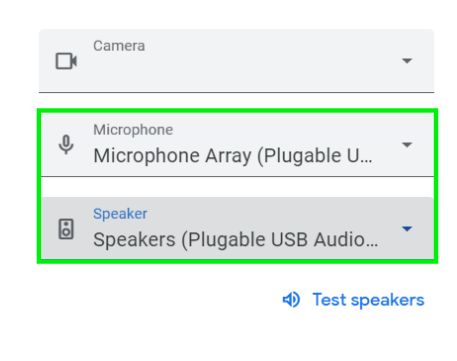
Here's an official article from Google if you'd like further details.
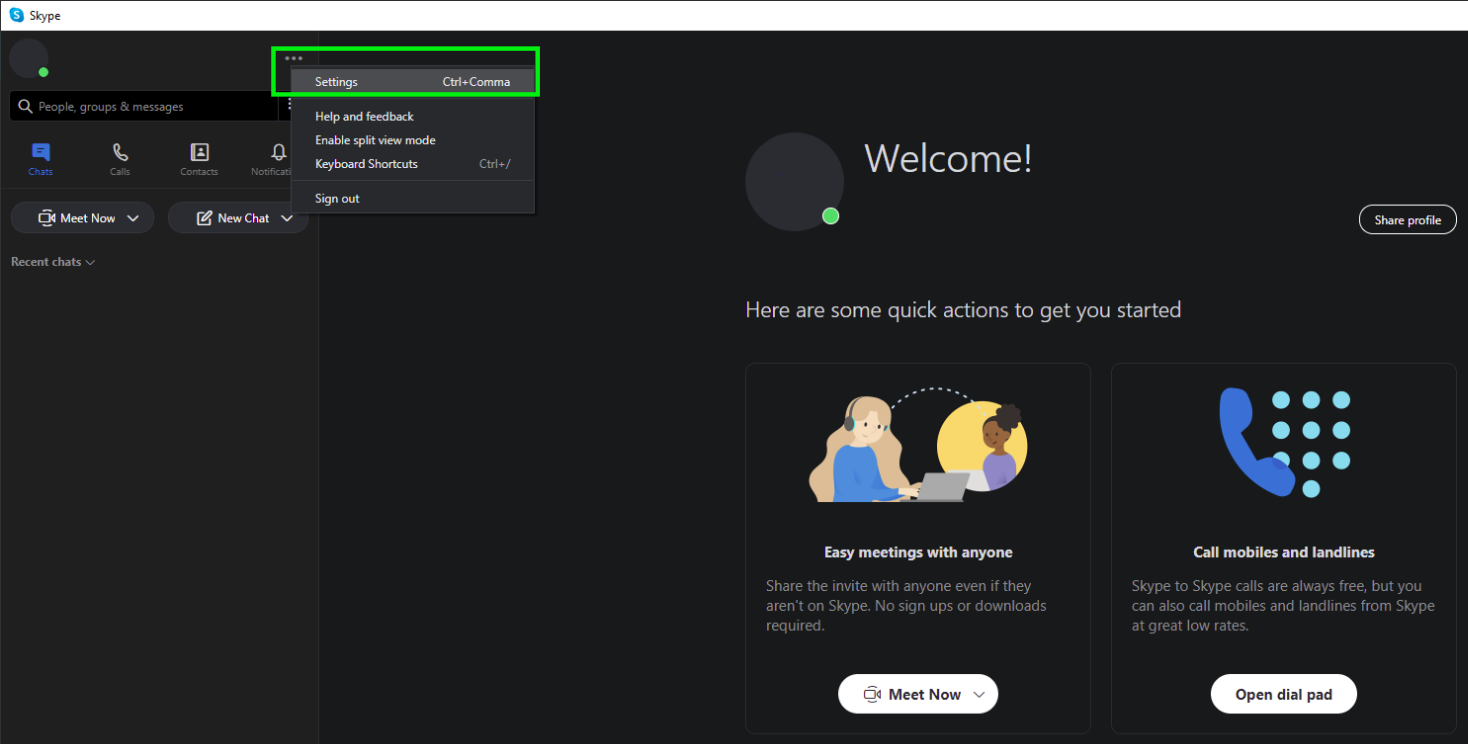
Microsoft Skype
- Click the ellipsis (three dots) and then click on Settings
- Click on Audio & Video, and scroll down to the Audio section. Then, click on the dropdown arrows to set both the Microphone and Speaker to the Plugable USB Audio Device
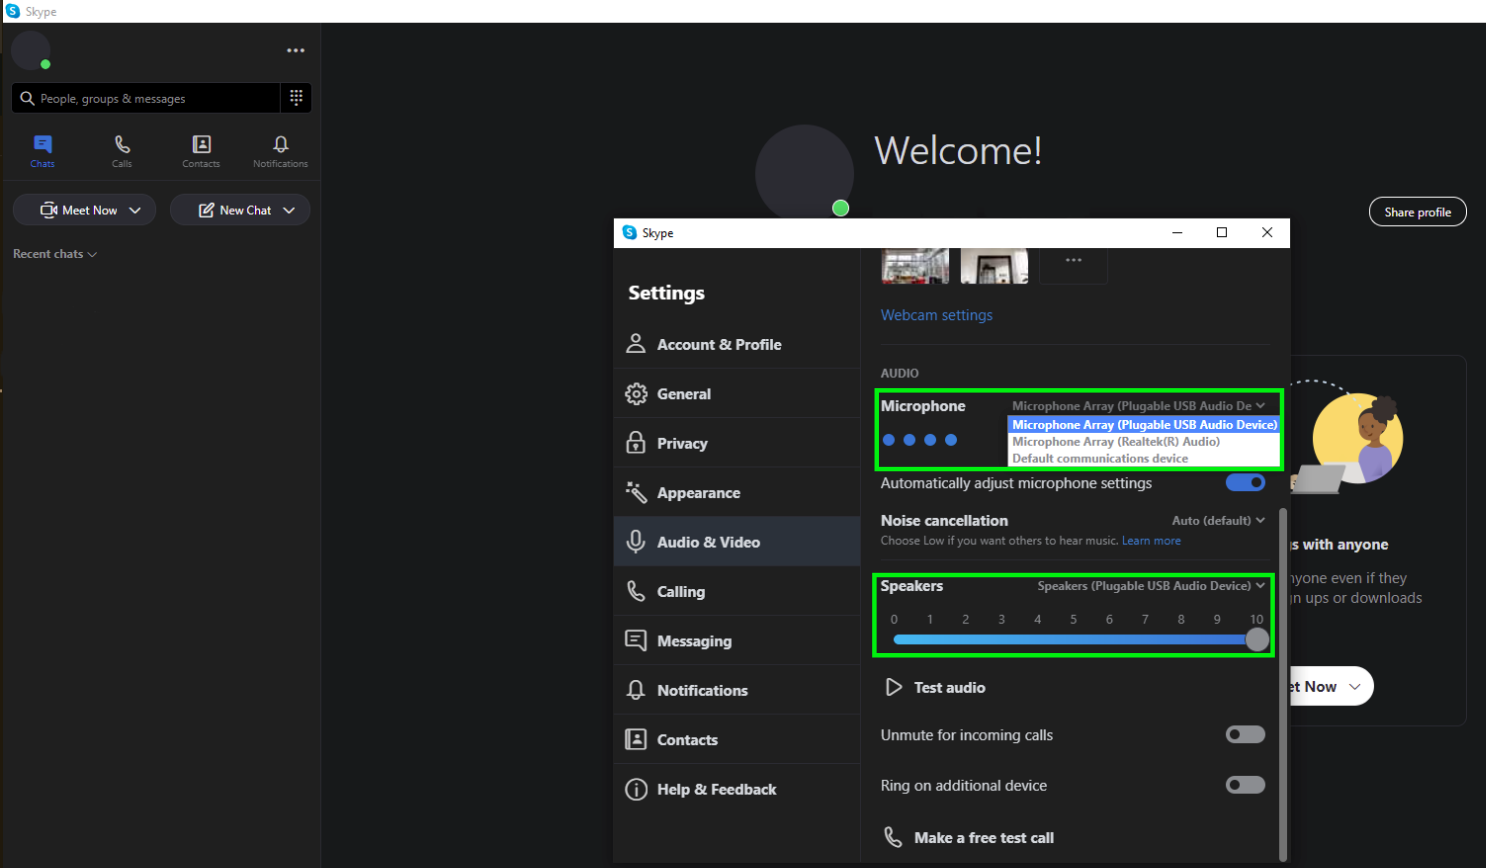
Here's an official article from Microsoft about Skype, if you'd like further details.
Microsoft Teams
- Click the ellipsis (three dots) to open some further options, and then click Settings.
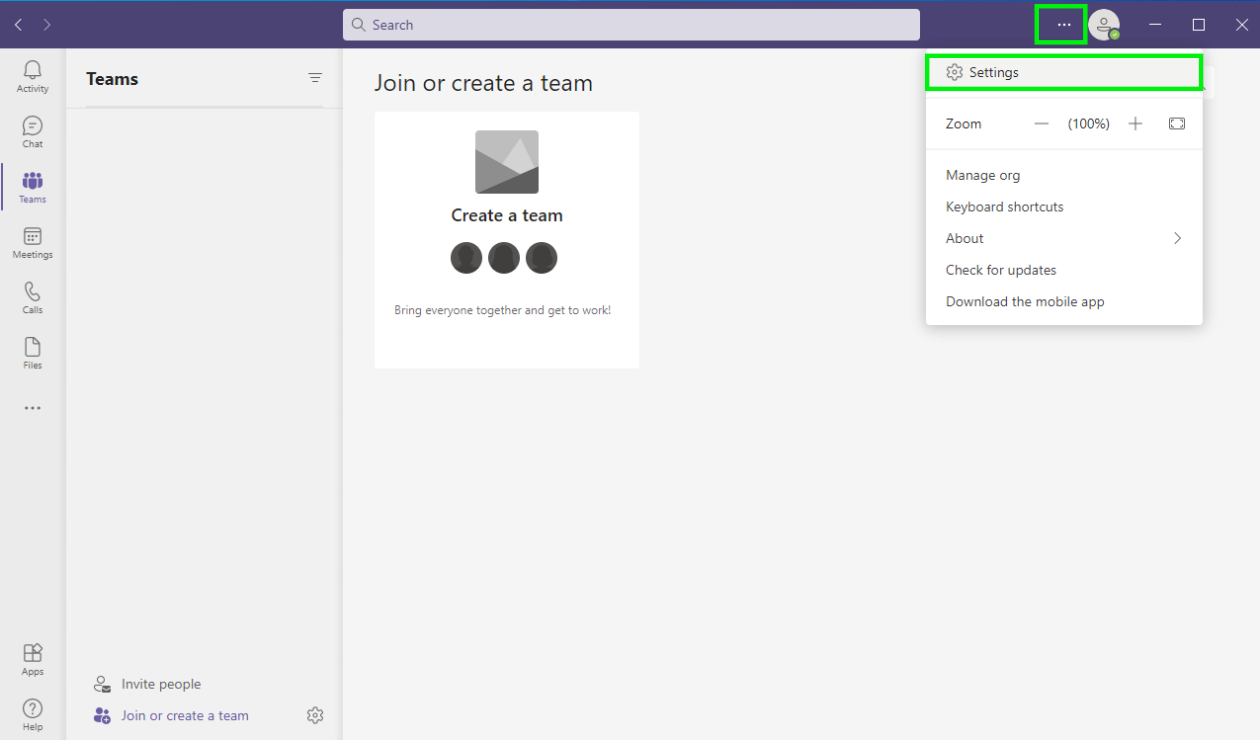
- Then, click on the dropdown menus to set both the Microphone and Speaker to the Plugable USB Audio Device
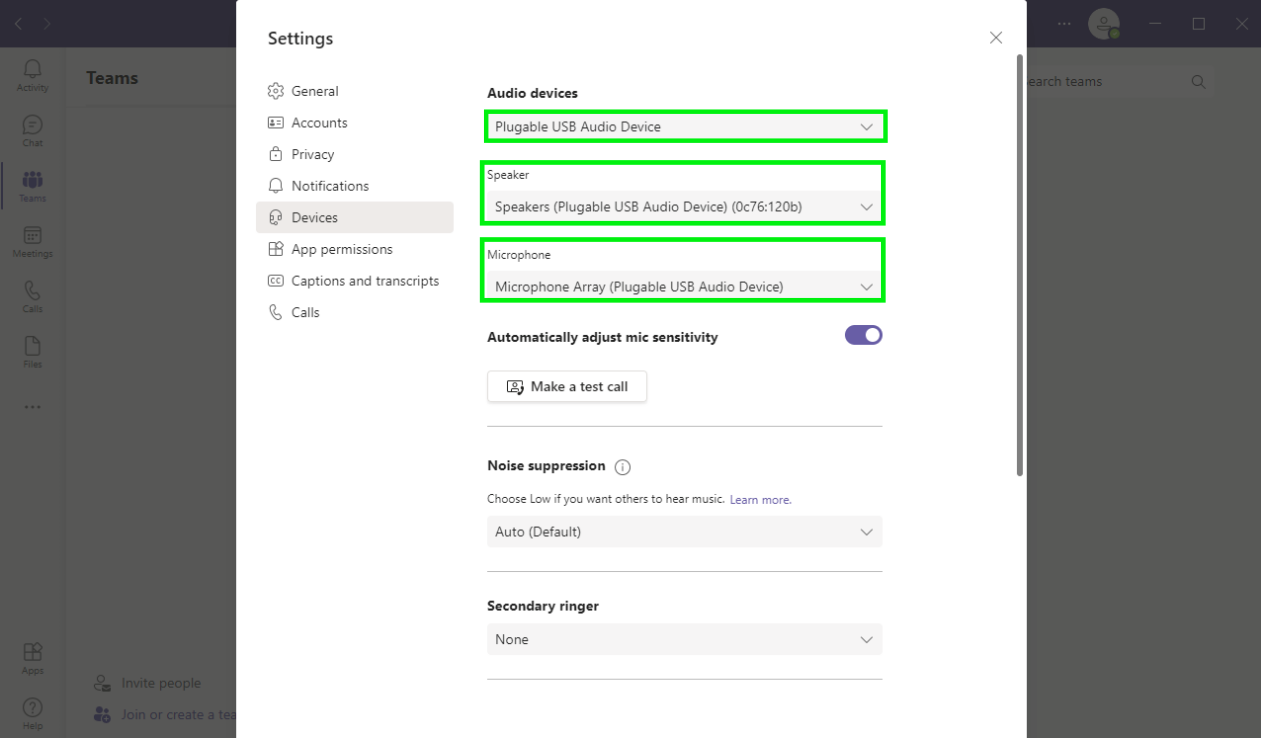
Here's an official Article from Microsoft about Teams if you'd like further details.
Zoom
- Click the Settings Gear icon , to open the Settings
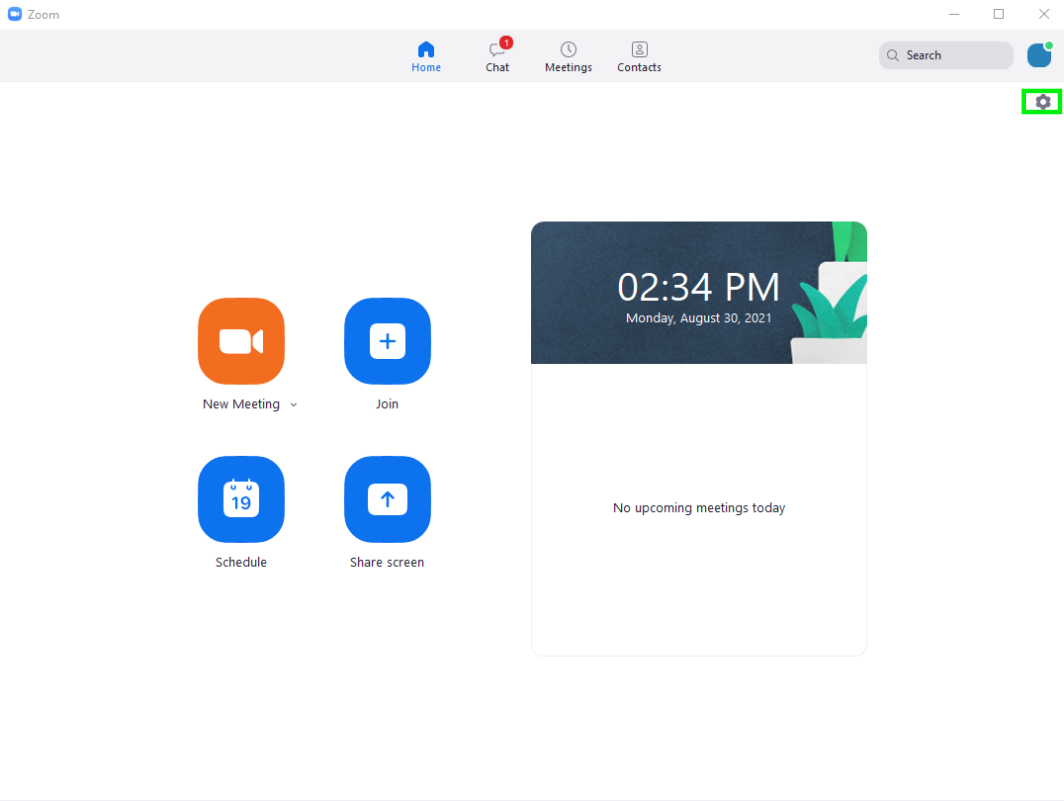
- Then, click on Audio click on the dropdown menus to set both the Microphone and Speaker to the Plugable USB Audio Device
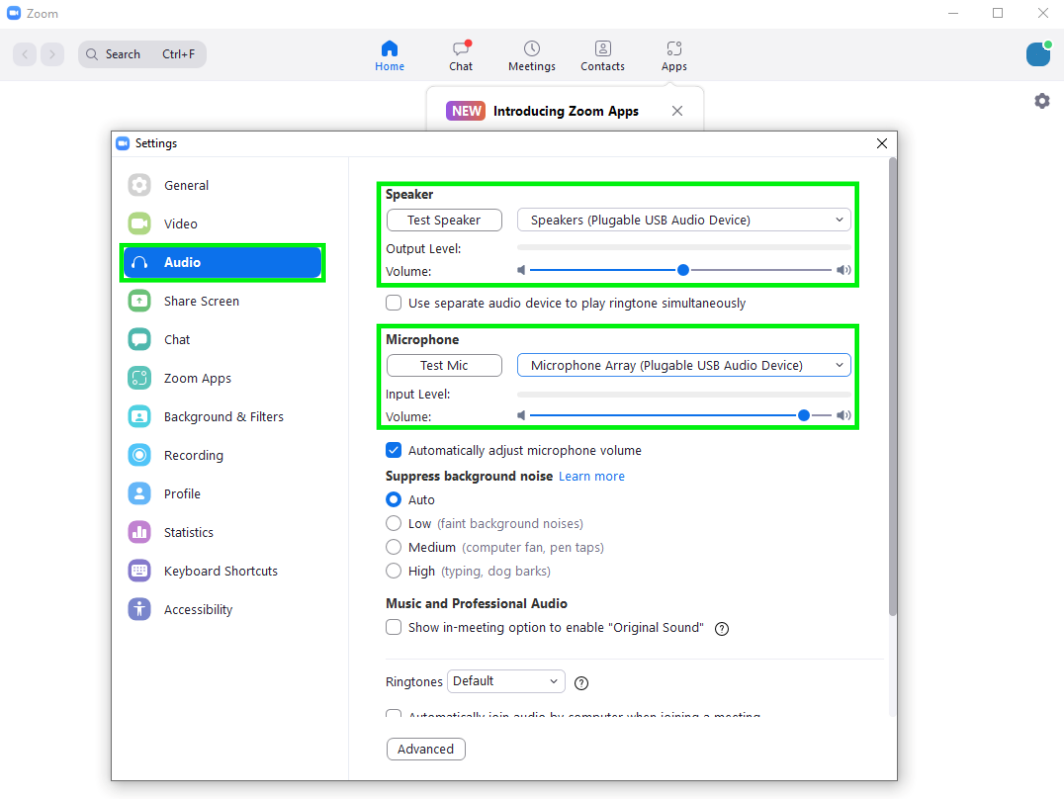
Here's an official article from Zoom if you'd like further details.
We hope this was helpful! Feel free to reach out to us directly at support@plugable.com if you have questions or concerns.
Pluga-Project - Raspberry Pi Bluetooth Audio Receiver
Open Article in New Tab
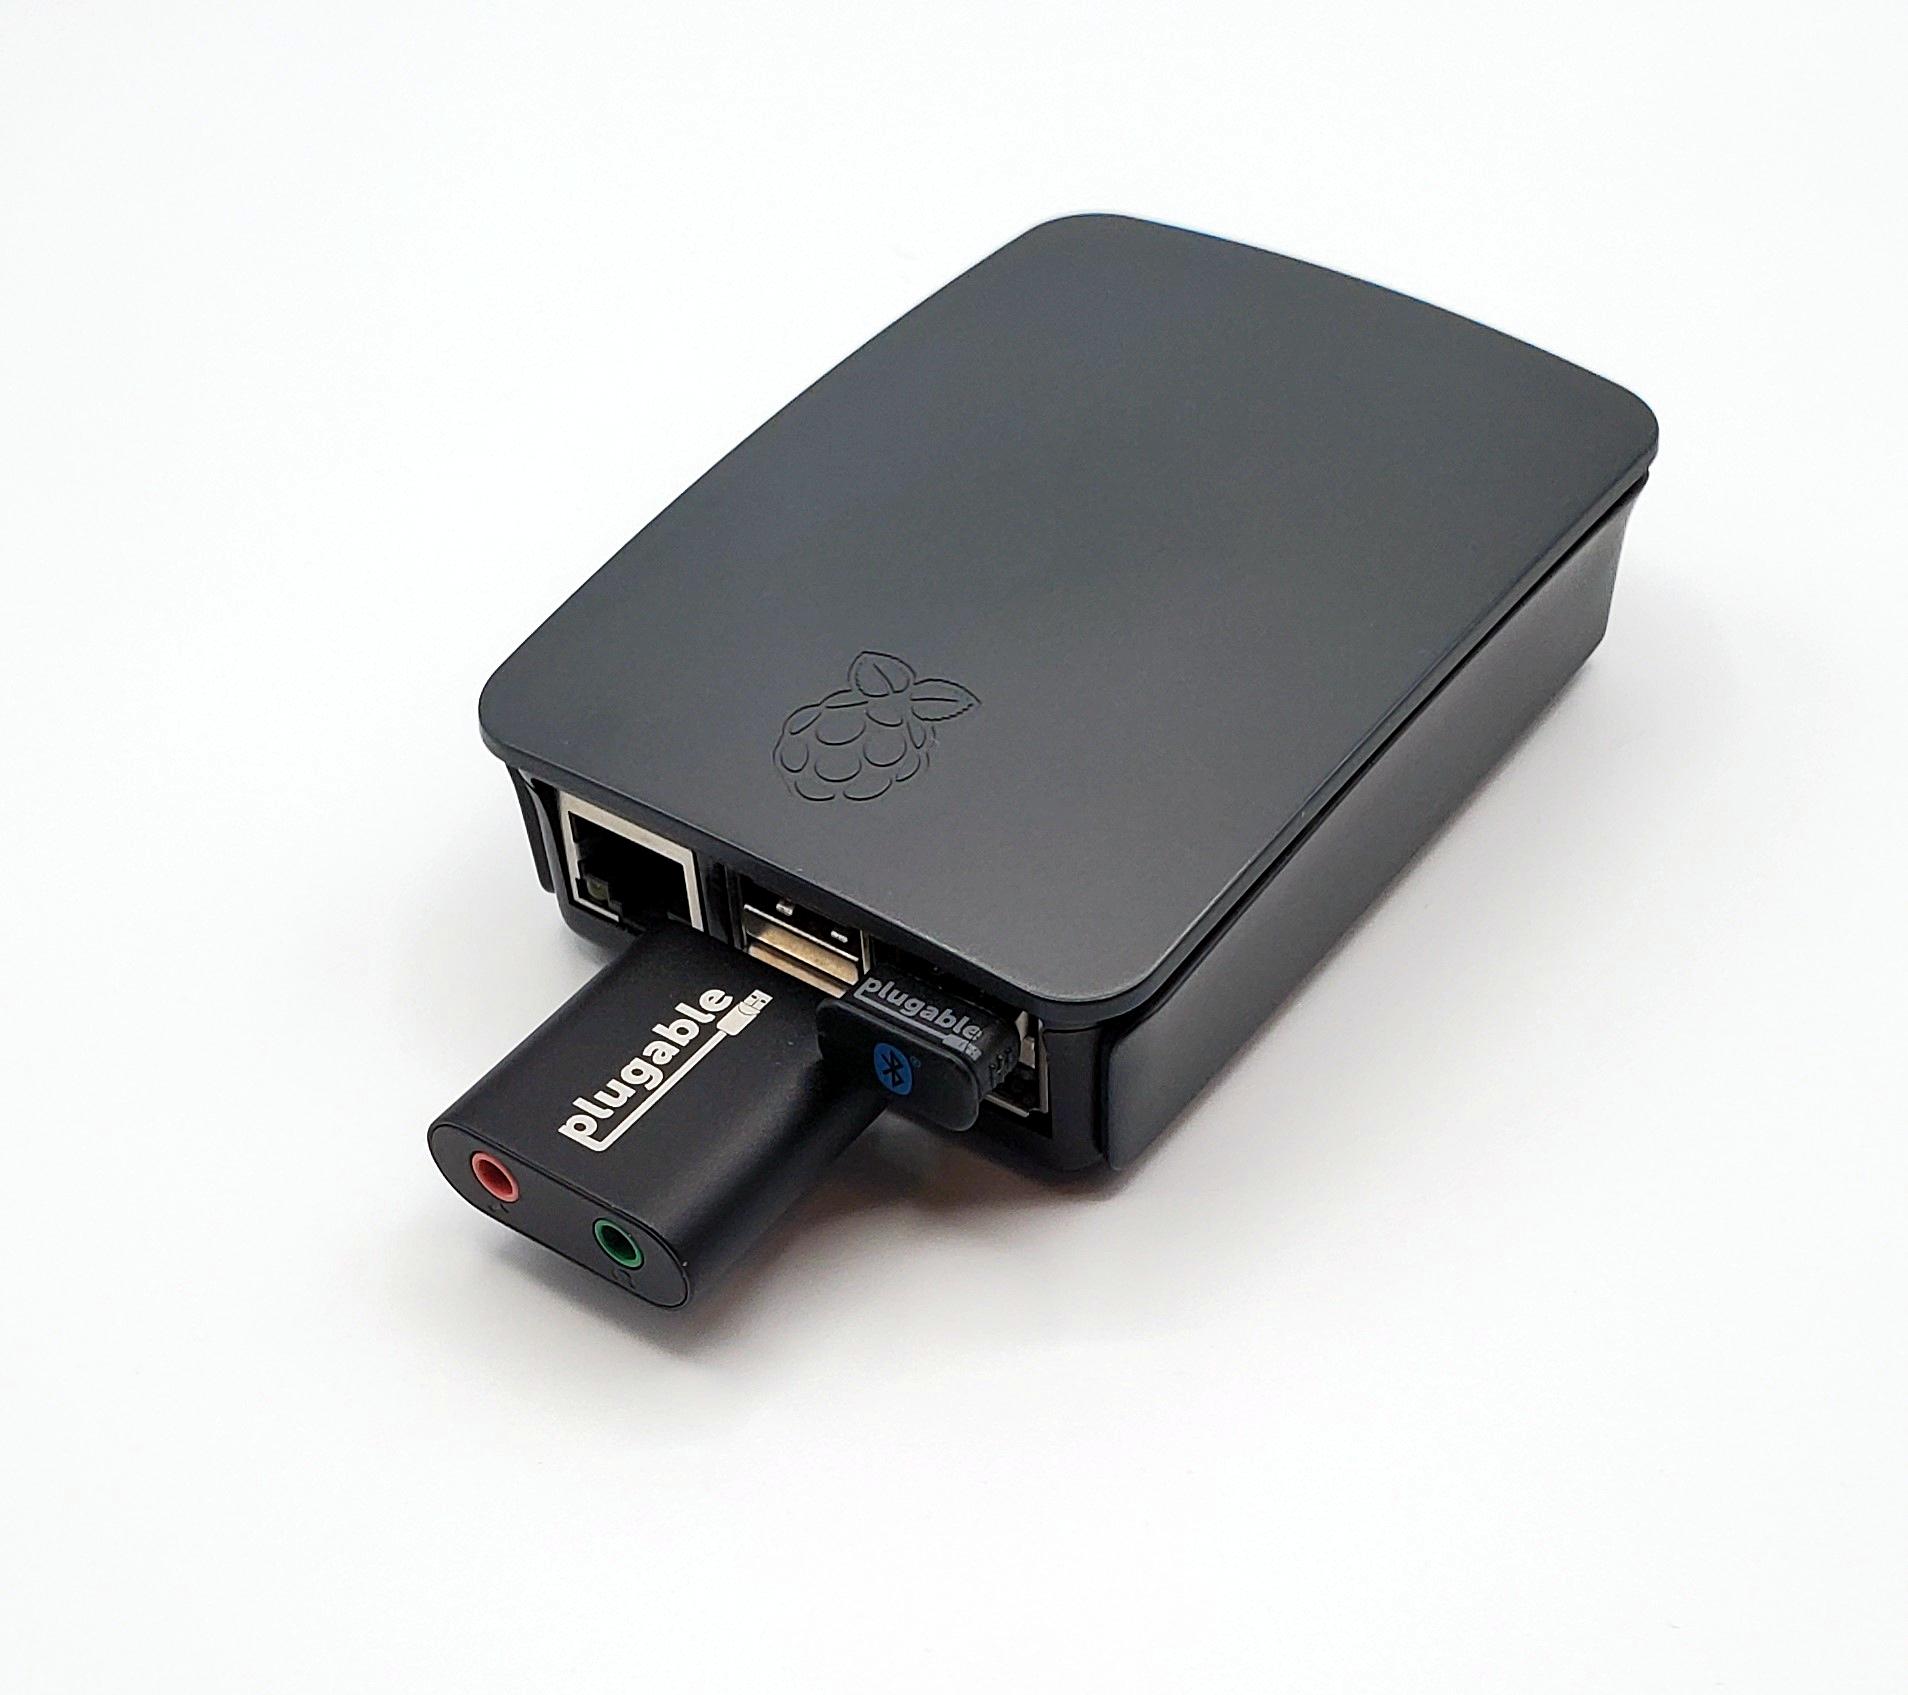
It's Pluga-Project time! This is a really neat one. We're going to make a Raspberry Pi Bluetooth audio receiver. We'll be able to stream audio in from a device like a phone, tablet or computer, and out to audio equipment like a stereo system, pair of speakers, headphones, etc.
The Project Developer suggests using a USB Bluetooth adapter instead of the onboard Bluetooth adapter due to issues with interference. We've seen some interference issues and lag with the onboard adapter, so that's where our
USB-BT4LE Bluetooth adapter comes into play. We'll stream our audio into the adapter.
The Raspberry Pi has a built in 3.5mm Audio out port, but the volume seemed a little low. You can manually adjust volume settings, but, ultimately we found that the volume would also need to be cranked on the audio equipment itself, which isn't ideal. So we've been testing with our USB-AUDIO adapter, and have had good results with a normal volume!
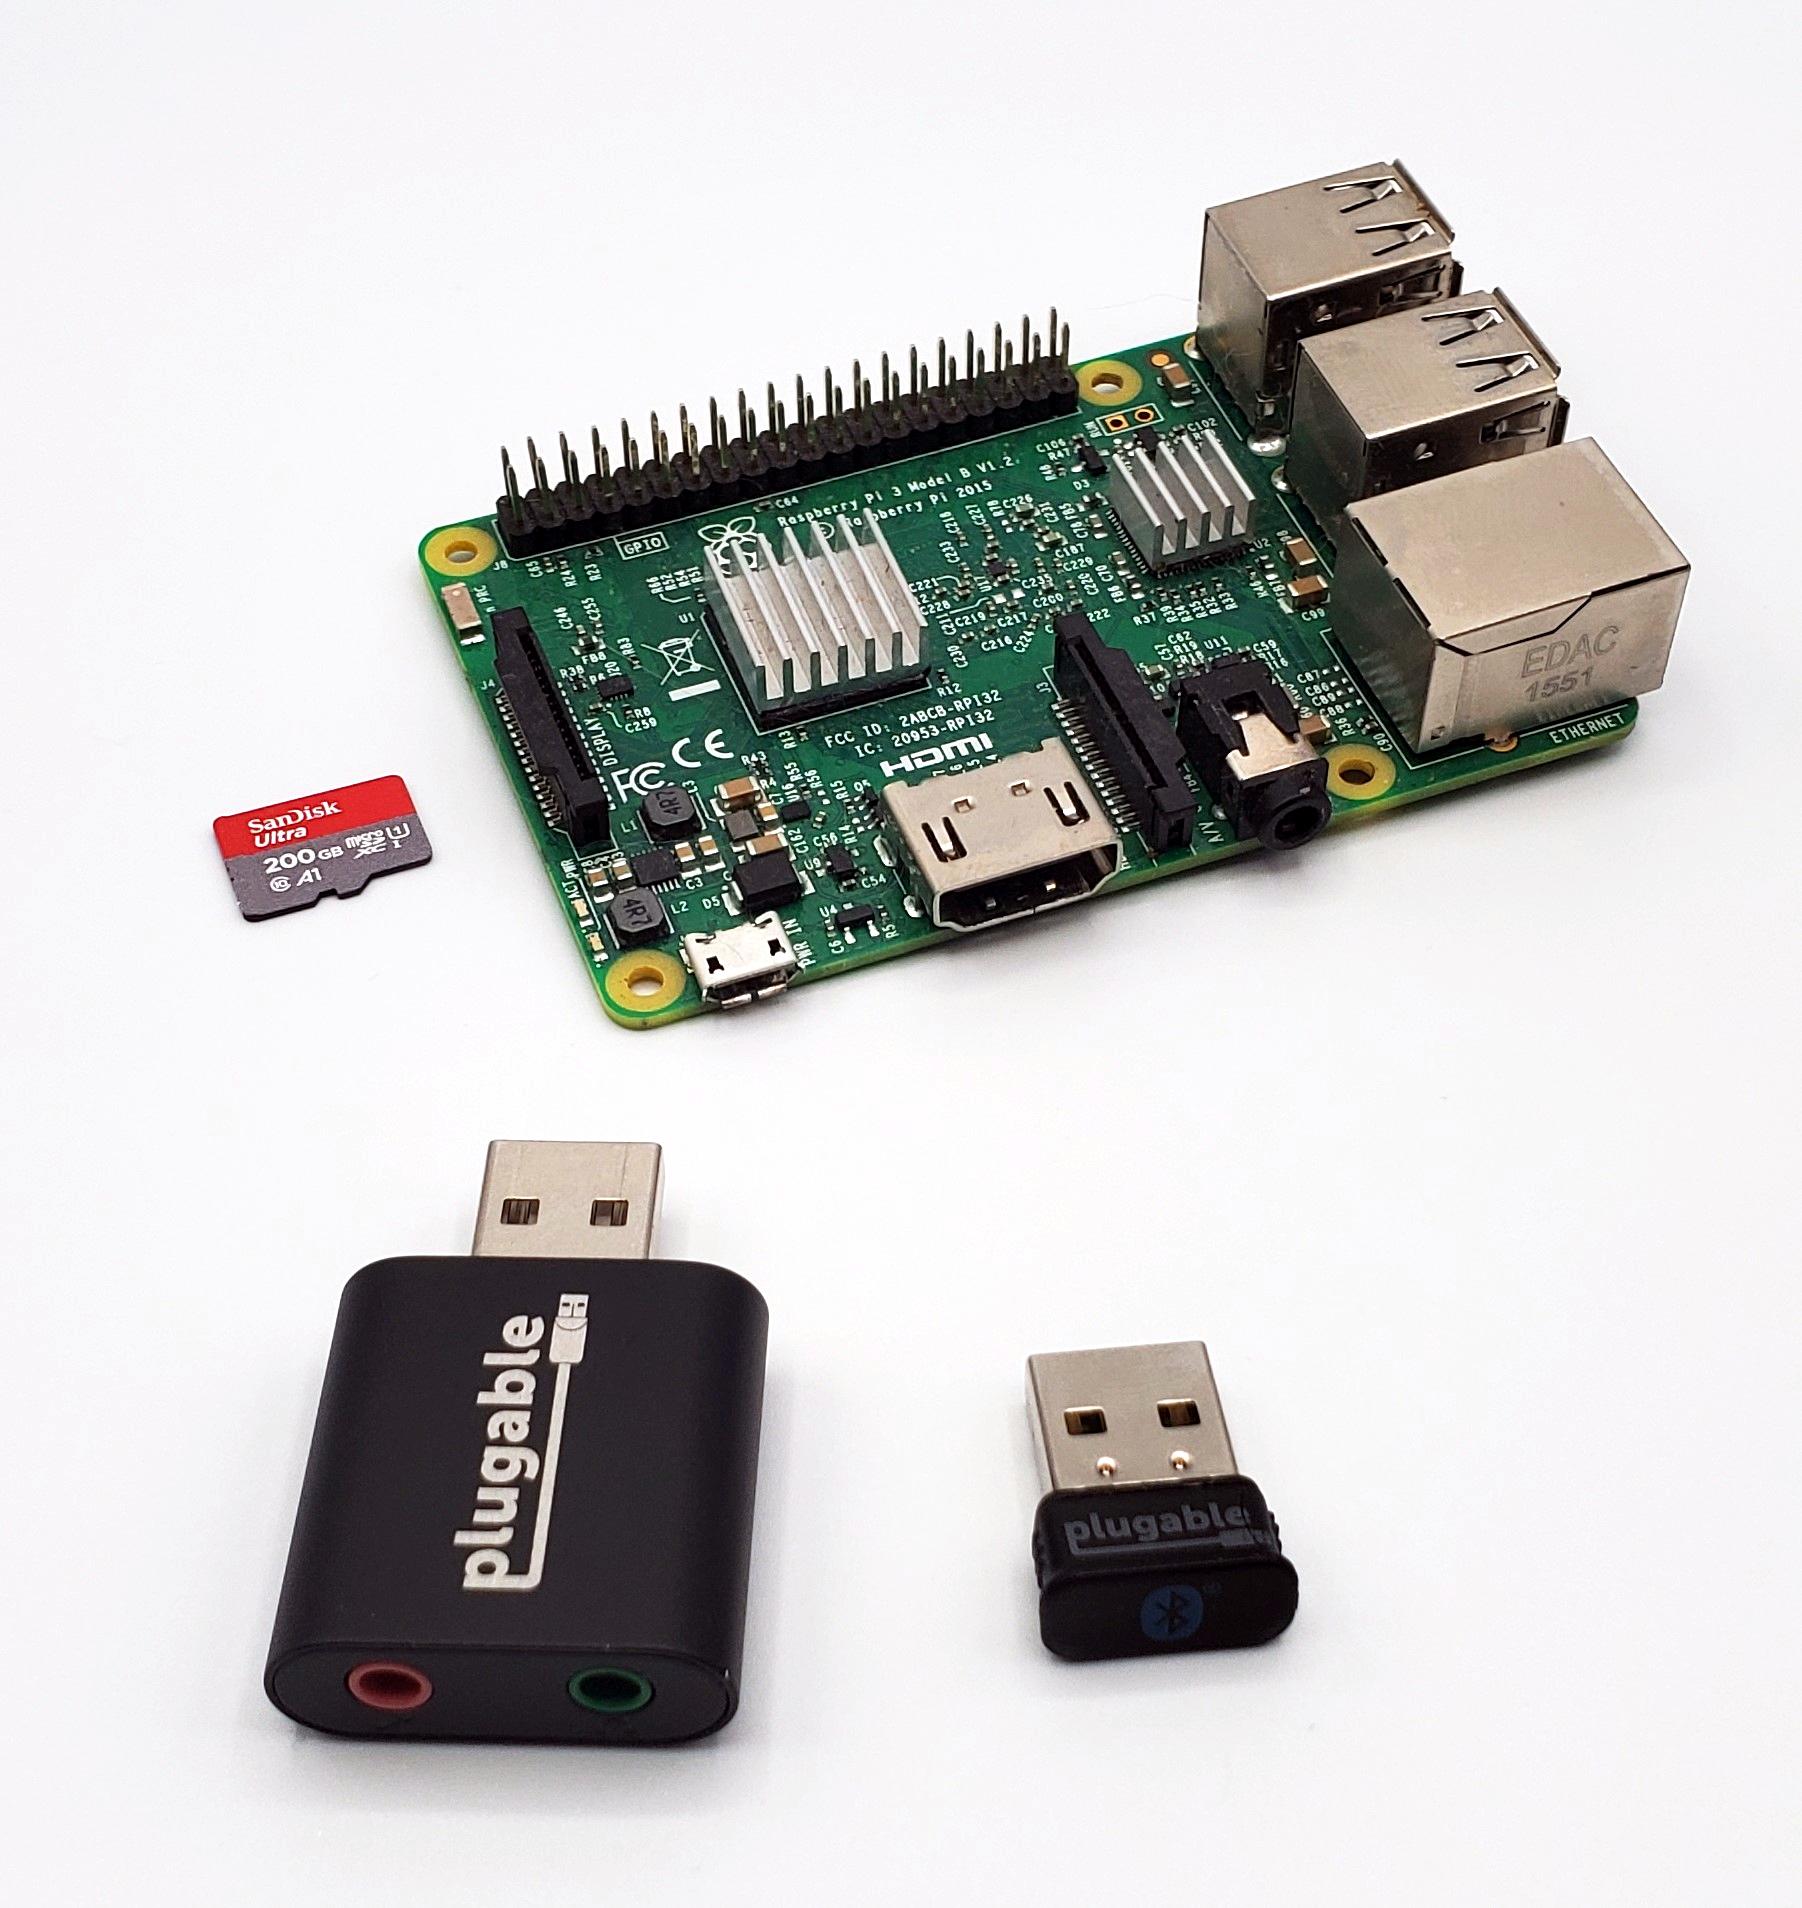
What we need
- A Raspberry Pi 3/3B+ or 4 series for the best results
- A Plugable USB-AUDIO adapter
- A Plugable USB-BT4LE Bluetooth adapter
- Speakers or a stereo system with an AUX/Line Input we can connect to
- A 3.5mm TRS Cable
Do you have what you need? Great! Below, you will find sections for each of the four main steps we need to take to get this thing working. Head down when you're ready, and let's have fun!
We're going to use the new Raspberry Pi Imager tool to cut down on the time and work. The program is available on Windows, macOS, Linux and can even be installed on a Raspberry Pi systems!
We'll need to use the Raspberry Pi OS Legacy build for this project, and we'd suggest the Lite version to keep things easy. That's because the receiver platform uses the BlueAlsa package for Bluetooth audio. There are some different packages in the latest Bullseye Version of Raspberry Pi OS, which unfortunately makes it incompatible with this system.
The Raspberry Pi Imager tool provides useful configuration options before boot, so we can cut down time afterwards. Head over to the link below, and install the version for your computer. Make sure you have the Micro SD Card inserted and then move on to the steps below when you're ready!
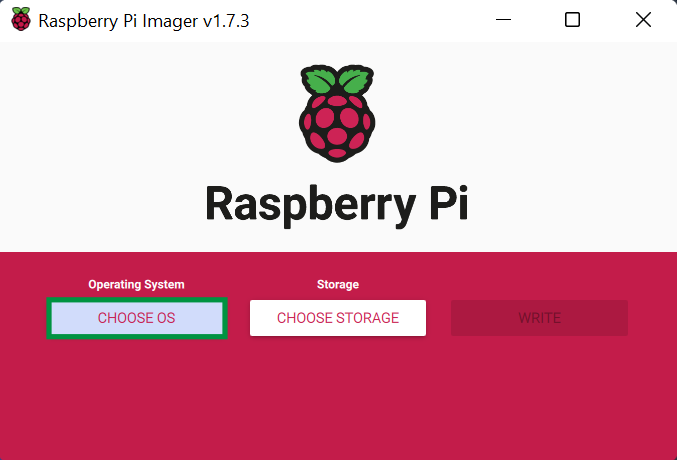
Did you install the Raspberry Pi Imager? Yes? Great! Let's move on. Start the program, and then let's follow along with the steps below:
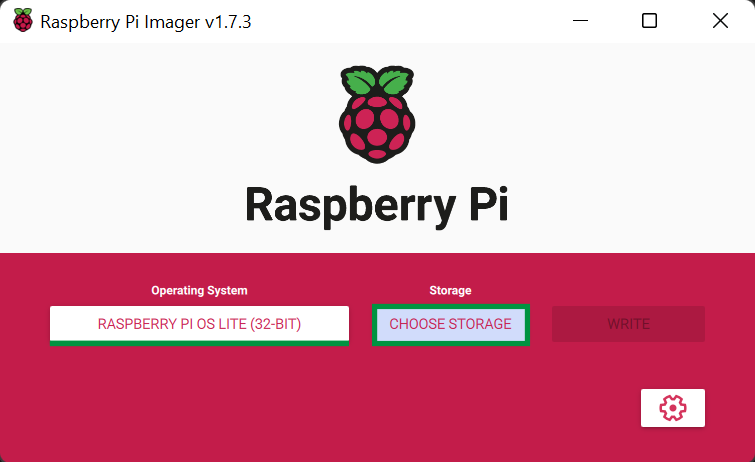
- We need to choose the operating system to install. Click Choose OS
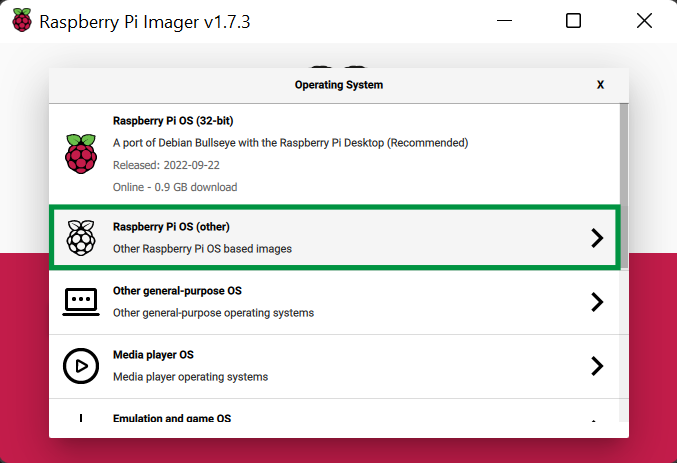
- Click Raspberry Pi OS (other)
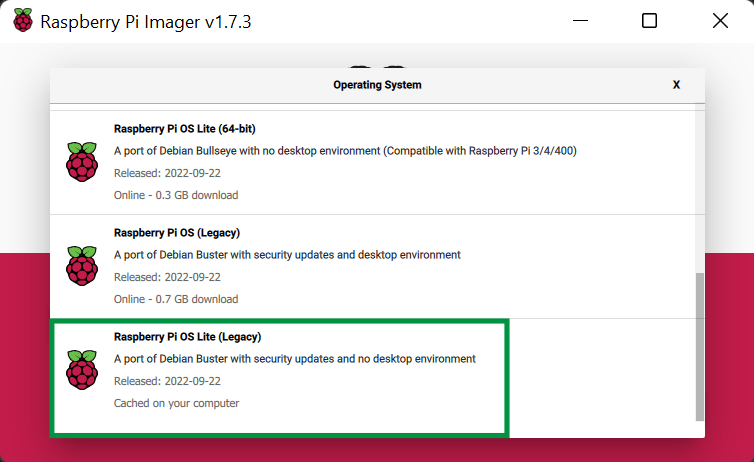
- Click on the Raspberry Pi OS Lite (Legacy) operating system. You may need to scroll down to see it or want to expand the window for a better view
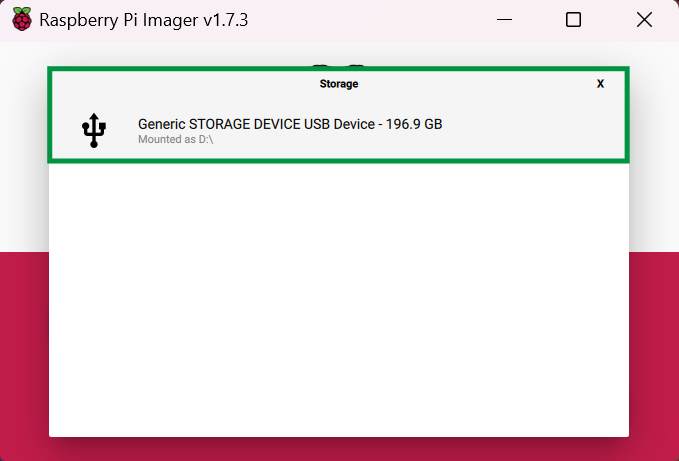
- Now, we have the Operating System set. Click Choose Storage
- Click on your Storage Device. Here, we have a 200gb MicroSD Card which we'll use. 8GB is the minimum amount of space suggested by Raspberry Pi
- Now that we have the Operating System and Storage Device set, we need to set our custom login properties. Click the Settings Gear
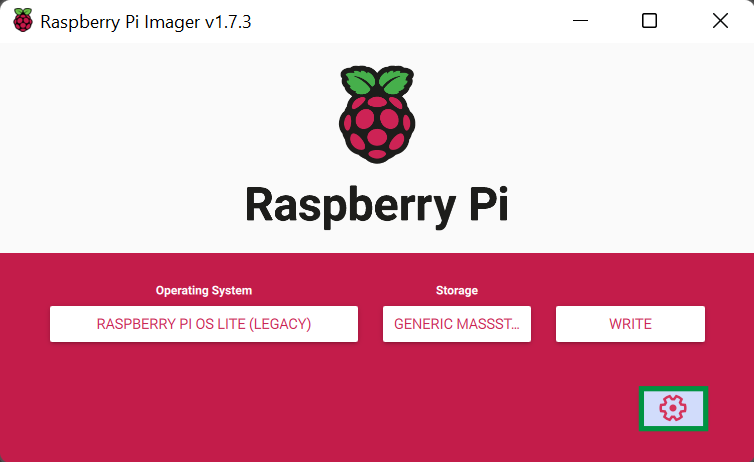
- Below are the custom properties that we should fill in to make our login process easier:
- Set Hostname
- Enable SSH - This will enable Secure Shell protocol so we can remote into our Pi
- Set username and password
- Configure wireless LAN (You could use the built-in ethernet, or a USB Ethernet adapter.)
- Set locale settings
Click Save to make the changes. Here, you can see the before and after of the setup (You may want to right-click on this picture, and view it in a new tab or window to enlarge it.)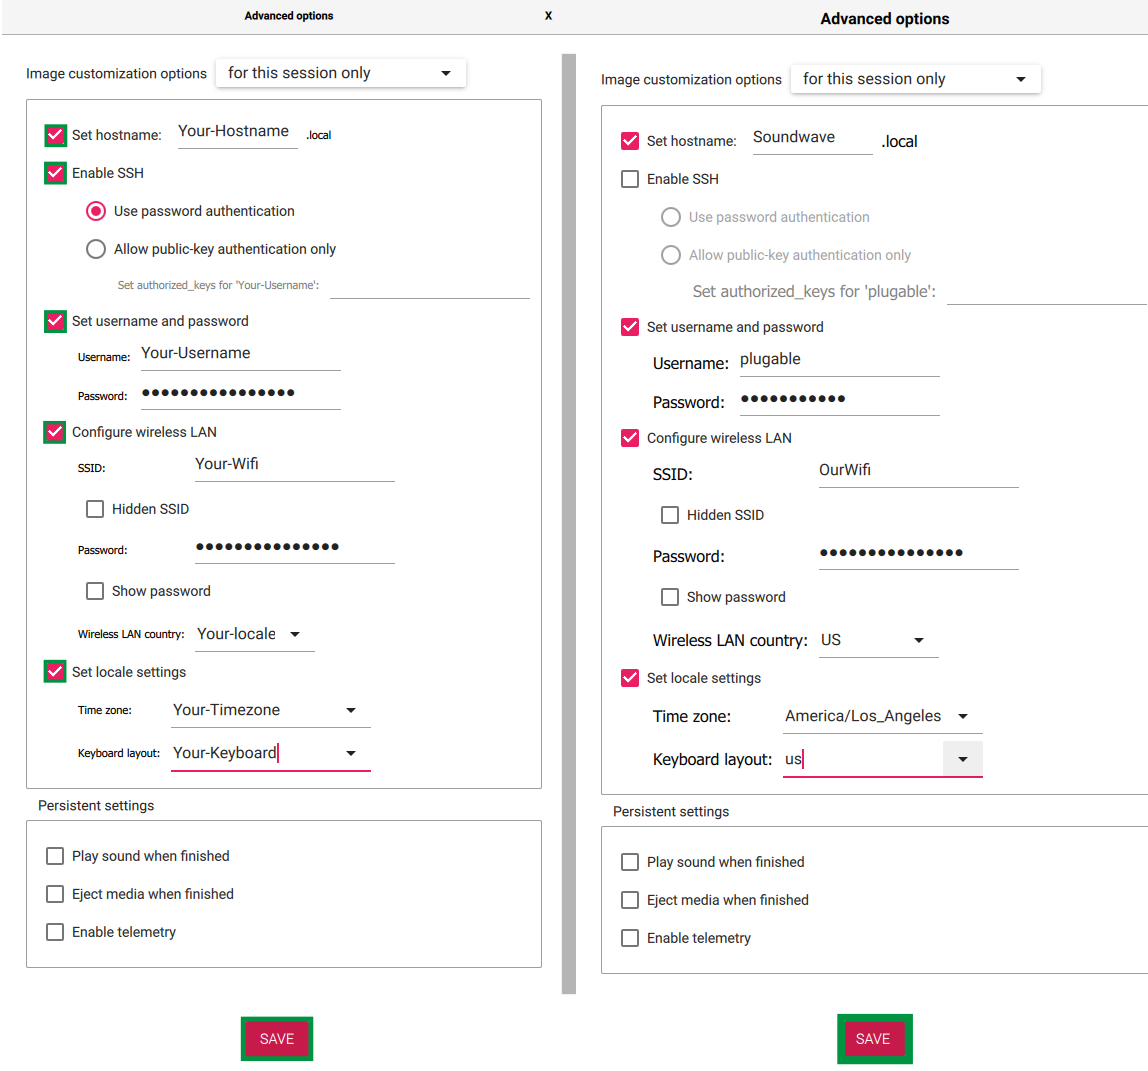
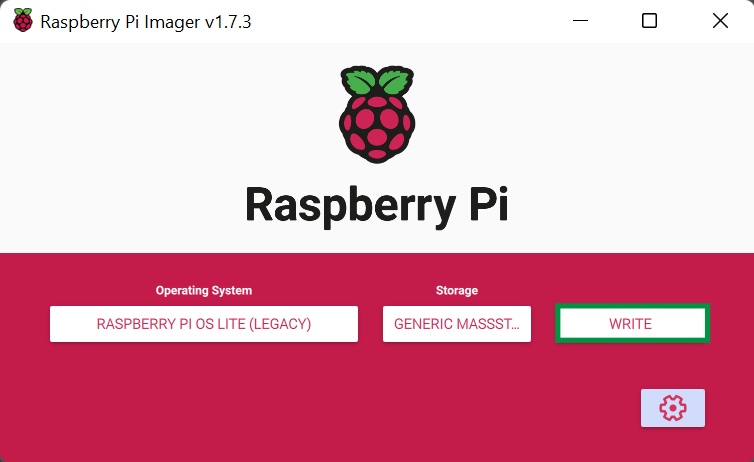
- Click Write to prepare for writing the OS to the card
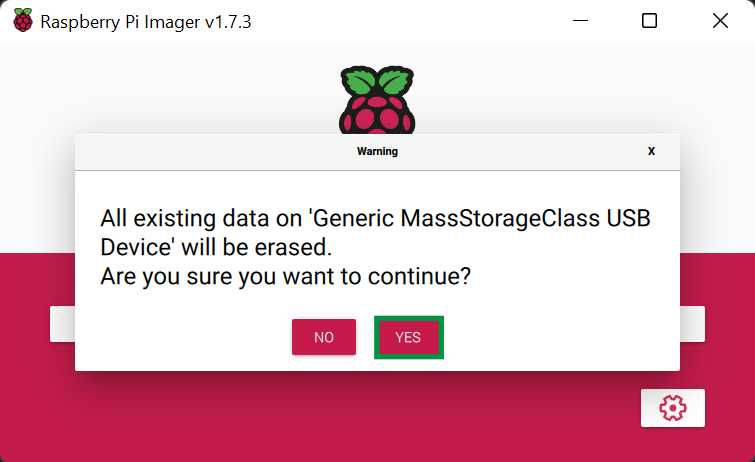
- You may get a message stating that all data on the card will be erased. Click Yes to continue
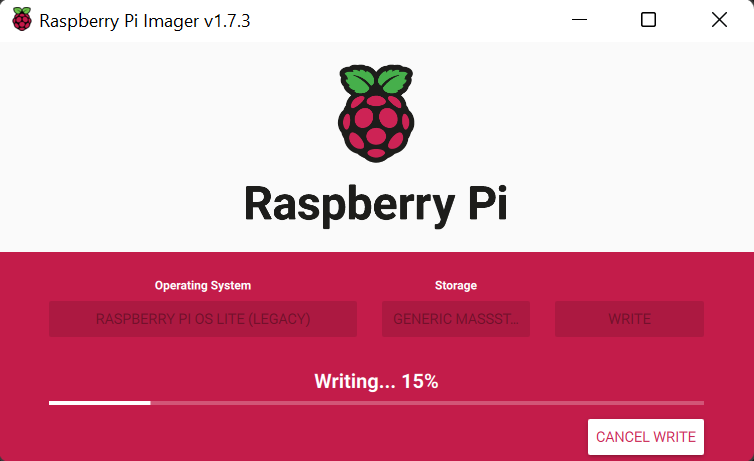
- Now, the image will be written
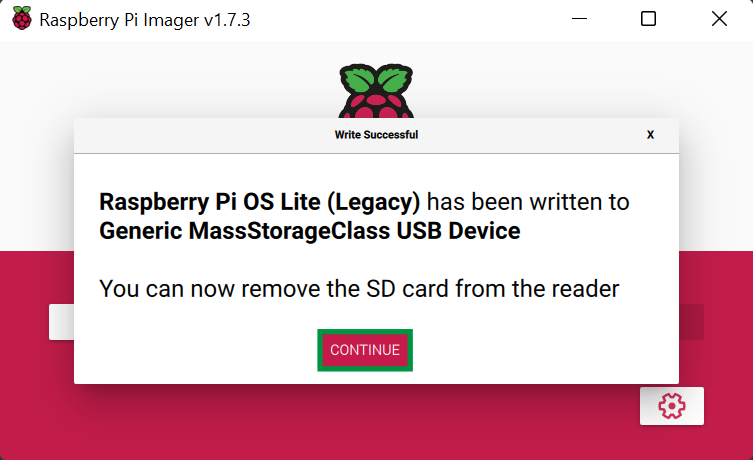
- It has been written! Click Continue to finish
That was pretty easy, right? Head down to the next section once you're ready to SSH into the Pi!
We're going to connect to the Pi from our computer using SSH (Secure Shell) protocol. That way, we can easily set up and configure the files and settings remotely to get the project to work.
There are many SSH programs available, but, we're going to use PowerShell on Windows to keep things easy. These commands can also be completed using the default terminal on macOS and Linux. Setup the Pi with the Micro SDcard, the Audio and Bluetooth adapters plugged into USB ports and turn it on.
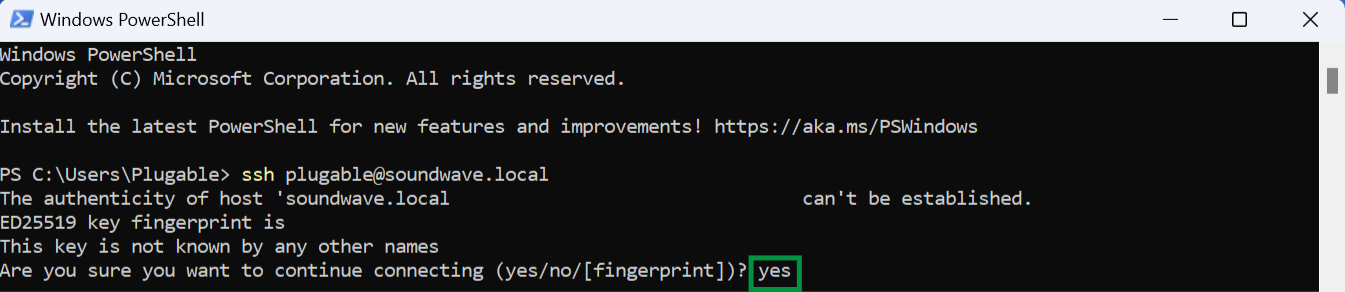
- Open PowerShell, and enter the ssh command combined with our username@hostname.local. So for example, my completed login looks like this:
ssh plugable@soundwave.local(Your username and hostname will be different)
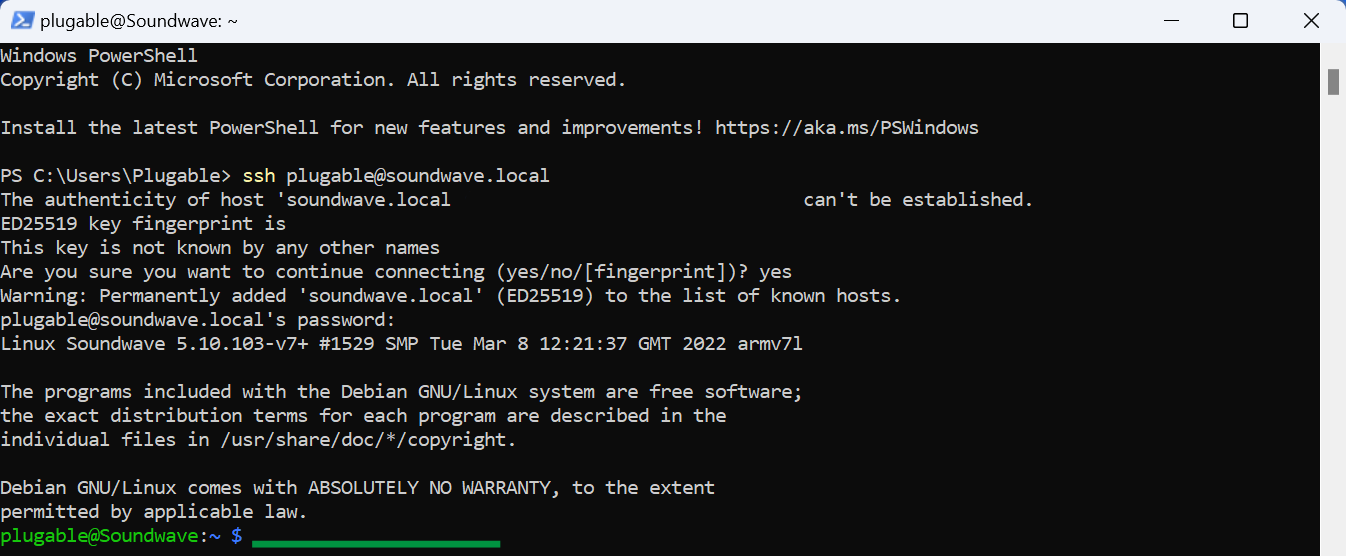
- This next screen seems a little scary. But, it's just asking us if we're sure we want trust this connection. We are sure, and we sure didn't come this far to turn back! Enter yes, into the terminal to proceed and it will make a note for next time
- Enter your password. (Please note, it will not be shown when typing)

- You should now be logged in!
- The first thing to do is update. Enter
sudo apt-get updatewhich will look for available updates and packages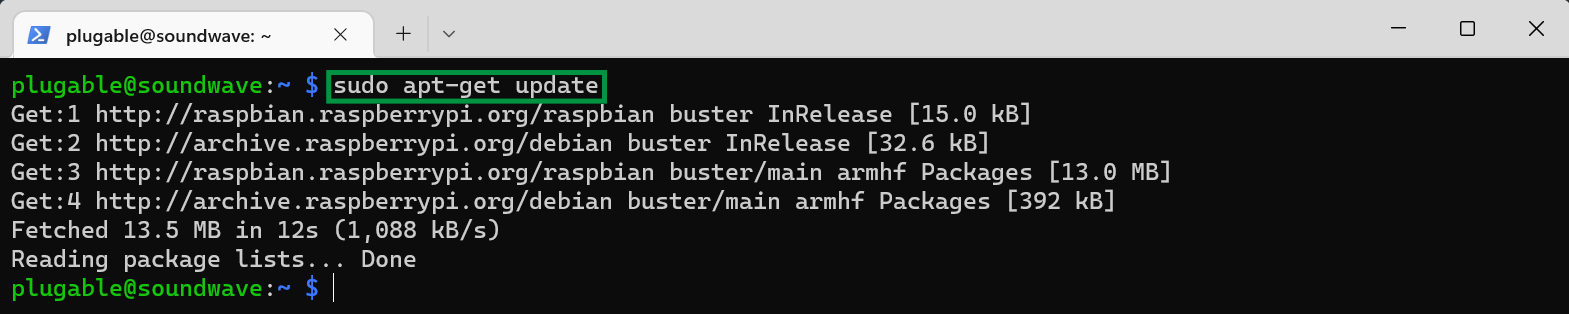
- Once the update finishes we need to upgrade. Enter
sudo-apt-get upgradewhich will prepare to install any updates/packages that were found. Then, we'll need to enter y for yes which will start the upgrade process. Please note, installation times may vary
- When the upgrade finishes we'll be ready to reboot, but first, let's get our actual IP address. Enter
hostname -Iinto the terminal, which will display the IP address. We can use this to log into the Pi going forward
- Enter
sudo rebootinto the terminal to reboot as we've done great work
Great! We've done the basic setup. Next, we will install the audio receiver files and setup the platform for use. See you there!
Overall we're going to follow the project guide, but with a few extra steps along the way to get everything configured for the adapters. Are you ready? Good! Let's go step-by-step and get this thing set up!
- First, we need to download the project files. Enter
wget -q https://github.com/nicokaiser/rpi-audio-receiver/archive/main.zipinto the terminal (Please note, you won't see any actual print out after entering, it will just be a blank line.)
- We need to unzip the files. Enter
unzip main.zipand we will see a new directory created, files extracted and inflated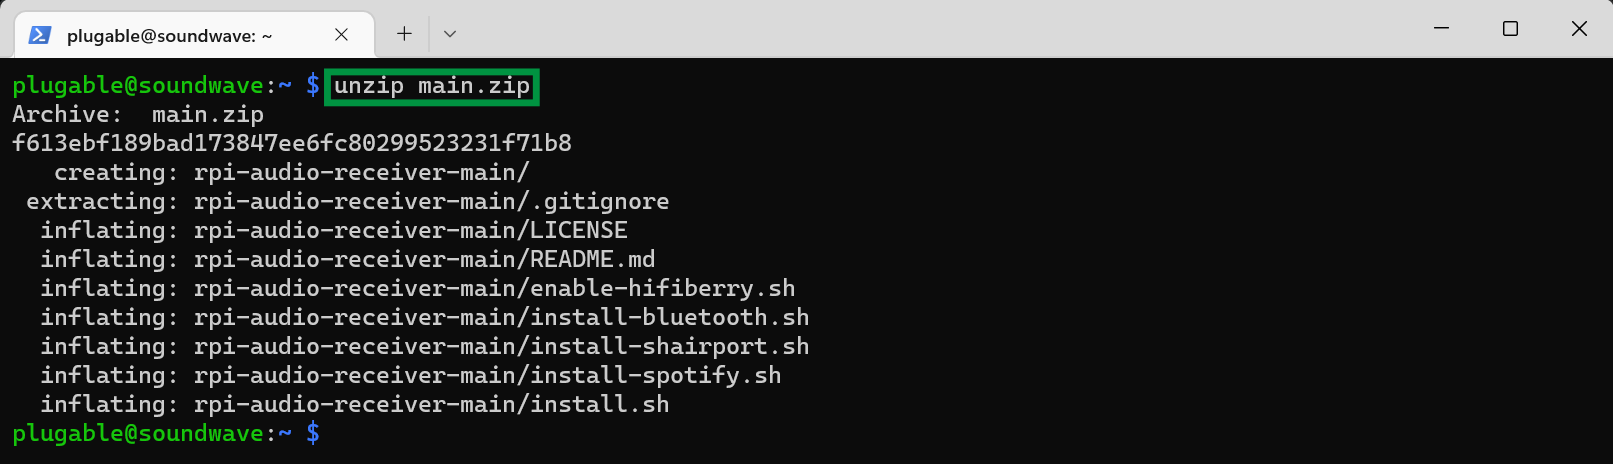
- Next, we can remove with archive the rm command now that the files have been extracted. Enter
rm main.zip
- We're going to Change Directory with the cd command into the newly created rpi-audio-receiver directory. Enter
cd rpi-audio-receiver-maininto the terminal
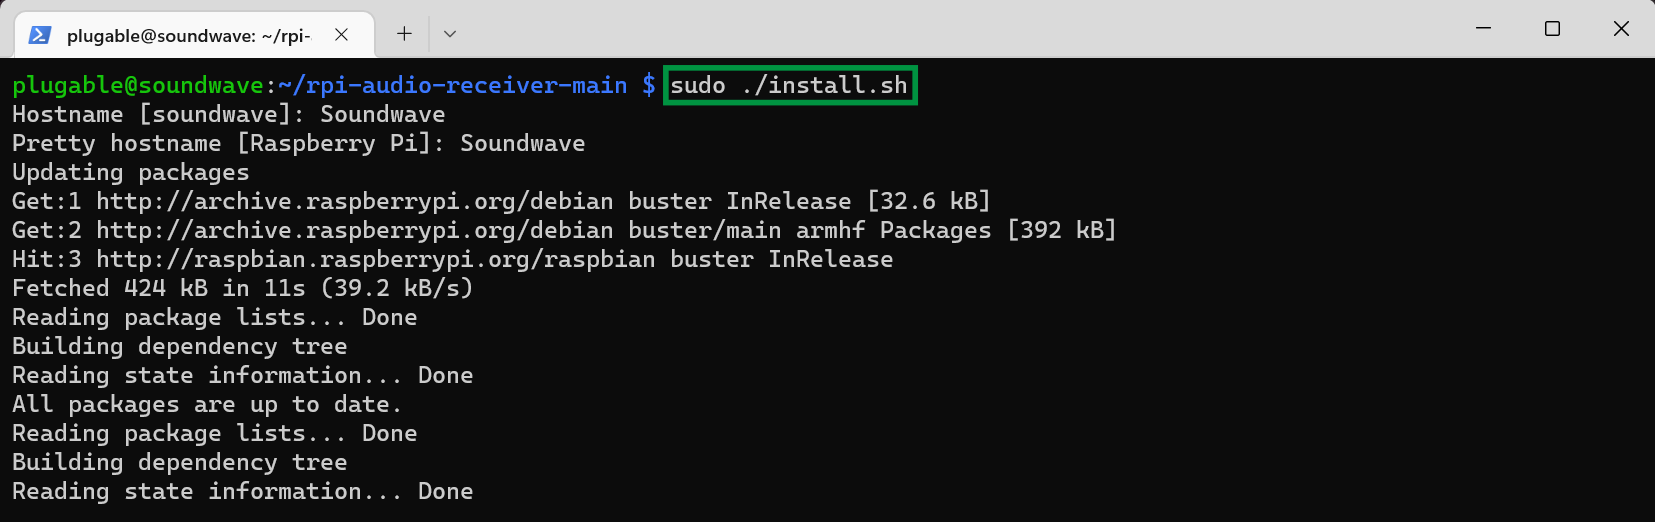
- We're now in the main audio receiver folder! Let's start the guided installation. We'll need to use sudo (Super User Do) to install the software. This is a powerful tool for administration, and we can do so by entering
sudo ./install.shinto the terminal
- The Hostname is the name of our device itself, and the Pretty Name is what we'll actually see in our Bluetooth listing when trying to connect our devices. You can make the Pretty Name something different than the hostname if you want. We're going to stay the course for this example, and use Soundwave as both the Hostname and Pretty name. Once you pick your names the installation will begin
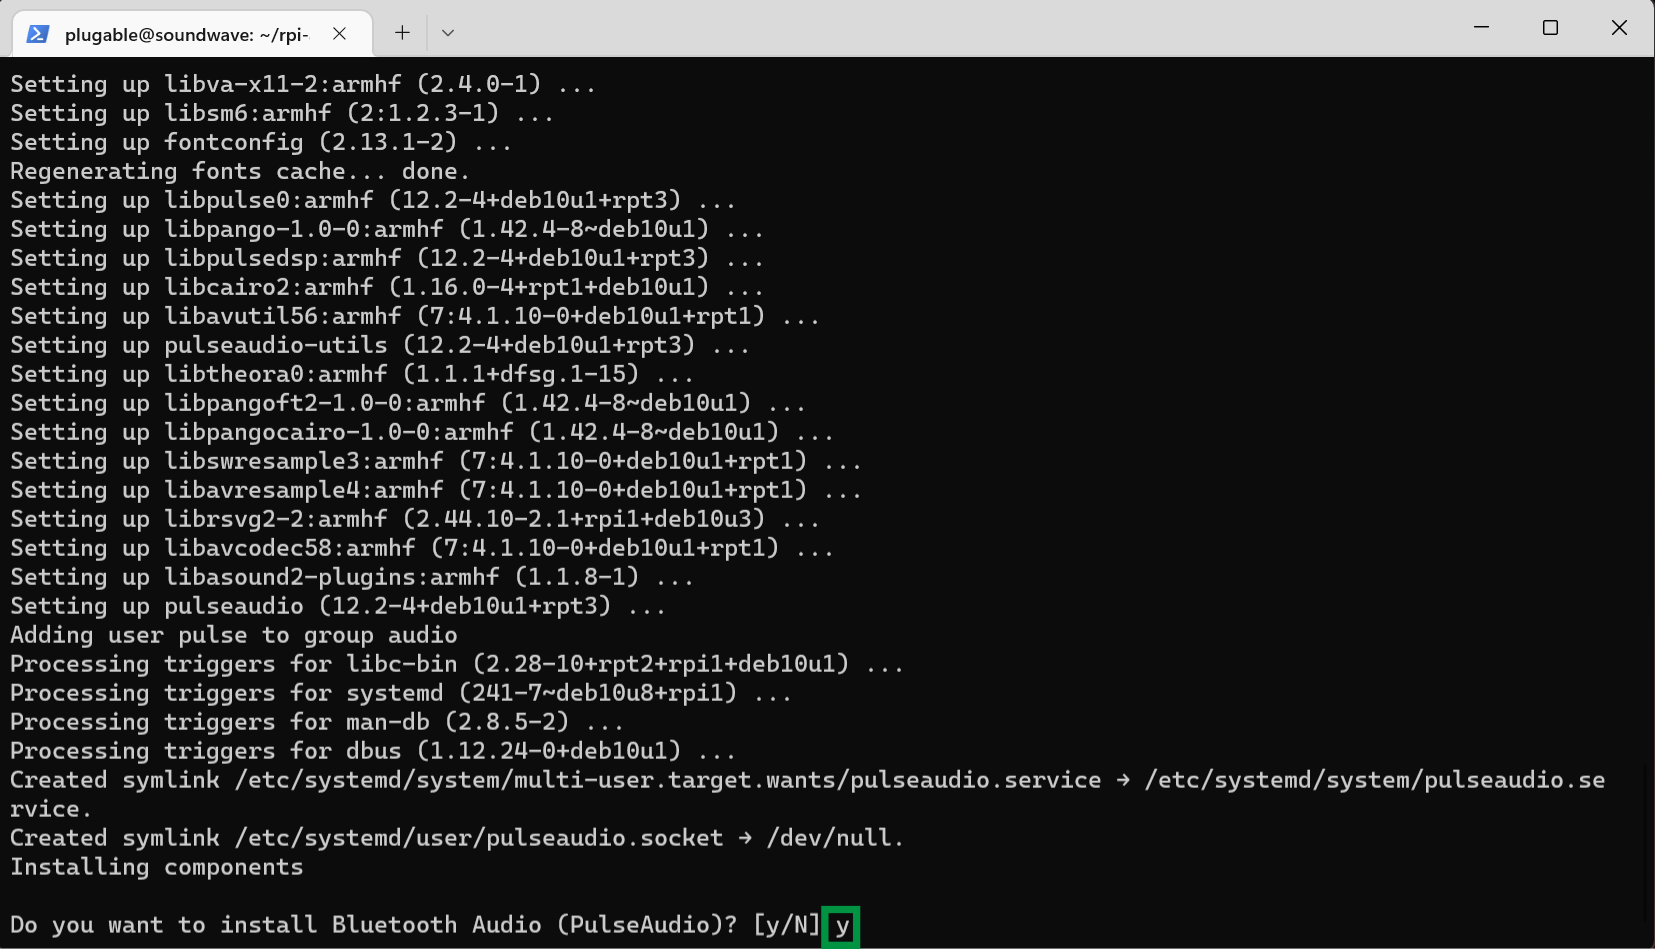
- Great, things are setting up nicely! Install Bluetooth Audio (PulseAudio) - This needs to be installed. Enter y for yes
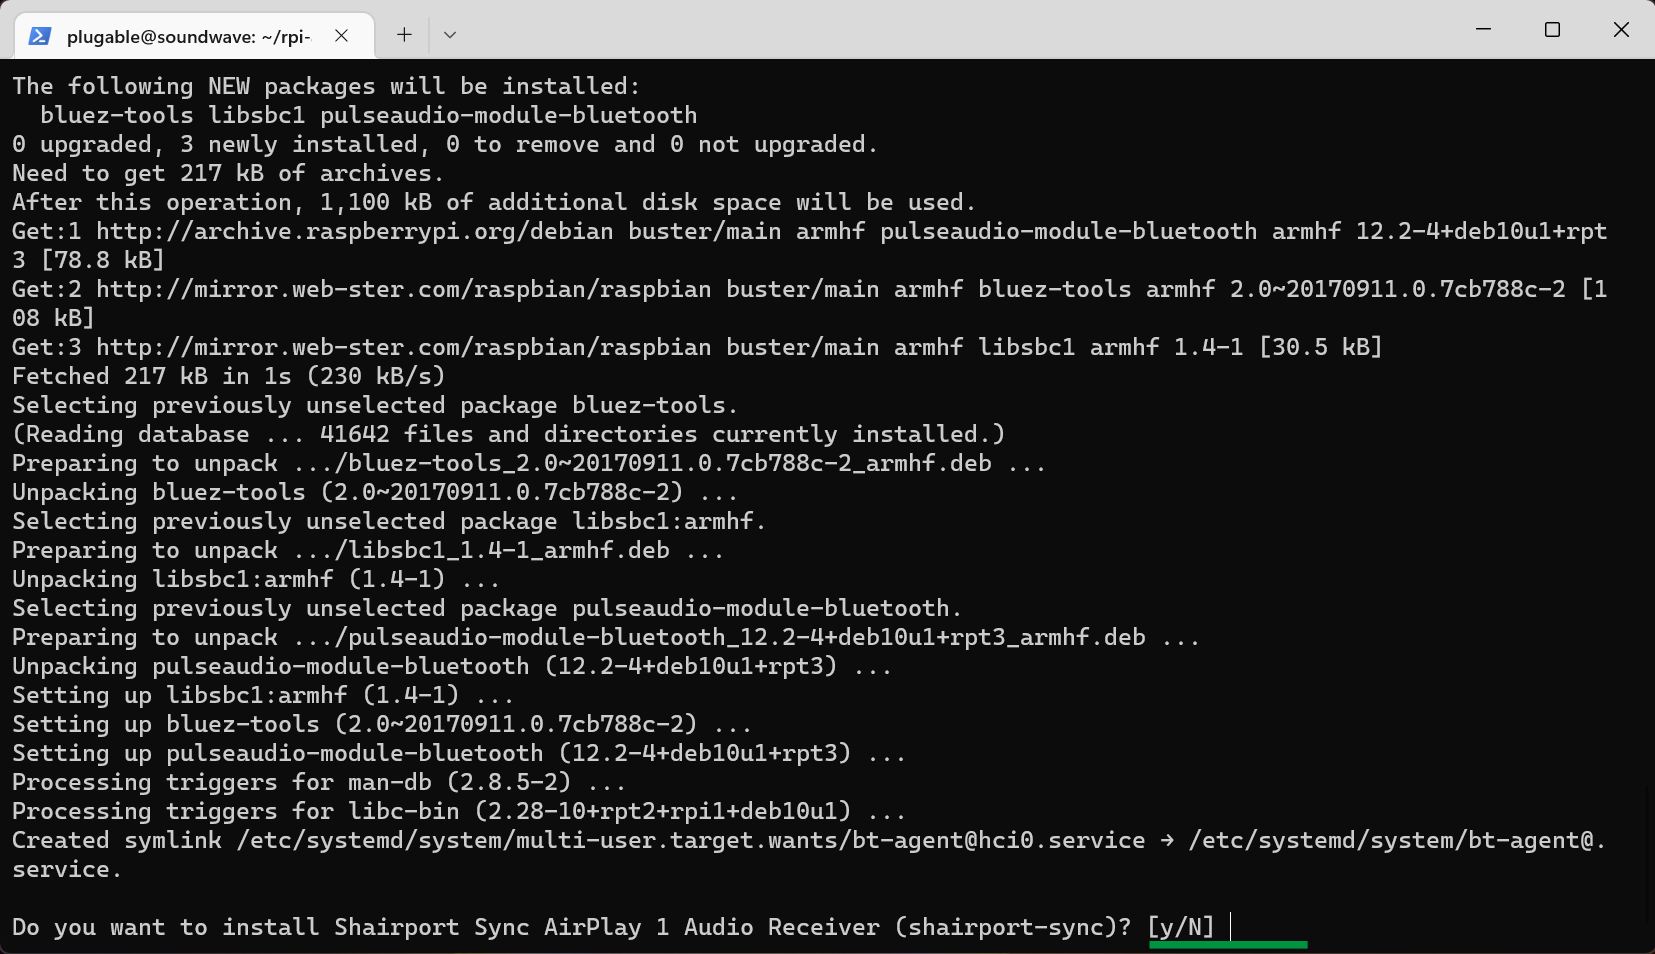
-
Optional - Install Shairport Sync AirPlay 1 Audio Receiver (see the link for more details)
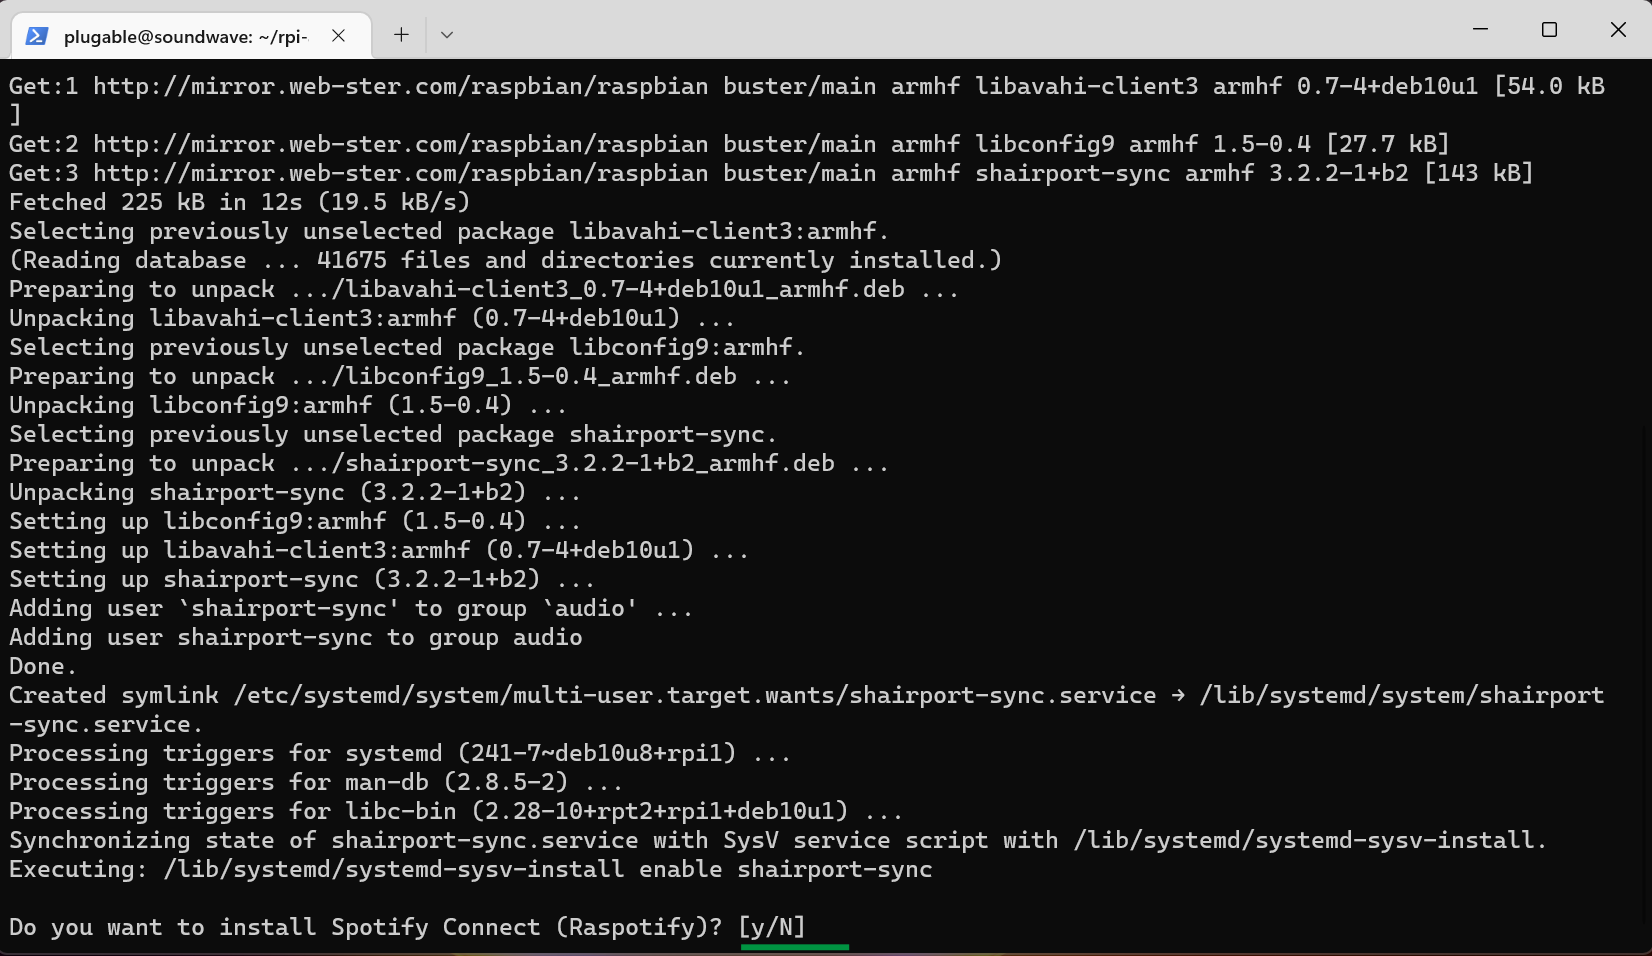
-
Optional - Install Spotify Connect (See the link for more details)
- After you've made your choices we'll need to disable the onboard Bluetooth adapter. There are different ways of doing this, but, editing the boot config is easy to do, and easy to re-enable. Enter
sudo nano /boot/config.txtinto the terminal
- Scroll down to the bottom of the file, and type in
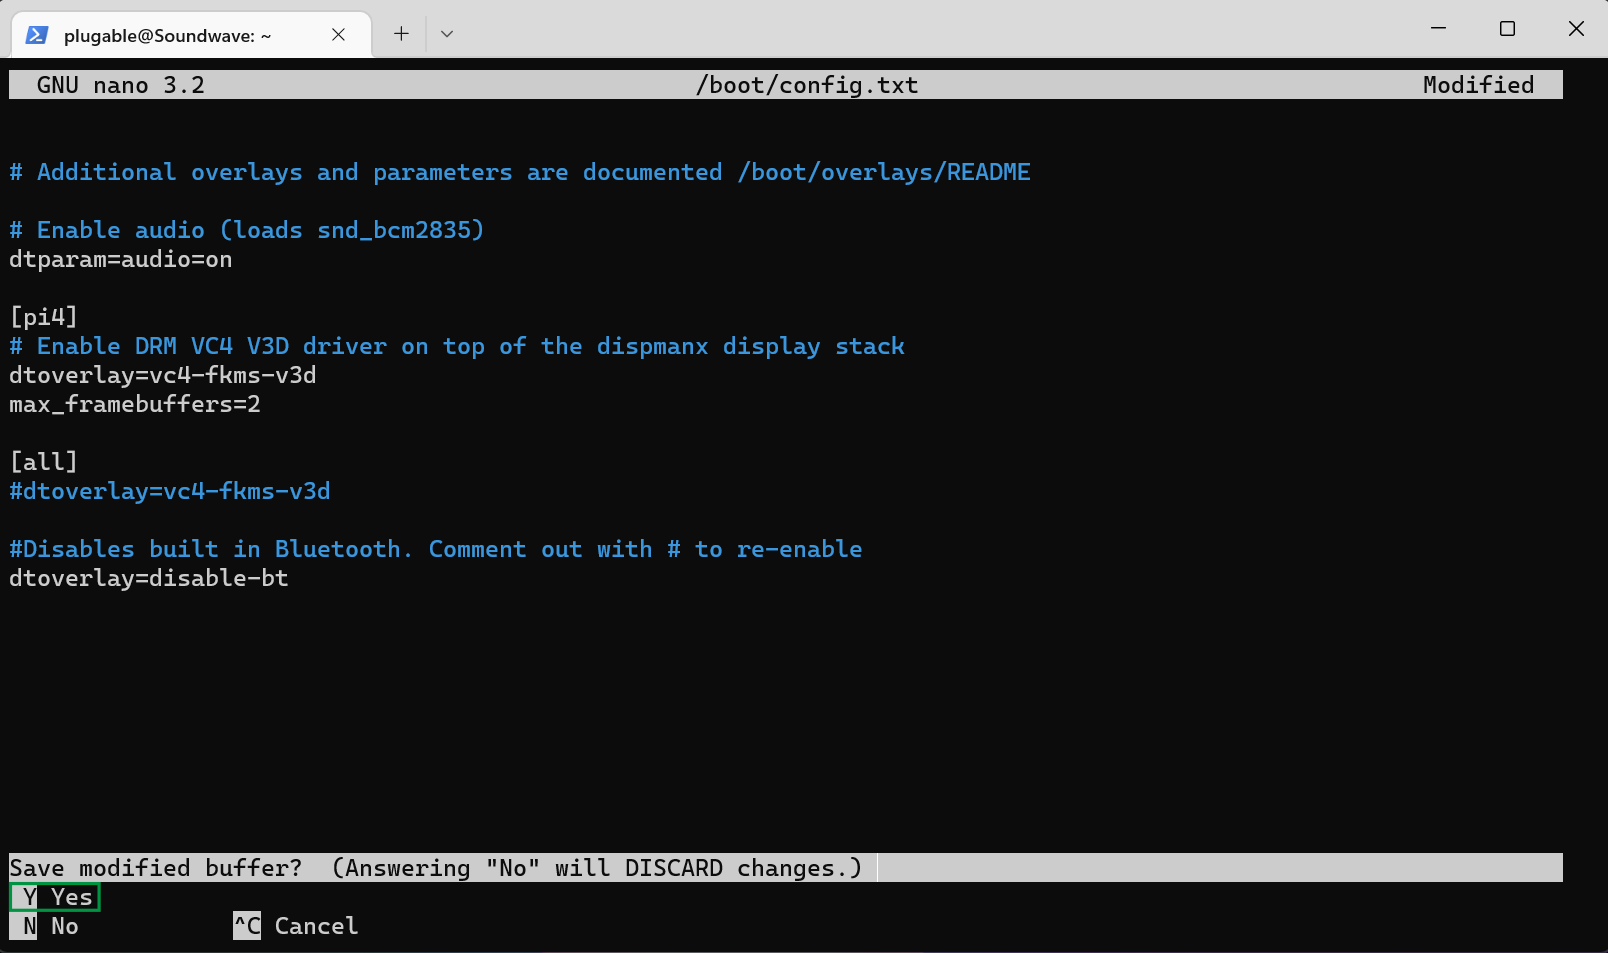
dtoverlay=disable-bt. This will disable the onboard Bluetooth adapter. Now we need to save the file. Press Ctrl and X at the same time on your keyboard to start a save and exit .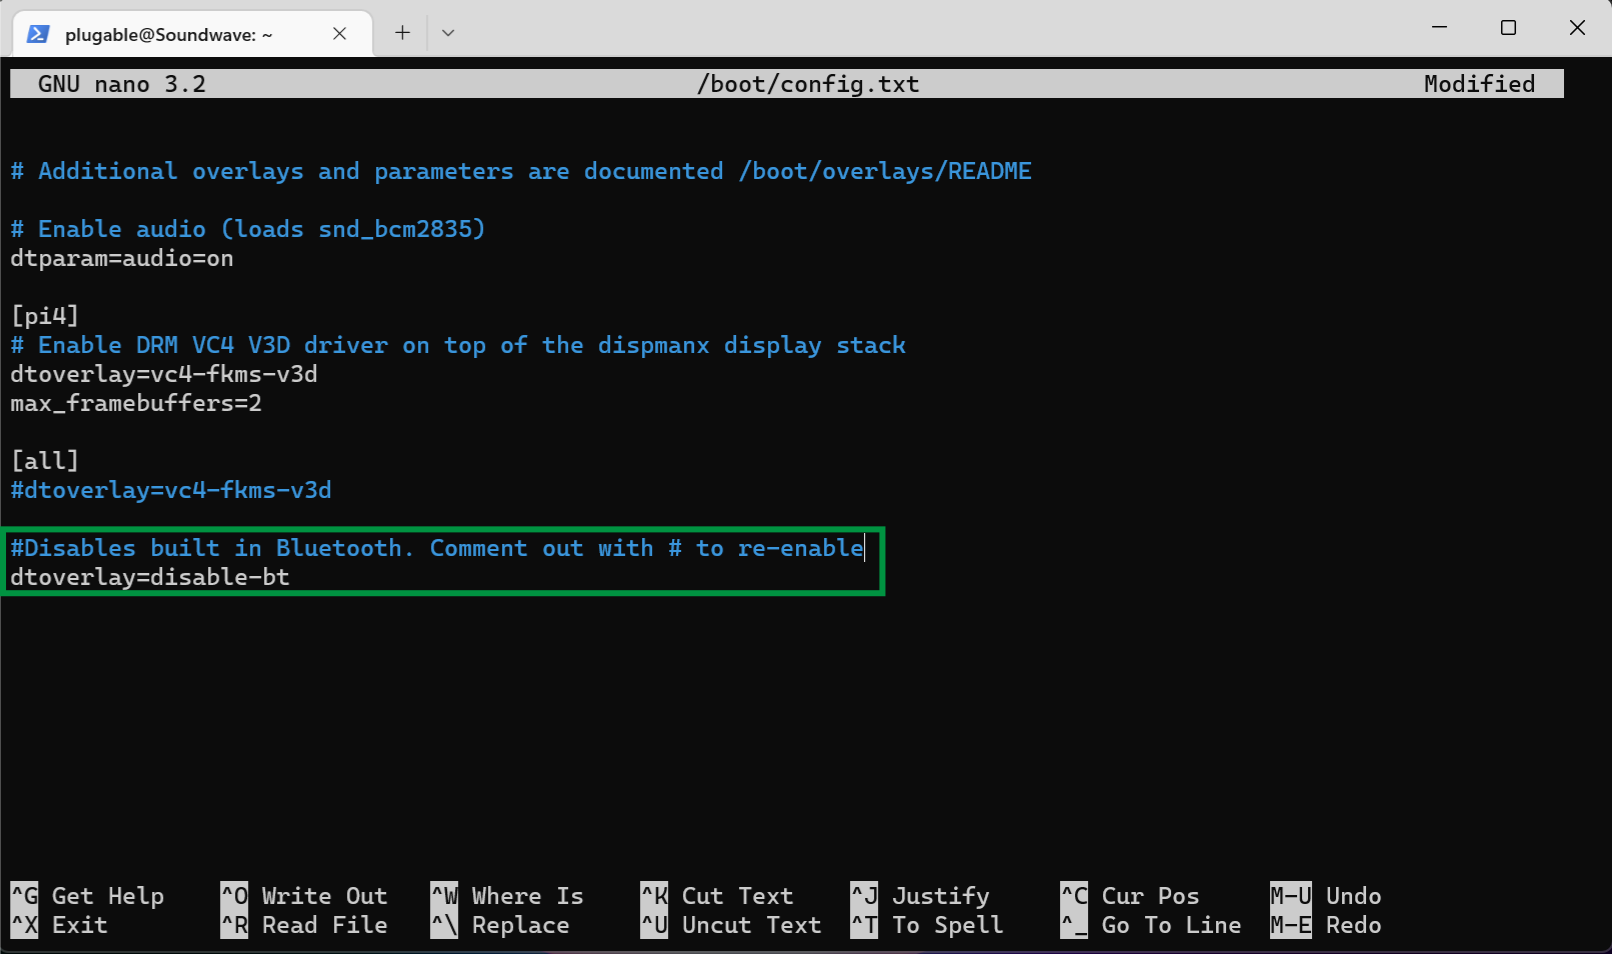
- This is asking us if we want to save what added into the file. Enter y for yes
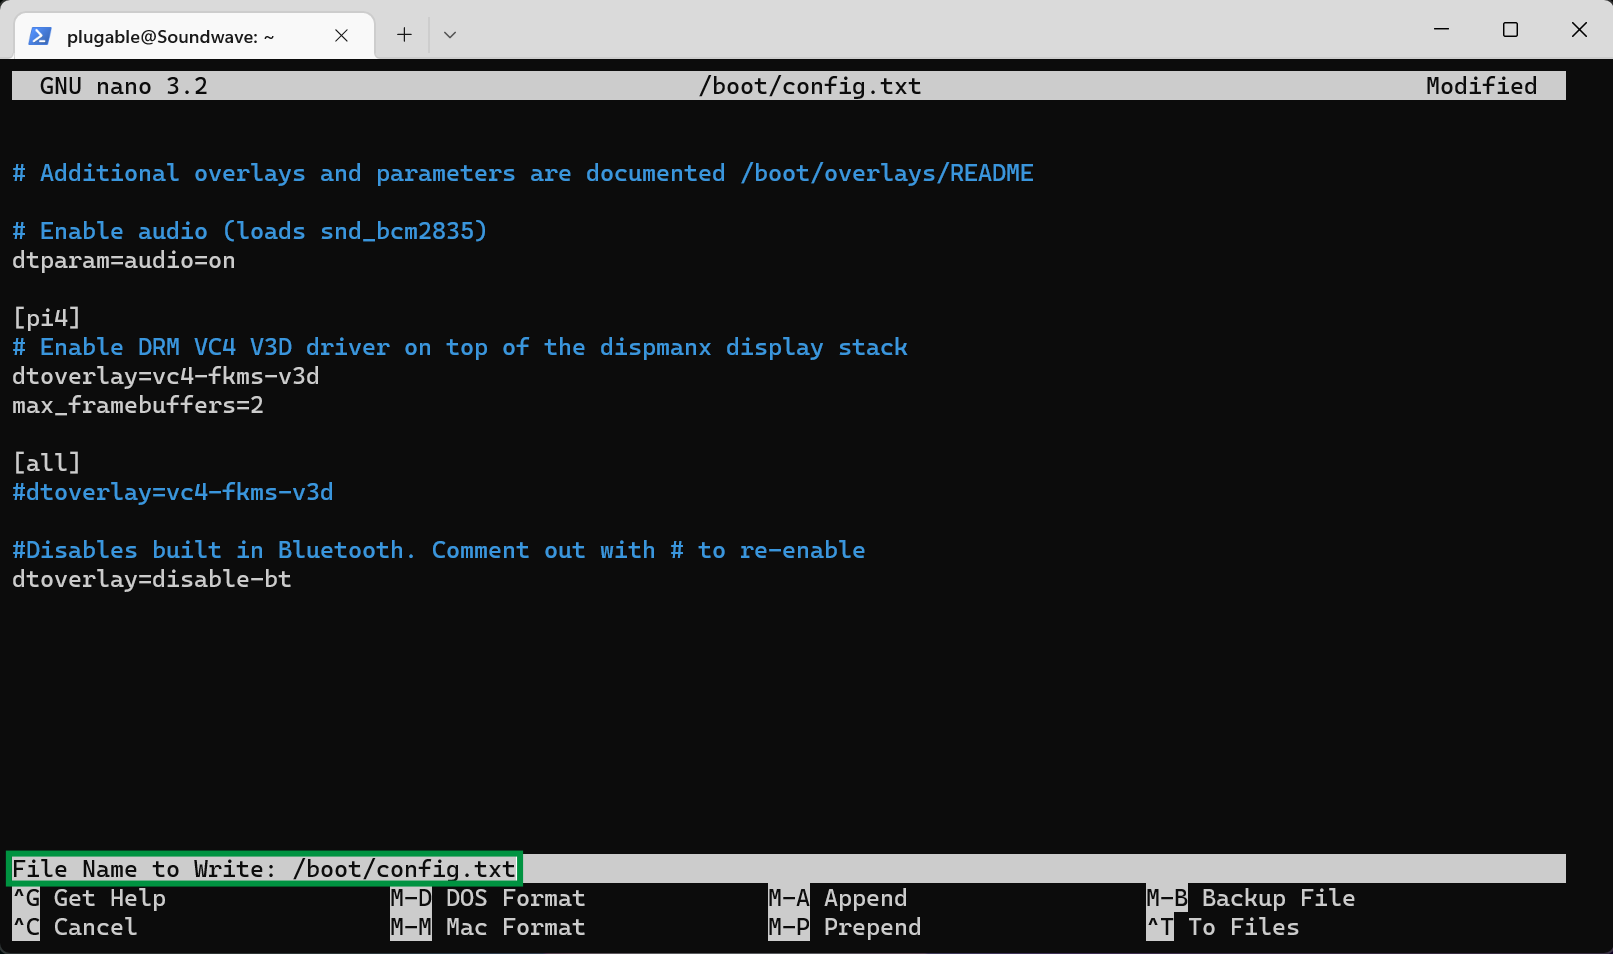
- Next we are going to confirm the file name which is Config.txt. We aren't going to change anything, so press the Enter key to confirm and save the file
- Great! We should reboot for the changes to finalize. Enter
sudo reboot
Ok. Here we are at the final stage. Let's connect everything up, and test it out! See you there!
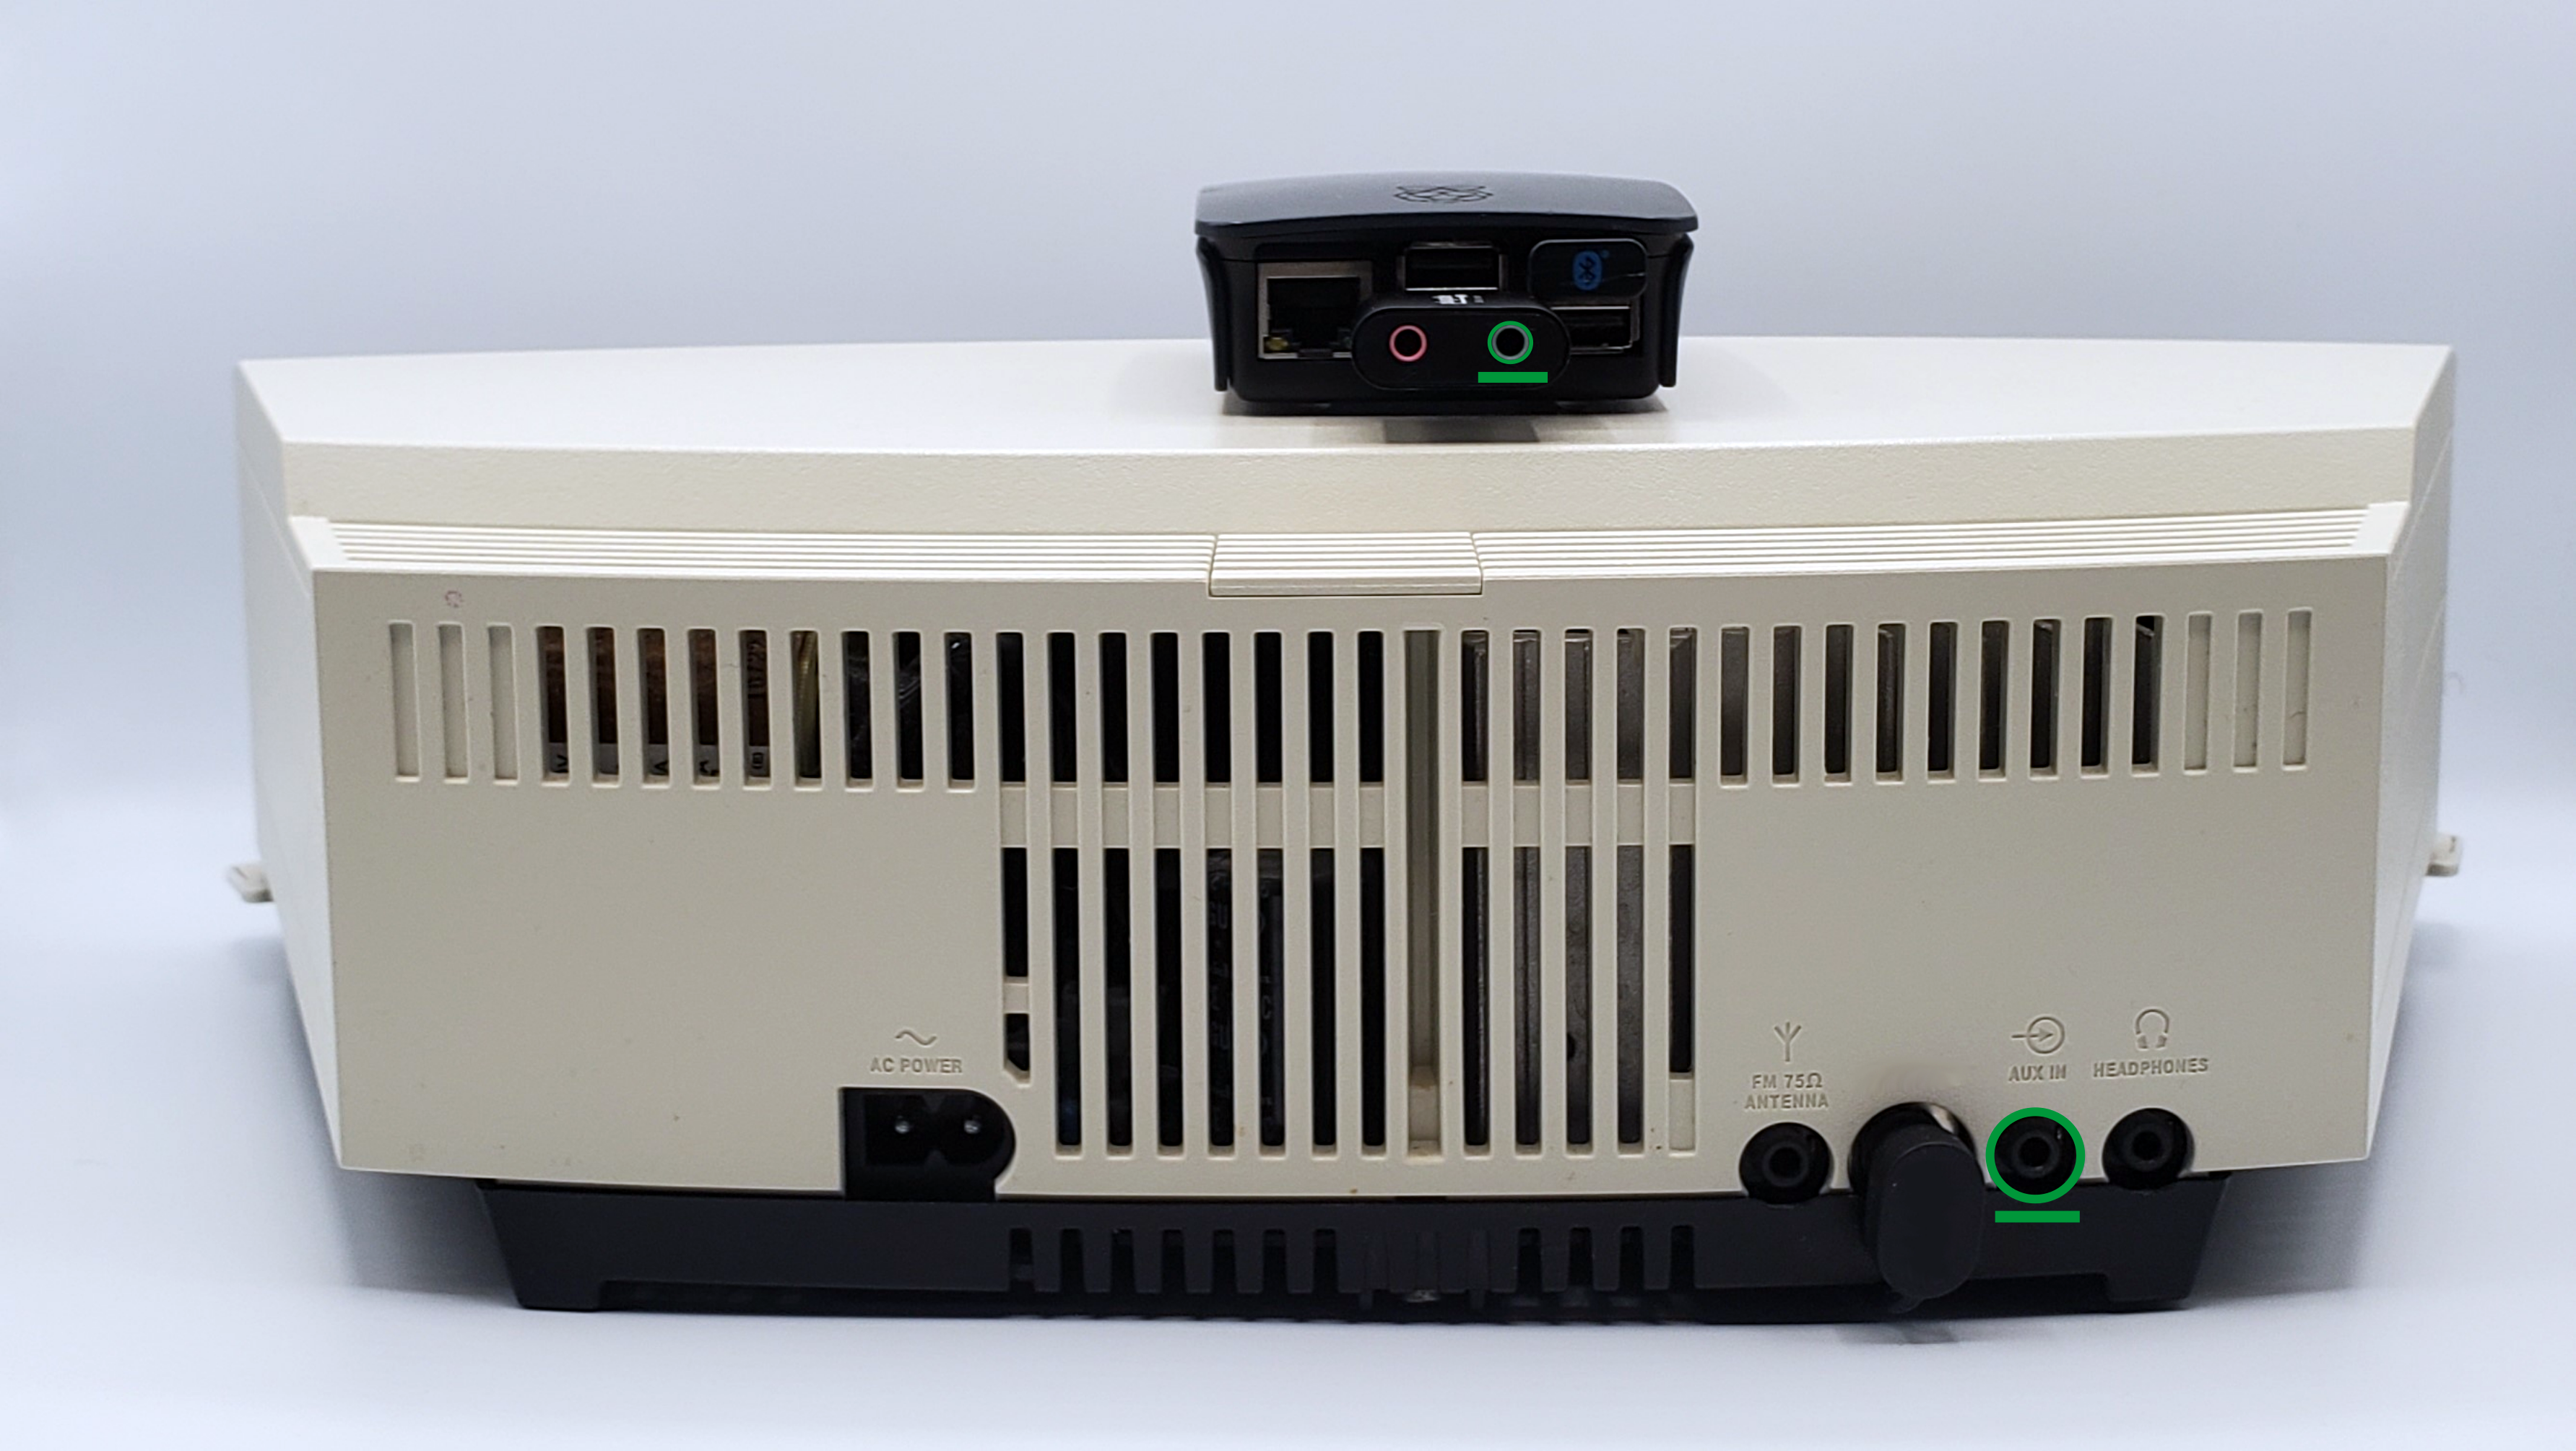
The time has come to test it all out. This older radio still has a great sound, but no network or Bluetooth connectivity. It does however have an Aux In jack and is just right for this project!
- Run a 3.5mm TRS cable from the green audio out jack on the USB-AUDIO into an aux or line in port on your equipment (Equipment varies, but typically you'll want to plug it into an Aux In or Line In jack)
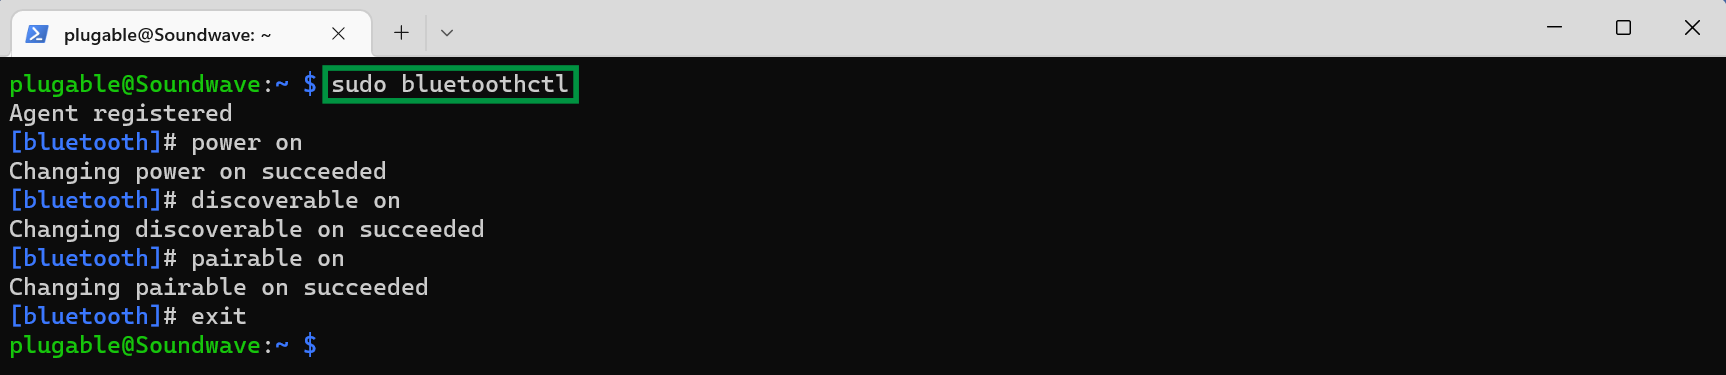
- We need to enter the final commands to get our receiver ready for a signal. Enter
sudo bluetoothctlinto the terminal to get into Bluetooth controls, and then enter the following commands:- power on
- discoverable on
- pairable on
- exit
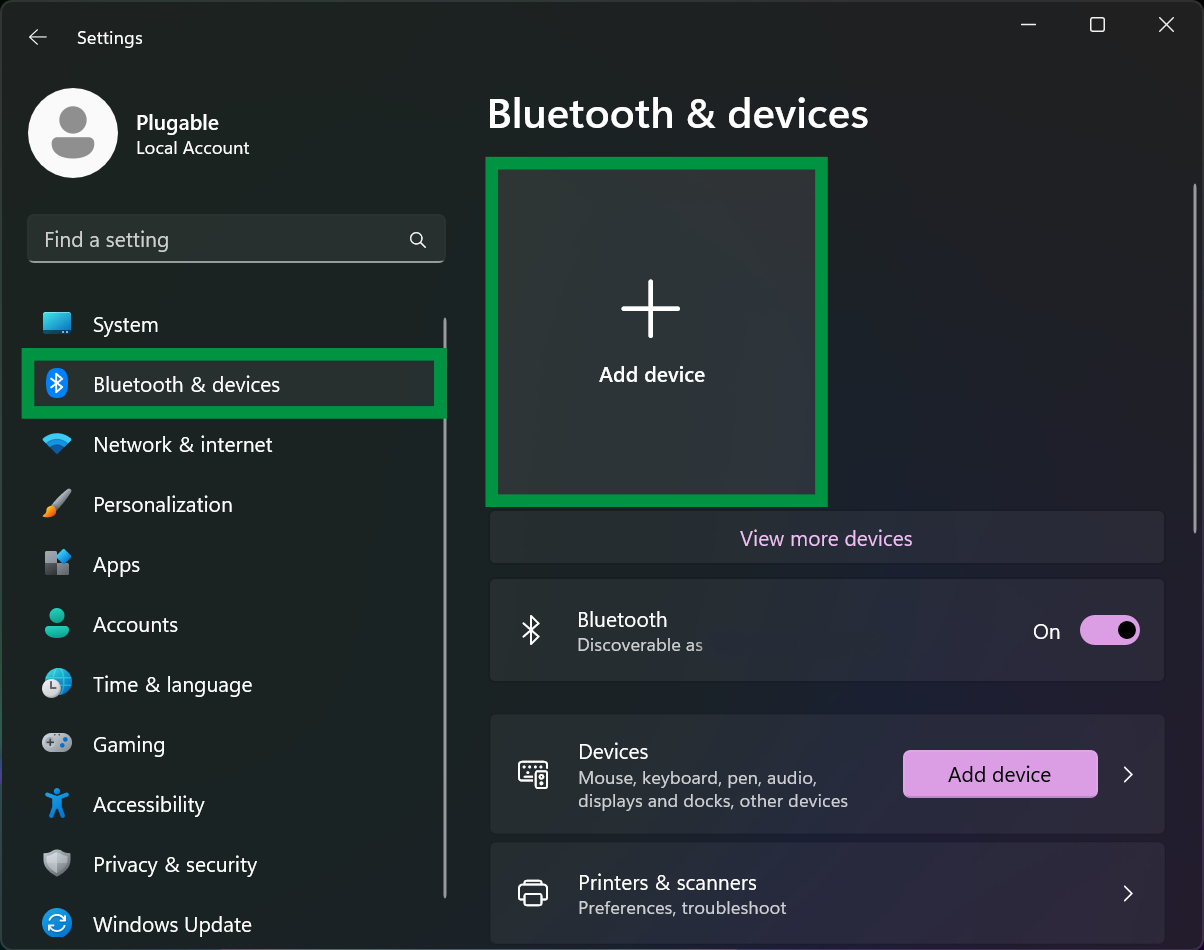
- Now it's time to try connecting to the receiver. Using Windows 11 as an example, go into your Settings > Bluetooth & Devices (or similar section) and click Add device
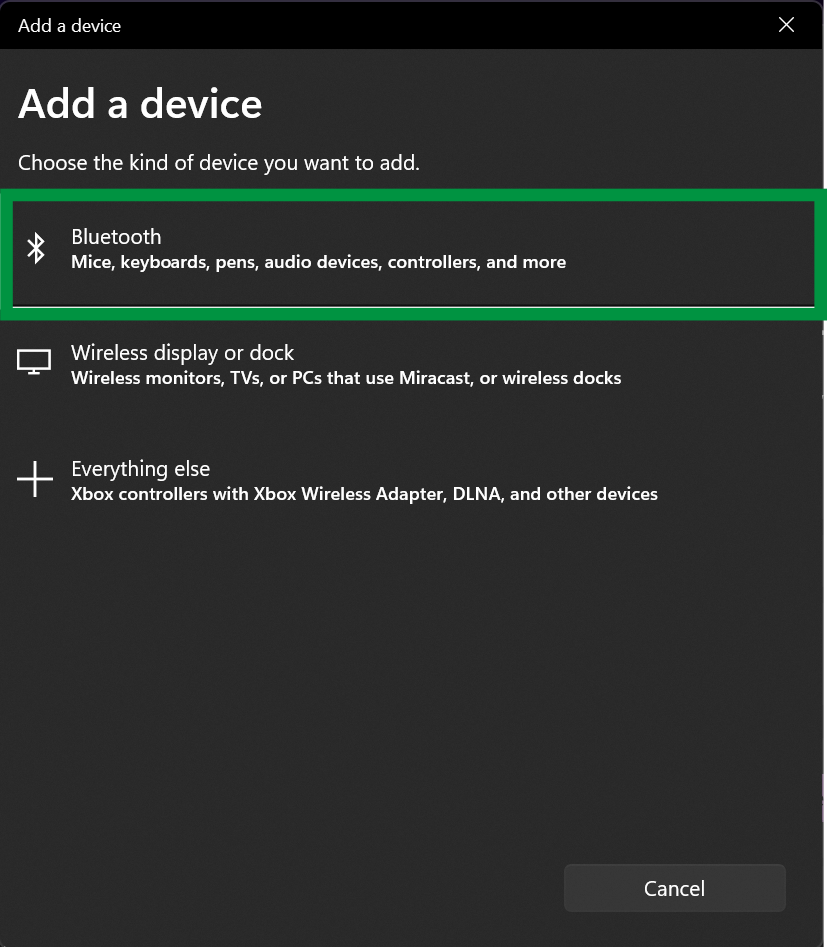
- Next, click Bluetooth
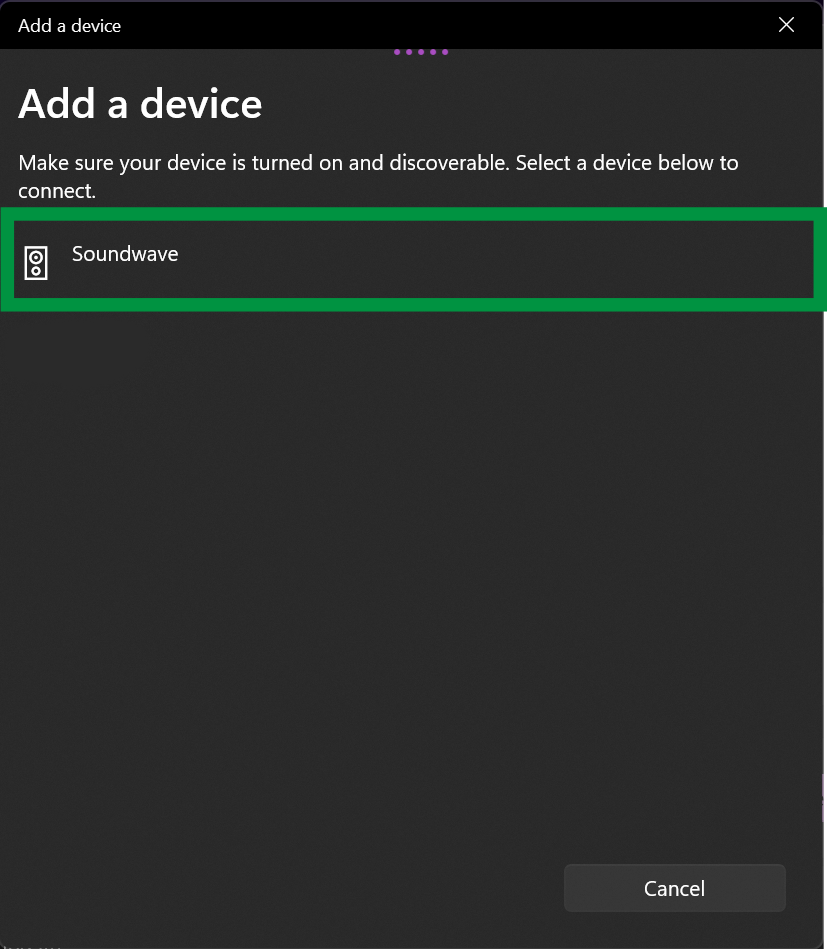
- You should see your receiver listed here. Click on it to set it as your device
- Great! Our device is ready to go. We can see that it we are connected to it for music. We can click Done
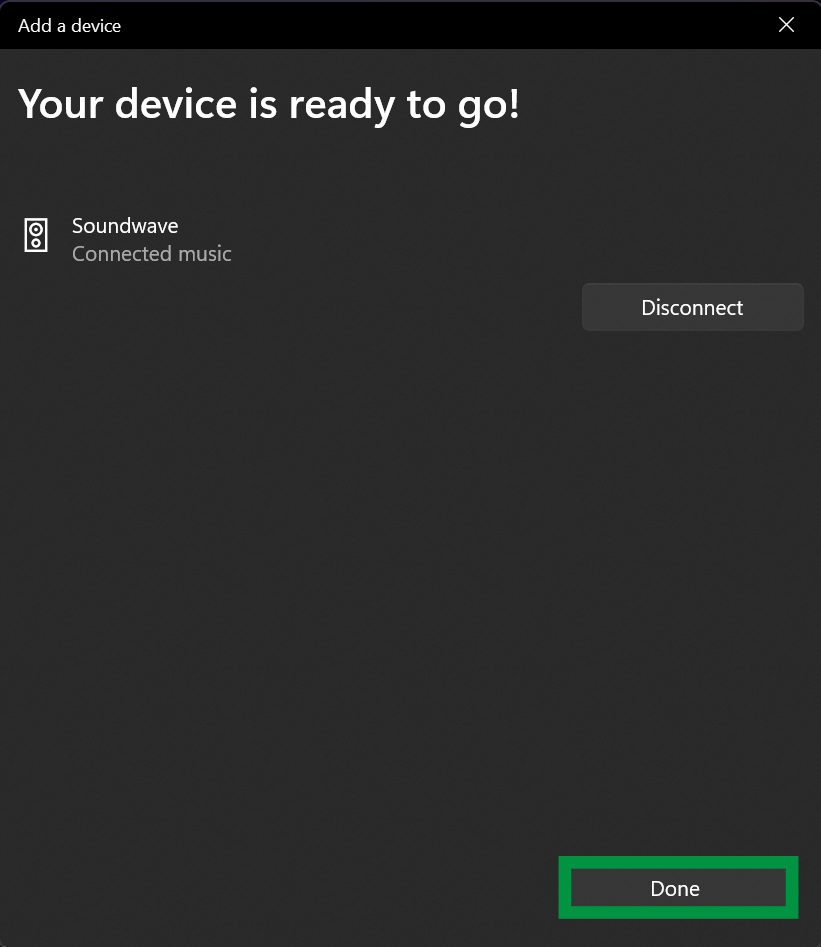
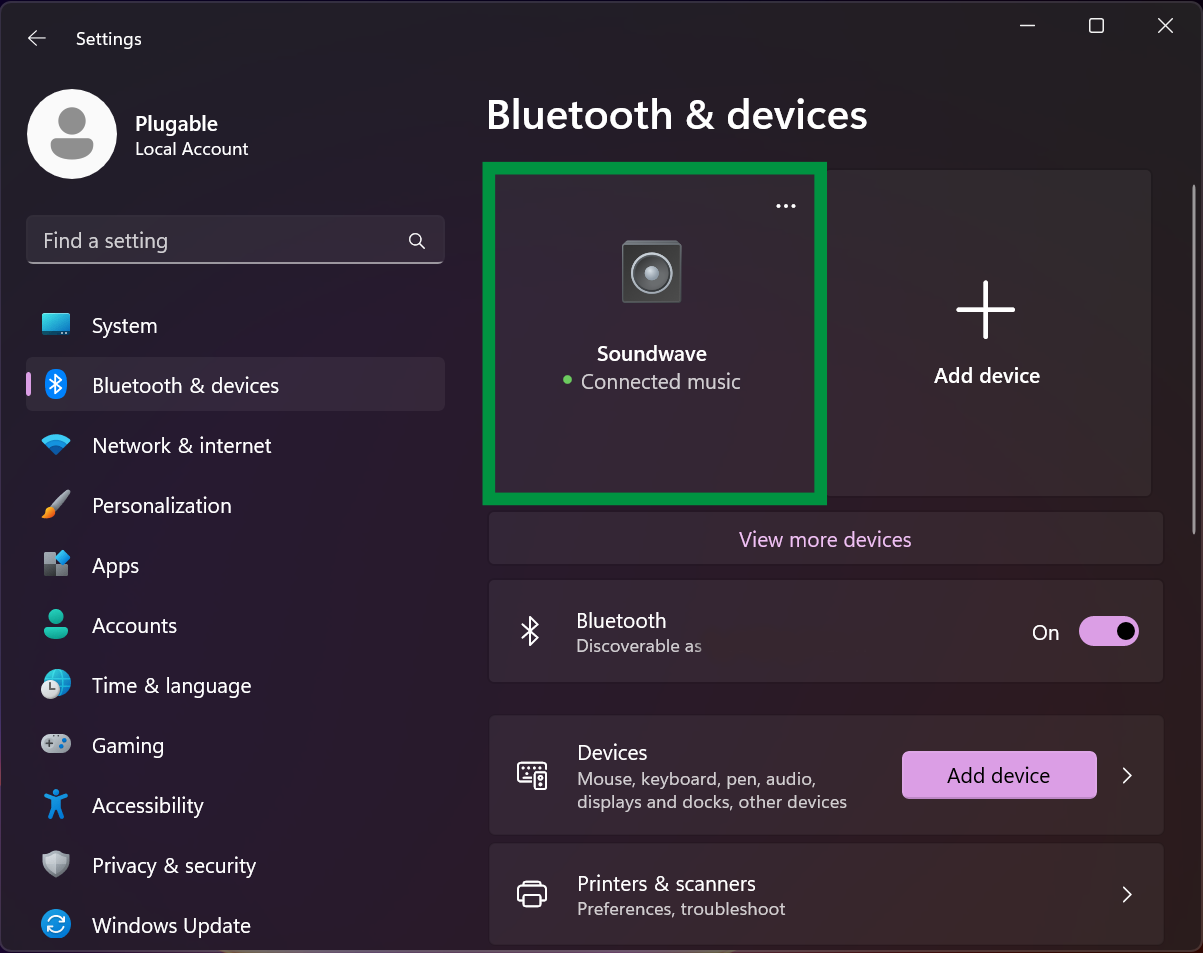
- We should now see our receiver in the main list of devices, and can now stream music to it
There we have it! This is a really neat project, and it's always cool to make something yourself!
We hope this was fun, helpful and informative! Feel free to reach out to us directly at: support@plugable.com with any Raspberry Pi project ideas, project results or other questions.