


Hassle free, 2-Year Warranty
Fast, Free Shipping on Orders $35+
Lifetime Technical Support
30-Day Money Back Guarantee
Plugable HDMI Switch With USB-C
$19.95 USD
SKU: HDMI-SC3Amazon Rating : (24 Reviews)
Features
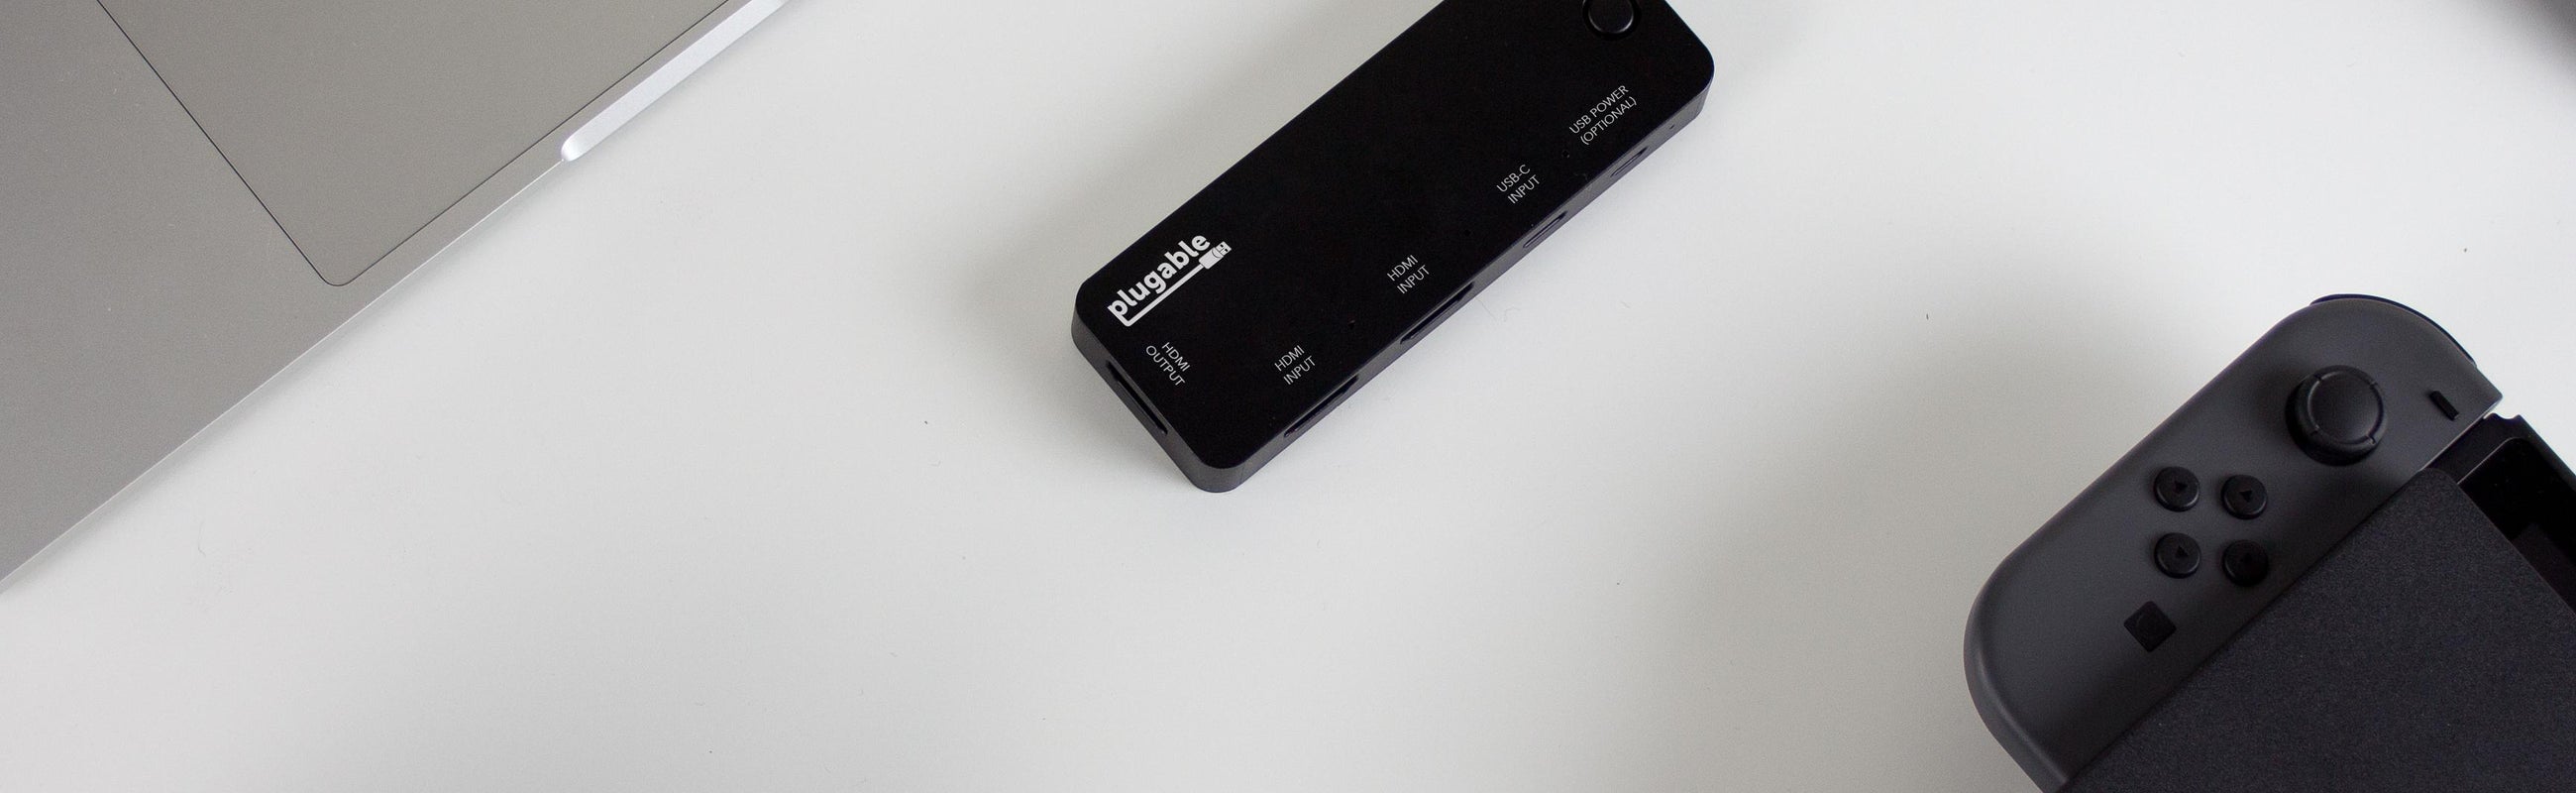
- 4K Switch— Connect a single HDMI display, up to 4K resolution (3840x2160 at 60Hz Standard Dynamic Range), to up to three video source devices and cycle between the inputs with the press of a button
- USB-C INPUT— Native support for USB-C DisplayPort Alternate Mode, compatible with many new computers including Apple MacBook Pro/Air systems with Thunderbolt 3, ChromeBooks, and a wide range of Windows Laptops
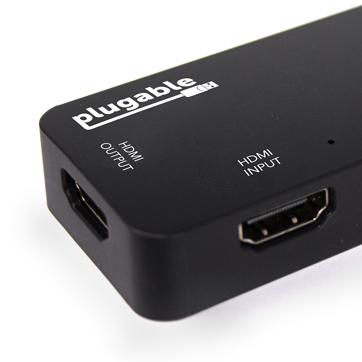
- HDMI Inputs— Connect up to two HDMI video sources to the switch, including desktop computers, laptops, game consoles, and set top media players to easily share a single display between multiple sources
- Compact and Portable— Saves space on the desktop in the home, office or dorm room. Easily packs for travel to conventions, conferences, and presentations
- 2-Year Coverage, Lifetime Support— Every Plugable product, including this HDMI Switch, is covered against defects for 2 years and comes with lifetime support. If you ever have questions, contact our North American-based team - even before purchase
For volume orders or business inquiries contact sales@plugable.com
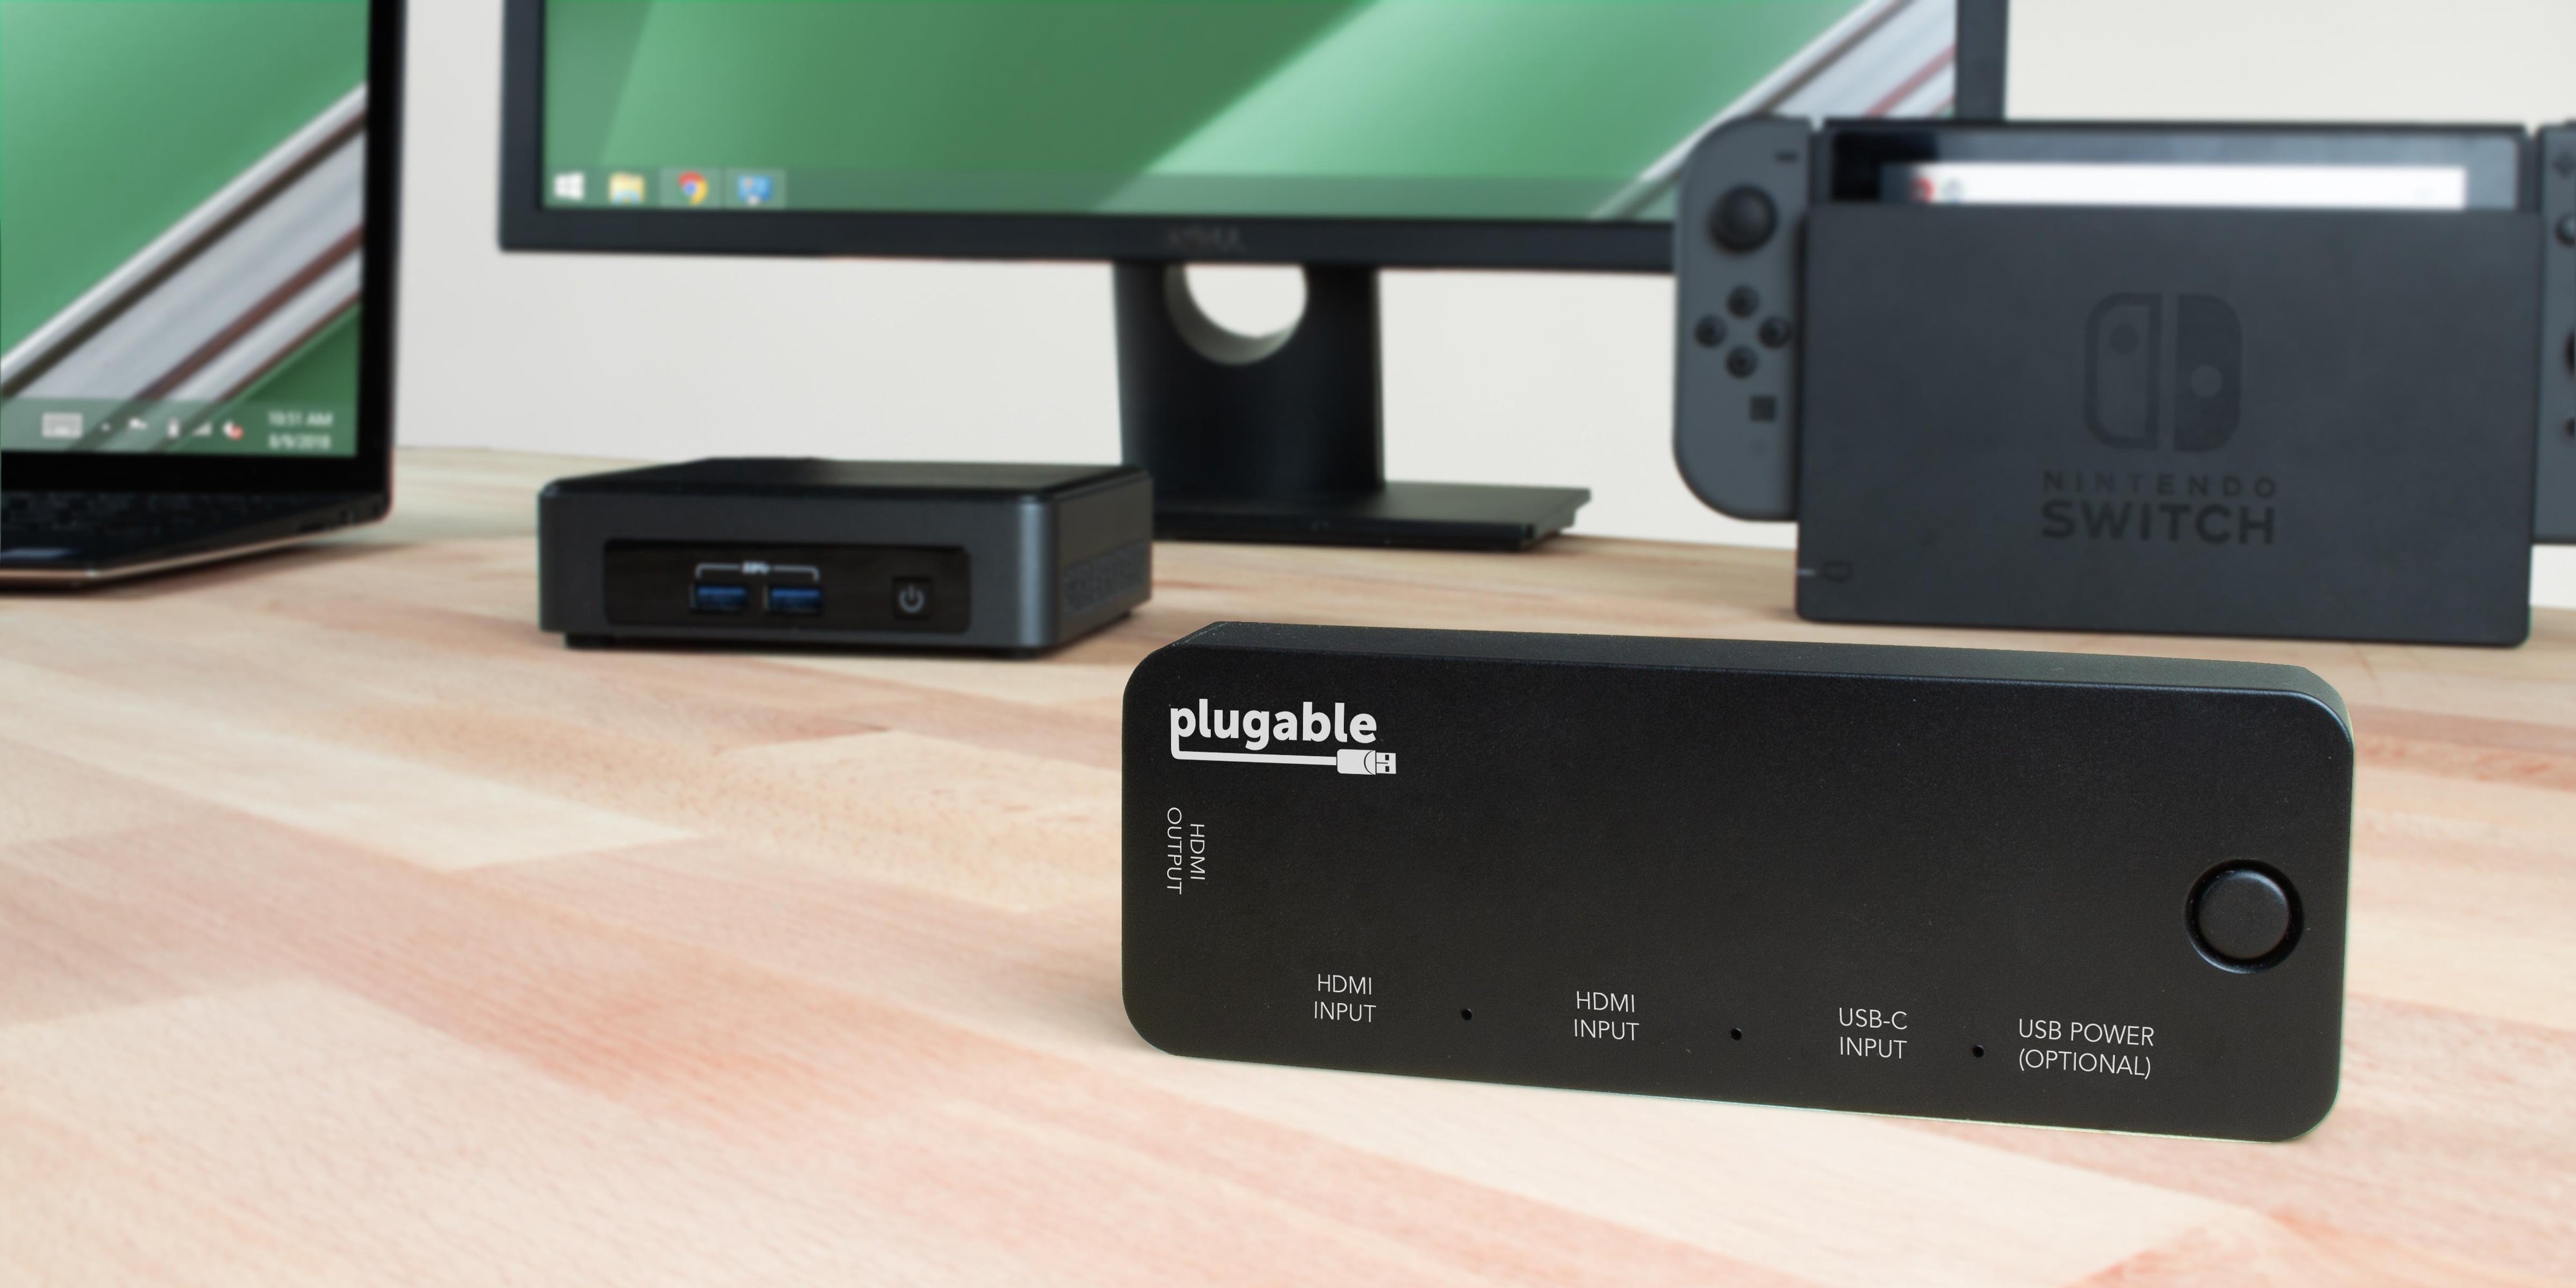
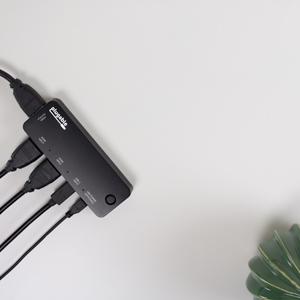
The Plugable HDMI Switch with USB-C (HDMI-SC3) allows you to connect and switch between up to three source devices (computers, gaming consoles, or set top media players) to a single HDMI display. Whether in the conference room, at home, or in the dorm, expand the connectivity of your display to support multiple inputs at the push of a button without swapping cables around. This HDMI Switch makes it easy to connect new systems with USB-C DisplayPort Alternate Mode output to your HDMI display.
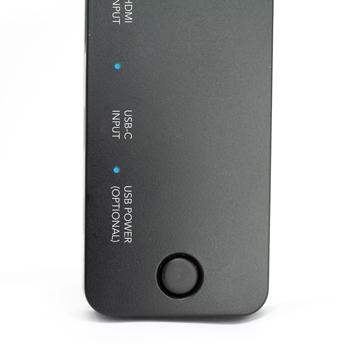
The HDMI switch cycles between the three inputs with a single button and an LED indicates the active input. Power for the switch is provided by the source device (we include an optional USB Micro-B power cable in case your source devices don't provide enough power).
Plugable's HDMI switch supports up to HDMI 2.0 and USB-C sources and can output at HDMI 2.0 resolution up to UHD 4K SDR (3840x2160 @ 60Hz Standard Dynamic Range). HDMI 2.0 functionality requires compatible HDMI cables, USB-C cable, and source devices USB-C and HDMI cables are not included. See additional USB-C and HDMI compatibility details below.
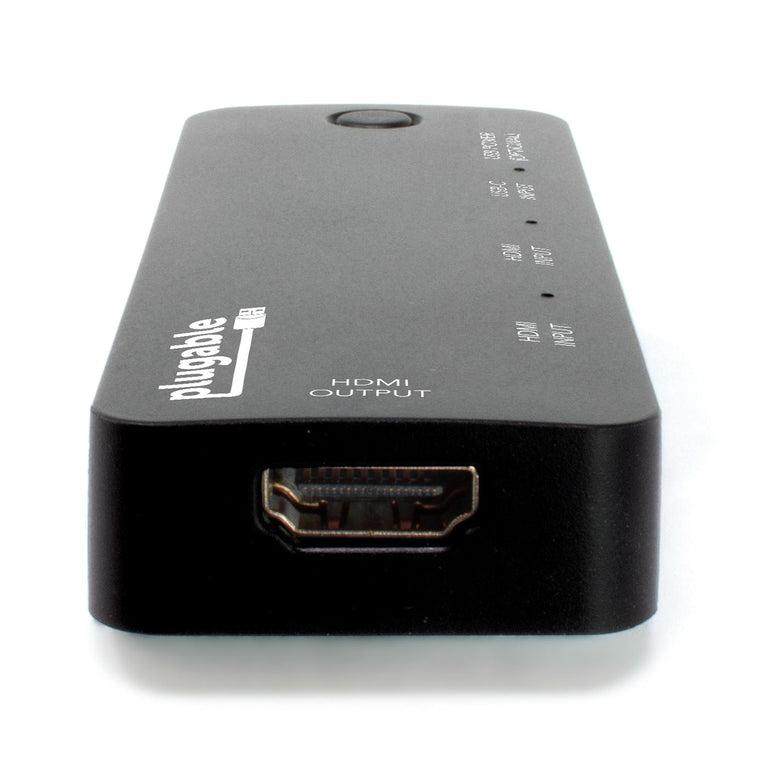
Compatibility
Two HDMI inputs support plug and play functionality with Windows, macOS, Linux, game consoles, and most media players.
Single USB-C input requires a computer, tablet, or phone which can output video over the USB-C or Thunderbolt 3 port (known as "DisplayPort Alternate Mode" or "Alt Mode" output). Alt Mode video output over USB-C must be built-in by your laptop, tablet, or phone manufacturer.
Resolution and refresh rate are dependent on source device, output display, and cable specifications. HDMI switch does not upscale content; the output will be limited to the capability of the source device, up to HDMI 2.0 capability.
Audio switching is supported on HDMI capable TVs and monitors with built-in speakers.
Incompatible Devices
Many computers and phones with USB-C ports do not support video output from this port. Some system manufacturers document this functionality while others do not. Plugable can help with USB-C compatibility questions prior to purchase.
USB-C charging cables provided with most Apple computers and tablets do not support video transfer and are not compatible.
ASMedia USB 3.1 controllers do not support USB-C video output.
Samsung USB-C Phones only support mirrored display output over USB-C.
HDMI ARC is not supported. DTS/DD bitstreaming is not supported.
May not be compatible with some HDMI receivers.
High Dynamic Range (HDR) is not supported with this switch. HDR requires HDMI 2.0b specification, connected 4K HDR displays may have reduced refresh rate, limited HDR capabilities, or graphics compression.
HDMI 2.0, 4K TVs, and HDMI Cables
When utilizing HDMI 2.0's highest resolution and refresh rate (3840x2160 @ 60Hz), twice the data is being transmitted as the maximum allowed by the previous HDMI 1.4 specification.
As a result, it is critical that an HDMI 2.0-compliant cable capable of providing the increased bandwidth be used for 4K 60Hz functionality. HDMI 1.x cables will likely result in a blank screen, digital noise/artifacts, or display drop-offs.
If using an HDMI 2.0 4K TV, it is strongly recommended to update the firmware/software of the TV for the best compatibility, performance, and stability.
4K UHD Televisions with HDR may be limited to 30Hz refresh rate.

USB-C System Compatibility
- Compatible with Thunderbolt 3 MacBook Pro systems (Late 2016 and newer), MacBook Air 2018 with Thunderbolt 3, and USB-C 12" Retina MacBooks (2015/2016/2017)
- Compatible with Dell XPS systems with Thunderbolt 3 and many with USB-C
- Compatible with most HP systems with Thunderbolt 3 and many with USB-C
- Compatible with many other USB-C and Thunderbolt 3 systems from a variety of manufacturers
- If you're unsure if your USB-C or Thunderbolt 3 port supports video output, please post your system model to the Questions section of the listing and we'll be happy to help!
Technical Specifications
- HDMI 2.0 supports up to 4K 60Hz refresh rate Standard Dynamic Range, 4K High Dynamic Range (HDR) not supported and may be limited to 30Hz refresh rate
- USB-C DisplayPort Alternate Mode supports DisplayPort 1.2 functionality
- Audio pass through: LPCM/HBR audio up to 8-channels and 192kHz sample rate (audio capability may be limited by source device or display/receiver capability)
In the Box
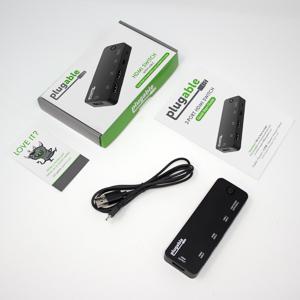
- Plugable HDMI Switch with USB-C
- USB-A to USB Micro-B power cable
- Quick Start Guide
Filter Help Articles and Frequent Questions by Category
Choose one or more filters within each category to narrow down the articles. Each selection will result in only displaying articles that include all of your choices.
Articles
Well how about that, it looks like we don't have any articles matching your filters! Try removing one of your choices or clear the filters to show all articles.
You can always contact support if you need help too!
Can I Connect a DisplayPort (DP) Monitor to the HDMI Port on This Device Using an Adapter or Cable?
No. Most DisplayPort to HDMI cables and adapters are one-way adapters from a DisplayPort Source (computer or docking station) to a HDMI Sink (television, computer monitor, or projector). These cables do not work in reverse.
Why is DisplayPort to HDMI often a one-way conversion?
DisplayPort uses packet-based data transmission, breaking the video stream into individual packets of data allows for longer cable runs, use in both copper and fiber-optic cables, and allows for higher bandwidth than other video formats. It is relatively easy to convert from DisplayPort to HDMI (computers with HDMI output ports already do this internally) and dual-mode DisplayPort outputs (DP++) have built-in adapters to output a HDMI signal for use with passive DisplayPort to HDMI adapters.
HDMI historically uses a Transmission-Minimized Differential Signaling (TDMS) video signal originally based on DVI's signal, this requires more power to operate at the same cable lengths as DisplayPort and requires significantly more processing power to convert from HDMI to DisplayPort packet-based data. The latest HDMI specifications enable the new Fixed Rate Link (FRL) which is packet based similar to but not directly compatible with DisplayPort.
Externally powered HDMI to DisplayPort adapters do exist, these generally have a USB or small barrel plug for power, and can convert from a HDMI Source to DisplayPort Sink. In most cases they have reduced resolution or refresh rates compared to modern signal sources and can introduce delay in the data connection between the display and computer potentially causing reduced connectivity or display performance problems.
We do not currently recommend using HDMI to DisplayPort adapter with our docking stations. In our testing they have been unreliable compared to a native DisplayPort connection. Many of our newer docking stations include both HDMI and DisplayPort outputs to reduce the need for additional adapters or adapter cables.
If you have any questions please feel free to contact us at support@plugable.com and we'll be happy to help!
How To: Set the Display Refresh Rate in Windows 11
Summary
Many modern displays support refresh rates higher than 60Hz. In some cases, the desired refresh rate may need to be selected manually in Windows 11. The resolutions and refresh rates available depend on the capabilities of the display, computer, graphics hardware, docking station or adapter, and the connection between them.
Applicable To
Windows 11 computers using built-in or external displays, including displays connected through compatible Plugable docking stations, video adapters, and cables.
Setting the Display Refresh Rate in Windows 11
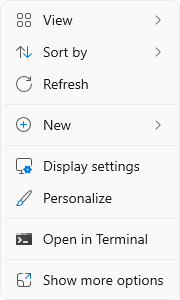
1. Right-click on the desktop and select Display Settings from the drop-down menu
2. Scroll down to the Related settings subsection and select Advanced display

3. At the top of the Advanced display window, select the display you want to configure from the drop-down menu.

4. From the Choose a refresh rate drop-down menu select the desired refresh rate
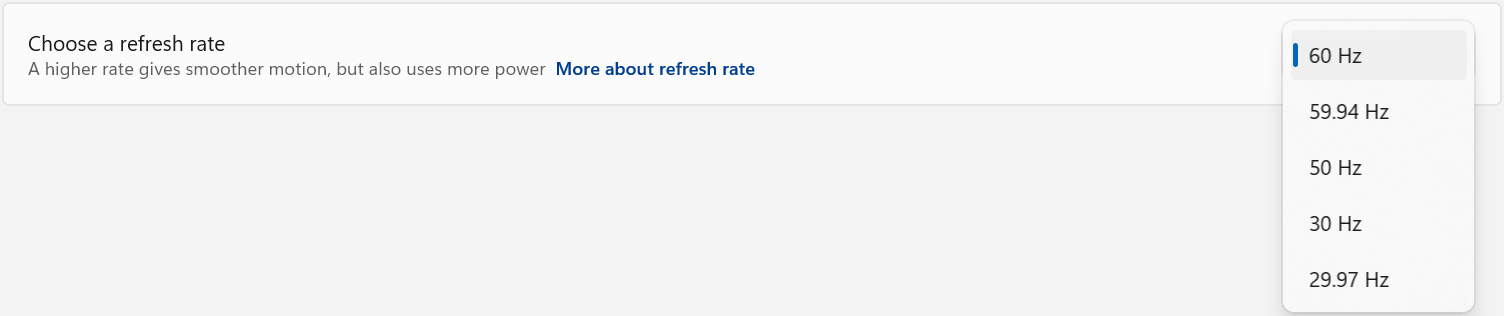
If the Desired Refresh Rate Is Not Listed
If the desired refresh rate is not available, confirm that the display, computer or graphics hardware, docking station or adapter, and video cable all support the desired resolution and refresh rate combination.
Some devices may support a higher refresh rate only at a lower display resolution. Check the specifications for each component in the display connection to confirm the supported resolution and refresh rate combinations.
Refresh Rate Limitations
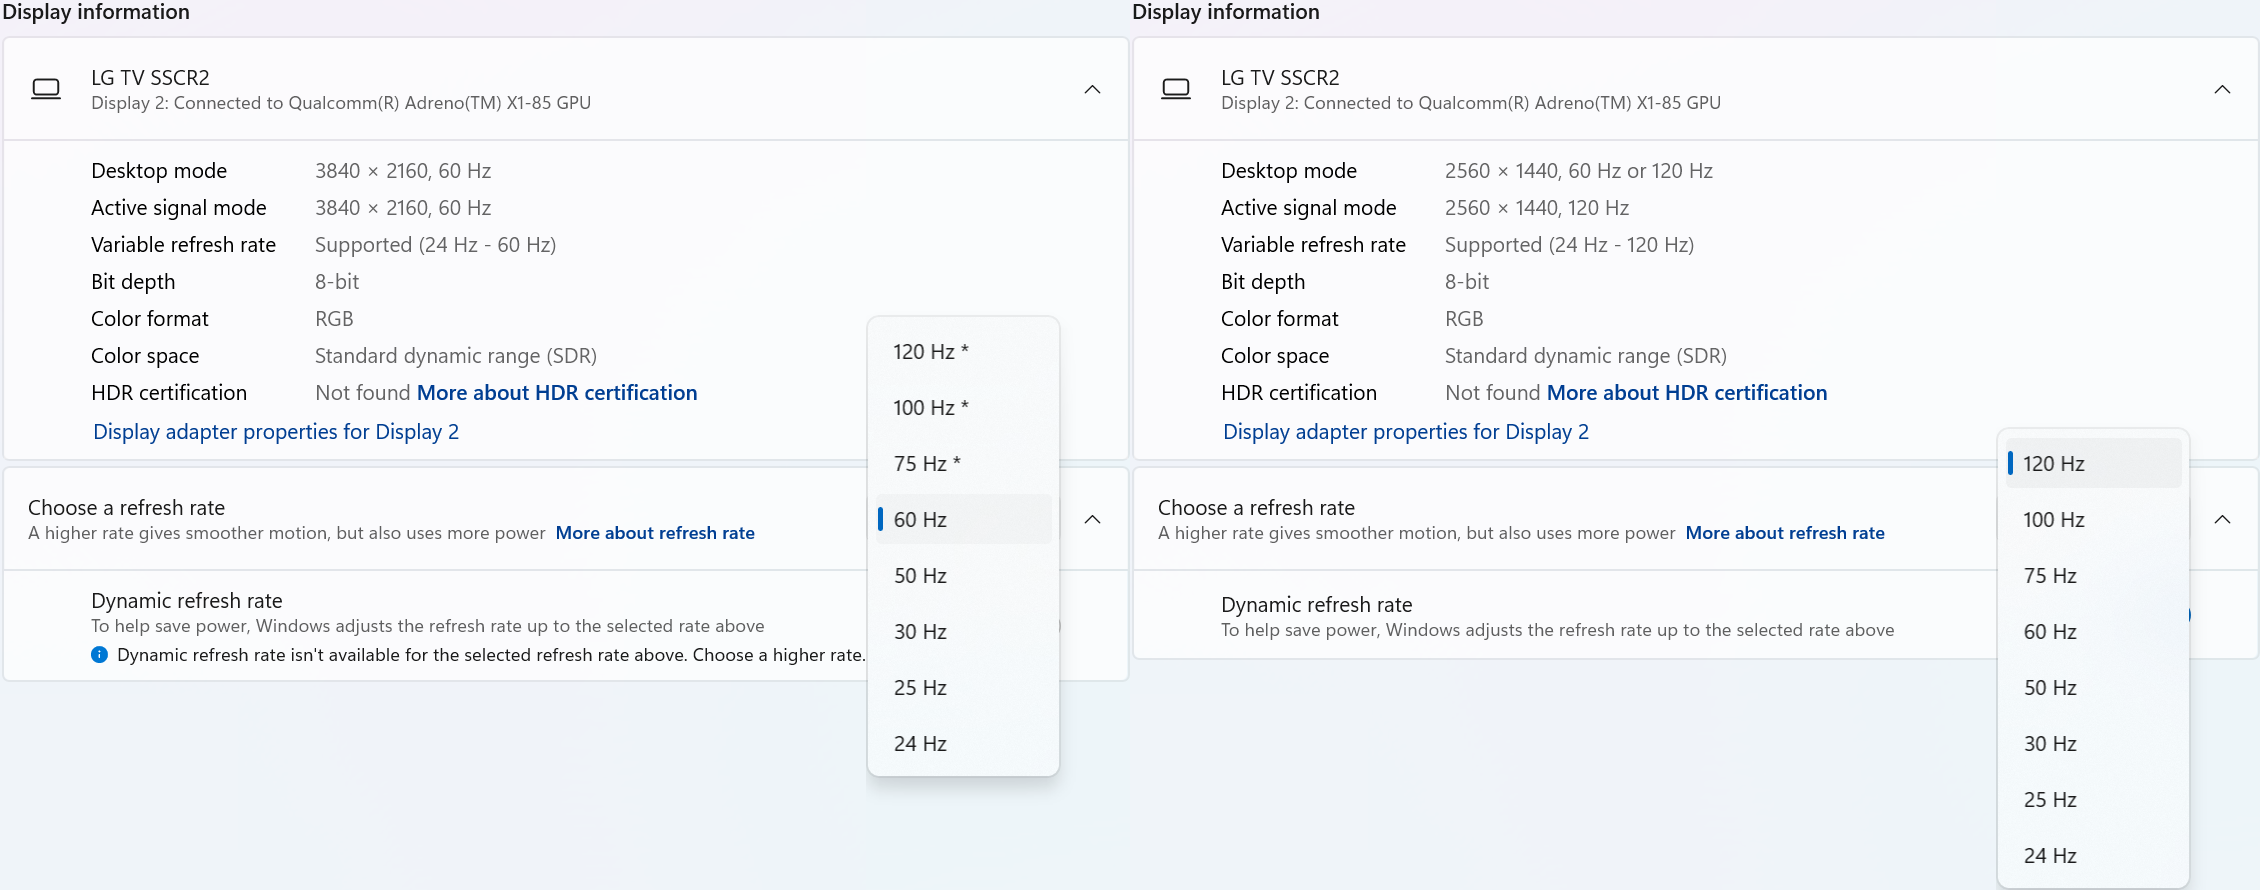
Windows 11 may display an asterisk (*) next to certain refresh rates in Settings > System > Display > Advanced display. The asterisk indicates that the selected refresh rate is not supported at the display's current resolution. Selecting one of these refresh rates will cause Windows to change the display resolution in order to achieve the selected refresh rate.
In the example below, the display supports 3840 × 2160 (4K UHD) at 60Hz and 2560 × 1440 (1440p) at 120Hz through the connected hardware. After selecting “120 Hz*”, Windows changes the display resolution from 3840 × 2160 to 2560 × 1440 so that the higher refresh rate can be used. Because the display is now operating at a lower resolution, the image may appear less sharp than when using the display's native 4K resolution. After selecting a lower refresh rate, Windows may retain the reduced display resolution. If the original resolution is not restored automatically, return to Settings > System > Display and manually select the desired resolution.
Dynamic Refresh Rate
Windows 11 also supports Dynamic Refresh Rate (DRR) on compatible hardware. When enabled, Windows can automatically adjust the display refresh rate based on what you are doing to provide smoother motion when needed while helping reduce power consumption at other times.
DRR requires a display that supports Variable Refresh Rate (VRR) and a refresh rate of at least 120Hz. If supported by the computer and display, DRR can be enabled or disabled under Settings > System > Display > Advanced display.
Need Assistance?
If the desired refresh rate is still unavailable after following the steps above, please contact Plugable Support at support@plugable.com.
When contacting support, please include:
- The Plugable product model
- Your computer model
- Your display model
- The resolution and refresh rate you are trying to use
- How the display is connected to the Plugable product
- The output from Plugable's diagnostic tool, PlugDebug
Update Graphics Drivers in Windows
Up to date graphics drivers are necessary for ensuring the best performance of your computer's built-in display, as well as the capability and compatibility with external displays and docking stations.
Windows has a built-in system update service: Windows Update, however this may not provide up to date drivers or timely updates. We often see systems with out of date drivers, in some cases systems may not receive updated graphics drivers for months or even years, leaving the computer with drivers incompatible with the installed version of Windows 11.
However, we can manually update the graphics drivers to ensure the best possible performance, reliability, and compatibility.
The first step is to identify the graphics hardware, then downloading, and installing the latest drivers.
Identifying Graphics Controller
For notebooks and many desktop computers, the primary graphics controller is embedded in the processor, both AMD and Intel provide graphics driver updates based on the processor model, as well as for discrete graphics controllers. Our first step is to identify up the processor or graphics hardware model details:
- Right-click on the Start Menu and select Settings from the pop-up menu
- From the left column select System and from the bottom of the right side select About
- From the top of the about page the processor details will be on the right side, and duplicated lower down on the page.

- In this example the processor is a 12th Gen Intel(R) Core(TM) i7-1260P, we'll keep that detail for the next step.
If your computer has two graphics controllers (it may show "Multiple GPUs Installed" under Graphics Card) then we can get the graphics card model details from the Windows System Information Utility.
- Open the Start menu and search for "msinfo32"
- Select the first result
- From the left-column expand the Components section, then select Display

- In this example the Intel Iris(R) Xe Graphics is enabled by the processor, while the Intel(R) Arc(TM) Pro B60 Graphics is a discrete graphics controller.
Downloading the Drivers
Intel Graphics
- In a web browser navigate to the Intel Driver Download Page
- In the "Search Drivers & Software" field, search for the Intel graphics card model or CPU model, "Arc Pro B60" in this example

- Select the appropriate "Intel Arc Pro Graphics - Windows" or similar entry from the search results, for modern hardware Intel will normally have at least one release per month, the list should return recent results within the last month
- Select the Download button to save the installer to your Downloads folder or selected location
AMD Graphics
AMD provides an Auto-Detect utility, this works relatively well and can be used to update the system available from the AMD Drivers and Support page.
This page also provides a search and browse option for finding drivers and specific compatibility details, we'll look up the drivers for an AMD Ryzen Pro 5650U processor with Radeon Graphics:
- Navigate to AMD Drivers and Support page
- From the Browse section, fill out the processor details and click the Submit button
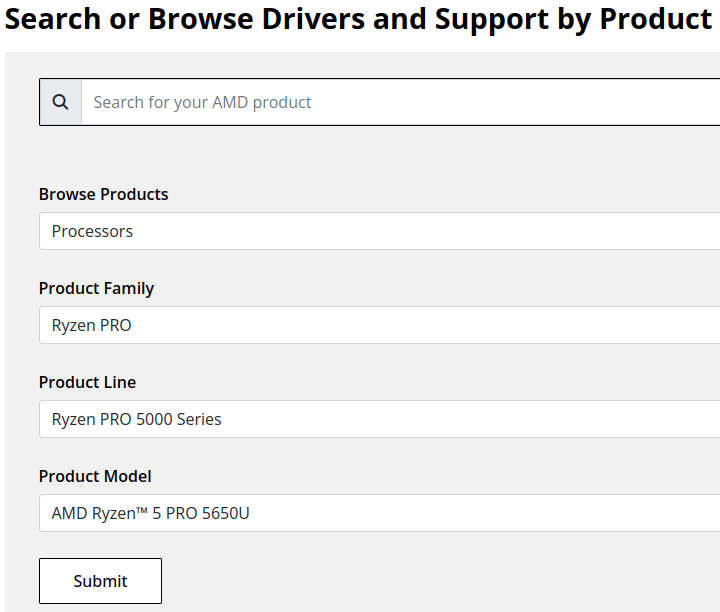
- Expand the "Windows 11 - 64-Bit Edition" section and select the Download button for the latest graphics drivers
NVIDIA Graphics
Like AMD, NVIDIA provides an automatic installation utility, as well as a Manual Driver Search on the NVIDIA Drivers support page. We will look up the drivers for an NVIDIA RTX 5080 graphics card.
- Navigate to NVIDIA Drivers support page
- Fill out the Manual Driver Search drop-downs and select the "Find" button when complete
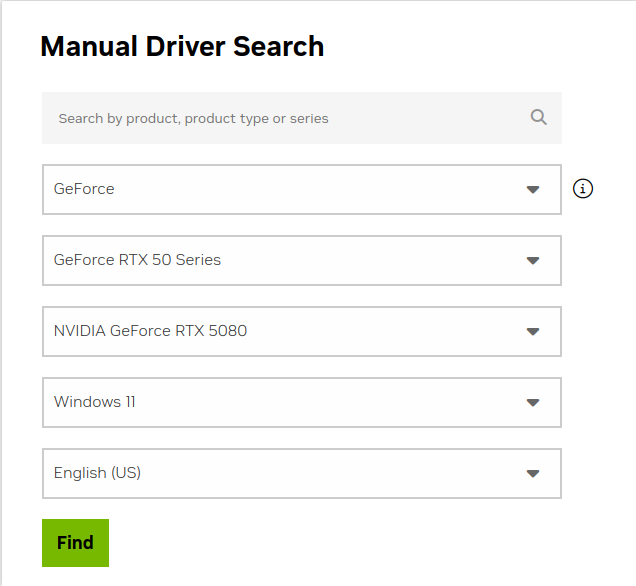
- From the search results, select the "View" button for the GeForce Game Ready Driver or NVIDIA Studio Driver (if you need the studio driver features)
- Select the green Download button for the latest graphics drivers
Installing the Graphics Drivers
For the most part this is relatively simple, we recommend disconnecting any external docking stations or devices that are not necessary for the driver installation, and for notebook computers connecting the system's original power supply.
Double-click on the downloaded driver installation executable and follow the on screen steps.
For more in-depth details on Intel, AMD, and NVIDIA's driver installation processes check out our step-by-step guides here:
- Intel Driver Installation In Detail
- AMD Driver Installation In Detail
- NVIDIA Driver Installation In Detail
If you have any questions or would like a recommendation, feel free to reach out to our support at support@plugable.com
How-To: Install the latest Intel Graphics Drivers
For a step-by-step guide to identify your graphics hardware and download the appropriate drivers, check out our KB article here
Download the drivers for your GPU or Processor Graphics
- In a web browser navigate to the Intel Driver Download Page
- In the Search Drivers & Software field, search for the Intel graphics card model or CPU model, "Arc Pro B60" in this example
- Select the appropriate Intel Arc Pro Graphics - Windows or similar entry from the search results, for modern hardware Intel will normally have at least one release per month, the list should return recent results within the last month
- Select the Download button to save the installer to your Downloads folder or selected location
Install the Intel Graphics Driver
To update the Intel Graphics Drivers to the latest version from Intel's website:
- Save and close any open applications
- Navigate to the downloaded graphics driver, then right-click on the saved driver installation file and select Run as administrator to start the installation process
- Allow the Intel driver installation through the User account control window, the drivers will be extracted
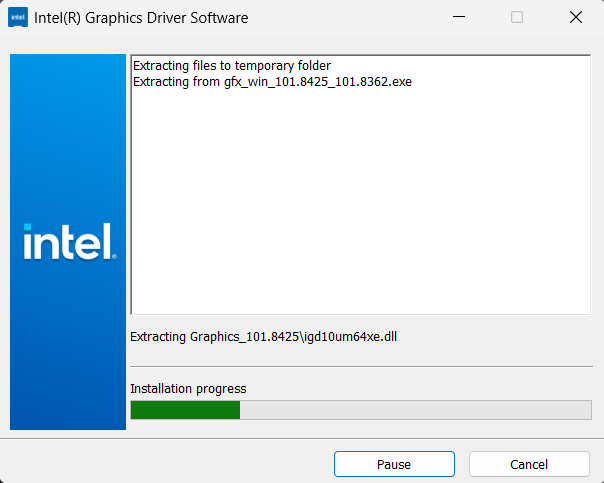
- When the extraction is complete select the Begin installation button

- Agree to the Intel Software License Agreement by selecting the I agree button
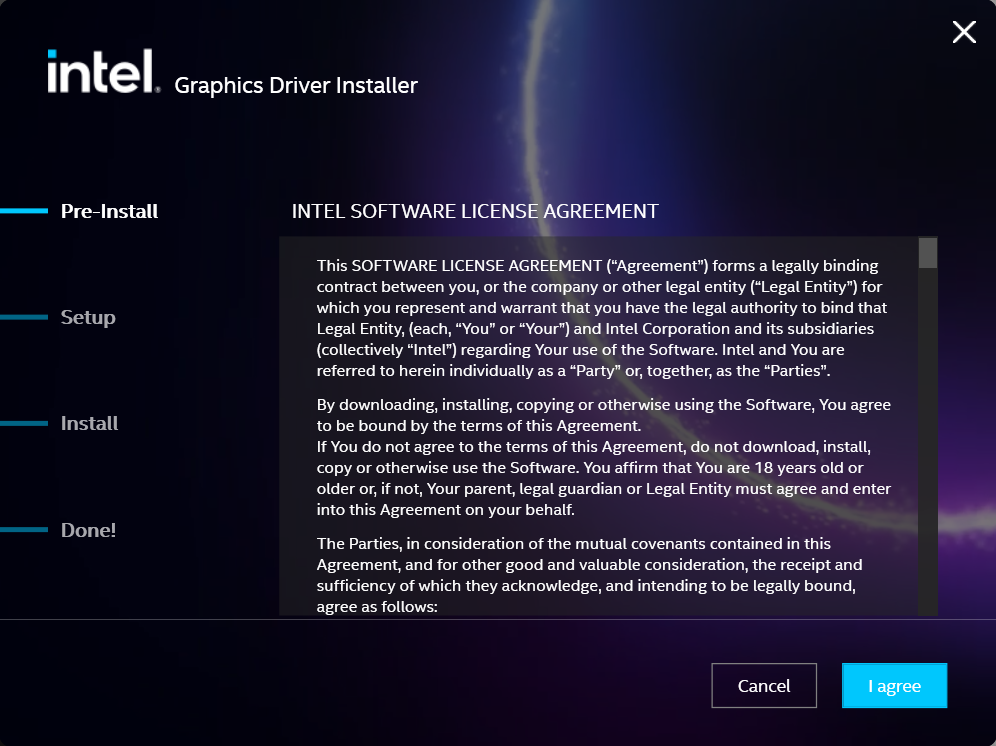
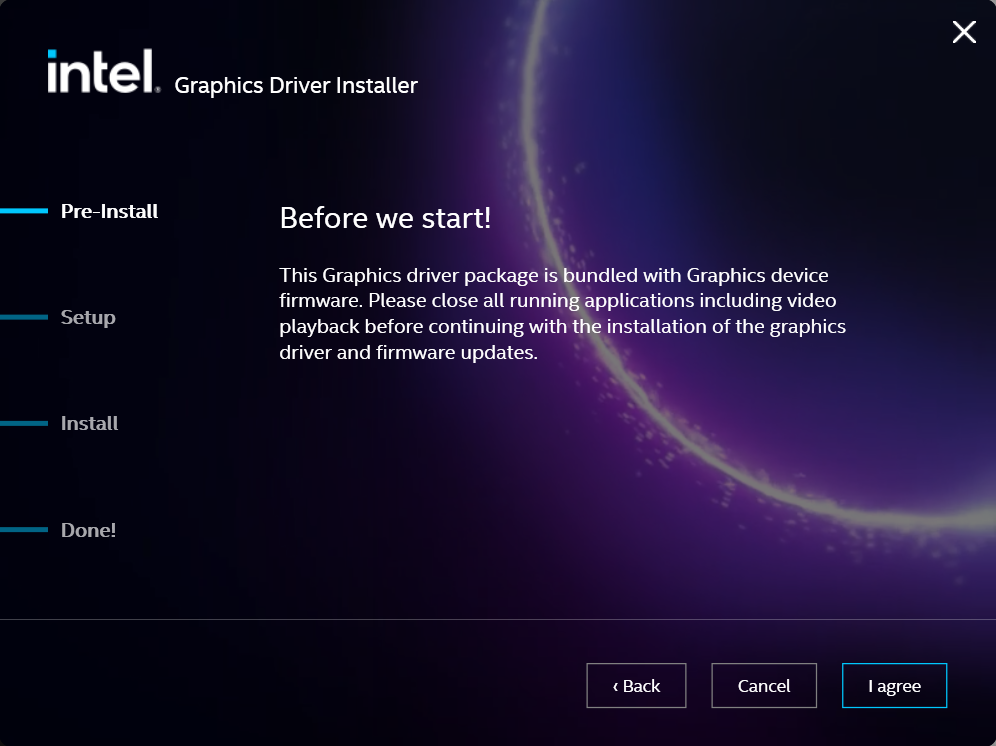
- Ensure all applications are saved and closed before selecting the I agree button
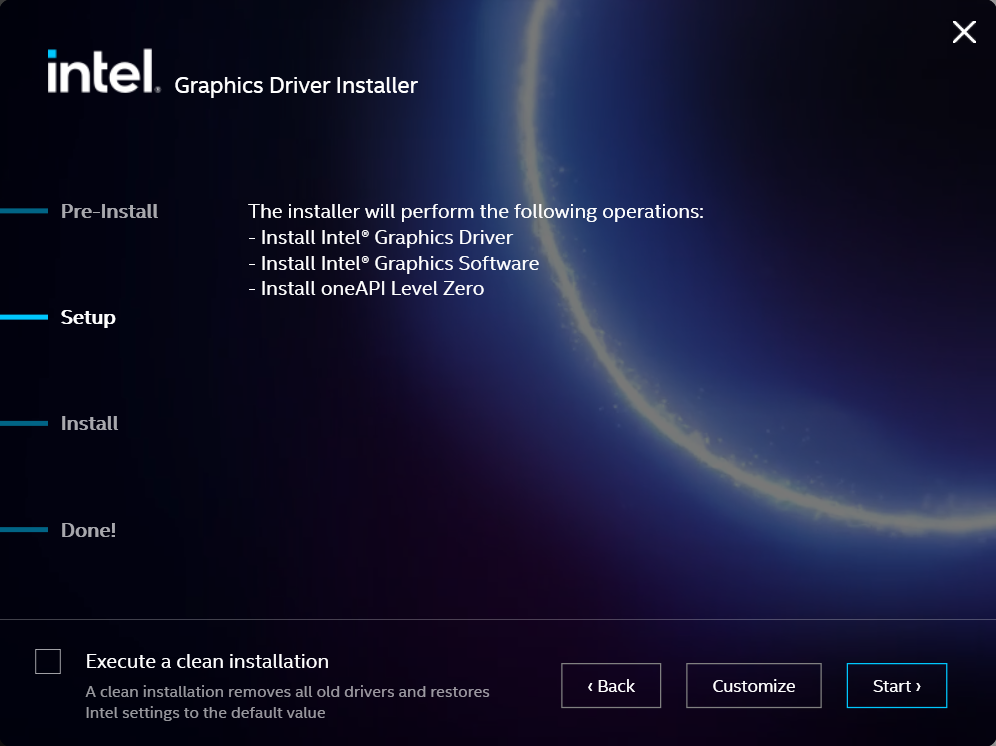
- For most installations, we recommend not selecting the Execute a clean installation checkbox. This option will remove previous driver versions and can lead to Windows Update reverting to an even older graphics driver. Select the Start button to proceed
- The installation process will proceed, but can take some time to complete
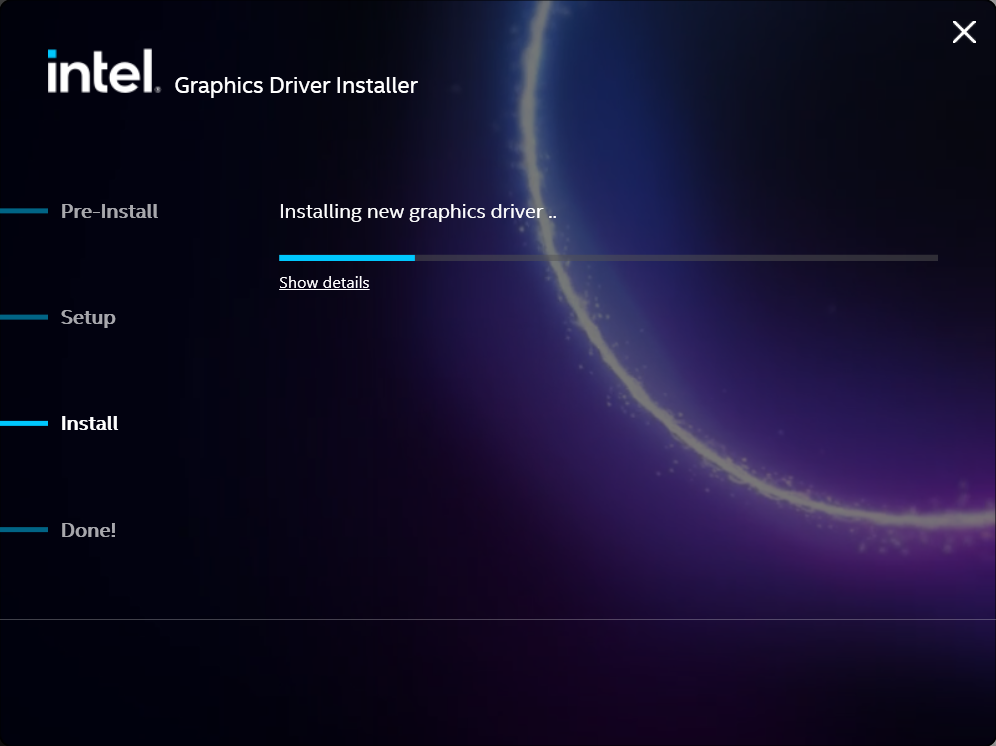
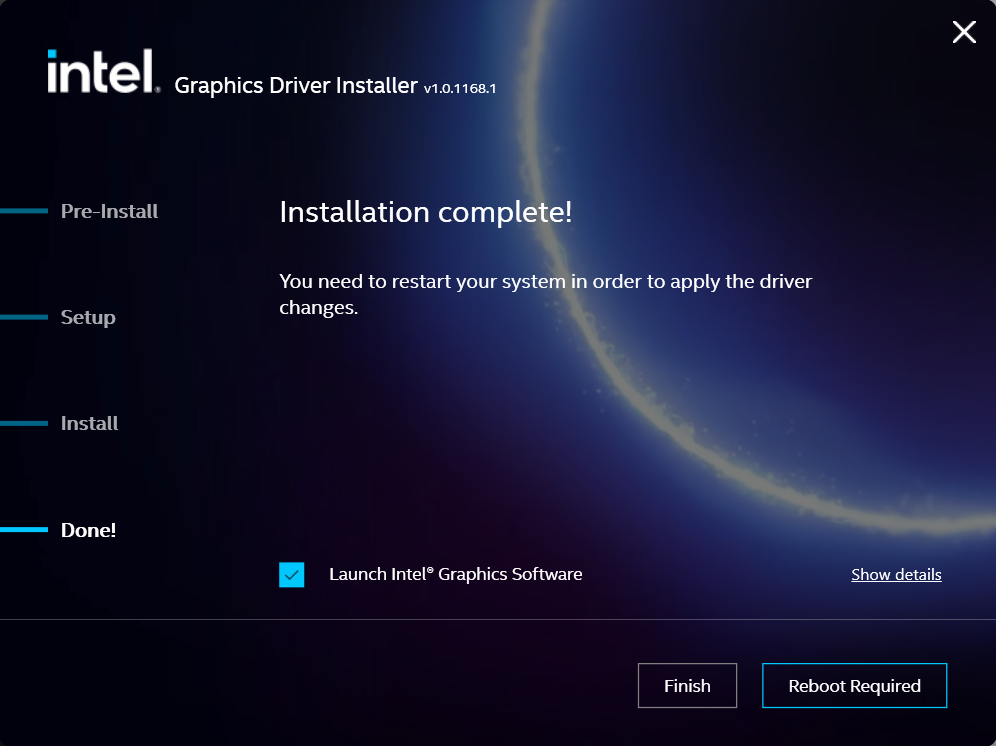
- When the installation has completed, deselect the Launch Intel Graphics Software checkbox - we don't need that right now, select the Reboot Now button to restart the computer applying the new graphics drivers
Windows should now detect the Intel Graphics Controller in the Device Manager and show the latest drivers.
If you have any questions or would like a recommendation, feel free to reach out to our support at support@plugable.com
How-To: Install the latest AMD Graphics Drivers
For a step-by-step guide to identify your graphics hardware and download the appropriate drivers, check out our KB article here
Download the drivers for your GPU or Processor Graphics
- In a web browser navigate to the AMD Drivers and Support page
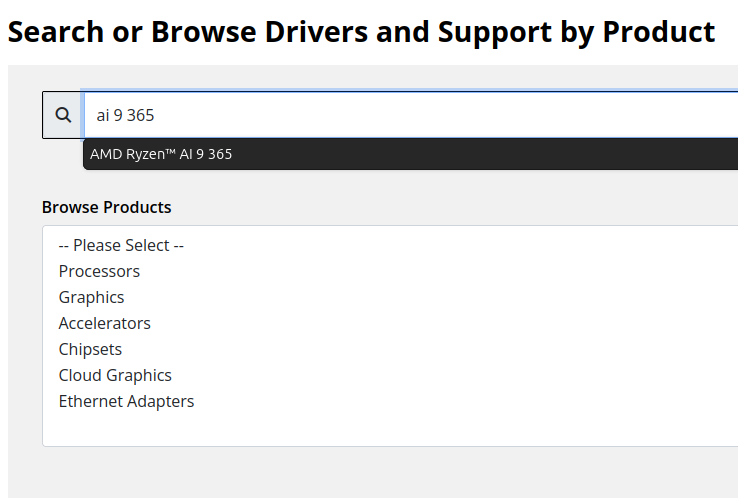
- In the Search for your AMD product field, type in the model name, for example “RX 5600XT” for the AMD Radeon RX 5600 XT graphics controller, or a processor model like "AI 9 365", then select the best fitting result and select the Search button - note: Searching for a processor the "™" is required, so I recommend searching for the text after that symbol.
- On the results page, expand the section for Windows 11 64-bit then select the Download button for the latest AMD Software: Adrenalin Edition drivers, AMD may not provide a direct download for all hardware, in that case use the Auto-Detect and Install option
- Save the installer to your Downloads folder or selected location
Install the AMD Graphics Driver
To update the AMD Graphics Drivers to the latest version from AMD’s website:
- Save and close any open applications
- Navigate to the downloaded graphics driver, then right-click on the saved driver installation file and select Run as administrator to start the installation process
- Allow the Intel driver installation through the User account control window, the drivers will be extracted
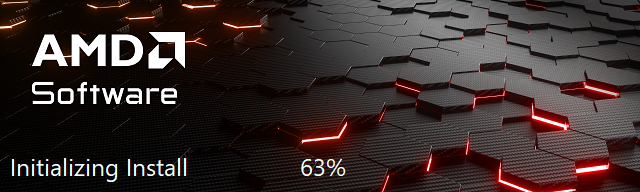
- For most users the express installation is fine, ensure all applications are saved and closed selecting the Accept & Express Install button. If you have been having issues with older graphics drivers causing crashes or errors the Factory Reset (Optional) checkbox may be selected, but it isn’t necessary for most installations.

- The installation will proceed, the displays may flicker or flash off/on while the drivers are installing.
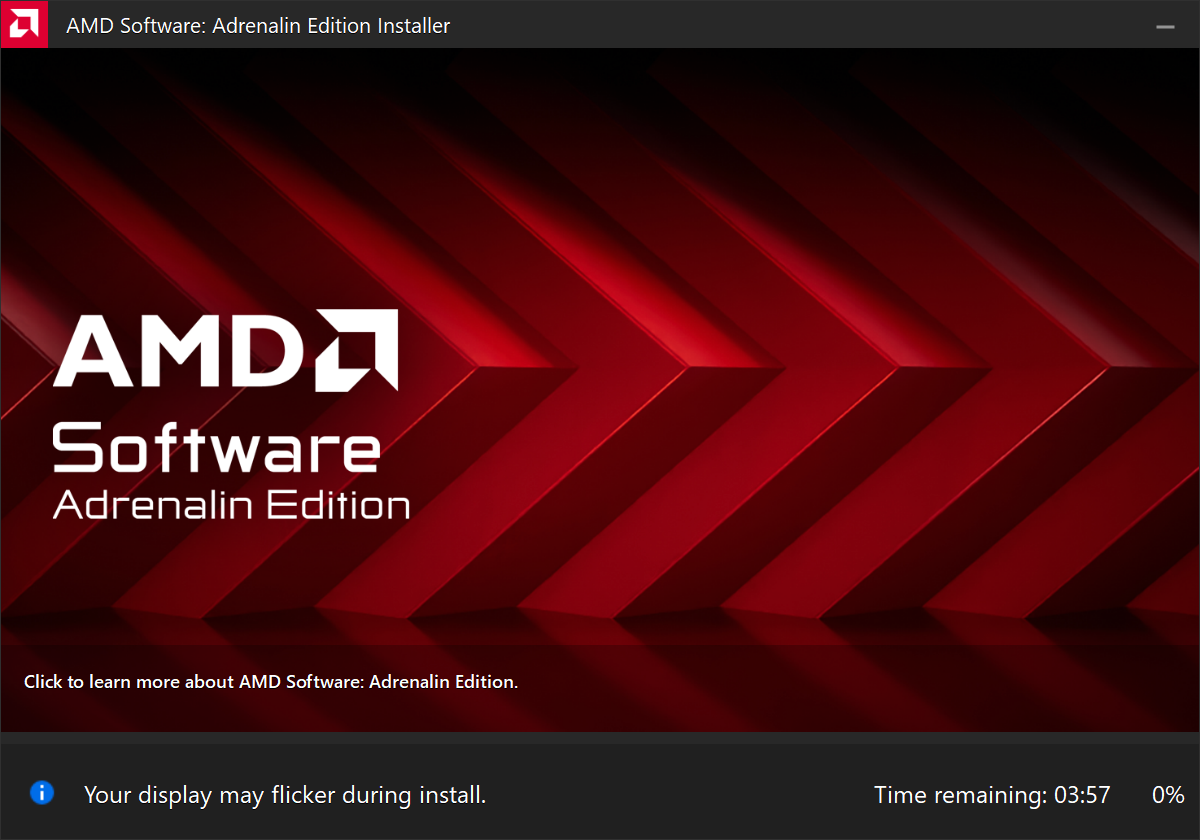
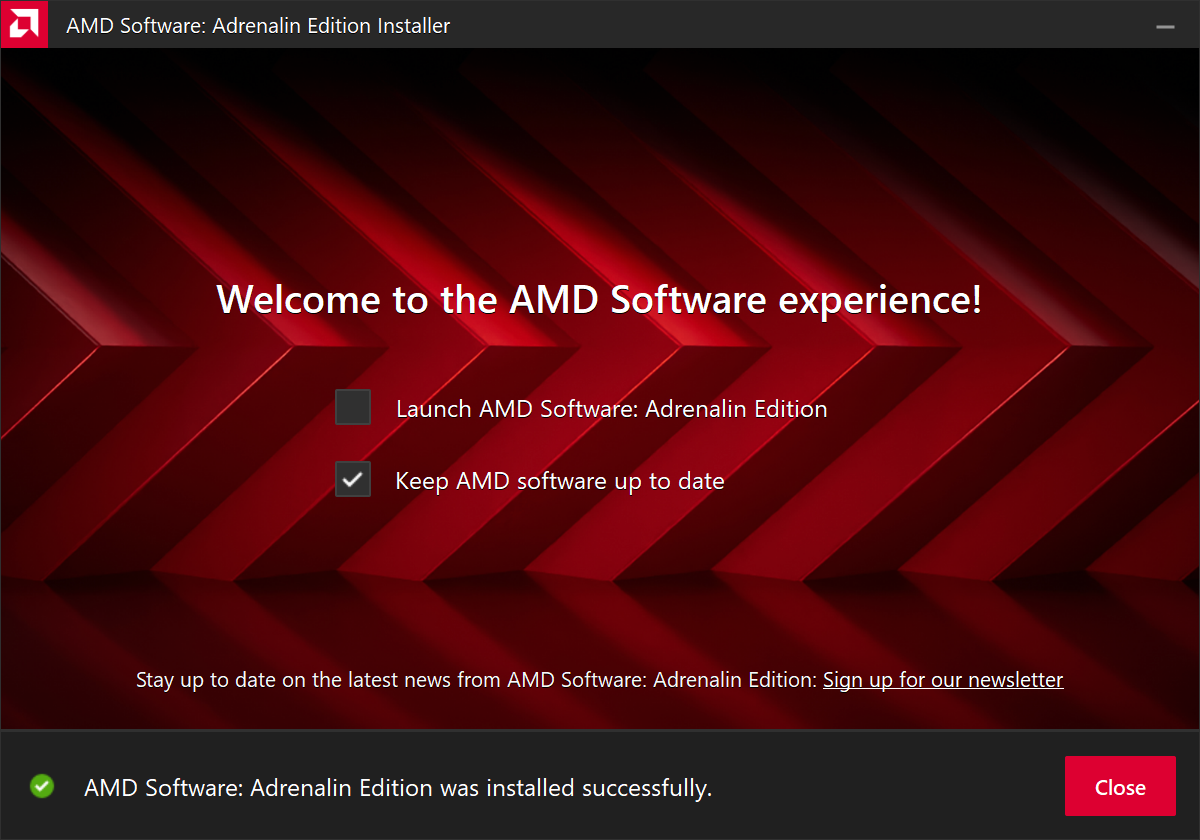
- When complete you will be prompted to Launch AMD Software: Adrenalin Edition and Keep AMD software up to date, you can uncheck the Launch AMD Software option
- Restart the computer to ensure the latest drivers are loaded from boot Start Menu > Power Icon > Restart
Windows should now detect the Intel Graphics Controller in the Device Manager and show the latest drivers.
If you have any questions or would like a recommendation, feel free to reach out to our support at support@plugable.com
How-To: Install the latest NVIDIA Graphics Drivers
For a step-by-step guide to identify your graphics hardware and download the appropriate drivers, check out our KB article here
Download the drivers for your GPU
Check your invoice for the specific model of NVIDIA graphics card, for this example we will use the RTX 5080 (the manufacturer is not relevant).
- In a web browser navigate to the NVIDIA Driver Download Page
- In the Manual Driver Search field, search for the NVIDIA graphics card model, "RTX 5080" in this example
- Select the GeForce RTX 50 Series | NVIDIA GeForce RTX 5080 | Windows 11 entry from the list
- Left-click the Find button
- Select either View buttons from the GeForce Game Ready Driver or NVIDIA Studio Driver
- Select the Download button to save the installer to your Downloads folder or selected location
Install the NVIDIA Graphics Driver
To update the NVIDIA Graphics Drivers to the latest version from NVIDIA's website:
- Save and close any open applications
- Navigate to the downloaded graphics driver, then right-click on the saved driver installation file and select Run as administrator to start the installation process
- Allow the NVIDIA driver installation through the User account control window
- Click OK to extract the NVIDIA Display Driver package contents
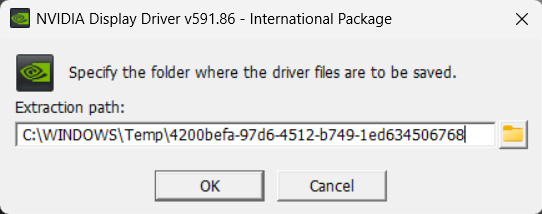
- At the System Check step, select either the NVIDIA Graphics Driver with NVIDIA App or the NVIDIA Graphics Driver alone, the NVIDIA App is gaming oriented and unnecessary for most users. Select AGREE AND CONTINUE
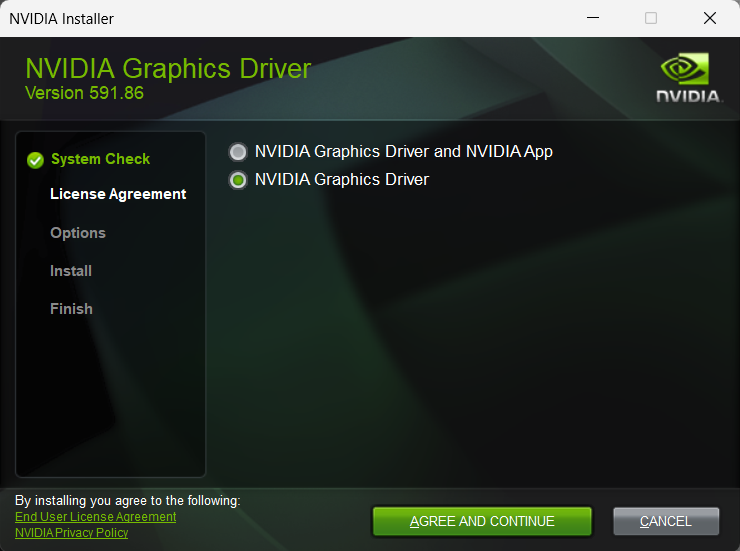
- At the License Agreement step, select the Express (Recommended) radio button then select NEXT to continue

- The installation will take some time to complete
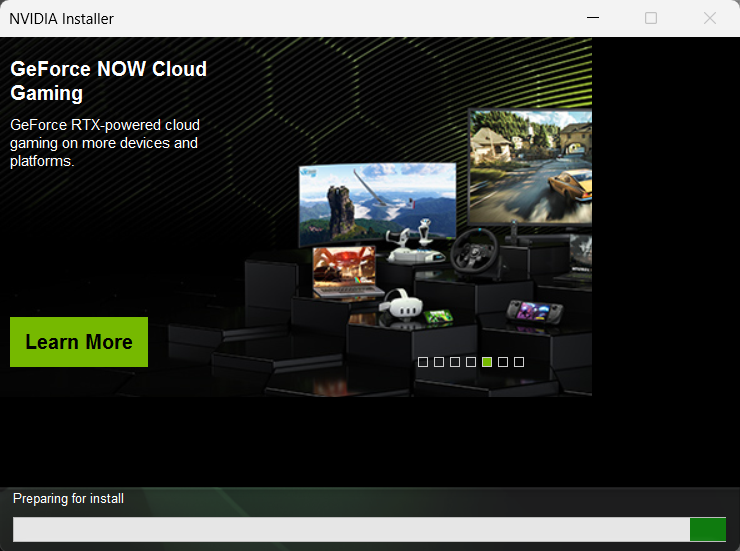
- When complete please restart the computer Start > Power > Restart
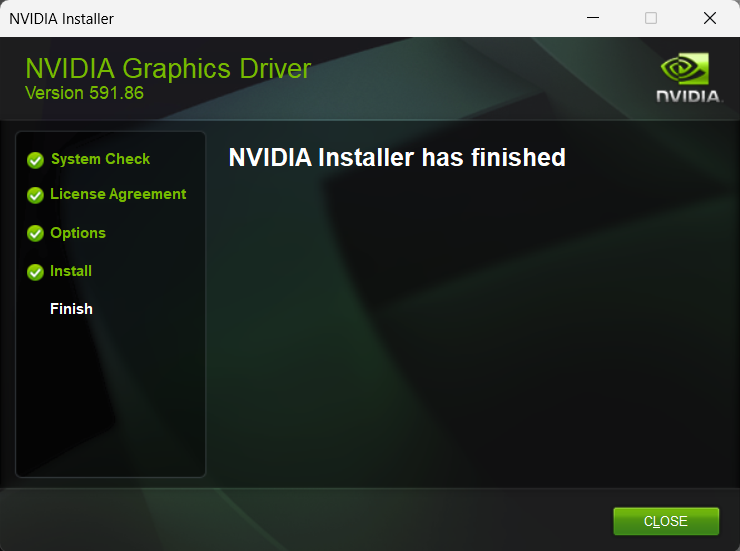
Windows should now detect the NVIDIA Graphics Controller in the Device Manager and show the latest drivers.
If you have any questions or would like a recommendation, feel free to reach out to our support at support@plugable.com


