


Hassle free, 2-Year Warranty
Fast, Free Shipping on Orders $35+
Lifetime Technical Support
30-Day Money Back Guarantee
Plugable USB 3.1 Gen 2 Tool-free NVMe Enclosure
$22.95 USD
SKU: USBC-NVMEAmazon Rating : (2354 Reviews)
Features
- Super Speed— Get up to 10Gbps transfer speeds with this USB-C NVMe enclosure. Supports USB 3.1 Gen 2, USB-C, USB4, Thunderbolt 3, and Thunderbolt 4. Read/write speeds over 900MB/s with compatible NVMe SSDs. Includes USB-C and USB-A cables for flexible connectivity.
- Tool-Free M.2 Enclosure Design— This innovative tool-less M.2 NVMe SSD Enclosure makes installing your SSD quick and hassle-free - no tools required. The compact, travel-ready design includes a removable cable and aluminum case with low-profile heatsink fins to help manage heat and protect your data on the go.
- Cross-Platform & Plug and Play— Works with Windows, macOS, Linux, and ChromeOS - no drivers needed. This NVMe SSD Enclosure supports most modern systems and file formats. SSD must be formatted with a compatible file system for the host operating system, new NVMe SSDs will require manual partitioning and formatting before first use.
- Wide SSD and Host Compatibility— Supports M.2 NVMe SSDs (2230, 2242, 2260, 2280) of any capacity - SSD not included. Compatible with PCIe Gen 3 and Gen 4 drives. Connect to USB 3.0, USB-C, USB4, Thunderbolt 3, or Thunderbolt 4 hosts at up to 10Gbps. Not compatible with M.2 SATA, AHCI, or non-NVMe PCIe drives. A versatile M2 external enclosure for desktops and laptops.
- 2-Year Coverage, Lifetime Support— Every Plugable product, including this SSD enclosure, is covered against defects for 2 years and comes with lifetime support. If you ever have questions, contact our North American-based team - even before purchase.
Free 3-Day Continental U.S. Shipping on Orders Over $35!


Blazing Fast USB-C Storage with Tool-Free Setup
Transfer, back up, and access your data at speeds up to 10Gbps with this high-performance M.2 NVMe SSD enclosure. Designed for speed and ease of use, it includes both USB Type-C and USB Standard-A cables, offering full compatibility with a wide range of systems and ports, including USB 3.0, USB-C, USB4, Thunderbolt 3, and Thunderbolt 4.Thanks to USB 3.1 Gen 2 and NVMe technology, this USB NVMe enclosure delivers read and write performance that’s up to twice as fast as traditional SATA-based USB 3.0 external SSDs and significantly faster than standard USB flash drives.
With a tool-free, screwless design, installing your SSD is fast and hassle-free. Just slide open the aluminum cover using the locking latch, insert your M.2 NVMe SSD, secure it with the adjustable retention peg, and close the cover. The adjustable peg supports all common form factors - 2280, 2260, 2242, and 2230.To support sustained high-speed transfers, the enclosure includes three thermal pads that improve heat dissipation by channeling heat into the aluminum heatsink cover – helping reduce thermal throttling on long transfers or older NVMe SSDs.

USBC-NVME Specifications
| Supported Drives | M.2 NVMe SSDs (2230, 2242, 2260, and 2280) |
| USB Data Rate | USB 10Gbps Type-C or Standard-A with included data cables |
| LED | Solid blue indicates power, flashing blue indicates activity |
| Thermal | Includes adhesive backed thermal pads and aluminum cover acts as a heatsink |
| Chipset | Realtek RTL9210 USB 3.1 Gen 2 to PCIe NVMe bridge chipset |
A: No, this enclosure is only compatible with M.2 NVMe SSDs. Retail drives will have the NVMe logo on the packaging and the SSD label, drives removed from a computer (OEM) may not specify if they are SATA or NVMe.
A: NVMe does not specify a maximum capacity like older hard drive technologies, so long as the drive conforms to the NVMe standard it can be used in this enclosure.
A: No, this is a USB 10Gbps enclosure, when connected to a USB4 or Thunderbolt host the drive will operate as a USB 3 device at USB 10Gbps speeds.
A: The enclosure includes three adhesive-backed thermal pads, these may be attached to the top of the NVMe SSD to provide a direct path for heat to be transferred from the SSD to the aluminum cover which acts as a heat sink to dissipate heat.
NVMe SSD Installation Animation
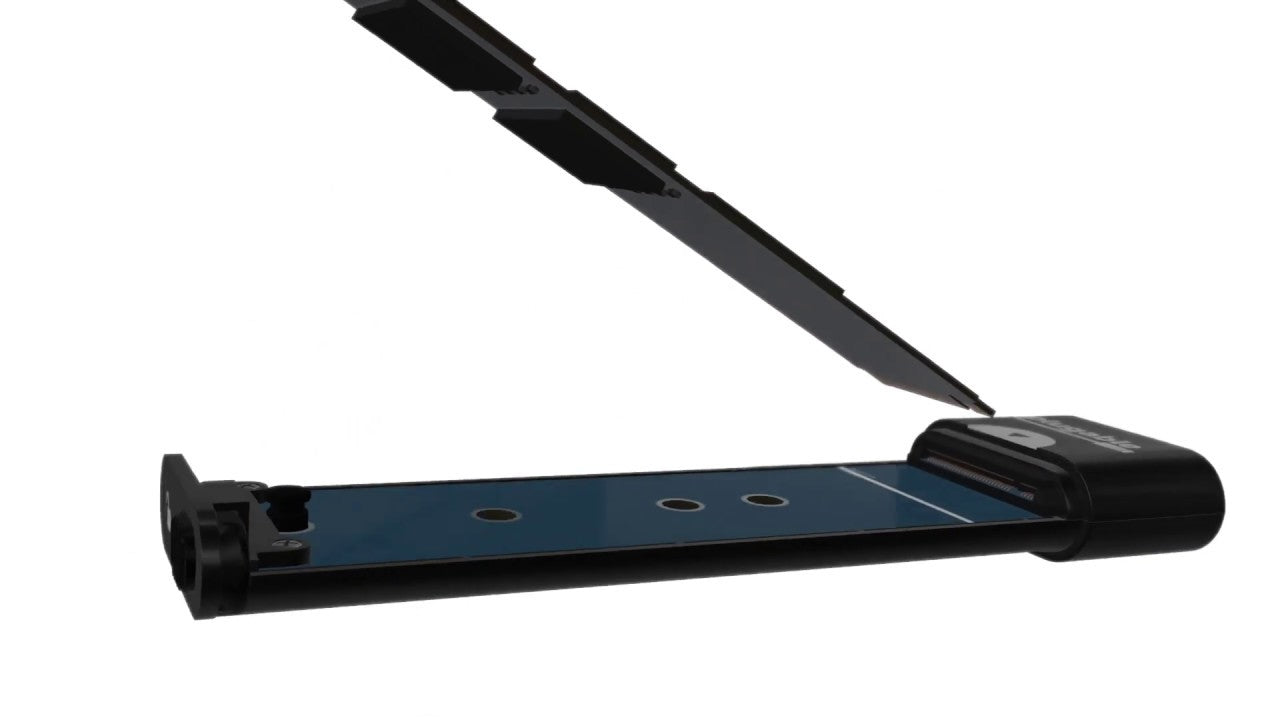
NVMe Retention Pin Installation

The included thermal pads are metallic loops to conduct heat from the SSD to the aluminum cover, the foam core provides light tension keeping the pad in contact with the aluminum cover.
Installation of these pads is recommended for older NVMe SSDs, or "high performance" NVMe SSDs that sacrifice thermal protection for performance NVMe SSD performance is limited by the USB 3 interface rather than the SSD specifications, using high performance NVMe SSDs with poor thermal management is not recommended.
Installation:
- Install the NVMe SSD into the enclosure and ensure the SSD is working as expected
- Disconnect the enclosure from the computer
- Remove the aluminum cover from the enclosure to expose the NVMe SSD
- Peel and stick the included thermal pads to the top surface of the NVMe SSD, so that they will be in contact with the aluminum cover when closed
We recommend orienting the thermal pads so the cut edges are perpendicular to the direction of travel of the aluminum cover, this will prevent them from snagging on the cover when closing.
Three thermal pads will cover the length of a standard (2280) NVMe SSD, one pad for a 2230 or 2242 NVMe SSD and two pads for a 2260 NVMe SSD.
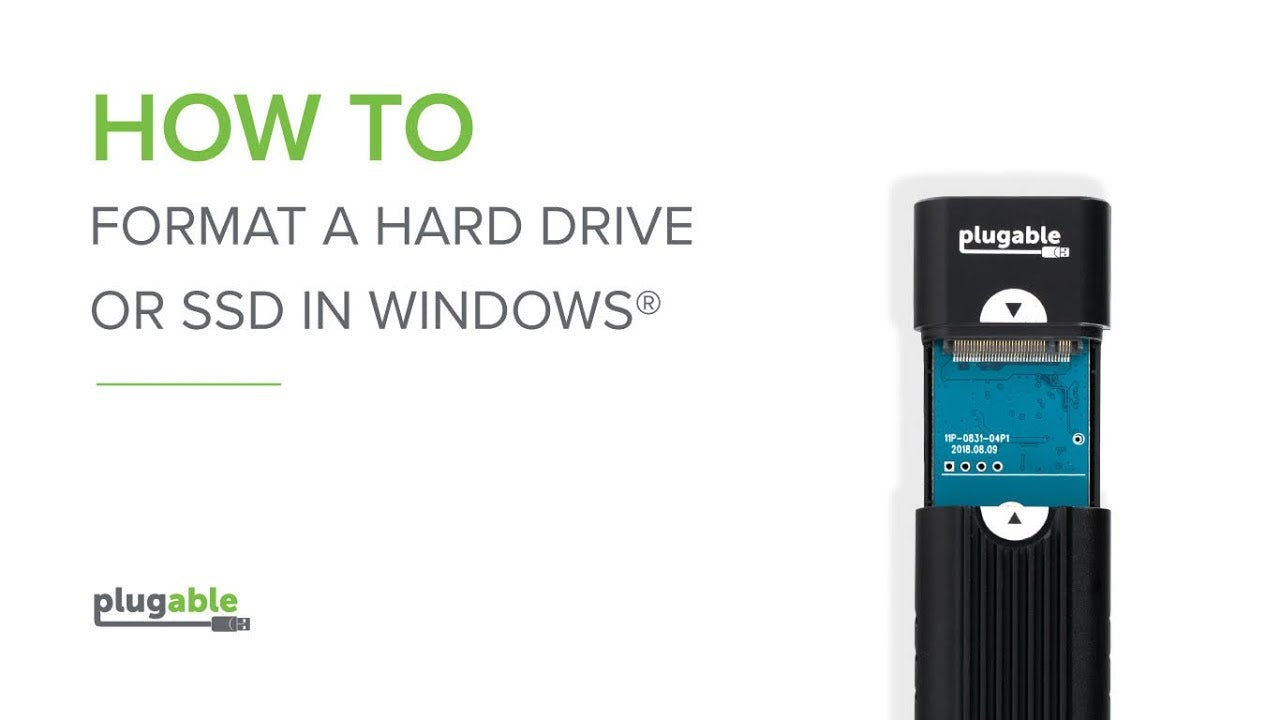
How to format a new drive in Windows
New NVMe SSDs come from the factory without a partition table or formatted partitions. Before the drive will be detected in Windows Explorer or Finder the drive will need to be formatted. Please see our video tutorials below for partitioning and formatting in both Windows and macOS.
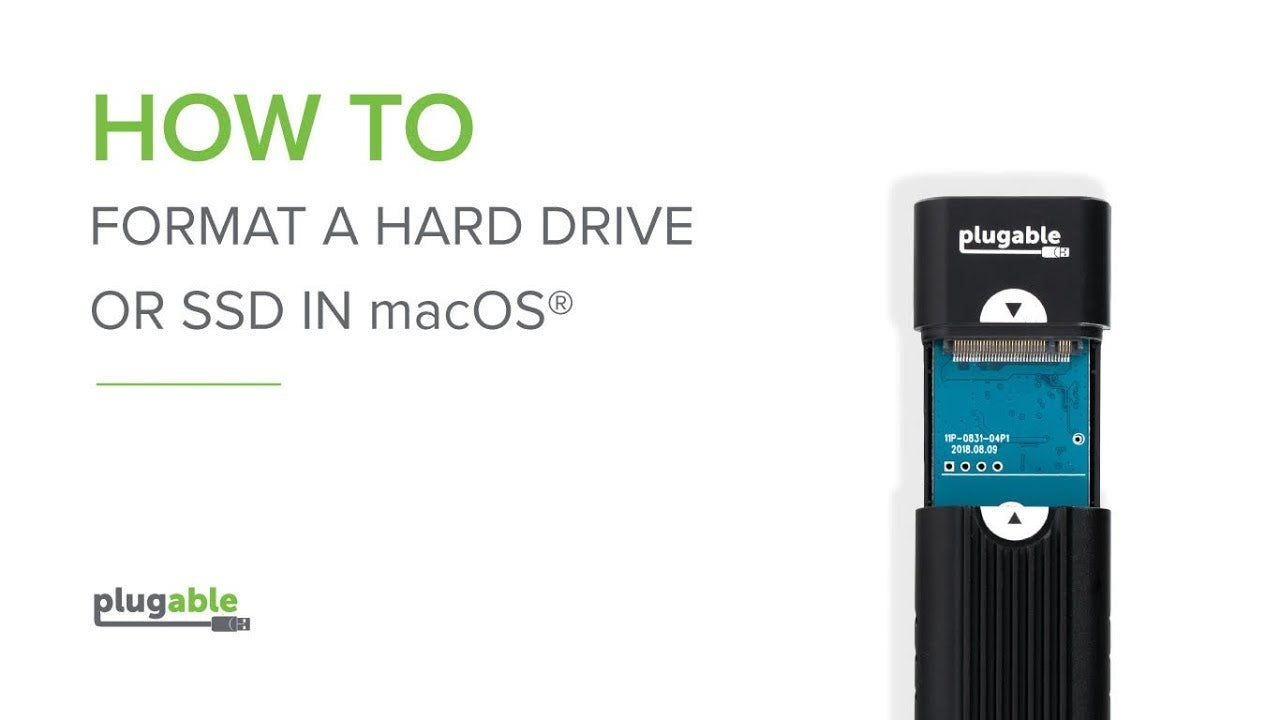
How to format a new drive in macOS
New NVMe SSDs come from the factory without a partition table or formatted partitions. Before the drive will be detected in Windows Explorer or Finder the drive will need to be formatted. Please see our video tutorials below for partitioning and formatting in both Windows and macOS.
Filter Help Articles and Frequent Questions by Category
Choose one or more filters within each category to narrow down the articles. Each selection will result in only displaying articles that include all of your choices.
Articles
Well how about that, it looks like we don't have any articles matching your filters! Try removing one of your choices or clear the filters to show all articles.
You can always contact support if you need help too!
Does the USBC-NVME Support SMART?
Yes! Our USBC-NVME enclosure does support SMART data in Windows 10+ and Linux. Apple macOS is not currently supported for USB to NVME SMART data access.
What is S.M.A.R.T?
Self-Monitoring, Analysis, and Reporting Technology - SMART is a hard drive (HDD) or solid-state drive (SSD) built-in monitoring software. This provides access to the drive's internal state including temperature, media status, and can help to predict imminent hardware failure or diagnose hardware failures.
How to Access SMART
Access to SMART data is software dependent, we have tested our enclosures with smartmontools, a free, cross platform SMART reading and monitoring utility. The command line utility smartctl is the primary method for accessing the SMART data from the Linux or Windows terminal.
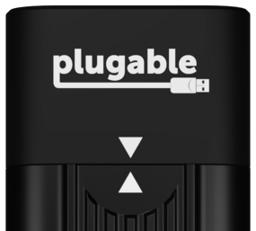
Our USBC-NVME enclosures with Realtek RTL9210 chipset does not require any special arguments and can be simply accessed like any internal drive. We thank the SmartMonTools team for ensuring this enclosure works smoothly with smartctl!
smartctl -a /dev/sdb
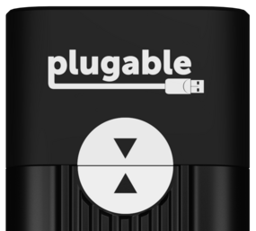
The Realtek based USBC-NVME can be identified by the two white triangles, one on the case and one on the cover, pointing towards each other.
For our original JMicron enclosures the SMART data can be read using the "-d sntjmicron" argument at the command line, for example:
smartctl -a -d sntjmicron /dev/sdb
The JMicron based USBC-NVME can be identified by the two white semi-circles with black triangles, one on the case and one on the cover, pointing towards each other.
Checking Drive SMART Values in Windows 10 and 11
Modern hard drives and solid state drives include support for Self-Monitoring, Analysis, and Reporting Technology or SMART. SMART data can show signs of drive failure or wear before data loss occurs and can be used to monitor the health of the drive including the temperature sensors in the drive itself.
From the Crystal Disk Info Graphical Utility
Crystal Disk Info can be downloaded from here, this is a 3rd party utility for viewing a drive’s SMART data in windows. This can be run without installation by downloading and extracting the ZIP file, or installed like many other applications.
Crystal Disk Info version 8.12.6 and above includes built-in support for these Plugable Products:
After extracting the zip file, right-click on “DiskInfo64.exe” and select “Run as Administrator” to start the application with Administrative permissions required to read the SMART data from the drive.
From the Command Line with smartctl
The smartctl command is provided in the smartmontools suite. This can be downloaded and installed for Windows or Linux.
Smartmontools version 7.2 and above includes built-in support for these Plugable Products:
Installation and Running
- After downloading the smartmontools-{VERSION}.win32-setup.exe, right-click on the file and select "Run as Administrator" to start the installation. Follow the on screen steps to install smartmontools.
- Open a terminal, right-click on the start menu and select "Windows PowerShell (Admin)" from the pop-up menu
- Type in `smartctl --scan` to list the available drives
- To output all of the drive's SMART data, type in `smartctl --all /dev/sdn` where /dev/sdn is the first column from the scan output for the drive to be read
- Optionally, output this to a file the desktop using the following: `smartctl --all /dev/sdn > $env:USERPROFILE\Desktop\smartdata.txt
If you receive an error "Open failed, Error=5" most likely the Windows PowerShell was not run as Administrator.
Applicable to
- Plugable USB 3.2 Gen 2 NVMe Enclosure
- Plugable USB 3.1 Gen 2 SATA Hard Drive Vertical Docking Station
- USB external SATA and NVMe SSDs
- Thunderbolt external NVMe SSDs
If you have any questions please feel free to contact us at support@plugable.com and we'll be happy to help!
Checking Drive SMART Values in Linux
Modern hard drives and solid state drives include support for Self-Monitoring, Analysis, and Reporting Technology or SMART. SMART data can show signs of drive failure or wear before data loss occurs and can be used to monitor the health of the drive including the temperature sensors in the drive itself.
From the terminal with smartctl
The smartctl command is provided in the smartmontools suite. This can be downloaded and installed for Windows or Linux. The current stable version 7.2 released December 30 2020, Fedora 34 provides the latest version through DNF, however both Ubuntu 20.04 LTS and CentOS 8 provide an older version that does not support all of our storage products. The latest daily build can be downloaded from here, these are built from the latest source code and include support for newer chipsets not available in the 7.2 release.
Smartmontools version 7.2 and above includes built-in support for these Plugable Products:
Downloading and running
- Download smartmontools from your repository using the following commands:
- For Ubuntu 20.04 LTS or Pop!OS: `sudo apt install smartmontools`
- For Fedora or CentOS: `sudo dnf install smartmontools`
- To scan for detected drives run the following command: `smartctl --scan`
- To print all SMART data for a specific drive use the command: `sudo smartctl --all /dev/sdn` where /dev/sdn is the path to the block device.
- Optionally, this output can be saved to a file using the following: `sudo smartctl --all /dev/sdn > ~/smartdata.txt` for detailed examination
Downloading and running the nightly build
If your distribution has not updated to smartmontools 7.2, then running the nightly build is the easiest way to read SMART values on our USBC-NVME enclsoure, smartmontools 7.1 supports both our USB-C SATA adapter and vertical drive dock.
- Download smartmontools latest build for your system from the nightly builds webpage here https://builds.smartmontools.org/
- For modern x86_64 computers I recommend: 'builds/smartmontools-linux-x86_64-static-7.3-r####.tar.gz' where #### depends on the build number.
- Extract the contents of the tarball using the following command: `tar -xf smartmontools-linux-x86_64-static-7.3-*.tar.gz`
- This creates a file structure in the same directory as the smartmontools tarball file.
- Navigate into the file structure with the following command: `cd ./usr/local/sbin`
- To scan for detected drives run the following command: `./smartctl --scan`
- Please note, the './' preceding 'smartctl' tells the shell to run the command from this directory, rather than searching the PATH for the 'smartctl' command
- To print all SMART data for a specific drive use the command: `sudo ./smartctl --all /dev/sdn` where /dev/sdn is the path to the block device.
- Optionally, this output can be saved to a file using the following: `sudo ./smartctl --all /dev/sdn > ~/smartdata.txt` for detailed examination
Does the USBC-NVME Support TRIM?
Yes! The Plugable USBC-NVME enclosure does support Trim with compatible operating systems and files systems.
For Windows, Trim support was initially added with Windows 7 for SATA SSDs, however support for USB Trim was not added until Windows 8 with the UAS (USB Attached SCSI) Protocol. Trim is supported on Microsoft's ReFS and NTFS file systems.
For macOS, Trim support was initially added with macOS 10.6.8, however Trim support was limited to Apple branded SSDs. As of macOS 10.10.4 the trimforce terminal command was added to support Trim on 3rd party SSDs. Some users have reported success with Trim on our USBC-NVME enclosure while others have reported the command failed to execute correctly. Apple's HFS+ and APFS file systems both support Trim.
For Linux, Trim support was added with kernel 2.6.28 and is compatible with a variety of file systems, default Trim behavior is dependent on the specific Linux distribution and version.
Trim an SSD in Windows 10 and Windows 11
What is Trim, why is it necessary, and when should you use it?
SSDs (Solid State Drives) offer significant performance benefits over spinning disk drives, however each memory cell wears out slightly when it is written to. To optimize for longevity SSDs implement wear leveling, this intends to spread write operations across the drive more evenly than would normally occur with a spinning disk drive. One consequence of this is the SSD may not know which data blocks are in use by the file system. The Trim command syncs up the SSD and file system.
Trim can be performed either continuously, periodically, or manually. Continuous Trim is generally not recommended as it defeats the purpose of wear leveling. Scheduled periodic or manually activated Trim ensures the drive is in generally optimal states for writing data.
Trim Support in Windows
Windows 10 and Windows 11 enables Trim for both internal and USB connected SSDs with supported host controllers, devices, and file systems. These Windows version support Trim on USB storage devices that support UASP (USB Attached SCSI Protocol) and with either NTFS or ReFS file systems. Some early USB 3 host controllers may not support UASP or Trim correctly.
Check if Trim is Enabled
- Launch Windows PowerShell with Administrative Permissions ( Right-click on the Start Menu and select Windows PowerShell (Admin)
- Allow the application to run as administrator through Windows User Account Control
- Type in the following command to check the value for DisableDeleteNotify
fsutil behavior query DisableDeleteNotify - If DisableDeleteNotify is set to 1, we can enable Trim with the following command
fsutil behavior set DisableDeleteNotify 0
Run Trim on a File System Manually
- Open the Windows Start Menu and type "optimize" into the search box
- Select Defragment and Optimize Drives app from the search results
- The Optimize Drives window shows connected drives that can be optimized
- Select the USB connected SSD from the list and then press the "Optimize" button to manually start trim
- Use the "Change settings" button to adjust or schedule Trim on the drive
Alternatively Trim can be run manually from the command line
- Launch Windows PowerShell with Administrative Permissions ( Right-click on the Start Menu and select Windows PowerShell (Admin)
- Allow the application to run as administrator through Windows User Account Control
- Type in the following command, where X: is the drive letter of the external device to run Trim at the command prompt
defrag /o X:
Applicable to
- Plugable USB 10Gbps SATA Hard Drive Dock
- Plugable USB Type 10Gbps NVMe Enclosure
- Technologies: NVMe SSDs and SATA SSDs
- Features: NVMe DEALLOCATE, SATA ATA_TRIM
If you have any questions please feel free to contact us at support@plugable.com and we'll be happy to help!
Trim an SSD in macOS
What is Trim, why is it necessary, and when should you use it?
SSDs (Solid State Drives) offer significant performance benefits over spinning disk drives, however each memory cell wears out slightly when it is written to. To optimize for longevity SSDs implement wear leveling, this intends to spread write operations across the drive more evenly than would normally occur with a spinning disk drive. One consequence of this is the SSD may not know which data blocks are in use by the file system. The Trim command syncs up the SSD and file system.
Trim can be performed either continuously, periodically, or manually. Continuous Trim is generally not recommended as it defeats the purpose of wear leveling. Scheduled periodic or manually activated Trim ensures the drive is in generally optimal states for writing data.
Apple macOS enables Trim for internal Apple SSDs only. Advanced users can also enable Trim for USB connected SSDs with Apple APFS formatted partitions. Apple macOS runs Trim when the file system is detected by the operating system, this is either on device connection or system restart, Apple does not provide a manual Trim tool like with Windows or Linux.
Enabling Trim in macOS
Open a terminal (Finder > Go > Utilities > Terminal) and enter the following command:
sudo trimforce --enable
This requires administrative permissions to run and you will need to enter your password to continue.
A long warning will be presented, please read this fully.
Enter ‘Y’ to continue, or ‘N’ to cancel
Trim can be disabled with the following command:
sudo trimforce --disable
Verifying Trim on macOS
Apple macOS does not have a function to manually run a Trim command, instead it is run when a supported drive and supported file system is detected by the operating system. We can check to verify Trim is running on a drive by performing the following:
Open a terminal (Finder > Go > Utilities > Terminal) and enter the following command:
log show --start $(date +%F) | grep -i spaceman_trim_free_blocks
This may take a moment to complete, I recommend expanding the window to full screen for easier reading.
Each output line represents a file system that has been trimmed on today’s date, here is an example line:
2021-08-13 07:16:07.556498-0700 0x2b2d Default 0x0 0 0 kernel: (apfs) spaceman_trim_free_blocks:3371: disk3 scan took 0.000614 s, trims took 0.000000 s
The specific drive is “disk3” in my example, we verify that disk3 matches the external drive by comparing to the output of this command:
diskutil list
/dev/disk3 (synthesized):
#: TYPE NAME SIZE IDENTIFIER
0: APFS Container Scheme - +160.0 GB disk3
Physical Store disk2s2
1: APFS Volume Intel160 774.1 KB disk3s1If you have any questions please feel free to contact us at support@plugable.com and we'll be happy to help!
Trim an SSD in Linux
What is Trim, why is it necessary, and when should you use it?
SSDs (Solid State Drives) offer significant performance benefits over spinning disk drives, however each memory cell wears out slightly when it is written to. To optimize for longevity SSDs implement wear leveling, this intends to spread write operations across the drive more evenly than would normally occur with a spinning disk drive. One consequence of this is the SSD may not know which data blocks are in use by the file system. The Trim command syncs up the SSD and file system.
Trim can be performed either continuously, periodically, or manually. Continuous Trim is generally not recommended as it defeats the purpose of wear leveling. Scheduled periodic or manually activated Trim ensures the drive is in generally optimal states for writing data.
Trim Support in Linux
Modern Linux distributions support the Trim and DEALLOCATE commands for SATA SSDs and NVMe SSDs respectively, for simplicity we will refer to these two commands as Trim in this article.
These commands are filesystem dependent and supported on the following file systems:
| File System | Trim Support |
|---|---|
| Bcachefs | No |
| Btrfs | Yes |
| EXT3 | No |
| Ext4 | Yes |
| JFS | Yes |
| XFS | Yes |
| NTFS-3G | Yes (Periodic Only) |
| VFAT | Yes |
When a file is no longer needed by the file system, the Trim can be sent to the SSD to help the built-in garbage collection utility determine which memory locations need to be maintained and which can be ignored. Maintaining unnecessary memory locations takes time and can slow down read and write access to the drive.
Most current Linux distributions use fstrim.service and fstrim.timer to coordinate periodic SSD maintenance with Trim. However USB connected SSDs do not automatically have Trim enabled, instead requiring some manual configuration. The Trim command can be issued manually using the fstrim command, for example the following code will run Trim on compatible file system mounted to /media/user/USBSTORAGE. Please note, all code examples in this document require root permissions unless otherwise noted.
fstrim -v /media/user/USBSTORAGE
Ubuntu 24.04 LTS automatically mounts USB storage to /media/{username}/{storage volume name} while Fedora 43 automatically mounts USB storage to /run/media/{username}/{storage volume name}. The fstrim command can be run using these automatic mount points after enabling Trim for the USB storage drive.
Verify Trim Compatibility on the External SSDs
Our first step is to check for Trim support on the SSD, this requires installing the sg3 utilities package:
Ubuntu 24.04 LTS
sudo apt install sg-utils
Fedora 43
sudo dnf install sg_utils
Next we can run the sg_vpd command to check for unmap support, in the following command /dev/sdX is the path to the block device for the USB connected SSD (this can be found by checking the `dmesg` output after connecting the drive or with the `lsblk` command)
sudo sg_vpd -a /dev/sdX | grep "Unmap"
If the command returns the following line then we can enable Trim on this device.
Unmap command supported (LBPU): 1
Enable Trim on the External SSD: Temporarily
We can enable Trim on the SSD until the drive is either disconnected, or the computer is restarted with this command, with sdX again being the block device for the USB connected SSD:
echo unmap | sudo tee /sys/block/sdX/device/scsi_disk/*/provisioning_mode
To enable Trim on Plugable's SSD docks, adapters, and enclosures on every connection
USBC-SATA-V: USB-C Vertical Hard Drive Dock
Our USBC-SATA-V USB-C Vertical Hard Drive Dock supports both Trim and SMART for docked SATA SSDs.
Run the following command to enable Trim when the enclosure is connected to the computer:
echo 'ACTION=="add|change", ATTRS{idVendor}=="174c", ATTRS{idProduct}=="1153", SUBSYSTEM=="scsi_disk", ATTR{provisioning_mode}="unmap"' | sudo tee --append /etc/udev/rules.d/10-uas-discard.rules
USBC-NVME: USBC NVME Enclsoure
Our USBC-NVME Tool Free M.2 NVMe SSD Enclosure supports both Trim and SMART for installed NVMe SSDs.
Run the following command to enable Trim when the enclosure is connected to the computer:
echo 'ACTION=="add|change", ATTRS{idVendor}=="0bda", ATTRS{idProduct}=="9210", SUBSYSTEM=="scsi_disk", ATTR{provisioning_mode}="unmap"' | sudo tee --append /etc/udev/rules.d/10-uas-discard.rules
Applicable to
- Plugable USB 10Gbps SATA Hard Drive Dock
- Plugable USB Type 10Gbps NVMe Enclosure
- Technologies: NVMe SSDs and SATA SSDs
- Features: NVMe DEALLOCATE, SATA ATA_TRIM
If you have any questions please feel free to contact us at support@plugable.com and we'll be happy to help!
What happens if I install the USBC-NVME aluminum cover backwards and it gets stuck?
If the aluminum cover is installed backwards and gets locked trying to remove it, wiggle the cover from side to side, it should pivot to the right and come off (with the Plugable logo at the top, facing forward).
Can I clone my internal SSD to an NVMe SSD installed in this enclosure?
Yes! The enclosure can be used to connect a NEW NVMe SSD to your computer for cloning the operating system from the internal drive. After cloning completes the new NVMe SSD can then be installed into the computer replacing the original NVMe SSD.
How to clone from the internal drive
Our USBC-NVME external enclosure can be used to connect the second NVMe SSD to the computer, then 3rd party cloning software may be used to clone the contents of the internal drive to the external. Many full featured retail or open source cloning tools are available, we do not have any specific recommendations, nor do we directly support the 3rd party software. As long as the cloning tool is compatible with USB storage it should work just fine.
Some SSDs include proprietary or limited capability cloning software. For example Samsung includes the Samsung Data Migration software and Crucial includes a limited version of the Acronis True Image software. Generally these tools only require the destination drive to be from the same vendor as the tool.
This is a list of some of the more common drive cloning software we are asked about and compatibility with our USBC-NVME enclosure.
| Cloning software | Compatible with USBC-NVME (Realtek chipset) |
Compatible with USBC-NVME (JMicron chipset) |
|---|---|---|
| Macrium Reflect | Yes | Yes |
| Acronis True Image (Retail) | Yes | Yes |
| Clonezilla | Yes | Yes |
| Samsung Data Migration Software | Yes - Only to compatible Samsung SSDs | No |
| Acronis True Image (Crucial) | No | No |
If you have any questions please feel free to contact us at support@plugable.com and we'll be happy to help!
Can I update the firmware of the SSD installed in the USBC-NVME enclosure?
Unfortunately the manufacturer's SSD firmware updating and monitoring utilities are unlikely to be compatible with the NVMe SSD connected to the computer over USB. These utilities are designed to communicate with the NVMe SSD on a PCI Express interface and are not designed to be compatible with USB, it is possible this functional can be added by the SSD manufacturer, however with the risk of unexpected disconnections it is unlikely this will be added by most manufacturers.
USBC-NVME Firmware Updates
USBC-NVME with Realtek Chipset
Firmware version 1.29.12
Released July 2023
This firmware update is a roll-up of all previous updates and some minor changes to customizable LED behavior not utilized by the Plugable USBC-NVME hardware. Functionally this firmware should be no different from the previously released 1.27.5 firmware.
Applicable to enclosures with serial number starting with 2645-A##### and up.
Installation instructions in the "USBC-NVME Realtek Firmware Update Instructions EN.pdf" and translated to Japanese in the "USBC-NVME Realtek Firmware Update Instructions JA.pdf" included in the zip file. This firmware update utility is only compatible with Microsoft Windows operating systems.
Download USBC-NVME Firmware 1.29.12
For macOS and Linux users, the firmware updating utility is only available for Windows, please contact our support for additional assistance or if you do not have access to a Windows host, we’re more than happy to help!
USBC-NVME with Realtek Chipset
Firmware version 1.27.5
Released December 2021
This firmware update aims to improve stability with Samsung 980 Pro and Western Digital SN550 NVMe SSDs.
The power LED behavior is also improved on Windows, and Intel based Mac systems: now when safely ejected the power LED should turn off ( it may blink slowly ) indicating the drive may be safely unplugged from the computer.
This update is recommended for uses who have experienced connectivity problems with Samsung 980 Pro or Western Digital SN550 NVMe SSDs.
Applicable to enclosures with serial number starting with 2645-A##### and up.
Installation instructions in the "USBC-NVME Realtek Firmware Update Instructions EN.pdf" and translated to Japanese in the "USBC-NVME Realtek Firmware Update Instructions JA.pdf" included in the zip file. This firmware update utility is only compatible with Microsoft Windows operating systems.
Download USBC-NVME Firmware 1.27.5
For macOS and Linux users, the firmware updating utility is only available for Windows, please contact our support for additional assistance or if you do not have access to a Windows host, we’re more than happy to help!
Firmware version 1.23.15
Released February 2021
This firmware update aims to improve compatibility with some ASMedia USB 3.0 host controllers with roll-up firmware changes from 2020.
This update is recommended for uses with ASMedia host controllers, these are generally PCIe add-in cards or early USB 3.0 host controllers.
Applicable to enclosures with serial number starting with 2645-A##### and up.
Installation instructions in the readme_en.pdf included in the zip file. This firmware update utility is only compatible with Microsoft Windows operating systems.
Download USBC-NVME Firmware 1.23.15
For macOS and Linux users, the firmware updating utility is only available for Windows, please contact our support for additional assistance or if you do not have access to a Windows host, we’re more than happy to help!
Firmware version 1.20.12
Released March 2020
This firmware update aims to address an incompatibility with Phison E7 and E12 based NVMe SSDs, including some SSDs from Silicon Power.
This update is not necessary for most NVMe SSDs which do not use the Phison chipset.
Applicable to enclosures with serial number starting with 2645-A##### and up.
Installation instructions in the readme.pdf included in the zip file. This firmware update utility is only compatible with Microsoft Windows operating systems.
For macOS and Linux users, the firmware updating utility is only available for Windows, please contact our support for additional assistance or if you do not have access to a Windows host, we’re more than happy to help!
USBC-NVME with JMicron Chipset
There are currently no firmware updates available for this enclosure.
How to format a hard drive or SSD in Windows 10
New hard drives and SSDs, including NVMe SSDs, need to be partitioned and formatted before the first use. Windows will not prompt to format a blank drive when connected.
Start by installing the hard drive or SSD (referred to as "drive") into the Plugable hard drive dock or drive enclosure and connect it to the computer using the provided cables and power supply if applicable.
With the drive connected to the computer, we can create a partition table, and at least one partition, then format the partition.
- Right-click on the start menu and select Disk management from the pop-up menu
- If this is a new, blank drive, the system will prompt to initialize the drive by writing a partition table to the drive with the Initialize Disk dialog
- Uninitialized drives are listed under the Select disks: section, check all that apply
- For drives over 2TB GPT is required to access the full storage capability of the drive, we also recommend GPT for SSDs and drives used with other Windows 10 systems, MBR can be used for drives that need to be used with legacy Operating Systems, for example Windows XP
- Select OK to continue
- The drive currently has no partitions, right-click on the Unallocated space and select New Simple Volume... from the drop-down menu to start the New Simple Volume Wizard
- At the introductory screen, select Next to continue
- At the Specify Volume Size screen, select Next to continue with the default value
- At the Assign Drive Letter or Path screen, select Next to use the default values, this will assign the next available drive letter to the new partition
- At the Format Partition screen, select the File system from the drop down menu, NTFS is the default and works well with Windows computers, exFAT is also compatible with macOS and Linux*. A Volume label can also be entered on this screen, this is the name of the drive. We recommend leaving the other options at the default values, Quick Format should be checked
- Select Finish to start the formatting, it should complete within a few seconds to a minute depending on the drive
- The drive should now be accessible within Windows explorer under My Computer
How to format a hard drive or SSD in macOS
New hard drives and SSDs, including NVMe SSDs, need to be partitioned and formatted before the first use. macOS will normally prompt you when a blank drive is connected with the option to Initialize the drive.
Start by installing the hard drive or SSD (referred to as "drive") into the Plugable hard drive dock or drive enclosure and connect it to the computer using the provided cables and power supply if applicable. macOS will normally prompt you when a blank drive is connected with the option to Initialize the drive.
- Either select the Initialize button on the prompt, or select Go > Utilities > Disk Utility, either option will open the Disk Utility
- Select the external drive in the left column, then the Erase button to start the formatting process, please be sure this is the correct drive before formatting
- The Erase Drive dialog drop down lets us name the drive and select the file system format from a list, the defaults are recommended
- Select the Erase button to format the drive, this will take between a couple of seconds to minutes depending on the drive
- The newly formatted drive can be used as a Time Machine backup, or used as a standard storage drive.
Understanding Large SATA Drive Compatibility
Originally authored by: Jeff Everett, March 21, 2013
This post is intended to offer detailed technical information for troubleshooting issues affecting new “Advanced Format” 512e SATA disk drives.
Plugable’s full-size 3.5″ hard drive docks, the USB3-SATA-UASP1, USB3-SATA-U3 and USBC-SATA-V; these feature support for these new 512e Advanced Format drives. Our Plugable Storage System “PSS” products also support 512e large volumes (as soon as 2.5″ drive capacities increase and these drives become available in smaller sizes than 3.5″).
Some docks have a non-standard sector emulation feature that enables using capacities above 2TB on Windows XP 32 bit. But this requires that drives initialized and formatted in a special way, and NOT be used with other SATA controllers in desktop PC’s or other drive docking stations, unless those units also have a matching firmware version and support for this feature.
Plugable USB SATA docks do not support sector emulation for XP. Rather, we’ve chosen to support 3TB+ Advanced Format drives in the standard way without any emulation.
Background
The storage model used by disk makers for the last 10+ years is changing, and this post is an effort to explain how these changes work in detail. In case of issues moving drives between different systems, or when encountering issues using USB attached drives to host enterprise application data, the details here can help understand what factors are at play.
Data is stored fundamentally in bits (bits with a little b). Busses like USB often measure throughput in bits, like USB 2.0’s 480 Megabits per second (480 Mbps) or SATA III’s Gigabits per second (6 Gbp/s). Eight of these individual bits of data make up one of the capital-B “Bytes” that we usually measure data in, be it kilobytes (KB) in a document, MegaBytes (MB) in an MP3, or GigaBytes (GB) of data on a storage volume like a hard drive or SSD. Generally speaking, transfer rates industry-wide are measured in bits so transfer rates appear higher than if they were measured the same way the data is actually stored, in Bytes.
On modern solid state drives and traditional hard or even floppy disks, these bytes are grouped into sectors for actual read/write operations. Over the last decades, almost all storage drives used 512 Bytes per sector to store data since addressing individual bits and Bytes would be impractical.
Having all drives at 512 bytes per sector was nice, as there were few compatibility issues to think about when moving drives between systems or SATA docks, or when cloning them.
Evolution
512 byte sectors present problems with larger capacity drives (3TB+)- to make way for larger drives, sector sizes had to grow. This presents challenges throughout the “software stack” from the SATA hardware controllers and their firmware, their drivers, the operating system, and even to how applications may sometimes assume certain sector sizes or where sectors will start. Resulting issues are numerous and will take time for the industry to fully work out.
Over the past few years, Advanced Format Drives (512e, AF) drives reporting 512 Bytes/”logical” sector while actually using physical sectors of 4096 Bytes/”physical” sector have gained in popularity due to their higher data density potential, and resulting larger capacities. For more on how these drives work and why the industry switched, read this great ZD net post. Soon, we’ll be seeing drives that use 4096B logical and physical sectors.
| Drive Type | Support/functionality |
|---|---|
| 4K native (4K logical sector size) | Supported on the following operating systems:
|
| Advanced Format or 512E (4K physical and 512-byte logical sector size) | Supported on the following operating systems:
*Except for Hyper-V. See the “Windows support in enterprise” section below. Specific requirements are listed in the following section. Run only applications and hardware that support these drives. |
| 512-byte native (512-byte physical and logical sector size) | Supported on all platforms. |
*from Microsoft support policy for 4K sector hard drives in Windows
As you can see from the table above, determining whether you have a 512n (drive with reported and physical sectors of 512 bytes), 512e (the 512 emulation 4096 “Advanced Format” drives with physical 4096B clusters), or 4Kn (drive with both reported and physical sectors of 4096B) is crucial to determine which Windows operating systems will be able to recognize the drive.
On OS X, large volume support is somewhat better, with effectively no limits on volume size in modern OS X versions:
*From Mac OS X: Mac OS Extended format (HFS Plus) volume and file limits
How to check your drive’s sector size
To determine if you have an 512e Advanced Format Drive, open an administrative command prompt and run the following command on the NTFS formatted volume:
fsutil fsinfo ntfsinfo [your drive]
[your drive] will be the letter of the disk you’re testing, so c: or d: etc.
The output will look like this, with the bold portion below being the relevant information. Bytes per Sector of 512 and bytes per Physical Sector of 4096 indicate a 512e drive:
C:\Windows\system32>fsutil fsinfo ntfsinfo h:
NTFS Volume Serial Number : 0x8a0c5e820c5e68e9
NTFS Version : 3.1
LFS Version : 1.1
Number Sectors : 0x00000001d1bcafff
Total Clusters : 0x000000003a3795ff
Free Clusters : 0x000000003a3671d7
Total Reserved : 0x0000000000000000
Bytes Per Sector : 512
Bytes Per Physical Sector : 4096
Bytes Per Cluster : 4096
Bytes Per FileRecord Segment : 1024
Clusters Per FileRecord Segment : 0
Mft Valid Data Length : 0x0000000000040000
Mft Start Lcn : 0x00000000000c0000
Mft2 Start Lcn : 0x0000000000000002
Mft Zone Start : 0x00000000000c0000
Mft Zone End : 0x00000000000cc820
Resource Manager Identifier : DB59D441-7AD6-11E2-BEE8-00027232D73D’
If your drive reports:
Bytes Per Sector : 512
Bytes Per Physical Sector : 512
This one of the 512n volumes commonly used over the last decade. Support for these drives is universal.
If your drive reports:
Bytes Per Sector : 512
Bytes Per Physical Sector : 4096
The volume is operating in 512e mode, and should be recognized by most Windows Vista (SP1 and later) systems, as well as by newer Windows 7 and 8 PC’s. Windows 7 and Server 2008 users who do not have Service Pack 1 installed need a system update for 512e compatibility.
Macs should also be able to see the volume with no issue, however do not have native NTFS write capabilities, so they may only be able to read the drive.
If your drive reports:
Bytes Per Sector : 4096
Bytes Per Physical Sector : 4096
Then the drive has been formatted with non-standard sector emulation, in order to support 3TB+ drives on Windows XP.
A special release of firmware for the Plugable USB3-SATA-U3 (firmware v12092681f600) is available by special request that uses this non-standard emulation strategy. However, it is not the default and is generally not recommended as it limits moving the drive to other docks with the same emulation strategy.
How to clean and re-initialize a volume
Moving volumes initialized with 4096B sector re-emulation to other SATA controllers (other drive docks or PC SATA connections) may result in drives that are visible in disk manager but with no partitions, and no option to re-format the drive since the “new” (non U3) SATA controller doesn’t support the 4096B sector re-emulation. In this case, wiping the drive is necessary to use it on the new controller.
Wiping a misaligned drive’s partition table will allow the volume to be re-initialized as though it were new, and a new partition table may be written when the disk is re-formatted.
Performing the following steps will destroy all data on the disk selected, so these steps must be performed with extreme caution.
To check for all attached volumes, open an administrative command prompt and enter diskpart, then enter the list disk command as shown below, and select the disk of your choice to clean. After selecting whichever disk number you want to wipe, the clean command will destroy the partition table and allow you to re-initialize the volume.
C:\Windows\system32>diskpart
Microsoft DiskPart version 6.2.9200
Copyright (C) 1999-2012 Microsoft Corporation.
On computer: GRANDCENTRAL
DISKPART> list disk
Disk ### Status Size Free Dyn Gpt
——– ————- ——- ——- — —
Disk 0 Online 111 GB 1024 KB
Disk 1 Online 1863 GB 0 B
Disk 2 No Media 0 B 0 B
Disk 3 No Media 0 B 0 B
Disk 4 No Media 0 B 0 B
Disk 5 No Media 0 B 0 B
Disk 6 Online 1862 GB 0 B
Disk 7 No Media 0 B 0 B
Disk 8 Online 465 GB 0 B
DISKPART> select disk 8
Disk 8 is now the selected disk.
DISKPART> clean
DiskPart succeeded in cleaning the disk.
DISKPART>
From here the disk is blank and can be re-initialized and formatted with whatever partitions are desired. Most consumers will not need to be aware of the other issues that can arise with Advanced Format volumes in enterprise applications.
Partition Alignment
If the performance of your 512e large volume has degraded when being moved from system to system, partition alignment issues may be the cause. Issues with non-bootable cloned volumes may also be due to improperly aligned partitions. Western Digital and Hitachi offer drive alignment utilities for affected operating systems. Seagate drives should not require alignment. Customers with other brands of drives will need to check with the manufacturer of their drive to determine if an alignment tool is available and/or necessary. Partition alignment issues often affect older Windows Vista and Windows XP systems where drives are frequently accessed on other operating systems.
Before initializing a new drive, using a large volume with Windows XP, or especially before cloning an Advanced Format Western Digital drive, please check the chart below to determine if aligning your drive is necessary for maximum performance and compatibility with your software environment.
Using your WD Advanced Format Hard Drive with a Windows Operating System may require you to run the WD Align Windows software utility after you install your operating system or partition and format the drive as a secondary drive. The WD Align software aligns existing partitions on the Advanced Format drive to ensure it provides full performance for certain configurations. (Please see table for configuration details)
Running Hitachi’s “HGST Align” tool may be necessary for Windows XP or Windows Vista users. Windows 7 and Windows 8 users should not need to use this utility.
Windows support in the enterprise
Most end-users won’t need to worry about drive sector sizes, partition alignment, or any of the details above. Due to the specific issues documented by Microsoft with some of their enterprise applications, thorough planning for drive purchasing and migration is crucial in enterprise environments leveraging the following technologies:
- Hyper-V: http://support.microsoft.com/kb/2515143
- Microsoft SQL Server: http://blogs.msdn.com/b/psssql/archive/2011/01/13/sql-server-new-drives-use-4k-sector-size.aspx
- Windows Home Server v1: http://support.microsoft.com/kb/2385637
- Microsoft Exchange Server: http://technet.microsoft.com/en-us/library/ee832792.aspx#Phys
- Third-party applications and hardware: Applications and hardware devices may have reliability and performance issues when they are connected to these new drives. Contact your application and hardware vendors about their support policy for these drives.
*from “Microsoft support policy for 4K sector hard drives in Windows.”
For more details on 512e and 4Kn Advanced Format support across Windows versions, application specific issues, other known issues, and unsupported scenarios, read Microsoft support policy for 4K sector hard drives in Windows.
Further details on the evolution from 512n to 512e and 4Kn drives are available in this presentation from IDEMA (International Disk Drive Equipment and Materials Association).
Deeper technical details for driver developers are available in Microsoft’s “Advanced format (4K) disk compatibility update (Windows)” article.
How To - Share a Folder or Drive in Windows 11
Often it can be helpful to have access to a folder or external hard drive from two computers. Instead of unplugging an external hard drive and physically moving it to the second computer it may be more efficient to share the driver over the network.
Windows file sharing includes password based authentication and can be easily configured to share specific folders or entire drives over the network, providing access to the same data from multiple computers, while slower than a directly connected USB 3 hard drive it can be more convenient.
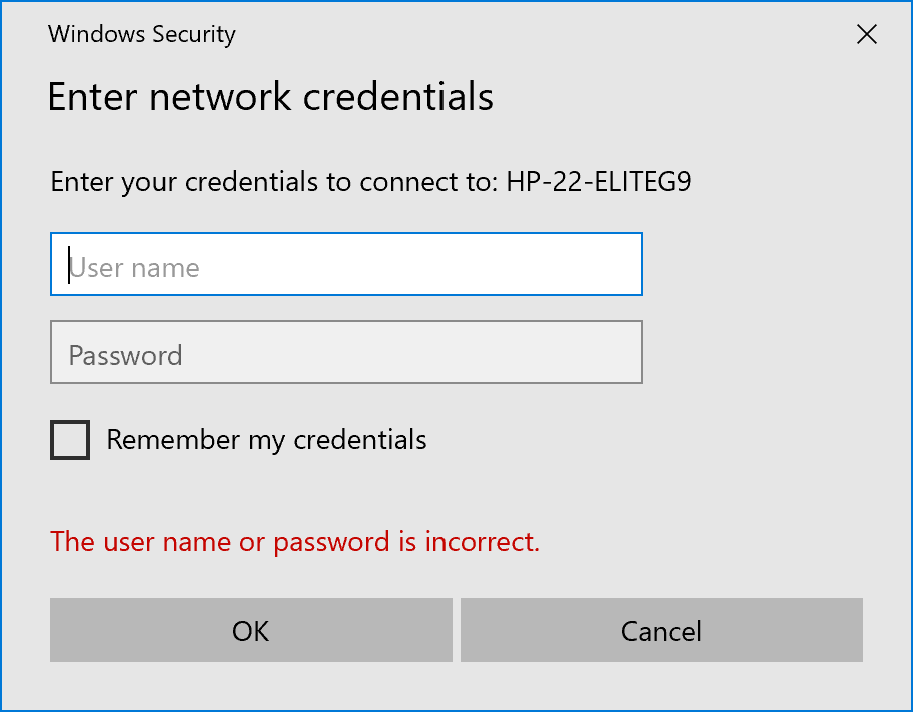
This article will demonstrate how to share the file system from an externally connected SATA SSD over the network for access from other Windows workstations. We will use the computer's local user account and password for authentication.
Definitions:
- Server - The server will be the computer with the USB attached SSD, this can have Windows 10 or 11 with an administratively privileged user account
- Client - The computer connecting to the shared driver over the network, this can have Windows 10 or 11
Hardware to replicate this setup:
- 2x Windows computers, the process is very similar for Windows 10 and Windows 11 to act as Server and Client
- 1x SATA Vertical Hard Drive Dock with USB-C connection USBC-SATA-V ( https://plugable.com/products/usbc-sata-v )
- 1x SATA SSD or Hard Drive
- Network with both Server and Client - recommended a wired network for best performance, however wireless also works
Setting up the file server
1 - Connect the hard drive to the Server, if not already formatted the partition and format the drive with an NTFS file system, ensure the file system is detected and accessible under your user account.
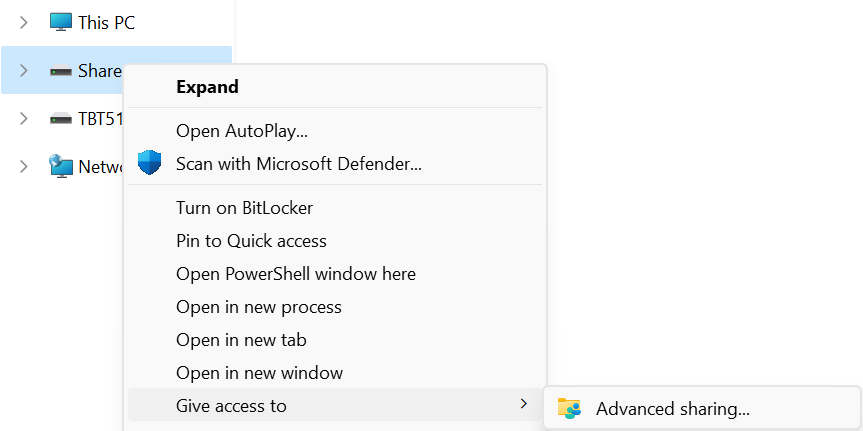
2 - Open Windows File Explorer, holding down the Shift key, right-click on the drive or folder to be shared, hover over “Give access to” and select “Advanced sharing…” to open the “Advanced Sharing” window
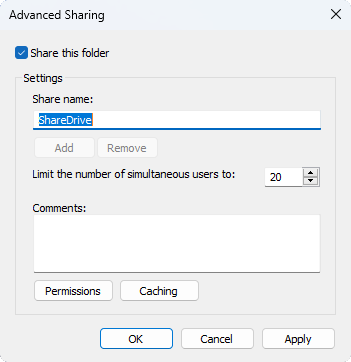
3 - Under the “Advanced Sharing” subsection, select the “Advanced Sharing” button, this requires local administrative permissions

4 - Under the “Settings” subsection, select the “Share this folder” checkbox", then select the “Permissions” button to open the “Permissions for <sharename>” window.
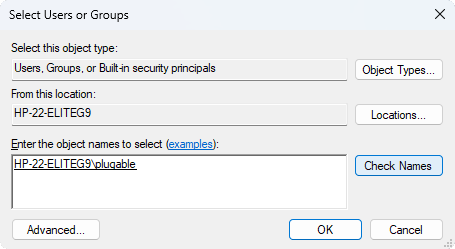
5 - Under “Group or user names:” subsection, select the “Add…” button to open the “Select Users or Groups” window
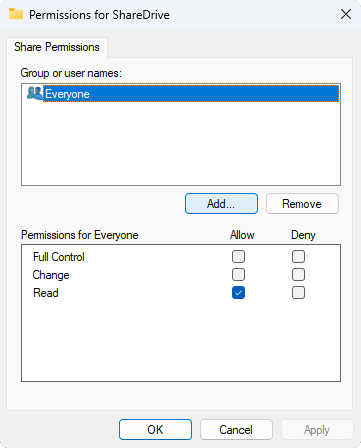
6 - In the text box in the “Enter the object names to select (examples):” heading, type in your user account name, in this example “plugable”, then click the “Check Names” button to automatically complete the field, the first part of this name is the computer's host name ending before the back slash “\”, noted this down for connecting to this computer, when done select “OK” button
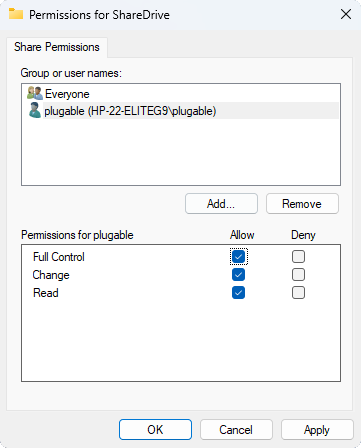
7 - On the “Permissions for <sharename>” window, under the “Group or user names:” subsection, select your username, then under the “Permissions for <username>” subsection, check the “Allow” boxes to provide both read and write permissions to the shared drive, click on “OK” when complete
8 - The drive or folder should now be shared and available for any Windows host connected to the same network - one note, this does require the computers to be on the same subnet ( for example connected to the same WiFi or same Ethernet switch/router ) and for the Windows Firewall to be set to a Private network - additional details here ( https://kb.plugable.com/2600495 )
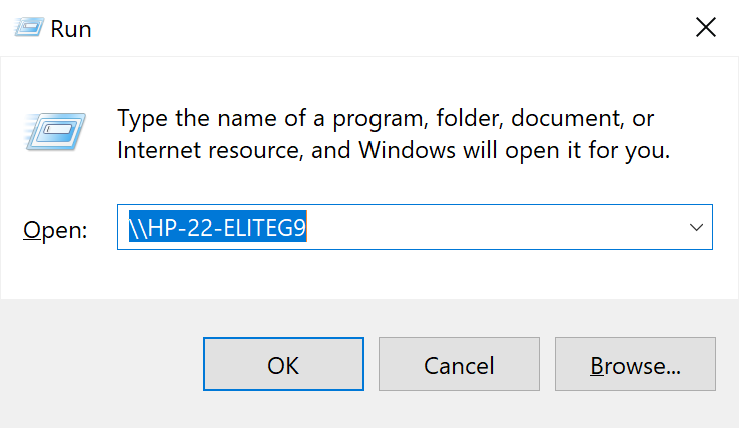
Connecting to the share for quick access
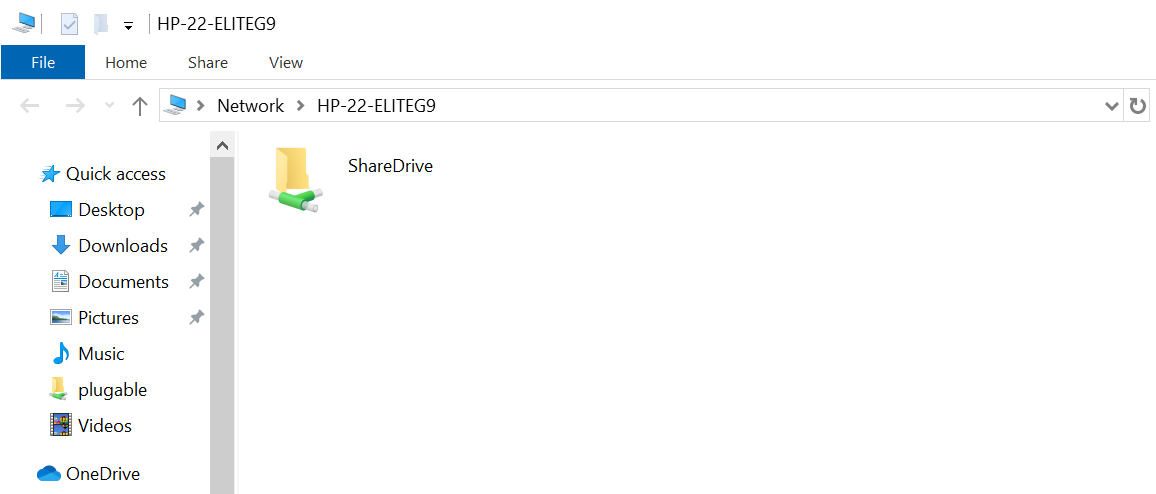
Assigning a drive letter to a network share
Additional notes
This method of network file sharing requires the Server to be active and on the network for the Client to access the shared files. If the Server is set to enter sleep mode or hibernation when idle the network share may become inaccessible.
Network file systems also have reduced performance compared to a directly connected USB external hard drive, depending on the network, drive type, and connection to the Server this can be anywhere from 1/10th the speed to nearly the same speed.
Can I connect this product to a computer's Thunderbolt/Thunderbolt 2 port?
Many users assume that USB-C devices can work with older Thunderbolt 2 Macs if they use a Thunderbolt 3 to Thunderbolt 2 adapter, such as the one made by Apple. However, this is not the case. These adapters are specifically designed to support Thunderbolt devices only - not standard USB-C peripherals.
While Thunderbolt 3 and USB-C share the same connector type, they use different underlying data protocols. Non-Thunderbolt USB-C devices, rely on USB standards for data and power. The Thunderbolt 3 to Thunderbolt 2 adapter does not carry USB signals; it only passes Thunderbolt data. Because of this, plugging a USB-C device into a Thunderbolt 2 Mac using this adapter will not work - the computer will not detect or communicate with the device.
If you need to connect peripherals to a Thunderbolt 2 system, we recommend using a USB-A dock or hub (if available on your system). This ensures compatibility without relying on unsupported adapter chains.
In short, even though the connectors may fit, USB-C devices are not compatible with Thunderbolt 2 Macs via Thunderbolt adapters - only Thunderbolt devices will work in that setup.
How To - Connect a Windows Operating System Drive to a New Computer
From time to time it may be necessary to remove the operating system drive from a Windows computer and connect it to another system to recover the data. While we always recommend keeping at least two separate backups of all important data there are times where a system failure may occur between backups or backup processes may fail.
Considerations
The state of the system - if the computer is not powering on, completing the Power On Self Test (POST) process, or not loading the operating system from the drive then the drive itself may be damaged, failing, or failed. Attempting data recovery from a failed drive can worsen the issues potentially making data unrecoverable even at professional data recovery services.
Windows 11 does not default to enabling BitLocker drive encryption, but if this is manually configured the encryption key will be required to recover data from the drive. The BitLocker encryption key is stored in the TPM module on the original computer ( separate from the drive ), a recovery key is provided either at the time of encrypting the drive in case the drive needs to be connected to another Windows system. This recovery key is necessary to unlock ( decrypt ) the drive for access on another system.
Some ultra-thin, or highly integrated computers like Chromebooks and MacBooks do not have removable storage, instead the storage is soldered directly to the system main board and may not be independently recovered, for these systems keeping an up to date backup of important data is very important.
Hardware Requirements
The most common operating system drives for both desktop and notebook computers are NVMe SSDs connecting to the computer with an M.2 edge connector. Older computers may use SATA SSDs (generally 2.5-inch or "laptop" form factor) while still older computers may use a spinning disk drive either 2.5-inch or 3.5-inch form factors for desktop computers.
Plugable's USB Type-C to M.2 NVMe Toolfree Enclosure supports M.2 NVMe SSDs from the 2230 (22mm wide, 30mm long) up through 2280 (22mm wide, 80mm long) form factors.
Plugable's USB Type-C SATA Vertical Hard Drive Dock supports 2.5-inch and 3.5-inch Serial ATA SSDs and Hard Drives.
You will also need a destination computer to recover the data to, this can be the same as the original computer after installing a new NVMe SSD and operating system, or another computer with Windows 10 or Windows 11.
Connecting to the New Computer
The drive to be recovered may be installed as a secondary into a desktop PC, or connected to a notebook or desktop using a USB adapter.
After installing the drive into a hard drive dock or NVMe enclosure, our first step is to ensure the computer is detecting the drive:
1. Right-click on the Start Menu and select Device Manager from the pop-up menu, expand the Disk drives section

2. Connect the drive to the computer, after a moment the drive should be detected in the Device Manager window

Next we check to see how Windows is detecting the partition table and file system(s):
3. Right-click on the Start Menu and select Disk Management from the pop-up menu

4. If the drive letter is not assigned to the old drive's largest partition we can manually assign the drive letter by right-clicking on the partition and selecting "Change Drive Letter and Paths...", follow the on screen prompts to assign the next available drive letter to the external drive.


5. To access the user data you will need to change permissions on the file system, this does modify the contents of the drive and could have an affect on the Windows operating system if you were to boot to this drive in the original computer again.

6. You should now have access to all of your user data stored on the computer. Some data may be stored on OneDrive by default ( for example the Desktop and Documents directories ) and not have local copies on the operating system drive.

7. After changing the permissions, the drive can still load into Windows on the original computer. In this case the user account logged in correctly but we can see the "Account Unknown" permission changes.

Windows BitLocker
If the computer had Windows BitLocker configured to encrypt the operating system drive then you will need to input the recovery key to gain access to data on the drive.
After connecting the drive to the computer a locked drive will be available in the Windows File Explorer left-most column.
1. Open Windows File Explorer, and select the locked drive from the left column

2. In the BitLocker prompt, type in or copy and paste the recovery key to unlock the drive, you should now have access to the file system and access the user account folder

When configuring BitLocker you are given the option to save the recovery key to your Microsoft Account, a file system ( only an external or secondary drive ), or to print the recovery key. If the recovery key is lost than data will not be recoverable and we highly recommend always keeping a backup of the recovery key, as well as physically separated backups of all important data.
Looking for more details? Check out our Plugable product pages for specs, frequently asked questions, and compatibility information.
USB Type-C to M.2 NVMe Toolfree Enclosure
USB Type-C SATA Vertical Hard Drive Dock
If you have any questions please feel free to contact us at support@plugable.com and we'll be happy to assist!


- Choosing a selection results in a full page refresh.