Hassle free, 2-Year Warranty
Fast, Free Shipping on Orders $35+
Lifetime Technical Support
30-Day Money Back Guarantee
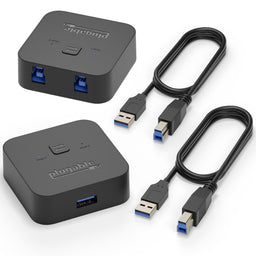
Plugable USB 2.0 Sharing Switch
$18.95 USD
SKU: USB2-SWITCH2Amazon Rating : (1753 Reviews)
Features
- Simple Device Sharing—Compact one-touch design allows you to easily switch usb devices between 2 computers
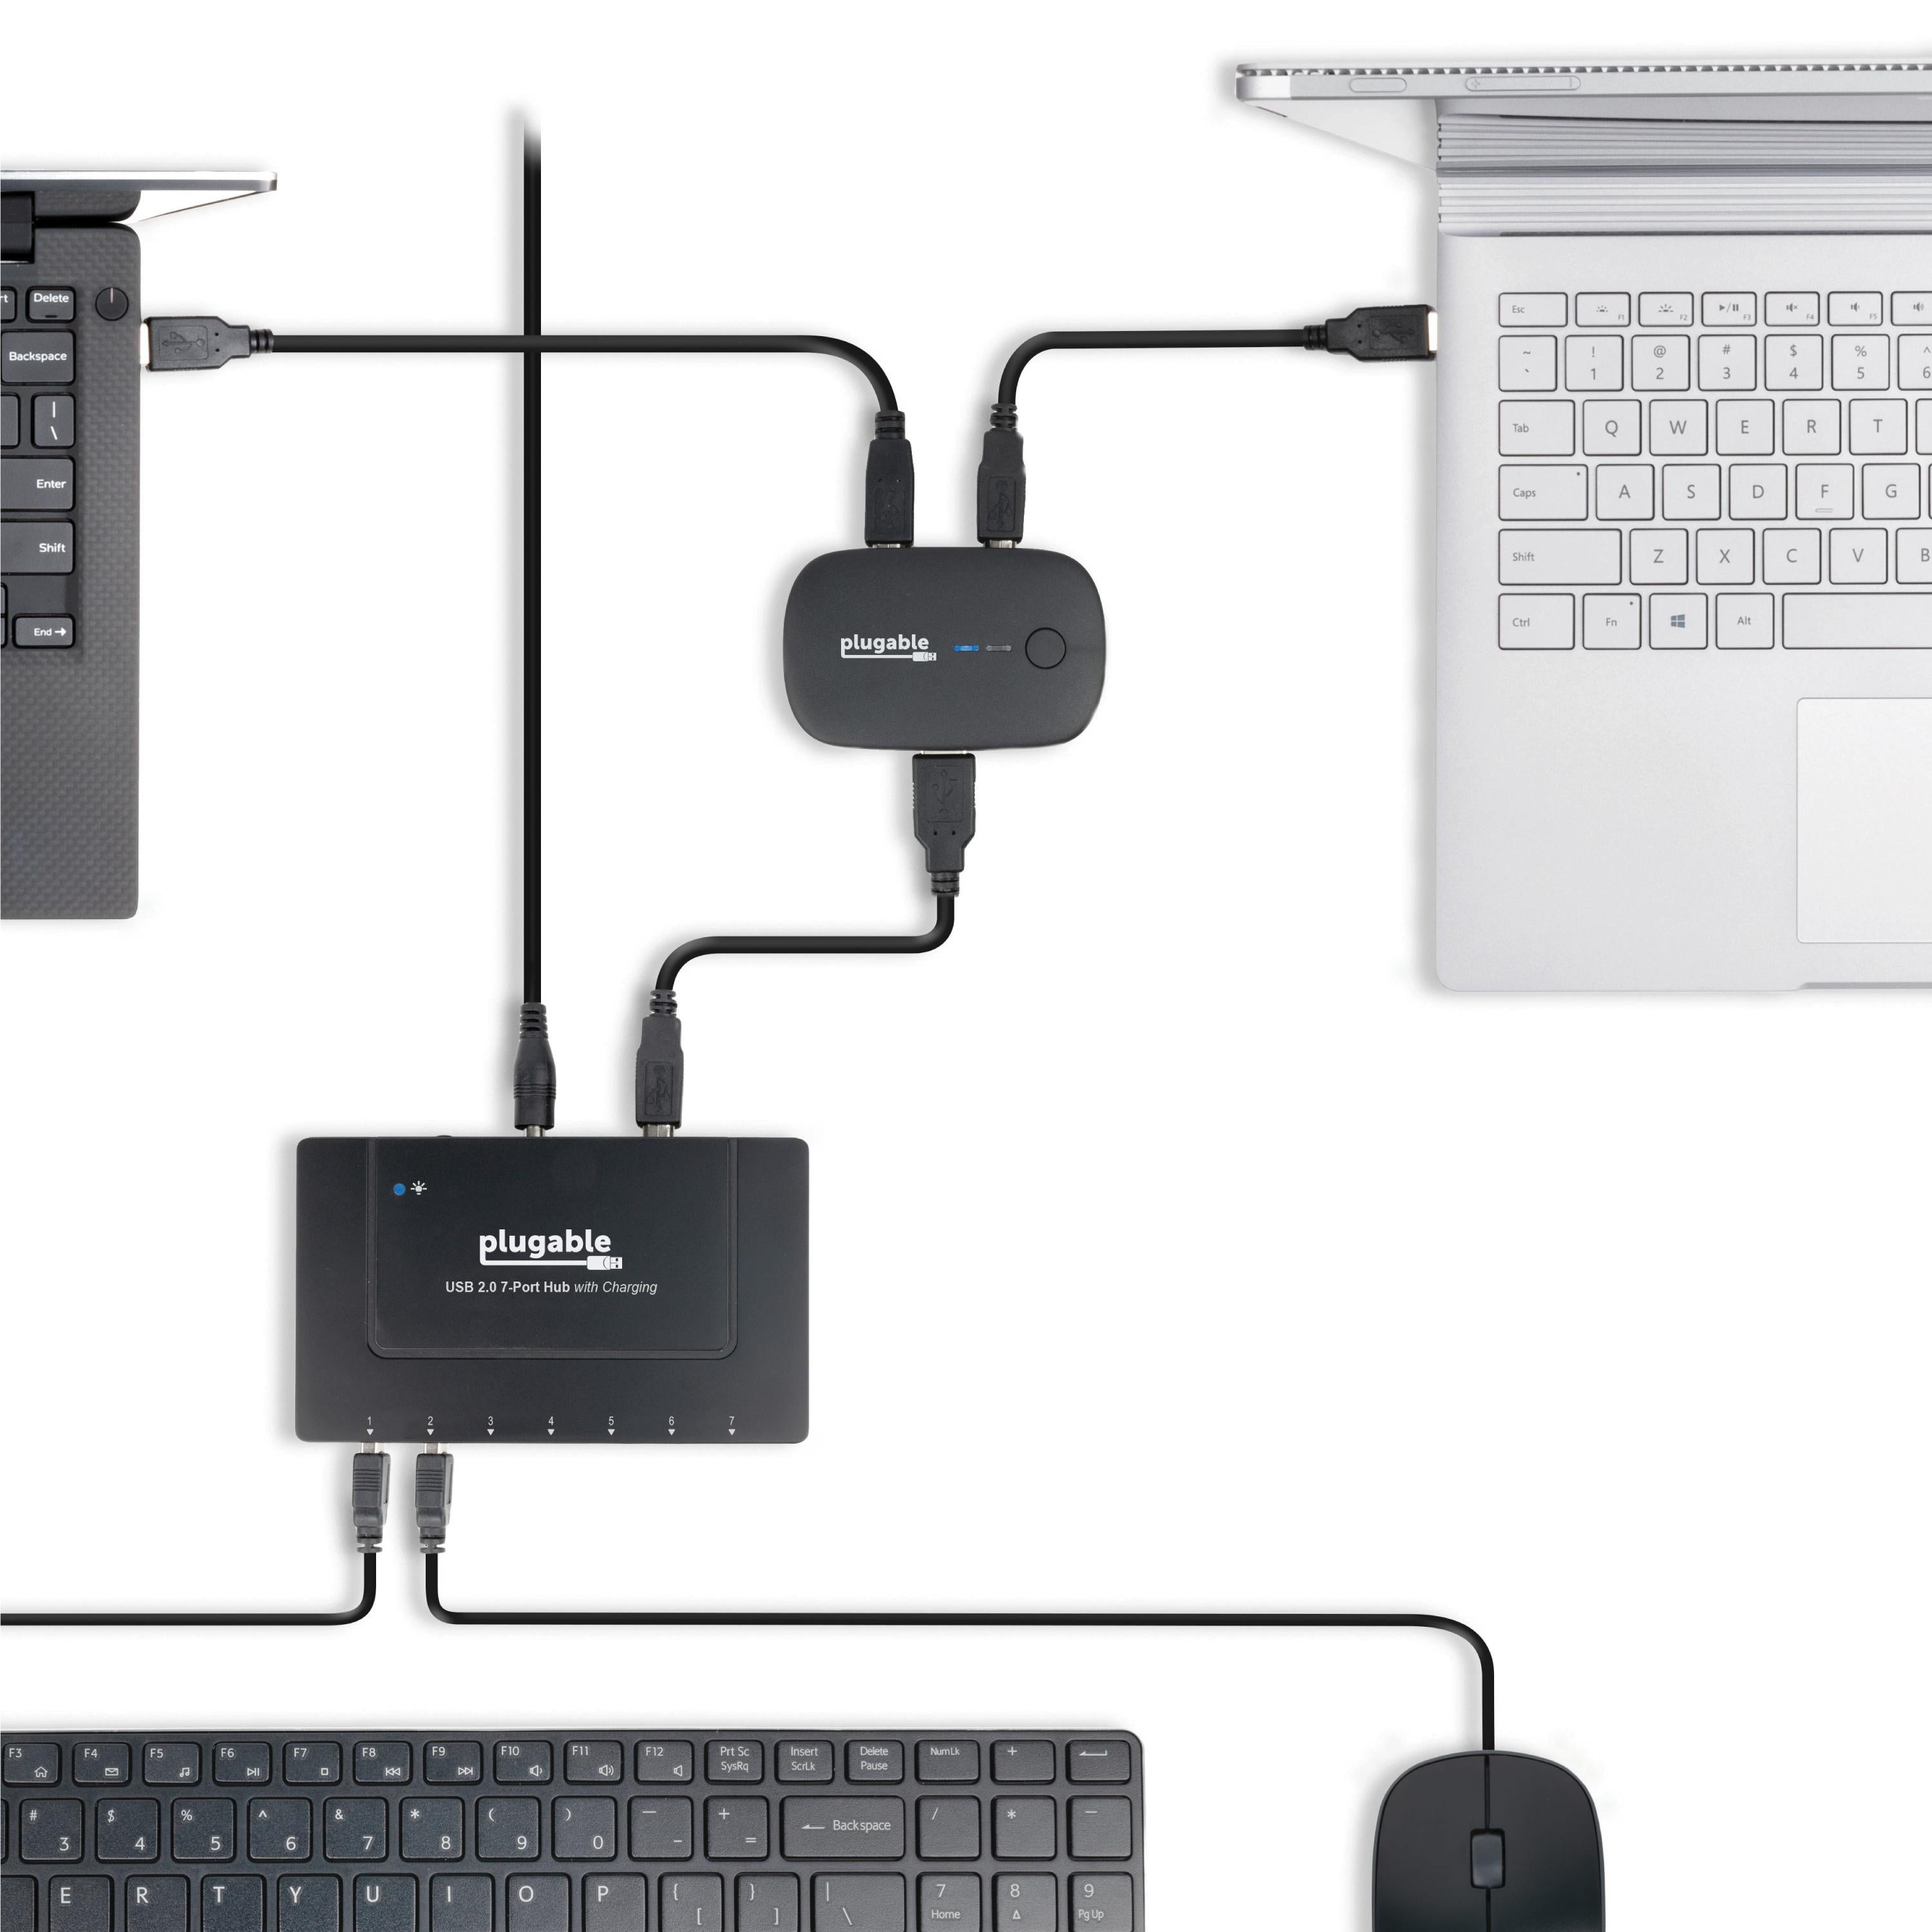
- One Button Toggle—Great for sharing a printer, scanner, or other USB device between two computers (one computer at a time). Attach a powered USB hub that is connected to the keyboard, mouse, and USB 2.0 graphics adapter for an all-USB KVM solution with this USB AB switch
- Plug and Play—Switch works with any USB-enabled computer without drivers - attached devices may require drivers as usual. LED indicator lights show which connected computer has control of the attached devices
- Compatibility—Not recommended for switching docking stations or mass storage devices such as hard drives, flash drives, memory cards, etc. We recommend using the provided 1m/3.3ft cables to connect the USB switch to your computer and 6ft/1.8m to your peripheral.
- 2-Year Coverage, Lifetime Support—Every Plugable product, including this USB 2.0 sharing switch, is covered against defects for 2 years and comes with lifetime support. If you ever have questions, contact our North American-based team - even before purchase
Free 3-Day Shipping on Orders Over $35!
Share Your Device(s) With Simplicity
The Plugable USB 2.0 Sharing Switch (USB2-SWITCH2) is the ideal solution for one-touch switching of access between two computers to a:
- Powered USB 2.0 hub
- USB 2.0 graphics adapter(s)
- Wired USB keyboard/mouse
- One wireless keyboard and mouse two computers
- USB printer or scanner
- Most other USB 2.0/1.1 devices
Features
One-Touch Switching
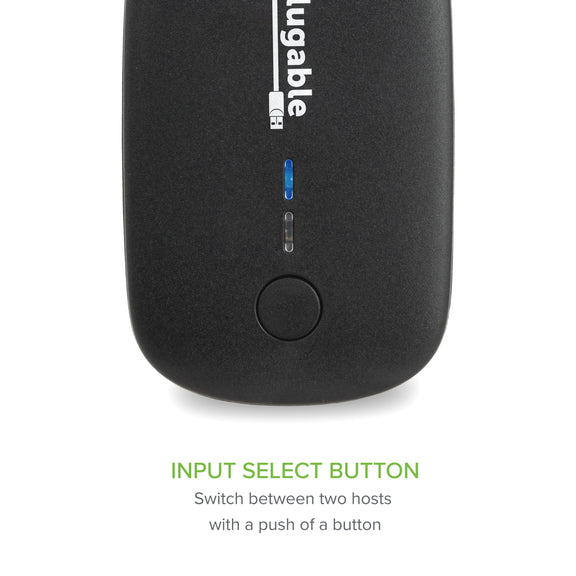
A single button press is all that's required to toggle between connected computers. Blue LED indicator lights show which connected computer has control.
Potential To Do More
Looking to provide two-computer access to a single keyboard and mouse, or other peripherals? Just attach the switch to a powered USB hub, then connect all your desired peripherals for an all-USB solution. Ideal for a variety of USB applications including as a scanner or printer AB switch.
Just Plug In And Switch Away
Switch works with any USB-enabled computer without drivers. Attached external devices will still require drivers as usual.
In The Box
- 1x Plugable USB 2.0 Sharing Switch
- 2x USB-A to USB-B Cables (1.5m/5ft)
System Compatibility
- Windows 11, 10, 8.x, 7, Vista, XP
- macOS
- ChromeOS
- Linux
Important Notes
- Not recommended for switching mass storage devices such as hard drives, flash drives, card readers, etc, as these devices should be unmounted or safely ejected via the host operating system prior to switching.
- Not recommended for USB 3 or USB-C display adapters or docking stations
- Drivers may be required for the connected USB device
Additional Features
- The switch is backward compatible with USB 1.1 devices
- Compatible with USB hubs for switching multiple peripherals
- Simple passive USB switch means no power adapter is needed (bus-powered)
Incompatible Setups and Features
- Autosensing of hosts is not supported; manual press of the button is required
- USB-C devices with video output are not supported
- The use of USB-A to USB-B cables greater than 6ft/1.8m is not supported
In The Box
Item and Quantity | Item Notes |
---|---|
1x USB 2.0 Sharing Switch | |
2x USB 2.0 Type-A to Type-B cables | |
1x Quick Start Guide |
Included Cables
Port Type (Side 1) | Cable Specification | Port Type (Side 2) | Cable Length | External Power for Cable |
---|---|---|---|---|
Male USB-A | USB 2.0 (480Mbps) | USB-B (2.0) | 1.5m/4.92ft | No |
Power
Port | Placement | Power Host / Device | Connection Type | Notes | Voltage | Amperage | Wattage |
---|---|---|---|---|---|---|---|
USB-A to Host | Rear | Device | Bus Powered (No Power Adapter) | 0.0W |
USB To Devices
Port | Placement | Version and Link Rate | Features | Voltage | Amperage | Wattage |
---|---|---|---|---|---|---|
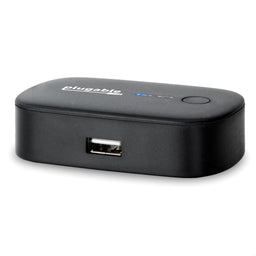
1x USB-A | Front | USB 2.0 (480Mbps) | 5V | 500mA | 2.5W |
Connection To Host
Port | Placement | Version and Link Rate | Features |
---|---|---|---|
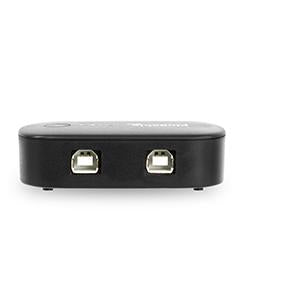
2x USB-A | Rear | USB 2.0 (480Mbps) |
Physical Stats
Item | Size (H x W x D) or Length | Weight | SKU or Part Number |
---|---|---|---|
USB 2.0 Sharing Switch | 2 x 8 x 5 centimeters 0.8 x 3.1 x 2 inches |
42 grams 1.5 ounces |
USB2-SWITCH2 |
LEDs
LED Number | Shape | Color | Status | Definition | Notes |
---|---|---|---|---|---|
1 | Line — | Blue | Solid | Active host connection | |
2 | Line — | Blue | Solid | Active host connection |
Get Started
- Plug the included USB cables into the Sharing Switch and the two computers that will share it.
- Connect the USB device such as a printer, scanner, USB hub, etc., into the Sharing Switch.
- When a device (other than the switch) is shared with a computer for the first time, drivers for that device may install.
Note: Because storage devices must be "Safely Removed" or "Ejected" in your computer's Operating System before disconnecting, we recommend exercising caution if using storage devices with this switch.
Questions? We're here to help! Please reach out to us at support@plugable.com
Filter Help Articles and Frequent Questions by Category
Choose one or more filters within each category to narrow down the articles. Each selection will result in only displaying articles that include all of your choices.
Articles
Well how about that, it looks like we don't have any articles matching your filters! Try removing one of your choices or clear the filters to show all articles.
You can always contact support if you need help too!
USB Port Types
USB-A
pietz, CC BY-SA 3.0 , via Wikimedia Commons
This is the standard USB connection that most computers offered prior to the introduction of USB Type-C (USB-C). Even after the introduction of USB Type-C, this is still quite common.
It can provide data transfer rates up to the USB 3.1 Gen 2 (10 gbps) specification depending on the host and device, but does not directly support video in the way that USB-C Alternate Mode does. This limitation makes DisplayLink USB graphics adapters and docking stations ideal on systems that do not have USB-C, or in instances where more displays are needed beyond available video outputs of a PC.
USB-B
Fred the Oyster, CC BY-SA 4.0 , via Wikimedia Commons
IngenieroLoco, CC BY-SA 4.0, via Wikimedia Commons
This type of connection comes in a couple different styles depending on whether USB 3.0 and higher transfer rates are supported (bottom graphic). Usually this type of connection is used to plug into USB devices that do not have a fixed cable connected, such as USB docking stations, USB hubs, printers, and others.
USB Mini-B
Fred the Oyster, CC BY-SA 4.0 , via Wikimedia Commons
One of the first connectors for charging a smartphone, wireless game controller (such as the Sixaxis and DualShock 3), and other small devices such as external hard drives. Not commonly used today, but is still used in some cases. Most devices using USB Mini B are using USB 2.0, though a USB 3.0 variant does exist. This specification also added USB On-The-Go (OTG) functionality, though it is more commonly implemented with Micro USB.
USB Micro-B
Fred the Oyster, CC BY-SA 4.0, via Wikimedia Commons
IngenieroLoco, CC BY-SA 4.0 , via Wikimedia Commons
A smaller connector that serves many of the same uses as the Mini B connector, with added optional features such as Mobile High-Definition Link (MHL) to allow devices like smartphones to output video to larger displays without requiring a dedicated port for video output.
The larger variant of USB-B is most commonly used for external hard drives for higher 5Gbps transfer rates.
USB-C, Thunderbolt™ 3, and Thunderbolt™ 4
Niridya , CC0, via Wikimedia Commons
The most recent USB connection, USB Type-C (USB-C), represents a major change in what USB can do. The connector is smaller, can be connected in two orientations, is able to carry substantially more power and data, and can directly carry video signals of multiple types (HDMI, DisplayPort, etc.) Intel has also adapted the USB-C connector for use with Thunderbolt 3 and Thunderbolt 4.
It is important to note that while all Thunderbolt 3 and Thunderbolt 4 connections are USB-C, not all USB-C connections can be used with Thunderbolt 3 or Thunderbolt 4 devices.
More details regarding physical USB connections can be found on Wikipedia . The graphics depicted here are adapted from Wikimedia Commons by various artists under the Creative Commons Attribution-Share Alike 3.0 Unported license.
Does the Sharing Switch Support Autosense functionality?
No, the Sharing Switch does not automatically switch to the active computer input. You must press the toggle button on the Sharing Switch to swap between inputs.
Why Is This Switch Is Not Recommended for Use With Hard Drives, Flash Drives, or Other Storage Devices?
When the button on the switch is pressed, the net effect is essentially the same as if you were to unplug the storage device from one system, and then plug it into the other. As such, the same same storage removal precautions and “best practices” must be followed to minimize the risk of data loss or corruption.
A bit of additional background may help to clarify this recommendation further. To access data on any storage device, the file system must be “mounted” by the operating system. (This is the process that results in the user seeing a corresponding drive letter for the device in Windows.) If the device is disconnected or loses power without going through the proper unmounting/ejection process, data corruption can sometimes occur. This potential data corruption is why Windows performs a lengthy chkdsk (“check disk”) process when booting back up after a power failure or a crash, and it’s the same reason you see Windows pestering you to “check the drive for errors” when you insert a flash drive that was not properly ejected.
It is also the very reason we generally do not recommend using storage devices with this switch. If control of the storage device were to be switched between systems while the storage device was being accessed, there would be the same potential for data corruption.
However, if you still wish to use a storage device with the switch, there are two potential methods of doing so while drastically reducing the risk of data corruption:
Method 1: “Eject” the device from within your Operating System prior to switching control of the device. This is the suggested procedure to perform prior to removing/switching any storage device from your system. The process for doing so varies depending which OS you are using.
- Windows: Click the icon in your taskbar/notification area titled Safely Remove Hardware, and stop/eject the appropriate device.
- Mac: Open Finder. Under the Devices category on the left, click the eject icon next to the corresponding device.
- Linux: Unmount the device by ejecting it through your graphical environment, or by using the umount command.
Method 2: (Windows Only) Enable the “Quick removal” setting for your storage device inside your operating system. Windows 7 (and later) will often implement this setting by default on devices that it detects as portable, but it is wise to confirm that this setting is enabled. Please note that while this setting reduces the risk of corruption somewhat, it is not as effective as the steps outlined in Method 1 above.
Is the USB2-SWITCH2 Compatible With USB 3.0 Devices?
While the USB2-SWITCH2 can be physically connected to USB 3.0 devices, the connection speed will be bottlenecked to USB 2.0 speeds, which can cause detection and latency issues, most notably in docks.
Due to this, Plugable does not recommend using the USB 2.0 switch with USB 3.0 products, especially devices that have video/USB/Ethernet functionality.
Do Plugable products support the Apple SuperDrive?
Unfortunately Plugable products do not support the Apple SuperDrive.
The Apple SuperDrive has stringent power requirements that can only be met by directly connecting the SuperDrive to your host laptop. As a result at this time Apple recommends only using their USB-C adapter cables. You can find more information on that here → How to connect the Apple USB SuperDrive
If you have purchased a Plugable product to use with your Apple SuperDrive, and would like some additional assistance please do not hesitate to reach out. You can do so by emailing support@plugable.com, or going to Plugable.com/Support.
How to Use Two External Displays with the Lid Closed on MacBook Air and MacBook Pro M3
Overview
With the release of Apple’s M3 CPU chips and the Sonoma 14.6 update your base MacBook Air and MacBook Pro systems with M3 chips can now host two external displays natively in clamshell mode. This guide will walk you through the process of setting up and using two external displays with the lid closed on your MacBook Air or MacBook Pro equipped with an Apple M3 chip.
Requirements
Before getting started, ensure you have the following:
- MacBook Air or MacBook Pro with an Apple M3 chip.
- macOS Sonoma 14.3 or later for an M3 MacBook Air or macOS Sonoma 14.6 or later for an M3 MacBook Pro.
- Two external displays with compatible video inputs (e.g., HDMI, DisplayPort, USB-C).
- A dock or graphics adapter can be used as well.
- External keyboard and mouse (wired or wireless).
- Power adapter or power source for your MacBook
- A docking station that provides adequate charge can be used in place of the native power adapter, be sure to check the wattage your dock provides.
Steps to Set Up Dual External Displays with the Lid Closed
1. Set Up Your External Keyboard and Mouse
- If you’re using a wired keyboard and mouse, connect them directly to your MacBook or Plugable dock.
- For wireless peripherals, ensure they are paired with your MacBook and functioning properly.
- An AC adapter/power cable of some kind will also need to be connected for clamshell mode to function properly. This adapter can be one from a docking station or the included Apple adapter.
2. Connect Your Displays
- Connect the first external display to your MacBook using the appropriate cable (e.g., HDMI, DisplayPort, USB-C)
- Close your laptop’s lid.
- Connect the second external display using a similar method.
- Ensure both displays are powered on and set to the correct input source.
3. Configure Display Settings
- Open System Settings on your MacBook.
- Go to Displays.
- You should see both external displays listed. Arrange them according to your preference by dragging the display icons.
- Adjust the resolution, refresh rate, and other settings as needed.
4. Enable "Clamshell Mode" (Lid Closed Mode)
- With your external displays connected and set up, close the lid of your MacBook.
- Your MacBook will automatically switch to "Clamshell Mode," where the internal display turns off, and the external displays become your primary screens.
- Ensure your MacBook is connected to a power source to prevent it from entering sleep mode.
5. Check the Display Arrangement
- With the lid closed, check that the external displays are functioning as expected.
- If necessary, re-open the Displays settings to adjust the arrangement, resolution, or other preferences.
Troubleshooting Tips
- No Display on External Monitors: If the external displays are not showing anything, open the lid of your MacBook and check the connections.
- MacBook Sleeps When Lid Is Closed: Make sure your MacBook is connected to a power adapter. Clamshell Mode requires the MacBook to be plugged into an external power source.
- Performance Issues: If you experience lag or performance drops, try lowering the resolution or refresh rate of the external displays.
Thunderbolt Dock Users
With these steps, one can use Plugable Thunderbolt docks to enjoy a dual-display setup without the need for additional software installation. The dock leverages the native capabilities of the MacBook Air M3 and MacBook Pro M3, providing a straightforward and efficient solution for expanding your workspace with additional USB ports, audio, and ethernet (as well as the dual displays).
Additional Resources
If you should need any assistance with your setup, please feel free to reach out to our support team at support@plugable.com.