Plugable USB-C Phone Stand Docking Station
SKU: UDS-7IN1
List Price : $69.00
Amazon Rating :
(6 Reviews)
Features
- 8 Port Hub—Get more from your mobile device with eight new ports, including an HDMI port, 2x USB 3.0 ports (5Gbps), SD card and Micro SD card, 100W pass-through charging, and an audio jack, all stashed away in the base of an easy to adjust stand
- From Mobile to Desktop—More than an iPad stand for desk, use your phone or tablet as a computer by adding a screen with resolutions up to 1080P, take advantage of the 2x USB ports to add a mouse and keyboard, and expand your storage space with SD and MicroSD slots
- 100W Charging—If there’s work to be done, or screens to scroll, that battery isn’t going to last forever. Get charged and stay charged with 100W pass-through charging (up to 91W output) using your mobile device’s USB-C power supply (no extra cords to carry)
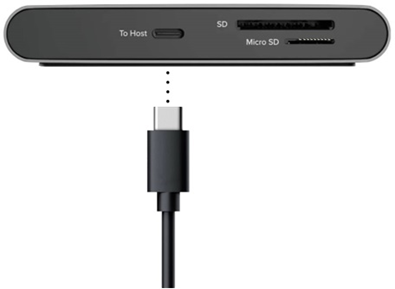
- Compatibility—USB C hub compatible with Microsoft Surface Pro 9, Windows 10 tablets or newer, M1 and M2 iPads with iPadOS 16+, and USB-C phones and tablets that support DisplayPort Alt Mode like Samsung Galaxy S series devices
- 2 Year Warranty—We love our Plugable products and hope you will too. All of our products are backed with a 2-year limited parts and labor warranty as well as Seattle-based email support

Portable, Meet Productive
The Little Screen Becomes the Big Screen
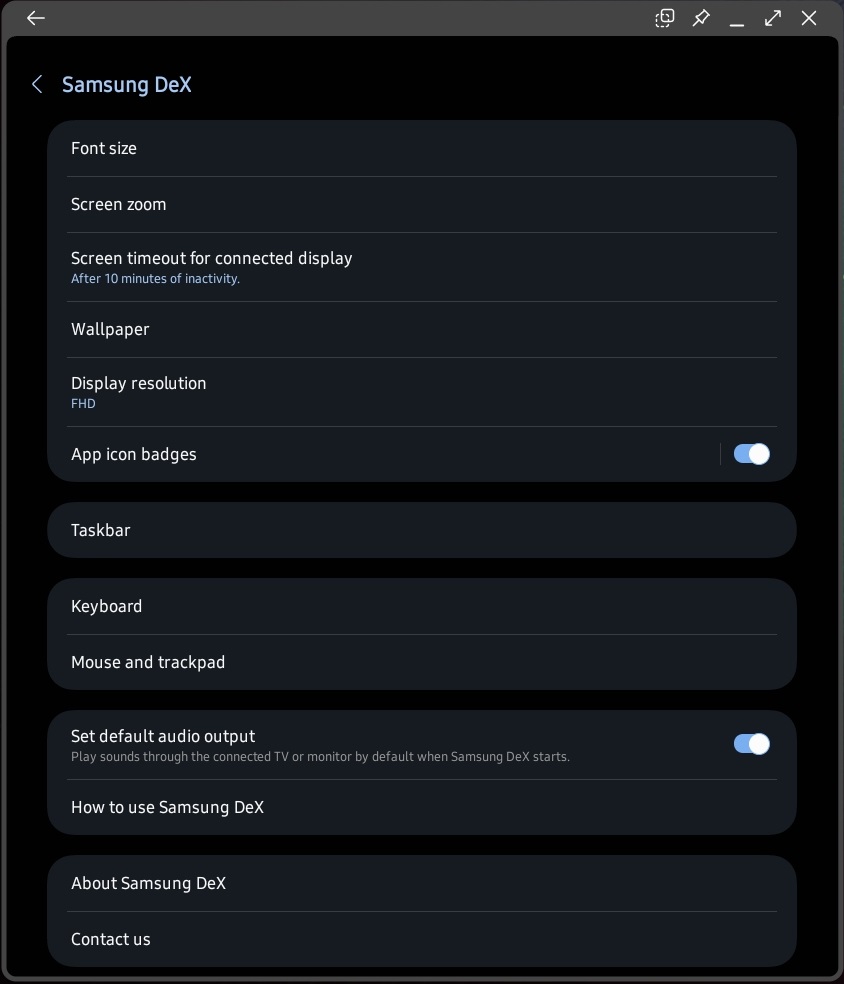
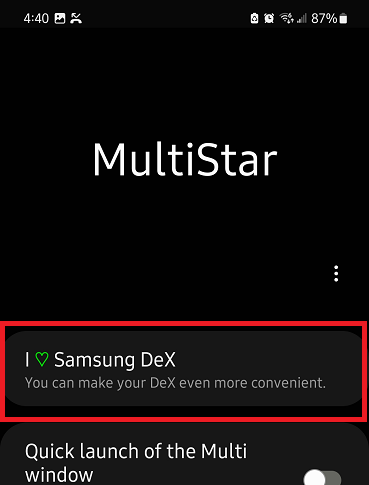
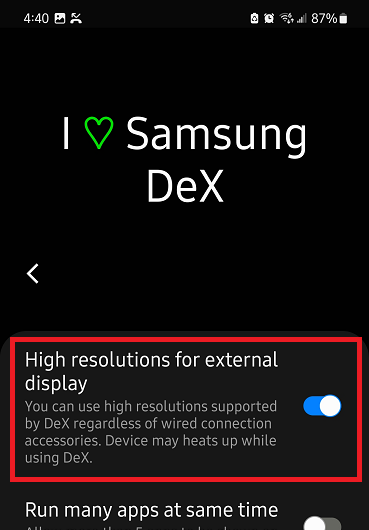
The Plugable USB-C Docking Station with Tablet Stand or Phone Stand (UDS-7IN1) adds functionality to your Windows tablet, M1 or M2 iPad Air or iPad Pro and USB-C phones and tablets that support DisplayPort Alt Mode, like the Samsung Galaxy devices that support DeX. Let’s start with your screen, when it comes time to get actual work done, the pinch and zoom will only get you so far. Extend to a bigger screen with a 4K 30Hz capable HDMI port. It’s like going from fun-sized to full-sized. Note: Samsung DeX can support 1600x900, 1920x1080, and 2560x1440 resolutions only
8-in-1
Your content is looking real sharp on that big, 4K screen, but a bigger screen is just the start. What if you could add a real keyboard? And a real mouse? Then you’d be ready to get some real work done.
In addition to the 4K HDMI port, this hub lets you power up with 100W pass-through charging (91W output), add a mouse and keyboard (or whatever you need) to the two USB 3.0 (5Gbps) ports, expand with SD and MicroSD ports, and tune out with the audio jack.
Hub and Stand in One
As a hub, you get port expansion. As a stand, you get solid aluminum construction that manages to be incredibly durable and still light enough to carry with you. But don’t let its potential for portability fool you, the UDS-7IN1 still has enough heft to hoist your iPad Pro 12.9. And the feeling of quality continues through to the hinges, too. With enough tension to stay put when you tap away at the screen, you might be surprised by the satisfying slide you experience when adjusting the stand for the perfect angle. And if you do decide to take it with you, the UDS-7IN1 folds flat enough to fit in your bag.

4K Display
A 4K 30Hz capable HDMI port lets you extend your tablet or DeX phone to the big screen.
Note: Samsung DeX can support 1600x900, 1920x1080, and 2560x1440 resolutions only

8-in-1
Get the full desktop experience from your mobile device with eight new ports, including 1x HDMI, 2x USB 3.0 (5Gbps), SD & MicroSD, and an audio jack.

Adjusts to You
A stand sturdy enough to stay in place when you’re tapping on your tablet’s screen, responsive enough for easy adjustment.

Compatibility
Windows 10+, iPad M1+ with iPadOS 16+ (iPadOS 16.1+ for Stage Manager), USB-C phones/tablets with DisplayLink Alt Mode, like the Samsung Galaxy S22.
Video
Port | Placement | Specification | Max Resolution and Refresh Rate | HDCP | Chipset |
---|---|---|---|---|---|
1x HDMI (Output) |
Rear | HDMI 1.4 | 3840x2160 @ 30Hz 3840x2160 @ 30Hz3840x1600 @ 30Hz 3440x1440 @ 30Hz 2560x1440 @ 60Hz 1920x1080 @ 60Hz 1600x900 @ 60Hz 1280x1024 @ 60Hz 1280x800 @ 60Hz 1280x720 @ 60Hz 1152x864 @ 60Hz 1024x768 @ 60Hz 800x600 @ 60Hz 640x480 @ 60Hz |
Host Dependent | AG9321 Algoltek |
Audio
Port | Placement | Connection | Max Bit Depth and Sample Rate | Signal Output | Channels | Chipset |
---|---|---|---|---|---|---|
Headphone Jack Bi-Directional |
Left | 3.5mm (TRRS) | 16-bit 48KHz | Analog | 2 |
Power
Port | Placement | Power Host / Device | Connection Type | Notes | Voltage | Amperage | Wattage |
---|---|---|---|---|---|---|---|
USB-C to Host | Rear | Host | USB-C Power Delivery 3.0 | When Self Powered (USB-C Power Adapter is Connected) | 20.0V | 5.0A | Up to 100.0W |
USB To Devices
Port | Placement | Version and Link Rate | Features | Voltage | Amperage | Wattage |
---|---|---|---|---|---|---|
2x USB-A | Left | USB 3.0 (5Gbps) | 5V | 900mA | 4.5W |
Connection To Host
Port | Placement | Version and Link Rate | Features |
---|---|---|---|
1x USB-C | Right | USB 3.0 (5Gbps) | Alternate Mode Video |
Included Cables
Port Type (Side 1) | Cable Specification | Port Type (Side 2) | Cable Length | External Power for Cable |
---|---|---|---|---|
1x Male USB-C (with DisplayPort Alt Mode) | USB 3.0 (5Gbps) | 1x Male USB-C (with DisplayPort Alt Mode) | 0.5m/1.6ft | No |
Compatible Systems |
Plug and Play installation on a tablet or phone which supports DisplayPort Alternate Mode (Alt Mode) video output functionality. Popular examples include:
Unsure if your device supports DisplayPort Alternate Mode? We're here to help! Please reach out to us at support@plugable.com |
Incompatible Systems |
Not recommended for use with the Nintendo Switch.
The UDS-7IN1 dock can be used with laptops, but using the stand with a laptop is not recommended. Google Pixel phones not supported at this time. |
Audio compatibility | The UDS-7IN1 is capable of providing audio over HDMI on TVs, projectors, and monitors with built-in speakers. |
Get Started
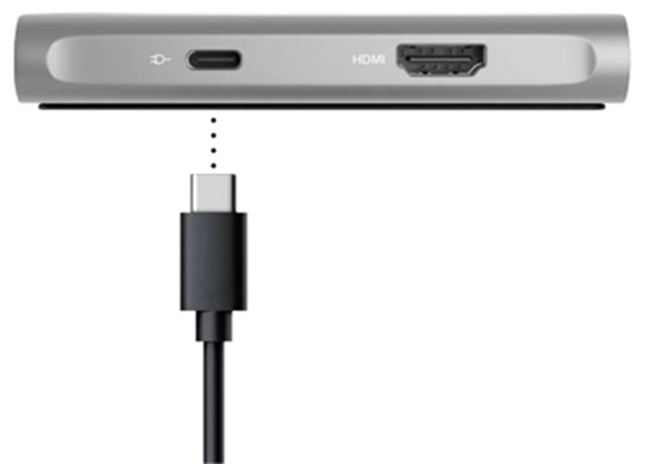
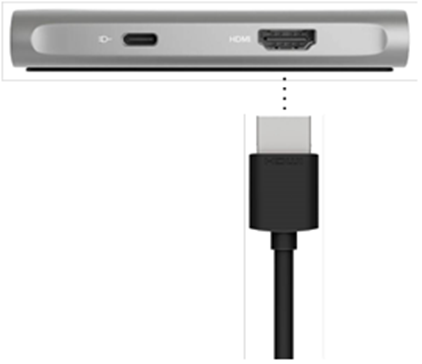
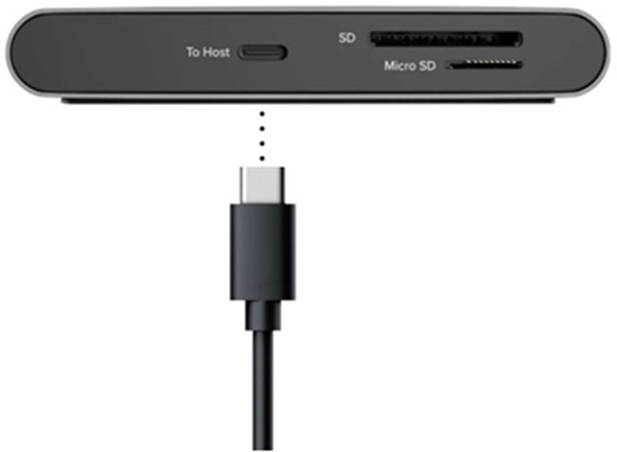
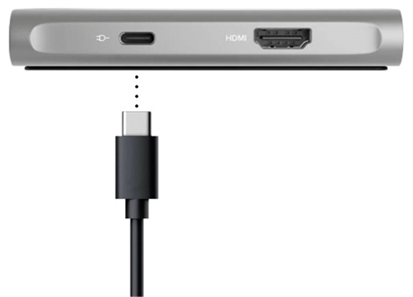
- Connect the hub to a USB-C port that supports video and charging on your tablet or phone.
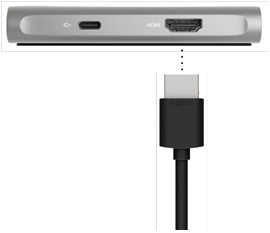
- Connect your USB peripherals, monitor, USB-C power adapter and SD/microSD card to the hub.
Note: Charging and HDMI output requires host device support for USB-C Power Delivery Charing and DisplayPort over USB-C Alternate Mode ("Alt Mode") standards.
Questions? We're here to help! Please reach out to us at support@plugable.com
Filter Help Articles and Frequent Questions by Category
Articles
Well how about that, it looks like we don't have any articles matching your filters! Try removing one of your choices or clear the filters to show all articles.
You can always contact support if you need help too!
USB Port Types
USB-A
pietz, CC BY-SA 3.0 , via Wikimedia Commons
This is the standard USB connection that most computers offered prior to the introduction of USB Type-C (USB-C). Even after the introduction of USB Type-C, this is still quite common.
It can provide data transfer rates up to the USB 3.1 Gen 2 (10 gbps) specification depending on the host and device, but does not directly support video in the way that USB-C Alternate Mode does. This limitation makes DisplayLink USB graphics adapters and docking stations ideal on systems that do not have USB-C, or in instances where more displays are needed beyond available video outputs of a PC.
USB-B
Fred the Oyster, CC BY-SA 4.0 , via Wikimedia Commons
IngenieroLoco, CC BY-SA 4.0, via Wikimedia Commons
This type of connection comes in a couple different styles depending on whether USB 3.0 and higher transfer rates are supported (bottom graphic). Usually this type of connection is used to plug into USB devices that do not have a fixed cable connected, such as USB docking stations, USB hubs, printers, and others.
USB Mini-B
Fred the Oyster, CC BY-SA 4.0 , via Wikimedia Commons
One of the first connectors for charging a smartphone, wireless game controller (such as the Sixaxis and DualShock 3), and other small devices such as external hard drives. Not commonly used today, but is still used in some cases. Most devices using USB Mini B are using USB 2.0, though a USB 3.0 variant does exist. This specification also added USB On-The-Go (OTG) functionality, though it is more commonly implemented with Micro USB.
USB Micro-B
Fred the Oyster, CC BY-SA 4.0, via Wikimedia Commons
IngenieroLoco, CC BY-SA 4.0 , via Wikimedia Commons
A smaller connector that serves many of the same uses as the Mini B connector, with added optional features such as Mobile High-Definition Link (MHL) to allow devices like smartphones to output video to larger displays without requiring a dedicated port for video output.
The larger variant of USB-B is most commonly used for external hard drives for higher 5Gbps transfer rates.
USB-C, Thunderbolt™ 3, and Thunderbolt™ 4
Niridya , CC0, via Wikimedia Commons
The most recent USB connection, USB Type-C (USB-C), represents a major change in what USB can do. The connector is smaller, can be connected in two orientations, is able to carry substantially more power and data, and can directly carry video signals of multiple types (HDMI, DisplayPort, etc.) Intel has also adapted the USB-C connector for use with Thunderbolt 3 and Thunderbolt 4.
It is important to note that while all Thunderbolt 3 and Thunderbolt 4 connections are USB-C, not all USB-C connections can be used with Thunderbolt 3 or Thunderbolt 4 devices.
More details regarding physical USB connections can be found on Wikipedia . The graphics depicted here are adapted from Wikimedia Commons by various artists under the Creative Commons Attribution-Share Alike 3.0 Unported license.
Does the HDMI 1.4 Port Support 4K Resolution at 60Hz?
No. The port complies with HDMI 1.4, and as such 3840x2160 (4K is only achievable at 30Hz. 2560x1440 and all lower resolutions will display at 60Hz.
Can I Connect a DisplayPort (DP) Monitor to the HDMI Port on This Device Using an Adapter or Cable?
No, this is not possible. Please note that DisplayPort to HDMI cables (as with most cables involving protocol/signal conversion) are not bidirectional adapters, which means they only work in one direction -- from a DisplayPort output to a HDMI input.
Connecting these type of cables backwards will not allow an HDMI output port (such as those on a dock) to function with a DisplayPort input on a monitor.
No Sound? How to Change Your Default Audio Device to Your Plugable Product
Whether you're on Windows, macOS, or Linux, it's common to add new audio devices to your computer.
Some examples of additional audio devices you may want to switch to include:
- Bluetooth headsets, headphones, and speakers
- Speakers built into a display, such as a TV or monitor
- A USB sound card, digital audio converter (DAC), or analog to digital converter (ADC)
- USB microphones
- Audio jacks on a docking station
These steps don't apply to the Plugable Performance NIX HDMI Capture Card (USBC-CAP60).
Here are the steps that you need to set a new default audio recording or output device on different operating systems.
Set Audio Output Device
Set Audio Recording Device
Set Default Playback Device in Windows
- Check that your device is properly connected, and that any necessary drivers are installed
- It is also a good idea to make sure that your sound device is turned on, and that the device's volume control is not at the absolute minimum setting
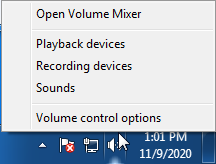
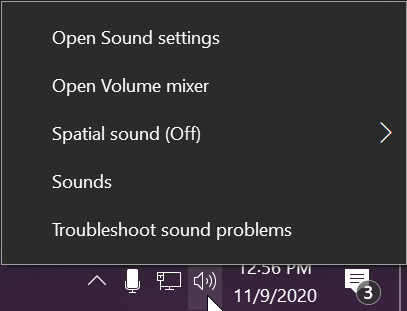
- Right-click on the speaker symbol in the Windows taskbar/system tray
-
Windows 7/8.x—Select Playback Devices. The Sound window will open with the Playback tab highlighted
-
Windows 10/11—Select Open Sound Settings then click the link under 'Related Settings' for Sound Control Panel, then click the Playback tab
- Alternatively, after selecting Open Sound Settings, use the dropdowns under the Output header
-
Windows 7/8.x—Select Playback Devices. The Sound window will open with the Playback tab highlighted
- Find your device in the window
- A Plugable USB 3.0 docking station or sound-enabled display adapter will appear as Plugable Audio
- A Plugable USB 3.0 Silicon Motion docking station or sound-enabled display adapter will appear as SMI USB Audio
- A Plugable USB 2.0 docking station will appear as USB Multimedia Audio Device
- A Plugable USB Audio adapter will appear as USB Audio Device
- Right-click on the device you found in step 3 and select Set as Default Device. A check mark should appear next to your device, and sound should now play through it
- Click OK to exit the window
Additional Configuration for Bluetooth
Please see our pairing and configuration guide for Bluetooth devices.
Set Default Playback Device in macOS
- Open System Preferences
- Click Sound
- Select Output
- Select the most appropriate device
- A Plugable USB Audio adapter will appear as USB Audio Device
Set Default Playback Device in Linux
- Ensure that you audio device is connected to the PC
- If the audio device is self-powered, it is a good idea to make sure that it is powered on, and that the device's volume control is not at the absolute minimum setting
- Launch the 'Settings' application in your distro
- Go to the 'Sound' option
- Find the dropdown for your 'Output Device', and change it to your preferred output device
- For additional sound device controls, you may want to consider using Pulseaudio Volume Controls (package name pavucontrol)
Set Default Recording Device in Windows
- Check that your device is properly connected, and that any necessary drivers are installed
- It is also a good idea to make sure that your sound device is turned on, and that the device's volume control is not at the absolute minimum setting
- Right-click on the speaker symbol in the Windows taskbar/system tray
-
Windows 7/8.x—Select Recording Devices. The Sound window will open with the Recording tab highlighted
-
Windows 10/11—Select Open Sound Settings then click the link under 'Related Settings' for Sound Control Panel, then click the Recording tab
- Alternatively, after selecting Open Sound Settings, use the dropdowns under the Input header
-
Windows 7/8.x—Select Recording Devices. The Sound window will open with the Recording tab highlighted
- Find your device in the window
- A Plugable USB 3.0 DisplayLink docking station or sound-enabled display adapter will appear as Plugable Audio
- A Plugable USB 2.0 docking station will appear as USB Multimedia Audio Device
- A Plugable USB Audio adapter will appear as USB Audio Device
- Right-click on the device you found in step 3 and select Set as Default Device. A check mark should appear next to your device, and sound should now play through it
- Click OK to exit the window
Additional Configuration for Bluetooth
Please see our pairing and configuration guide for Bluetooth devices.
Set Default Recording Device in macOS
- Open System Preferences
- Click Sound
- Select Input
- Select the most appropriate device
- A Plugable USB Audio adapter will appear as USB Audio Device
Set Default Recording Device in Linux
- Ensure that you audio device is connected to the PC
- If the audio device is self-powered, it is a good idea to make sure that it is powered on, and that the device's volume control is not at the absolute minimum setting
- Launch the 'Settings' application in your distro
- Go to the 'Sound' option
- Find the dropdown for your 'Input Device', and change it to your preferred input device
- For additional sound device controls, you may want to consider using Pulseaudio Volume Controls (package name pavucontrol)
My Docking Station/Adapter Works Well With My Windows Laptop, but When I Close the Lid the Displays and Laptop Turn Off or Sleep. How Do I Fix This?
Most Windows notebook computers power management settings will default to putting the computer to sleep with the lid closed, regardless of any external displays, keyboard, or mouse connected to the computer. If this is happening but you would prefer the system to remain active with the lid closed utilizing the external display or displays, these settings can be changed by performing the following:
For Windows 10:
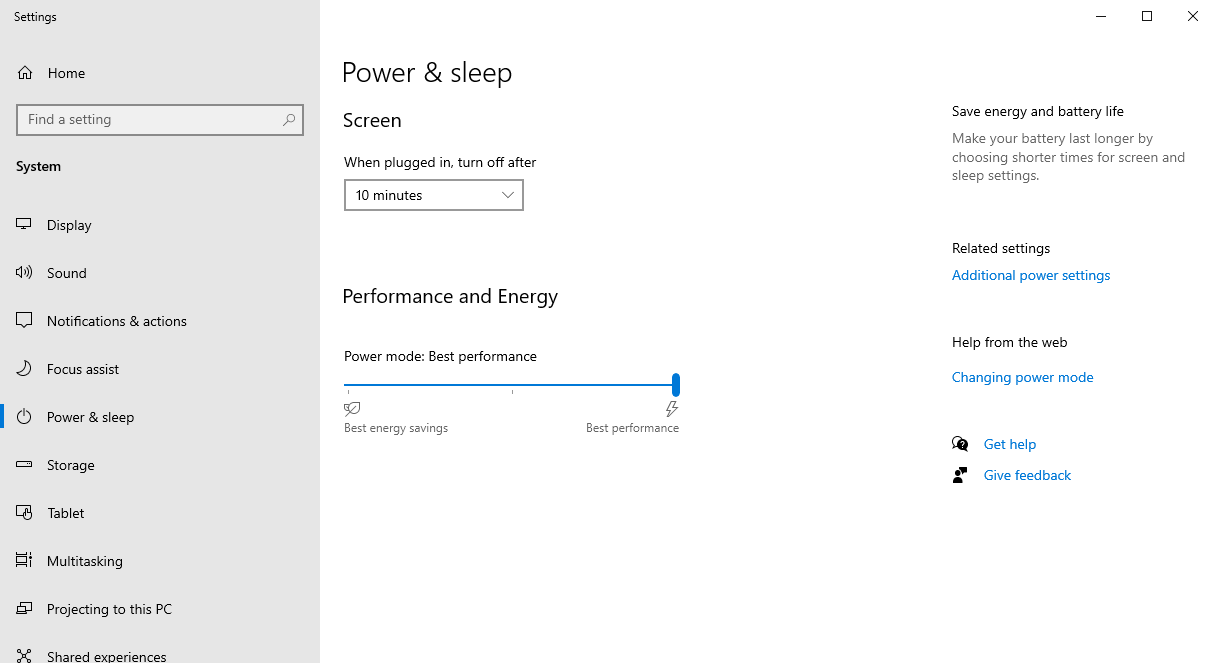
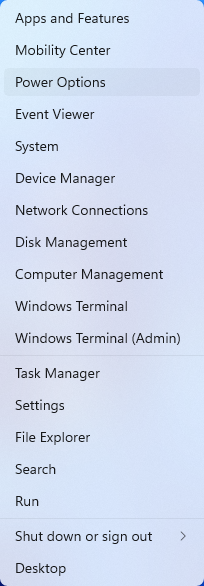
- Start by right-clicking on the Start button and select Power Options from the menu.
- From the right side of the Power Options settings page, select the blue link for Additional power settings
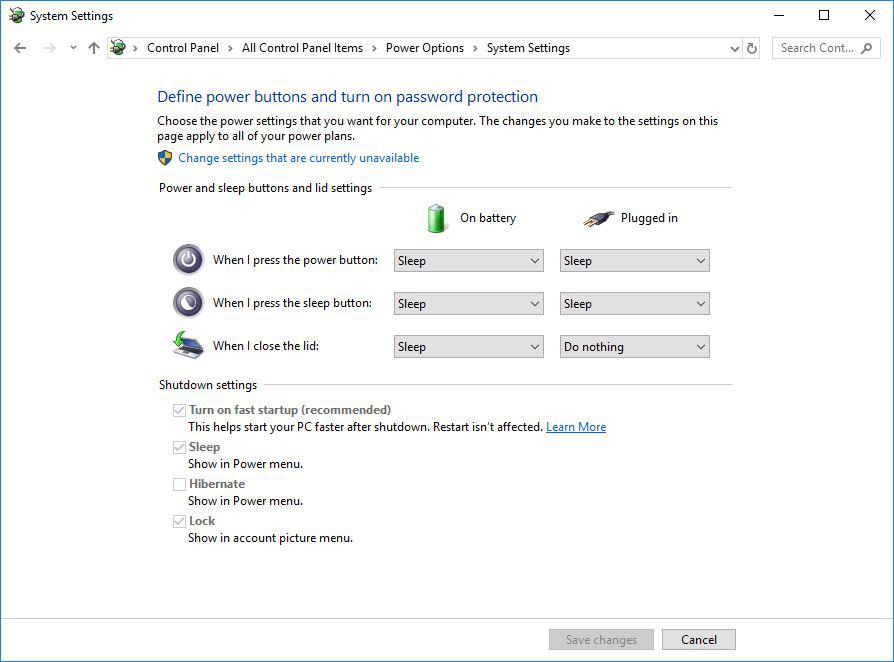
- From the choices present on the left-hand side of the Power Options window, please click on Choose what closing the lid does
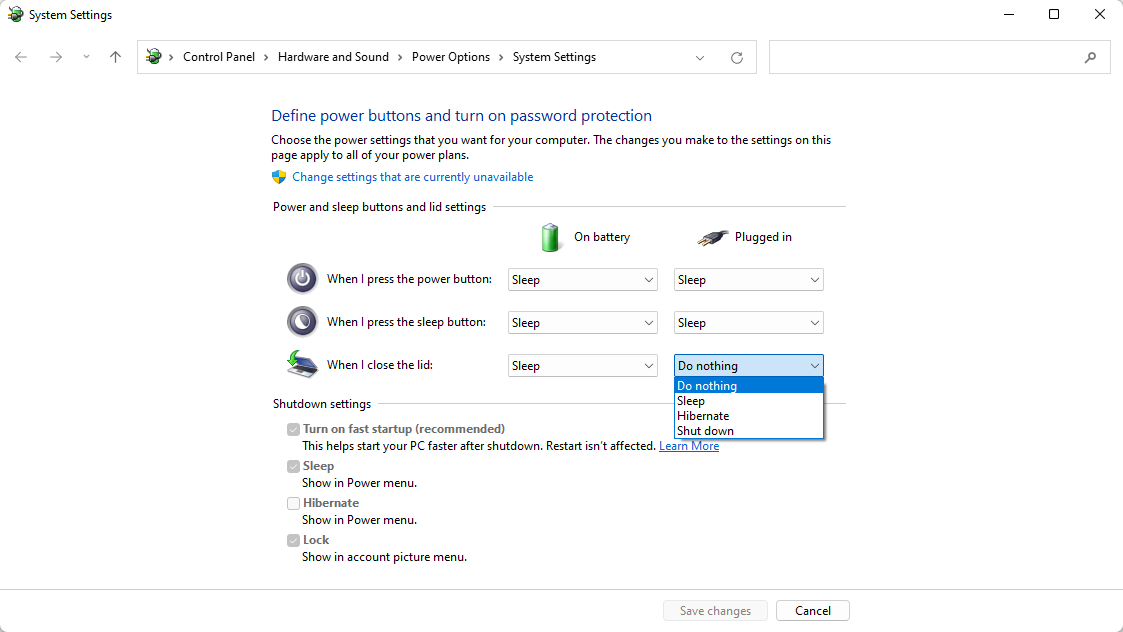
- Make sure the setting for When I close the lid under the Plugged In column is set to Do Nothing
- Click the Save Changes button and restart the system (making sure that the laptop’s power adapter is also connected) and test the behavior again.
For Windows 11:
- Start by right-clicking on the Start button and select Power Options from the menu.
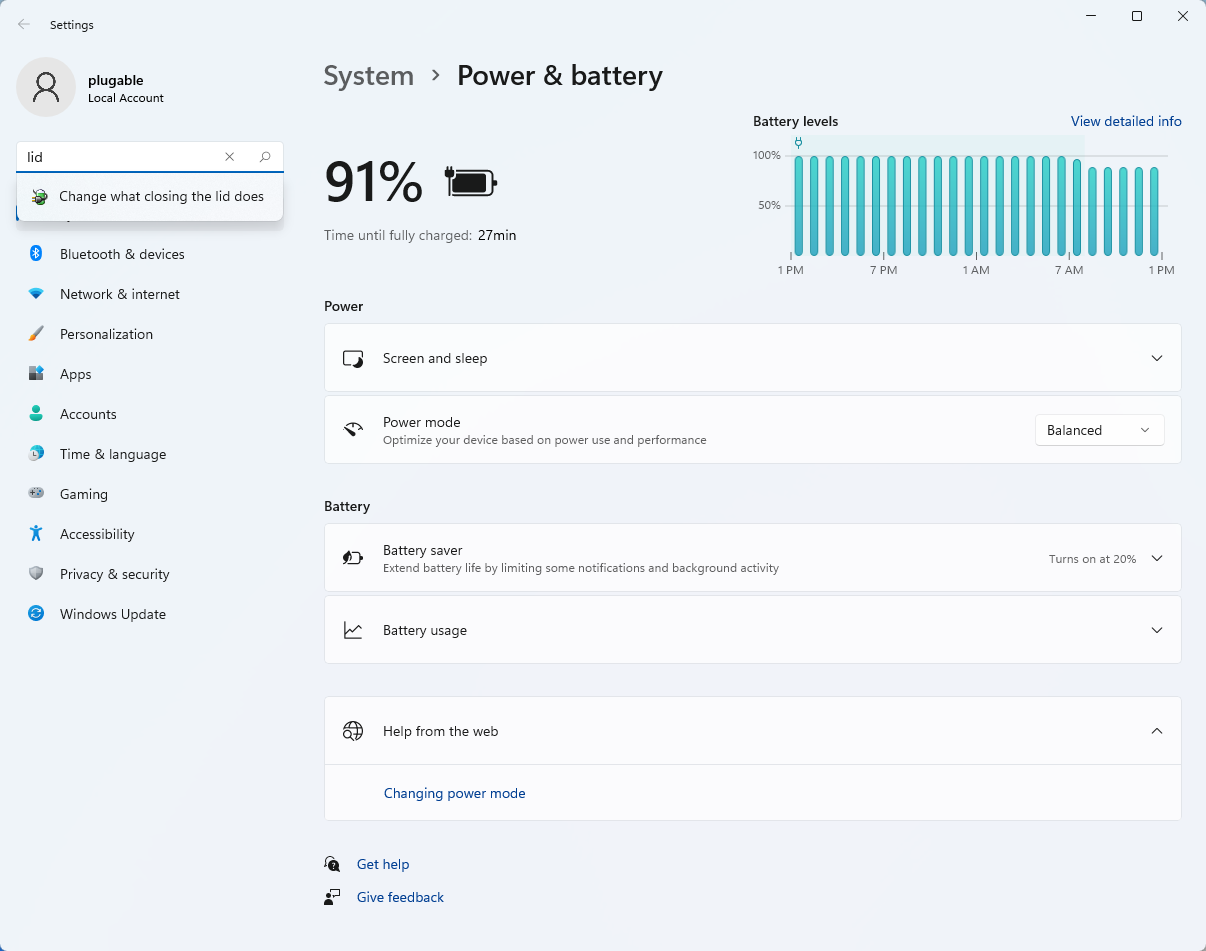
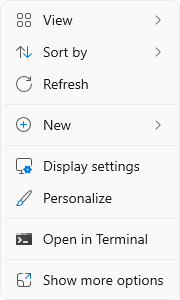
- In the upper left corner of the settings window, in the search box, type "lid" then select Change what closing the lid does from the search results
- Make sure the setting for When I close the lid under the Plugged In column is set to Do Nothing
- Click the Save Changes button to apply the new settings.
Closing the lid should no longer put the computer into sleep mode when an external display and power source is connected, instead one of the external displays should now become the Primary display with the desktop icons instead of the laptop's built-in display.
The lid may still need to be opened to perform the following tasks:
- To power on the computer from a fully powered off state
- To log into the computer if logged out or if the computer is restarted with the lid closed
- To wake the computer from a deep sleep state ( hibernation, or Windows hybrid sleep states )
My Windows Laptop Will Not Boot Properly When My Docking Station Is Connected
If your Windows laptop will not boot properly when a docking station is connected to the laptop, most often the cause is an external device connected to the docking station (for example an external USB storage drive) as opposed to the dock itself.
If you are affected by this condition, please follow these steps in order to isolate the behavior further:
- Disconnect all USB devices from the docking station and put them aside for the moment.
- Disconnect any displays connected to the dock's video outputs.
- Disconnect any audio devices connected to the dock's audio ports (if present).
- Disconnect the Ethernet network cable from the dock's Ethernet port (if present).
- The only remaining connections should be the dock's power adapter cable and the USB cable used to connect it to the laptop. No other external devices should be connected to the dock.
- While in this state, reboot the laptop to test the behavior.
- Assuming the laptop boots as expected, please reconnect each device back to the dock one at a time and reboot after each one to test the behavior again. Please reconnect the displays first, then the audio devices, then the Ethernet cable. Please reconnect any USB devices to the dock last, again rebooting after each one is added to test the behavior.
In our experience helping others, the most common cause of this behavior is an external USB storage drive connected to one of the dock's USB ports. In some cases, a laptop may try to boot from an external storage drive by mistake as opposed to the laptop's built-in storage drive. Since most external USB storage drives are not 'bootable', this can interrupt the boot process.
If this behavior occurs, the most common way to mitigate the behavior is to access the laptop's System BIOS (also known as UEFI firmware) to change the 'boot order' settings to ensure that the laptop's internal storage drive is the first boot option. Doing so helps ensure that the laptop will not try to boot from an external USB storage device.
Every laptop system is different, so the best resource for accessing the System BIOS and changing the settings is the manual for the laptop provided by the laptop manufacturer.
Replacement Docking Station Power Adapters
Below is a list of pre-tested power adapters and corresponding power prongs/cables for Plugable docking stations that can be purchased on eBay if a replacement is needed.
If the power adapter for your docking station or region is not listed or if it out of stock on eBay please contact us at support@plugable.com and we will be happy to assist further.
We offer a 30-day return period for our replacement power adapters listed on eBay.
Dock Models | Power Supplies |
---|---|
UD-3900 UD-3000 UD-5900 UD-PRO8 |
North America plug EU plug UK plug |
UD-3900Z | |
UD-3900H |
North America plug |
UD-6950Z | |
UD-6950H |
North America plug |
UD-6950 | |
UD-3900PDZ | |
UD-CA1 UD-CA1A |
|
UD-ULTCDL (MK1/Legacy version) | |
UD-ULTCDL (MK2/Updated version) |
|
UD-ULTC4K |
North America plug |
TBT3-UDV |
North America plug Australia plug EU plug UK plug |
TBT3-UDZ | |
TBT3-UDC1 | |
TBT3-UDC3 |
|
TBT4-HUB3C | North America plug |
USB4-HUB3A | North America plug |
My Plugable Dock Is Missing a Component Such As the Power Supply, USB Cable, or Other Adapter.
If your package is missing one or more of the items that should be included with your Plugable dock (included items are listed on a chart on the side of the box), start by double checking if the part is still in the packaging. Pieces can occasionally get stuck in the corners under the main insert in the box.
If you are still unable to locate the piece, please contact support@plugable.com with the following information:
1. Amazon Order ID (or other proof of purchase) associated with your Plugable device.
2. A description of the parts that are missing from your order.
3. Your preferred shipping address (and a phone number associated with that address).
4. The serial number of your Plugable Dock.
Can I Connect My High Refresh Rate Monitor (e.g. 120Hz, 144Hz) to a Plugable Dock?
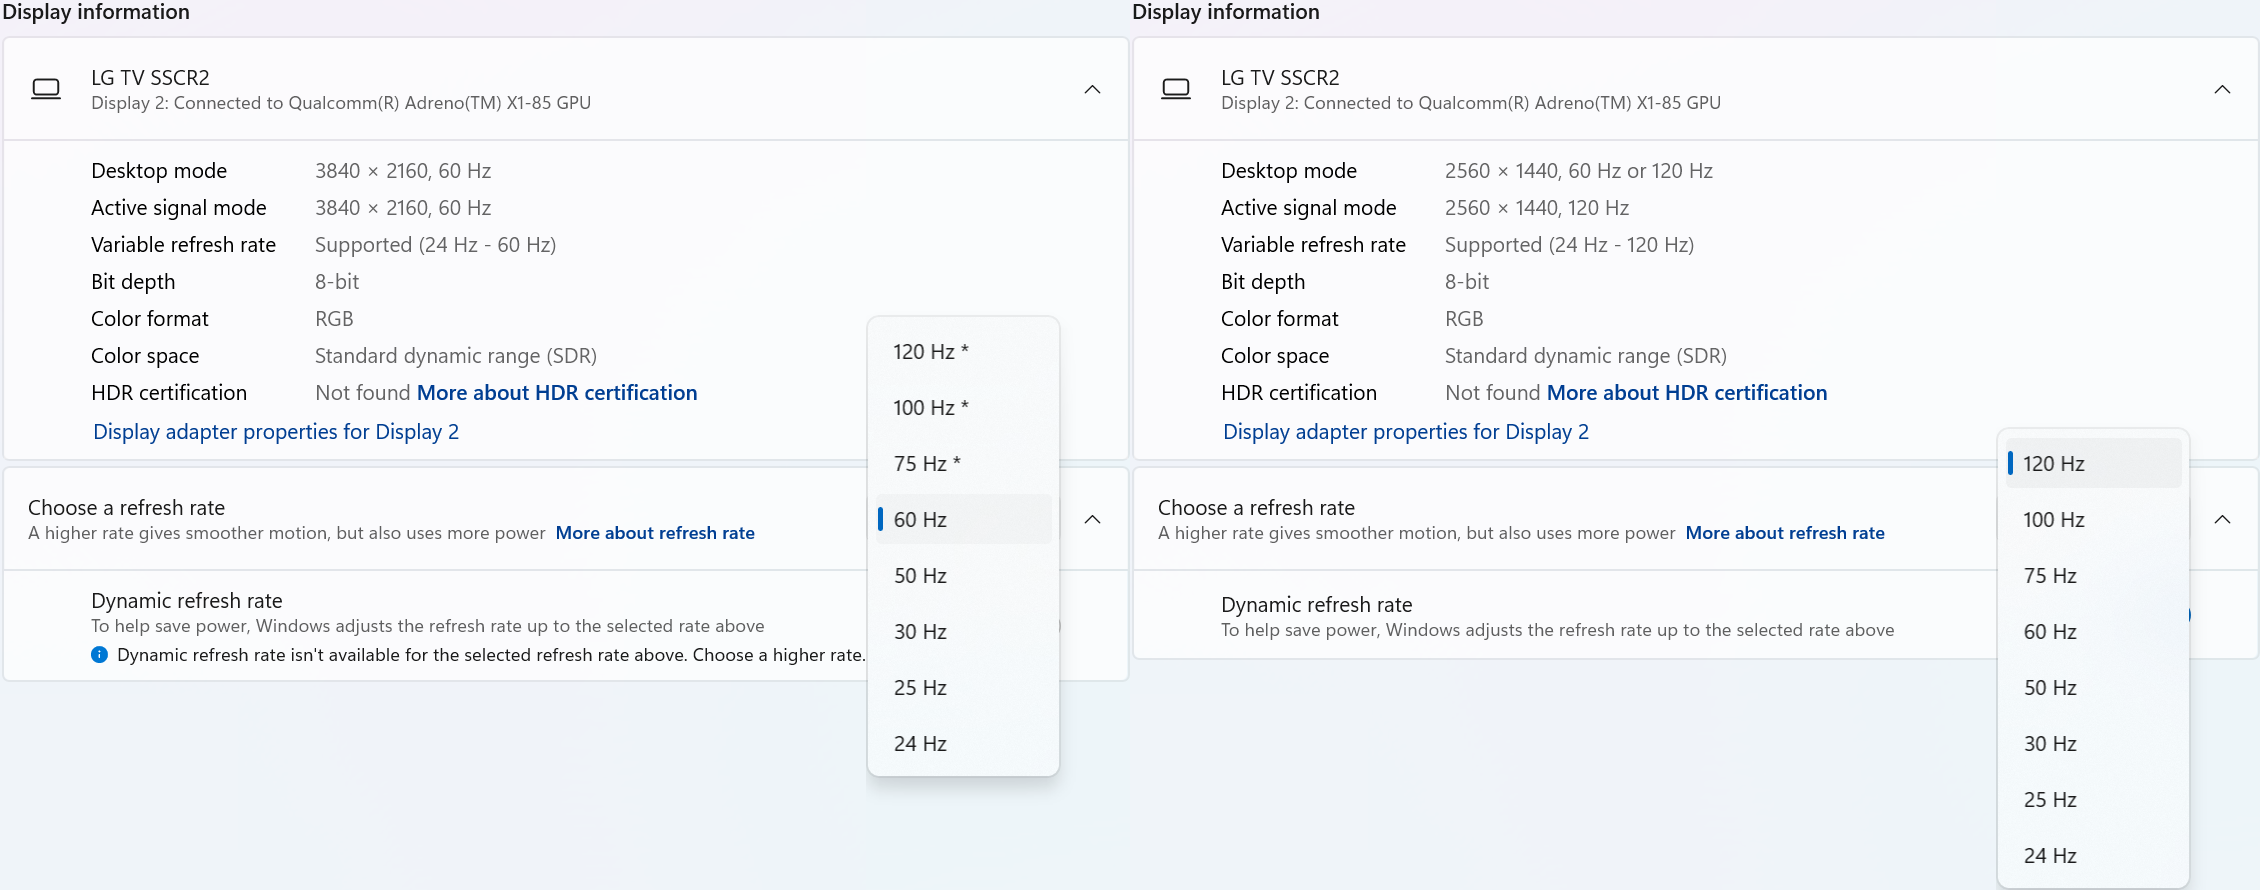
Plugable docks do not officially support monitors with a 120Hz or 144Hz refresh rate (only 30Hz or 60Hz depending on the product).
Monitors with refresh rates higher then 60Hz should be connected to a video output directly on the computer to ensure the display is powered by the system's native GPU.
Do Plugable products support the Apple SuperDrive?
Unfortunately Plugable products do not support the Apple SuperDrive.
The Apple SuperDrive has stringent power requirements that can only be met by directly connecting the SuperDrive to your host laptop. As a result at this time Apple recommends only using their USB-C adapter cables. You can find more information on that here -→ How to connect the Apple USB SuperDrive
If you have purchased a Plugable product to use with your Apple SuperDrive, and would like some additional assistance please do not hesitate to reach out. You can do so by emailing support@plugable.com, or going to Plugable.com/Support.