Hassle free, 2-Year Warranty
Fast, Free Shipping on Orders $35+
Lifetime Technical Support
30-Day Money Back Guarantee
Plugable USB 3.0 Wi-Fi 6 AX1800 Wireless Adapter
$39.95 USD
SKU: USB-WIFIAXAmazon Rating : (37 Reviews)
Features
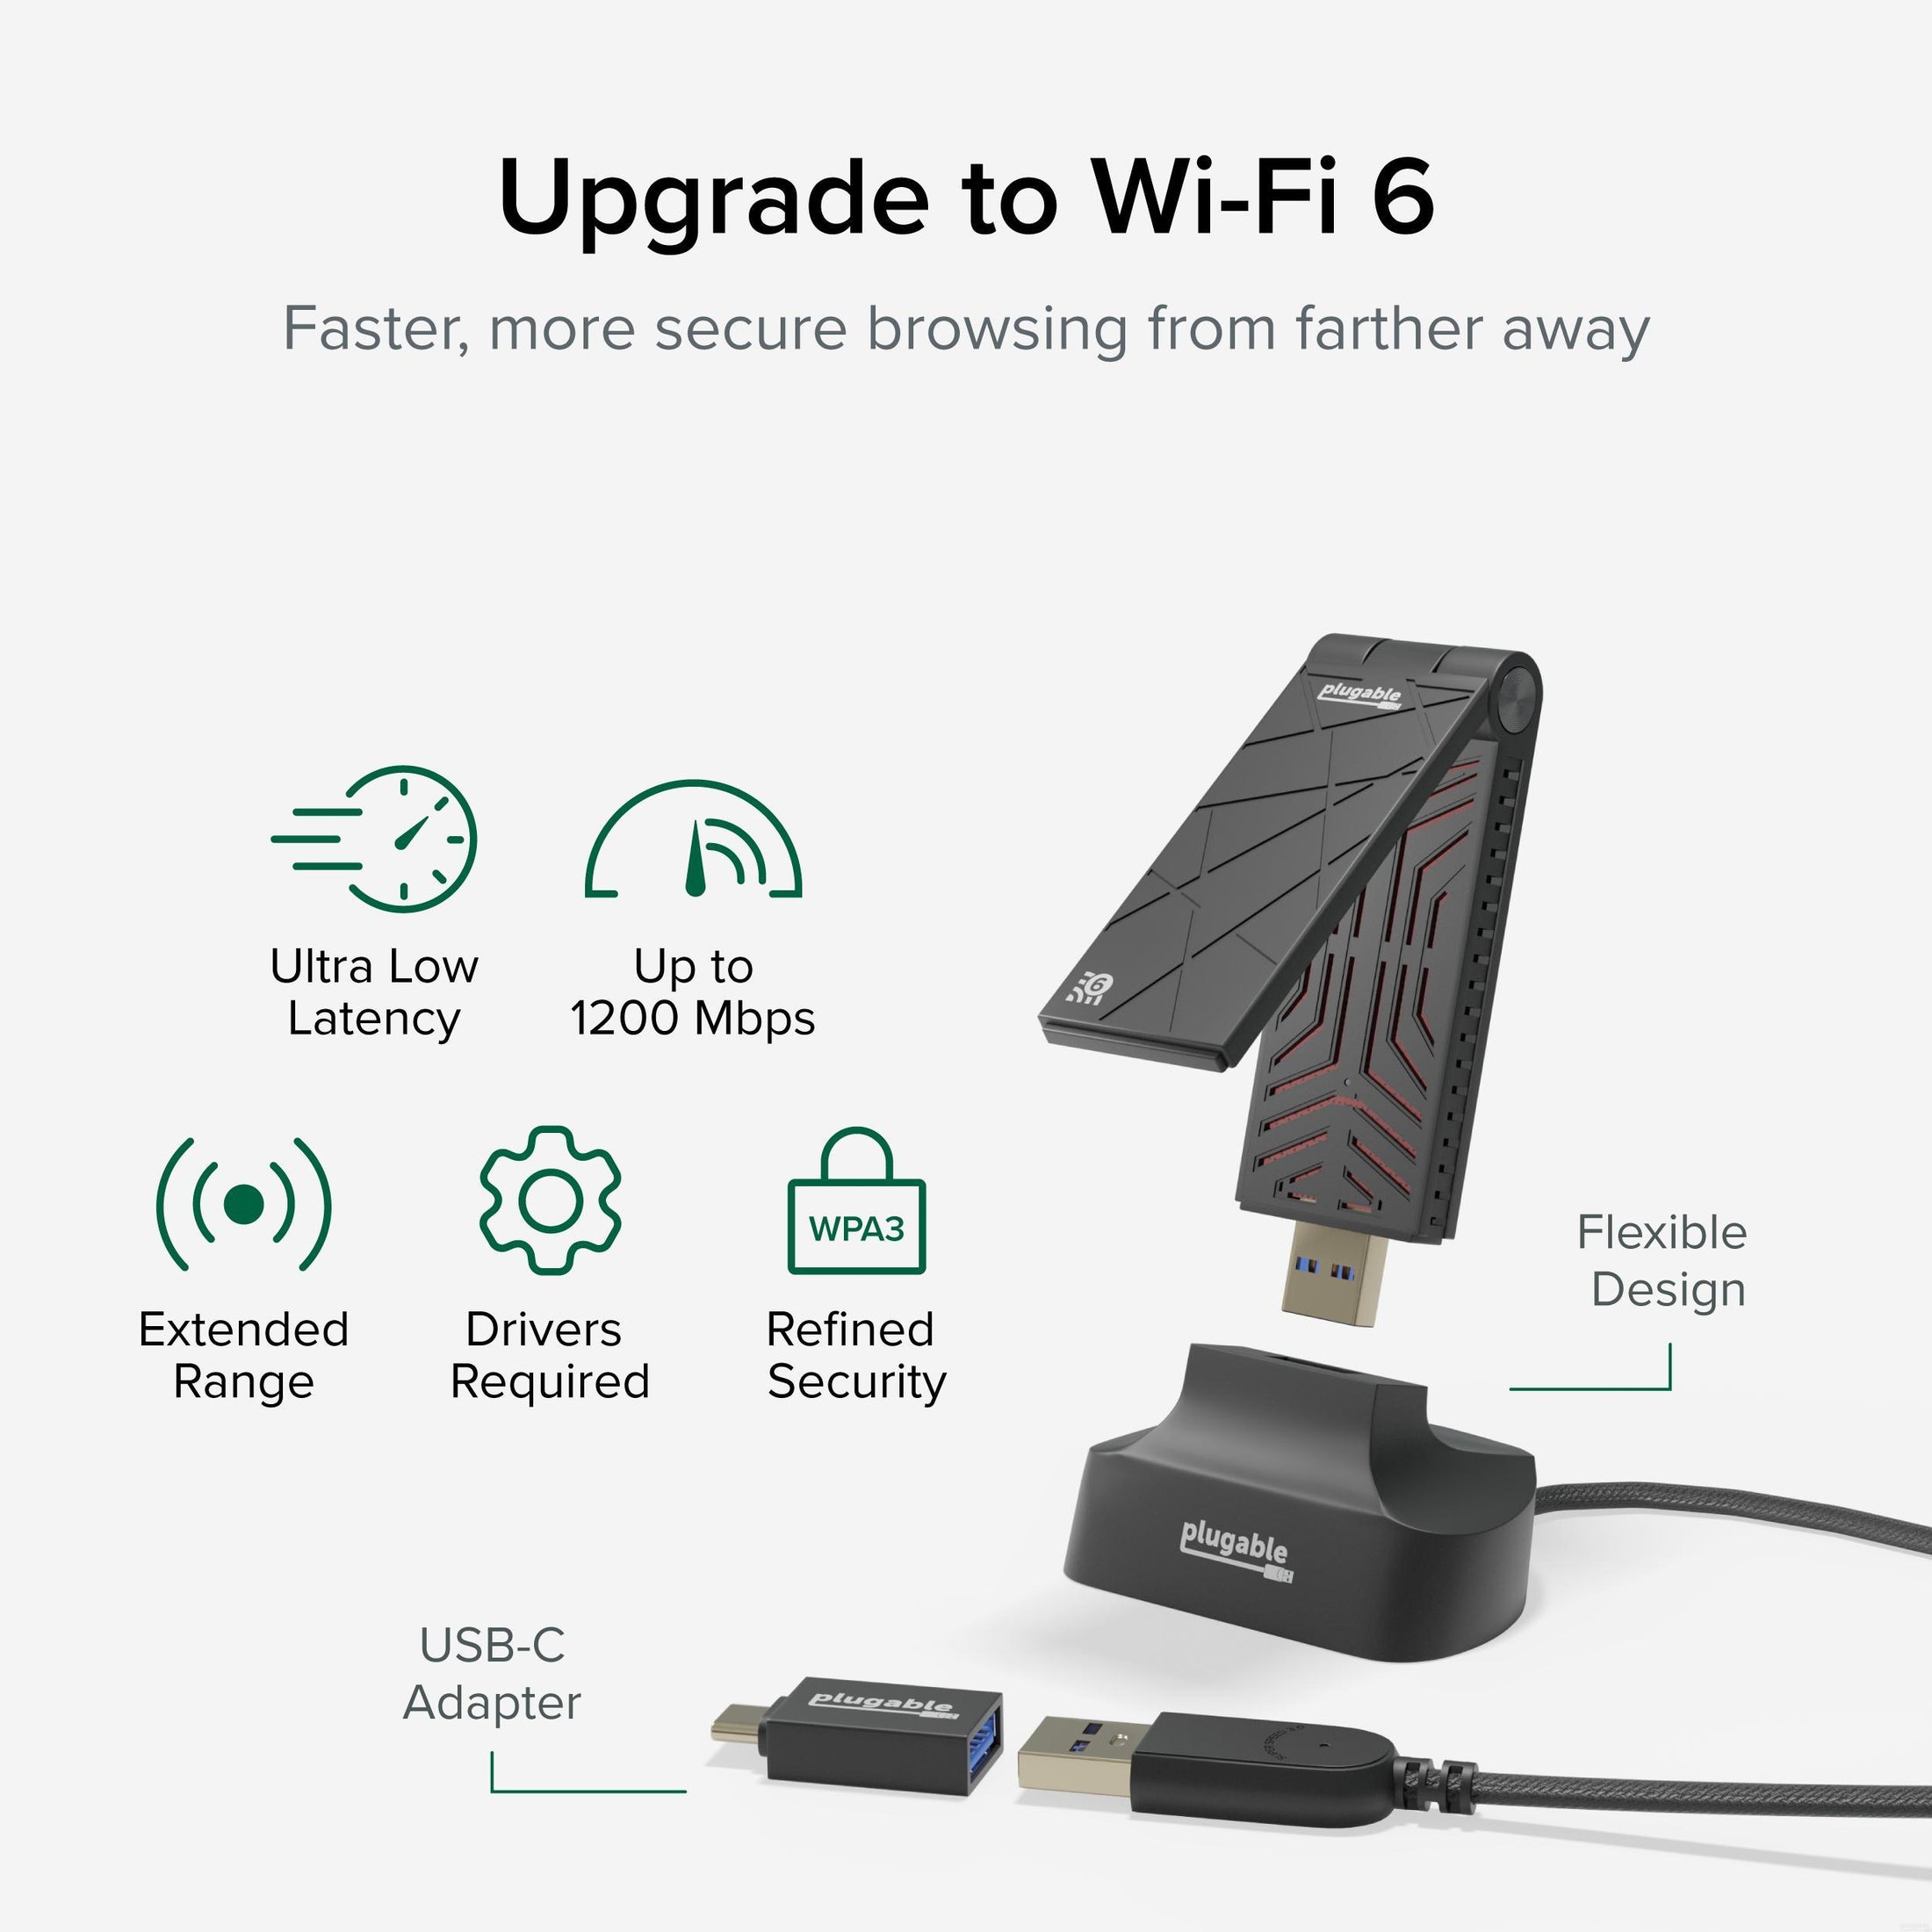
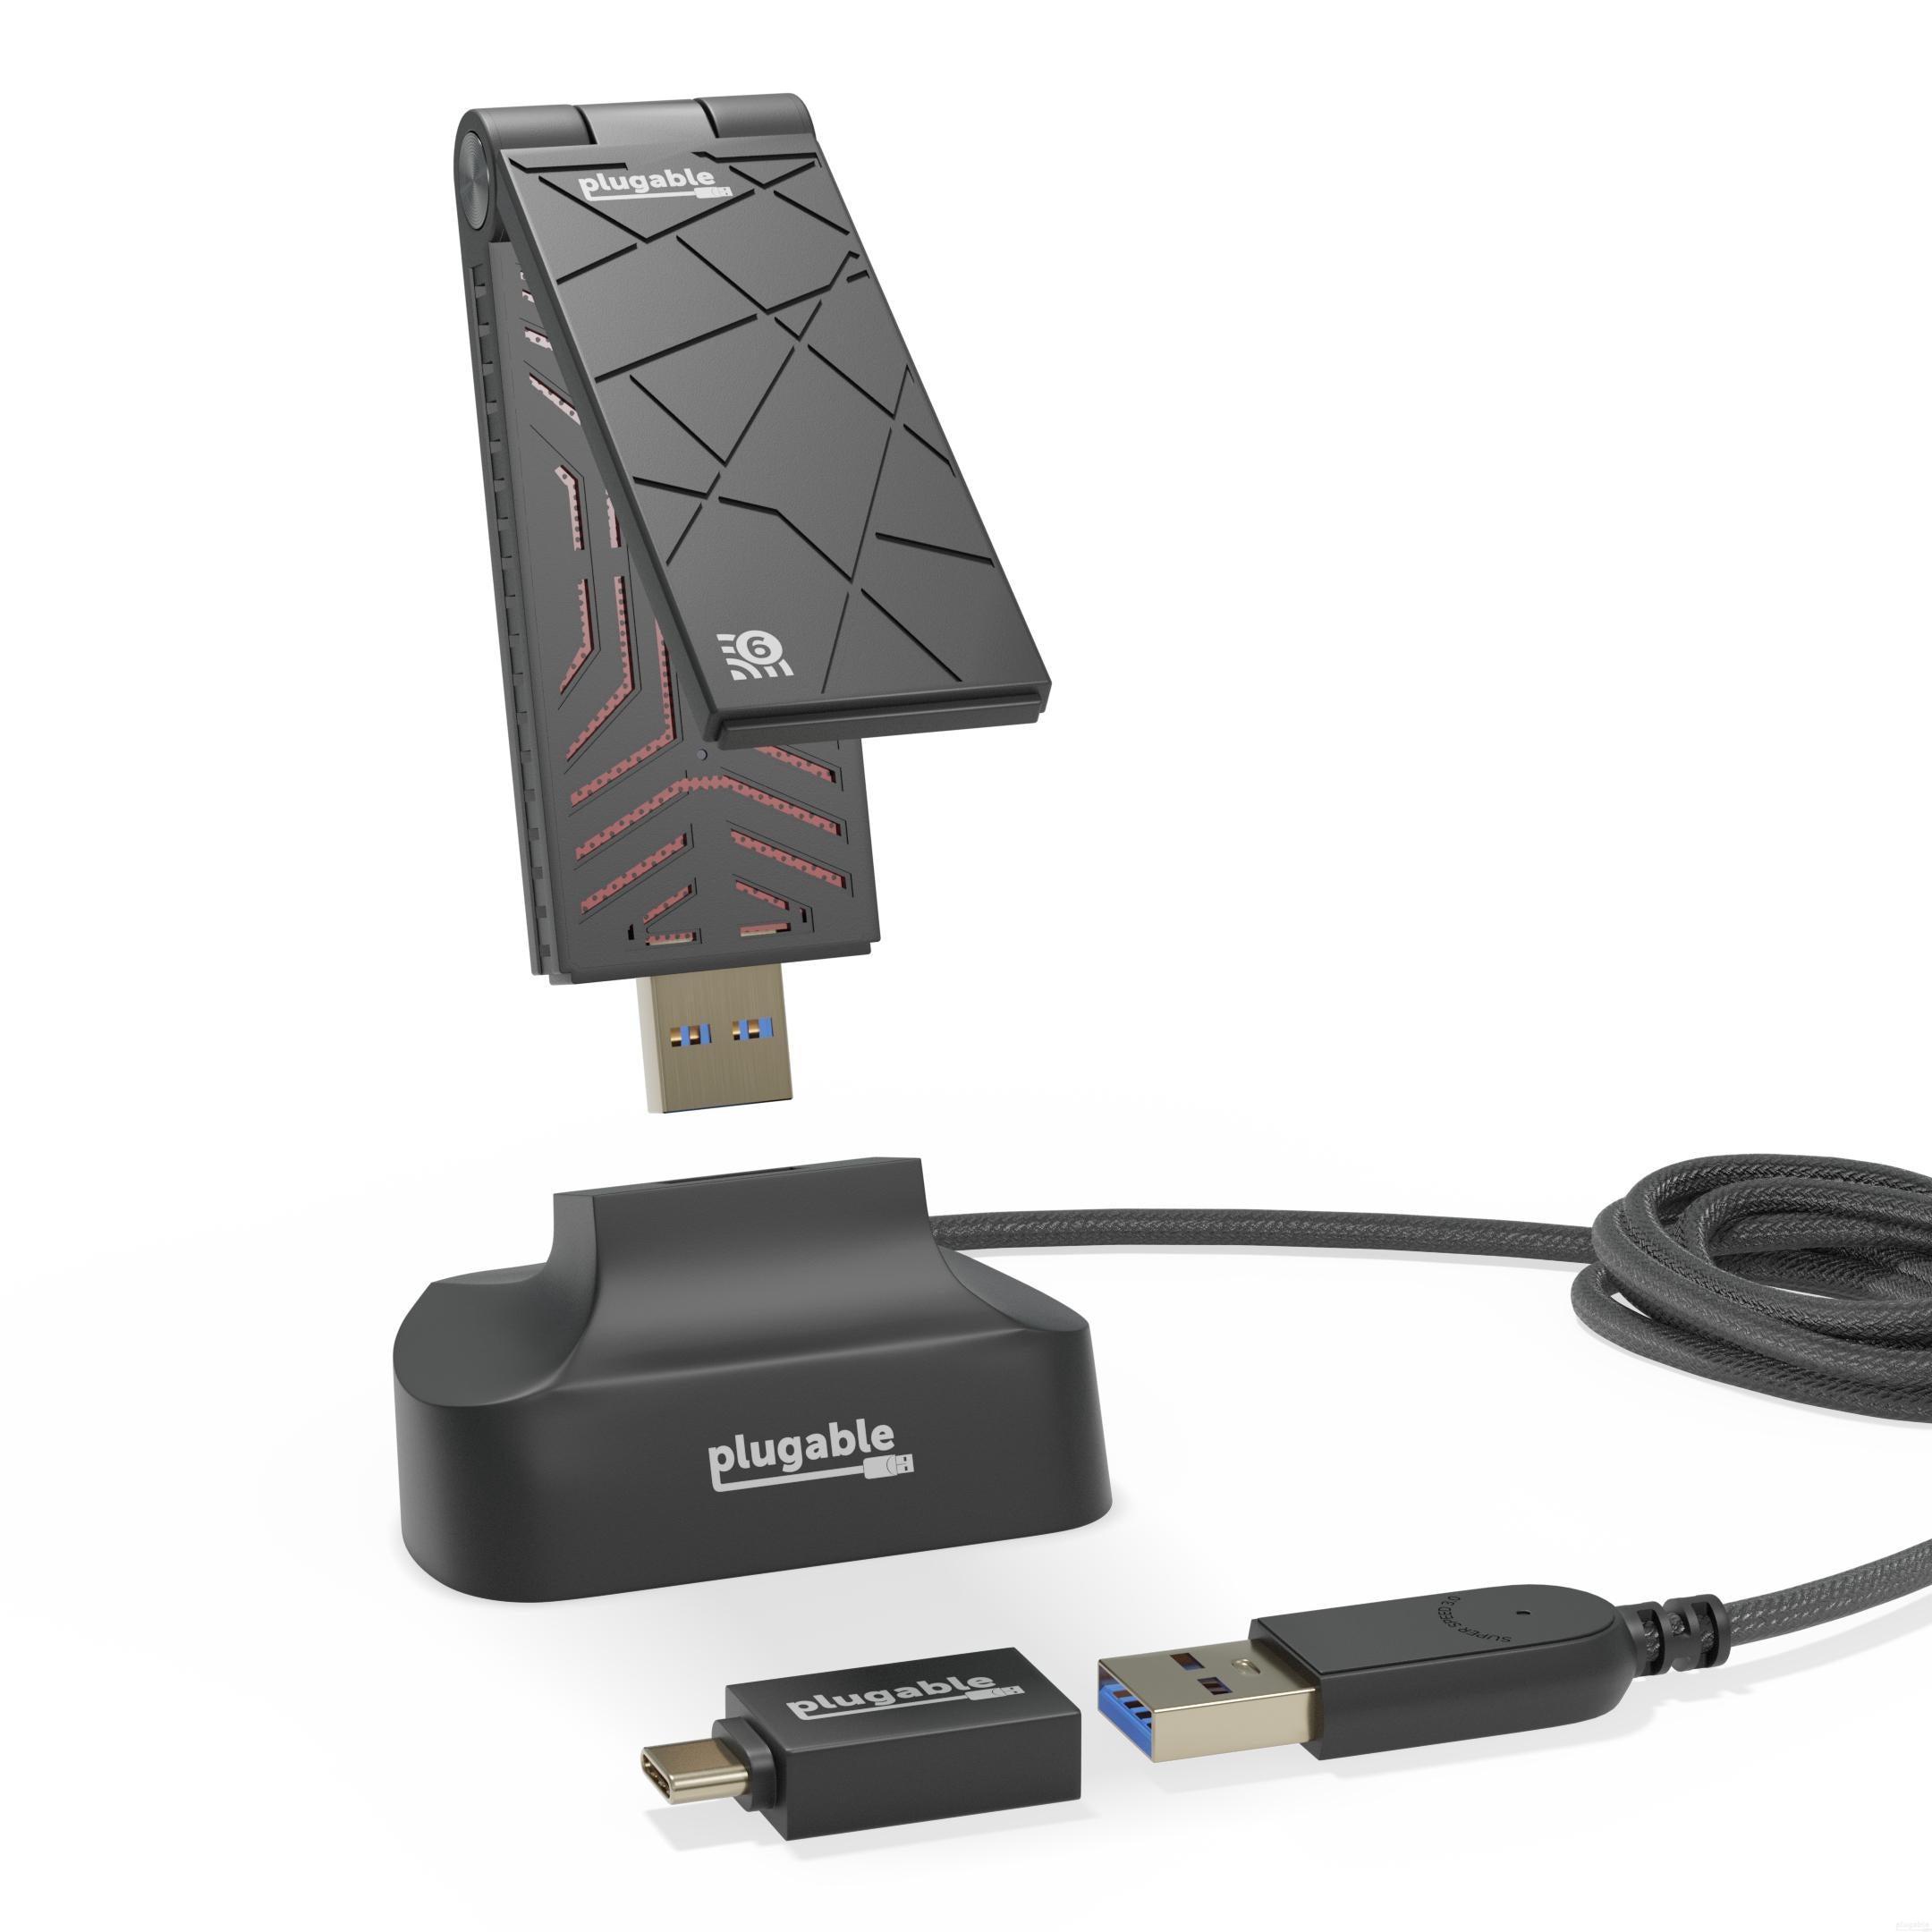
- Wi-Fi Upgraded—This Plugable Wi-Fi USB adapter for PC connects to the USB port on your computer (USB-A to USB-C adapter included). Upgrade to Wi-Fi 6 on systems with an older, slower PC Wi-Fi antenna, or no antenna at all. Perfect for folks building a PC
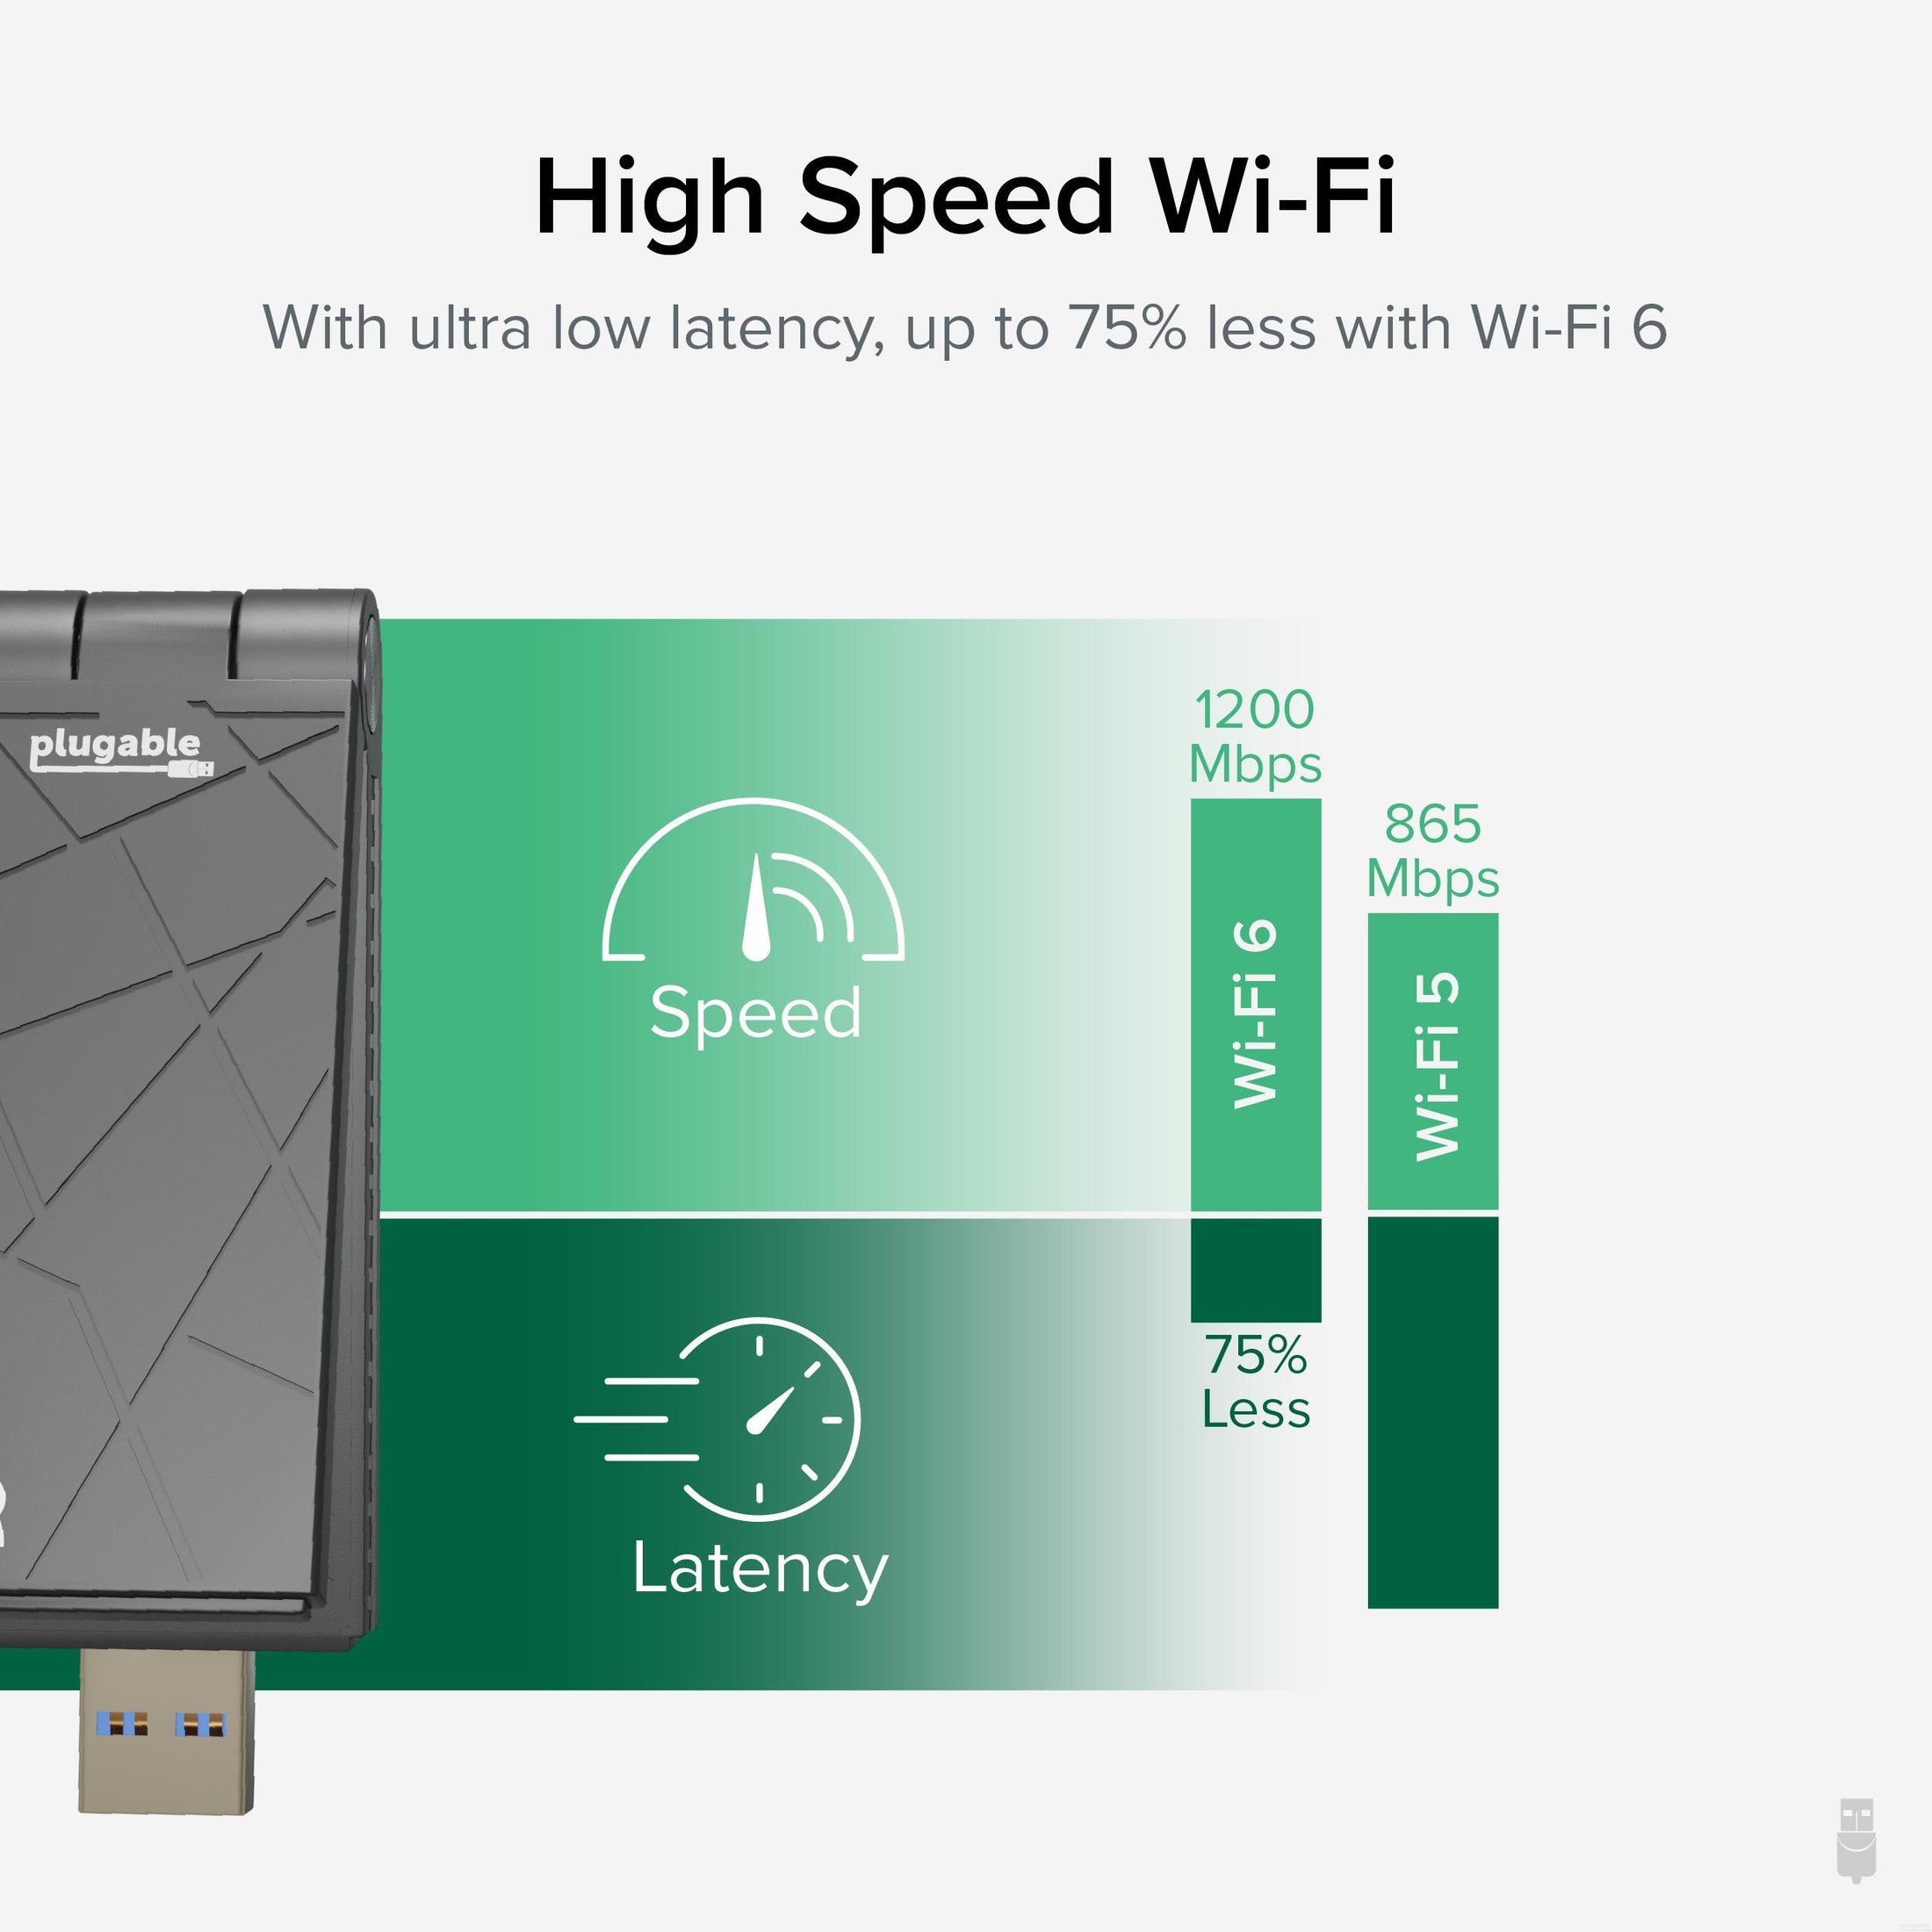
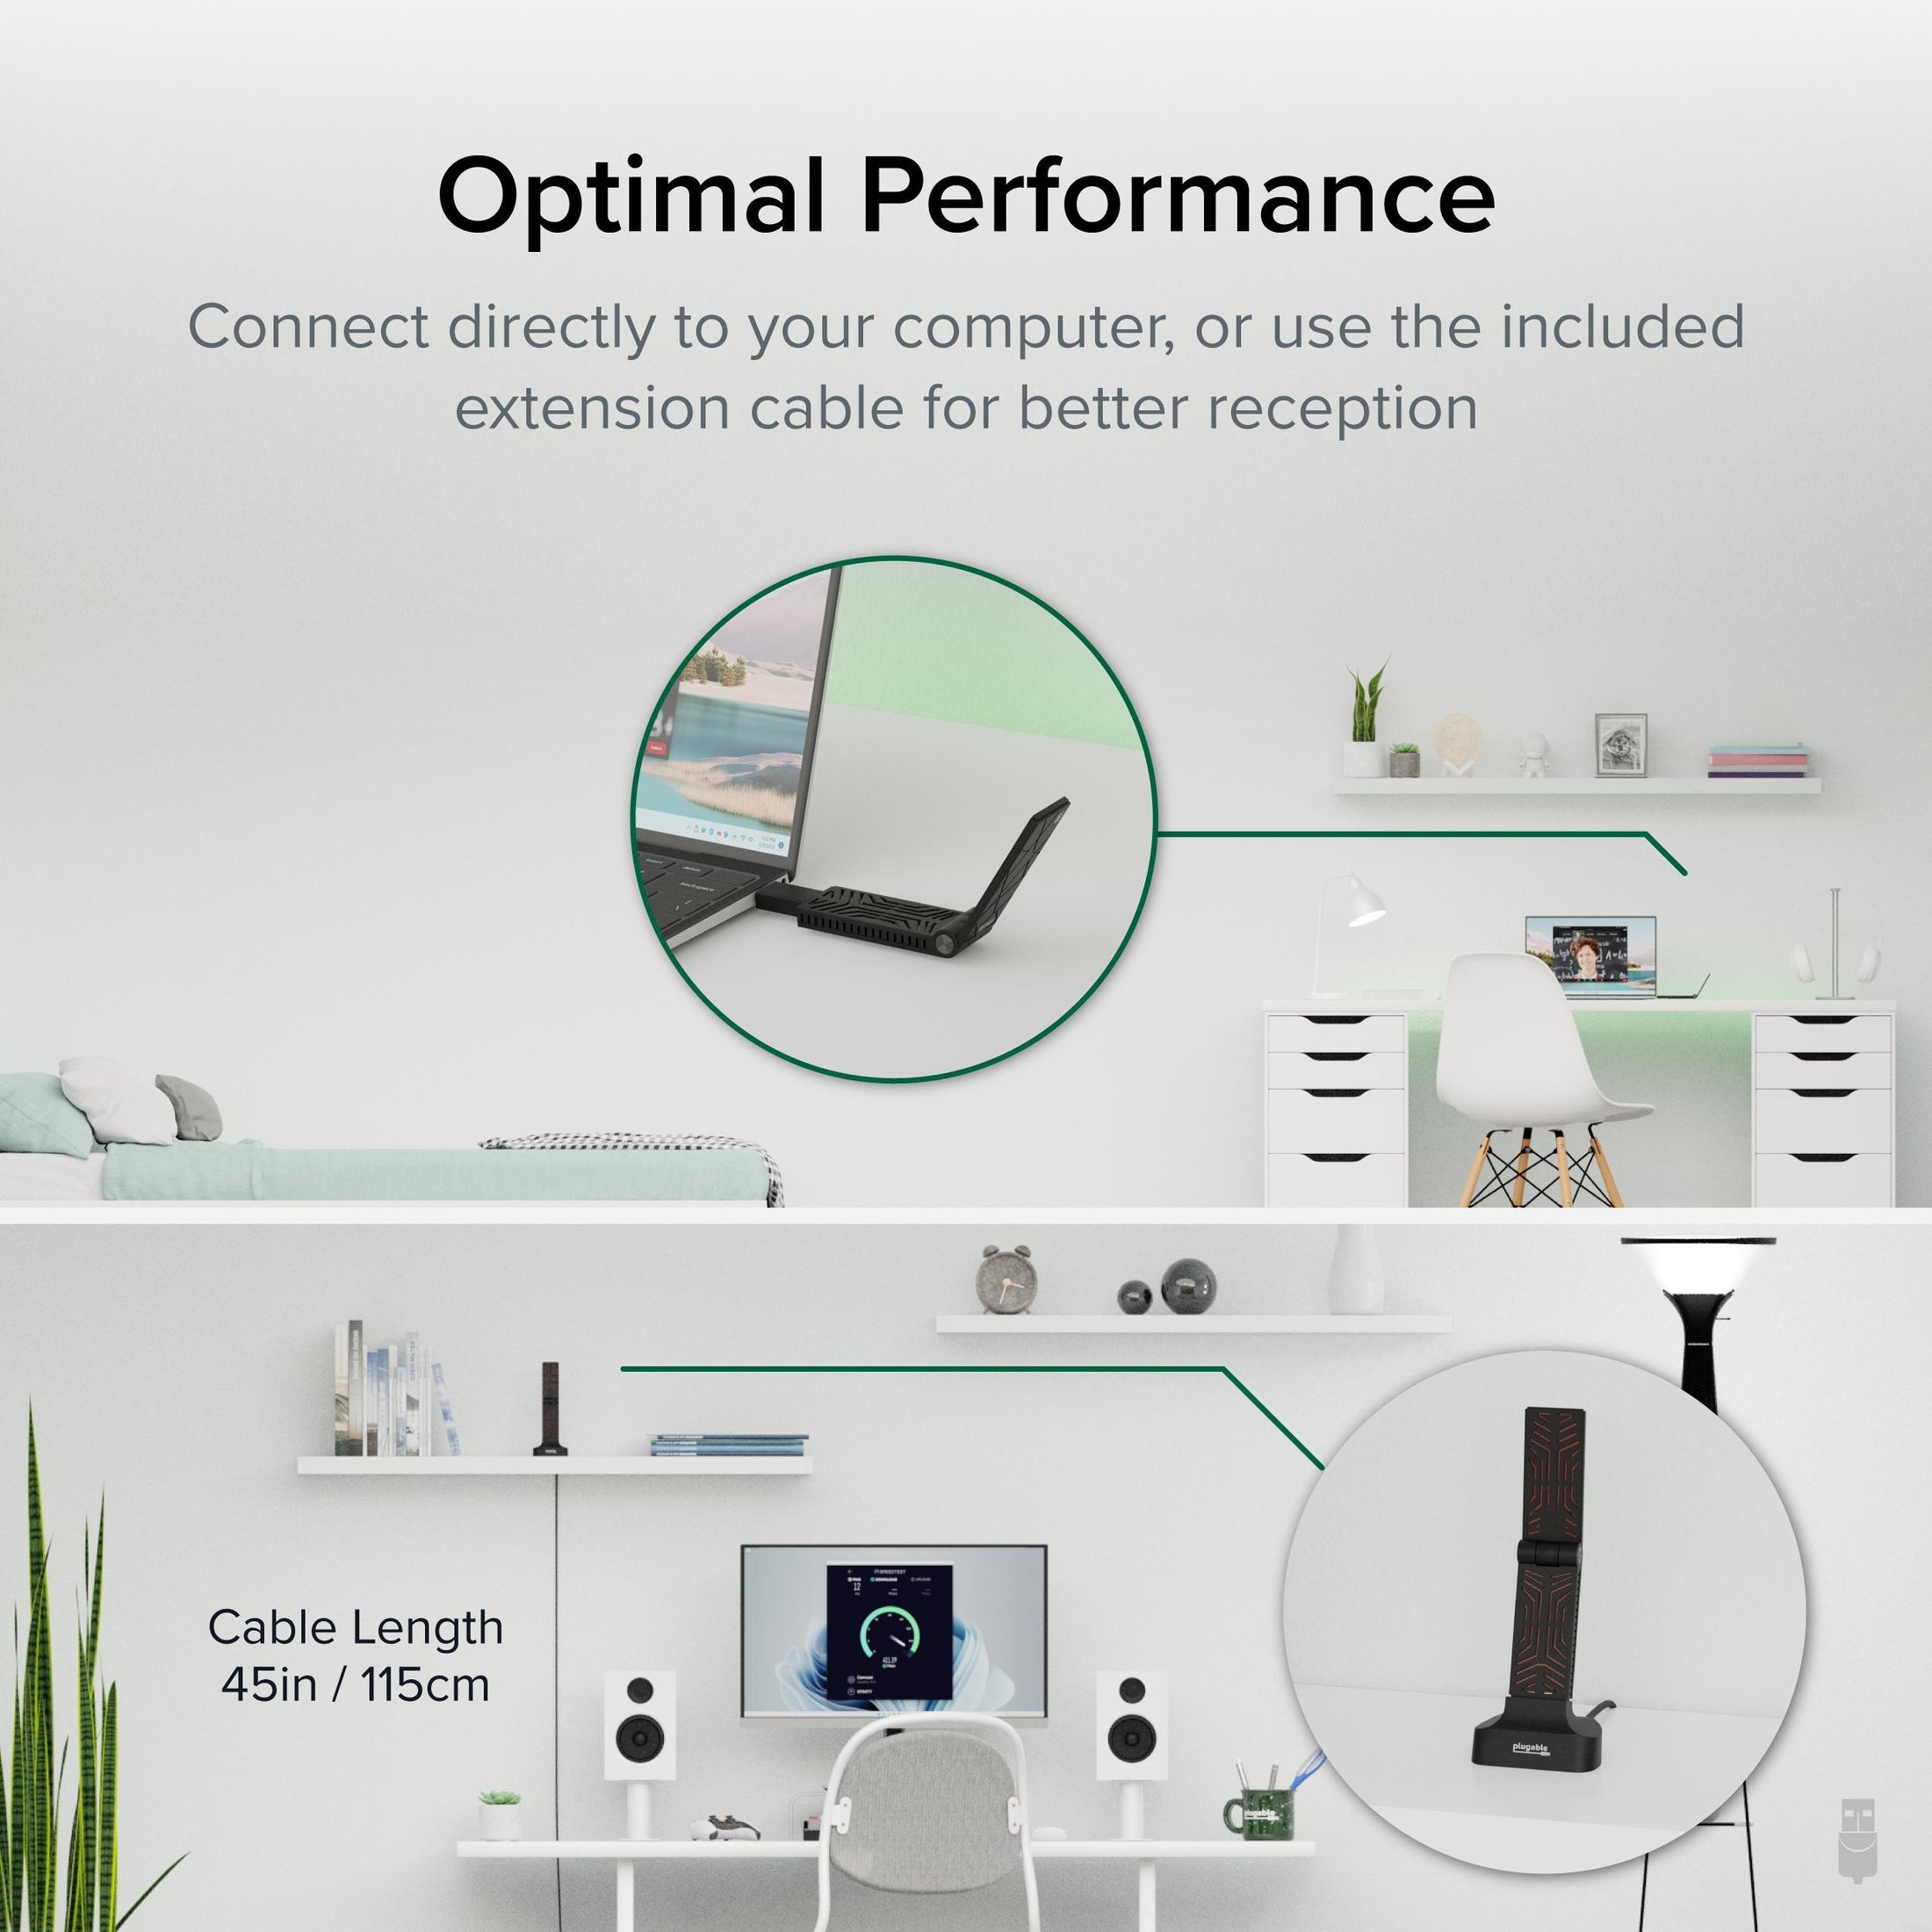
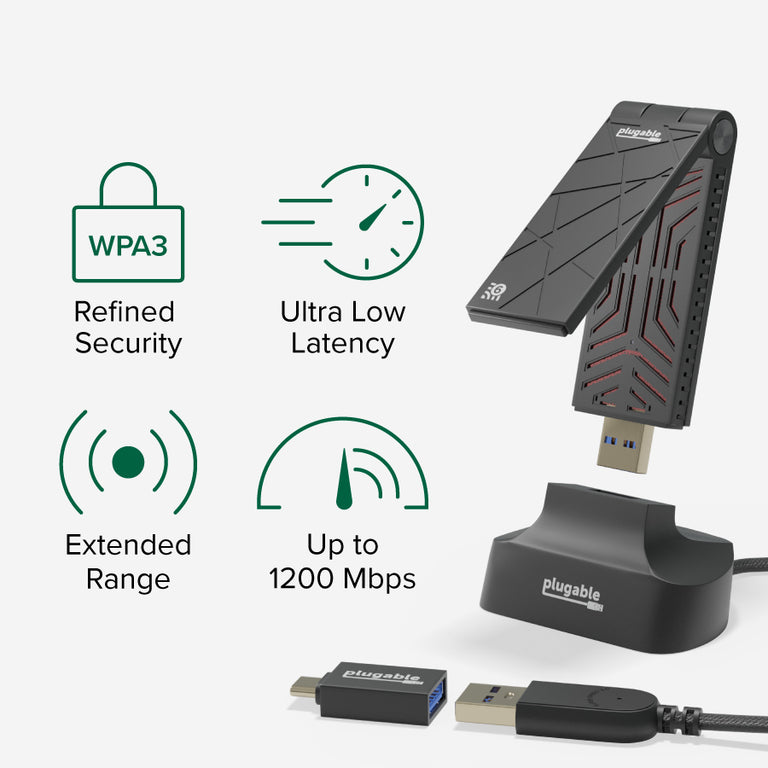
- Faster Wi-Fi—Easily upgrade to Wi-Fi 6 speeds with link rates up to 1,201Mbps when connected to 5GHz networks and up to 573.5Mbps on a 2.4GHz network. Use included 45” (115cm) extension cable to get the PC Wi-Fi adapter away from potential interference
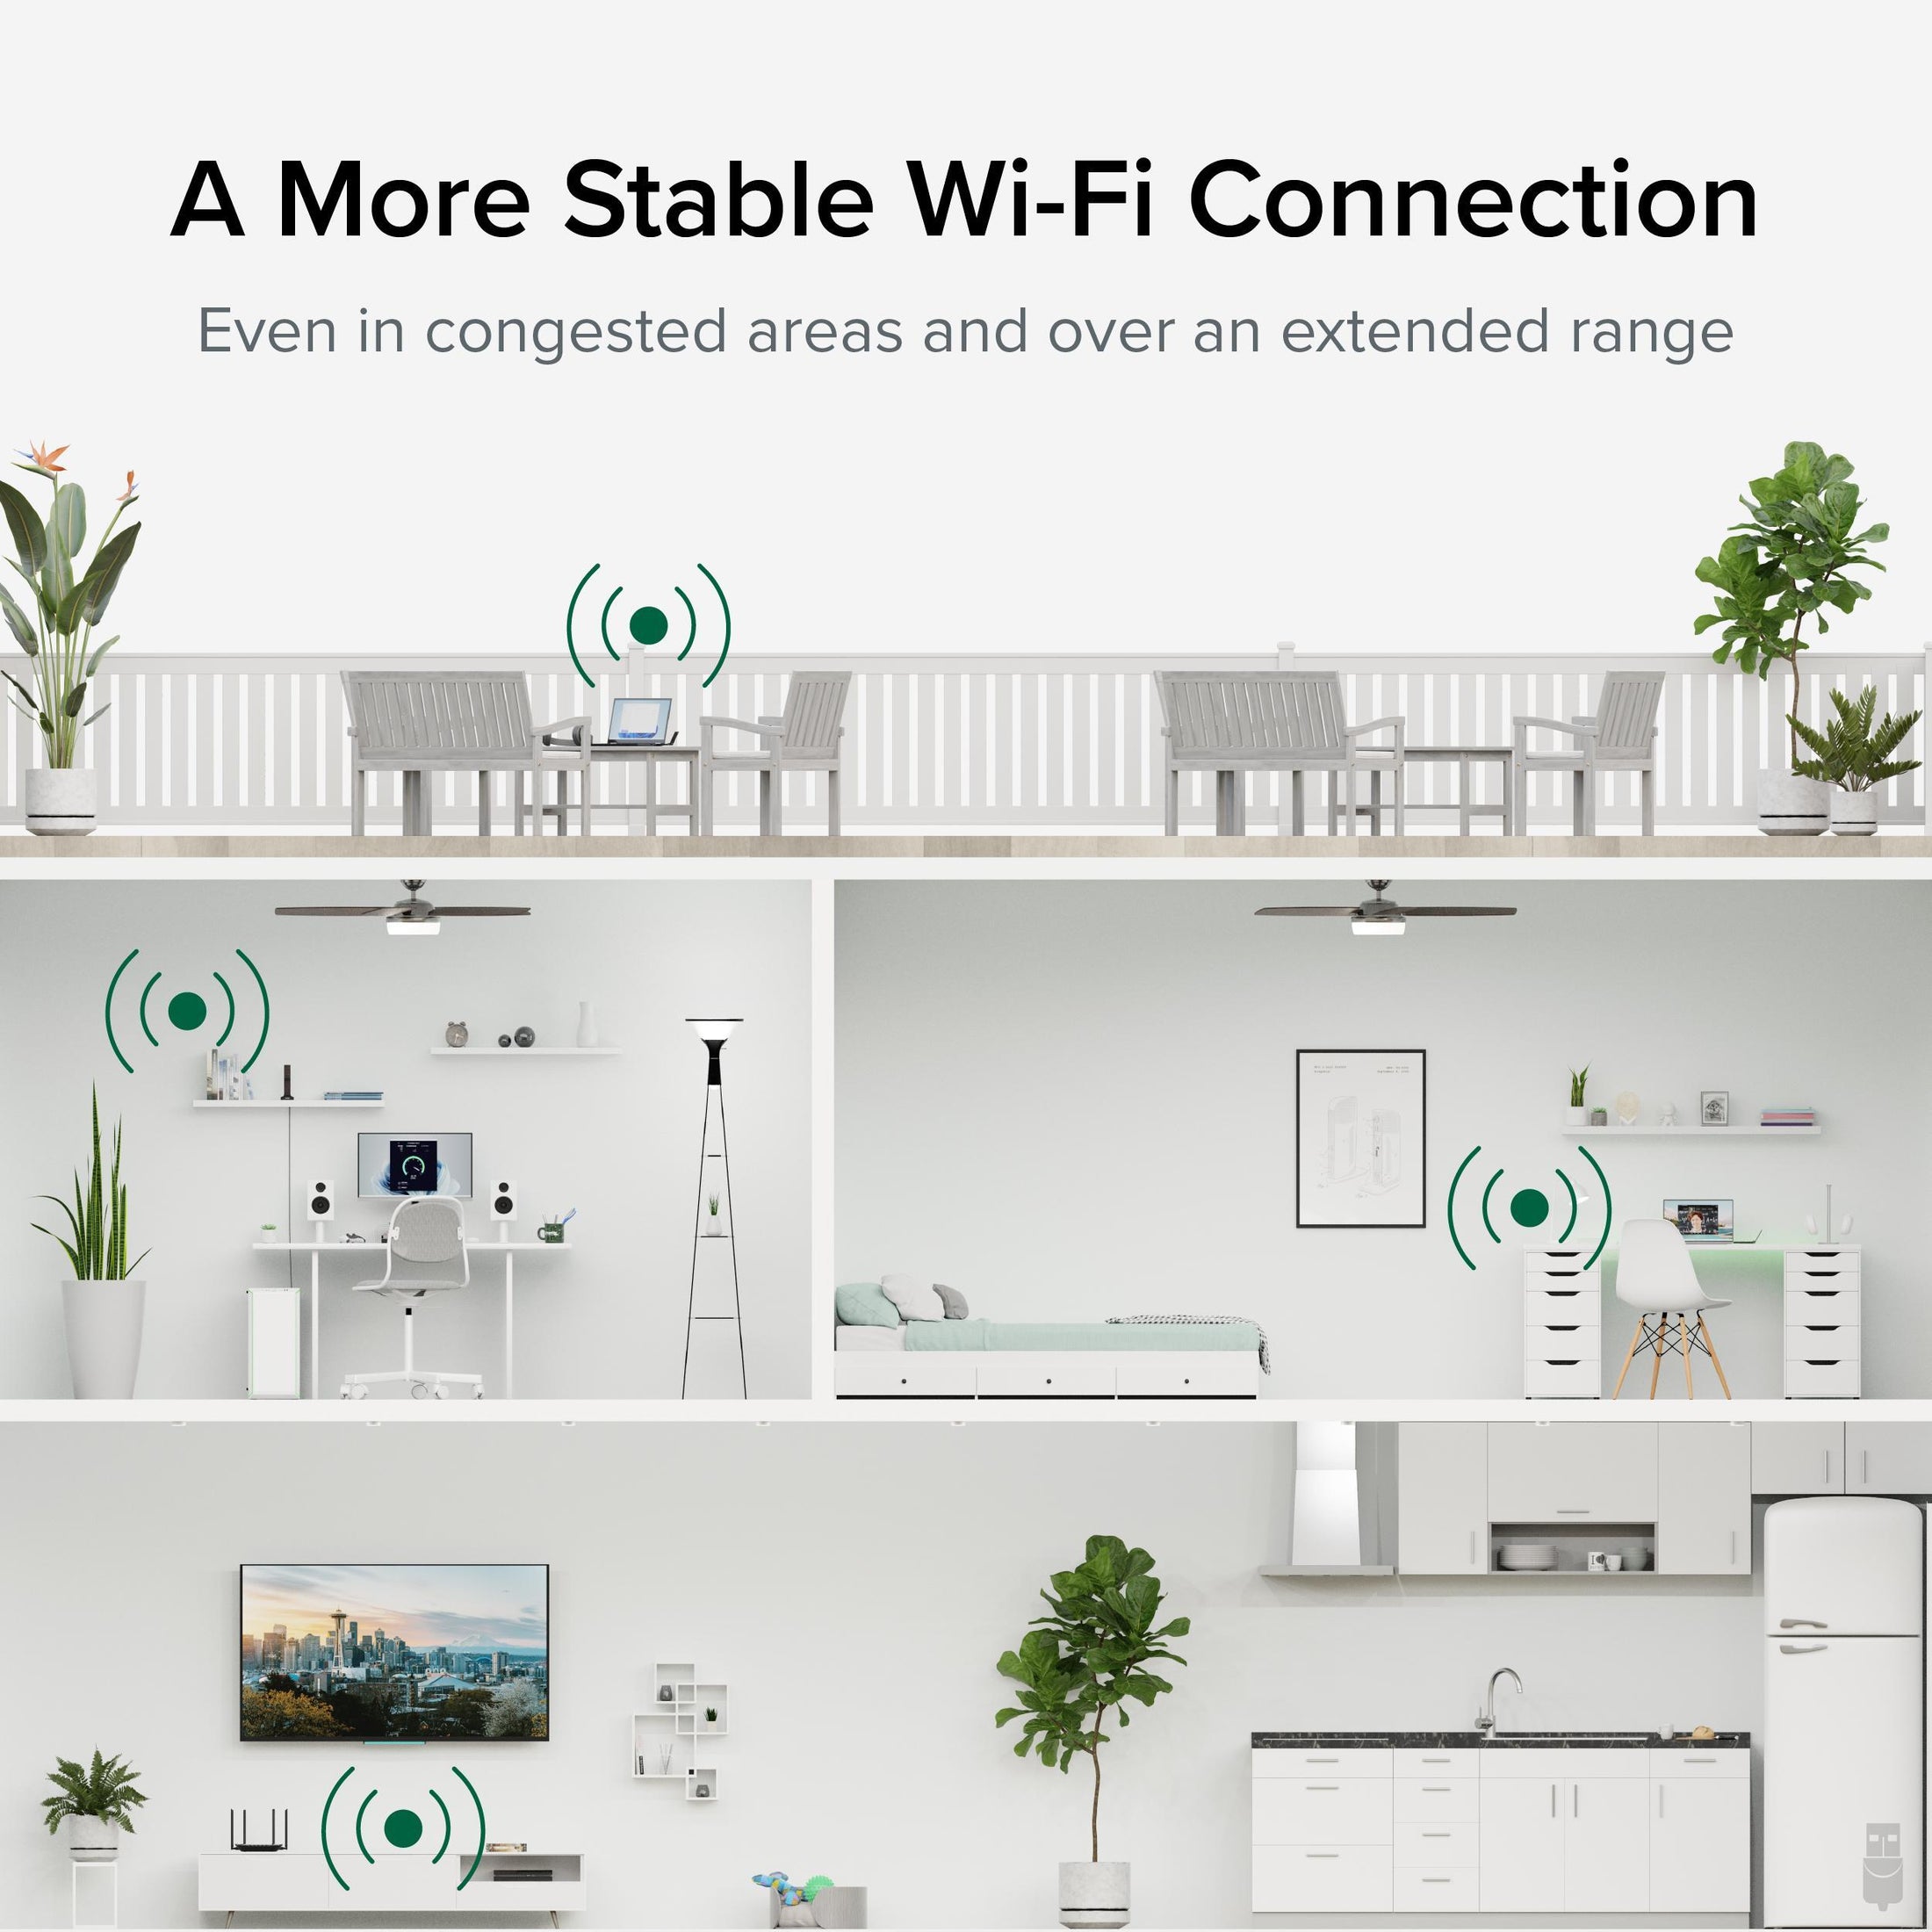
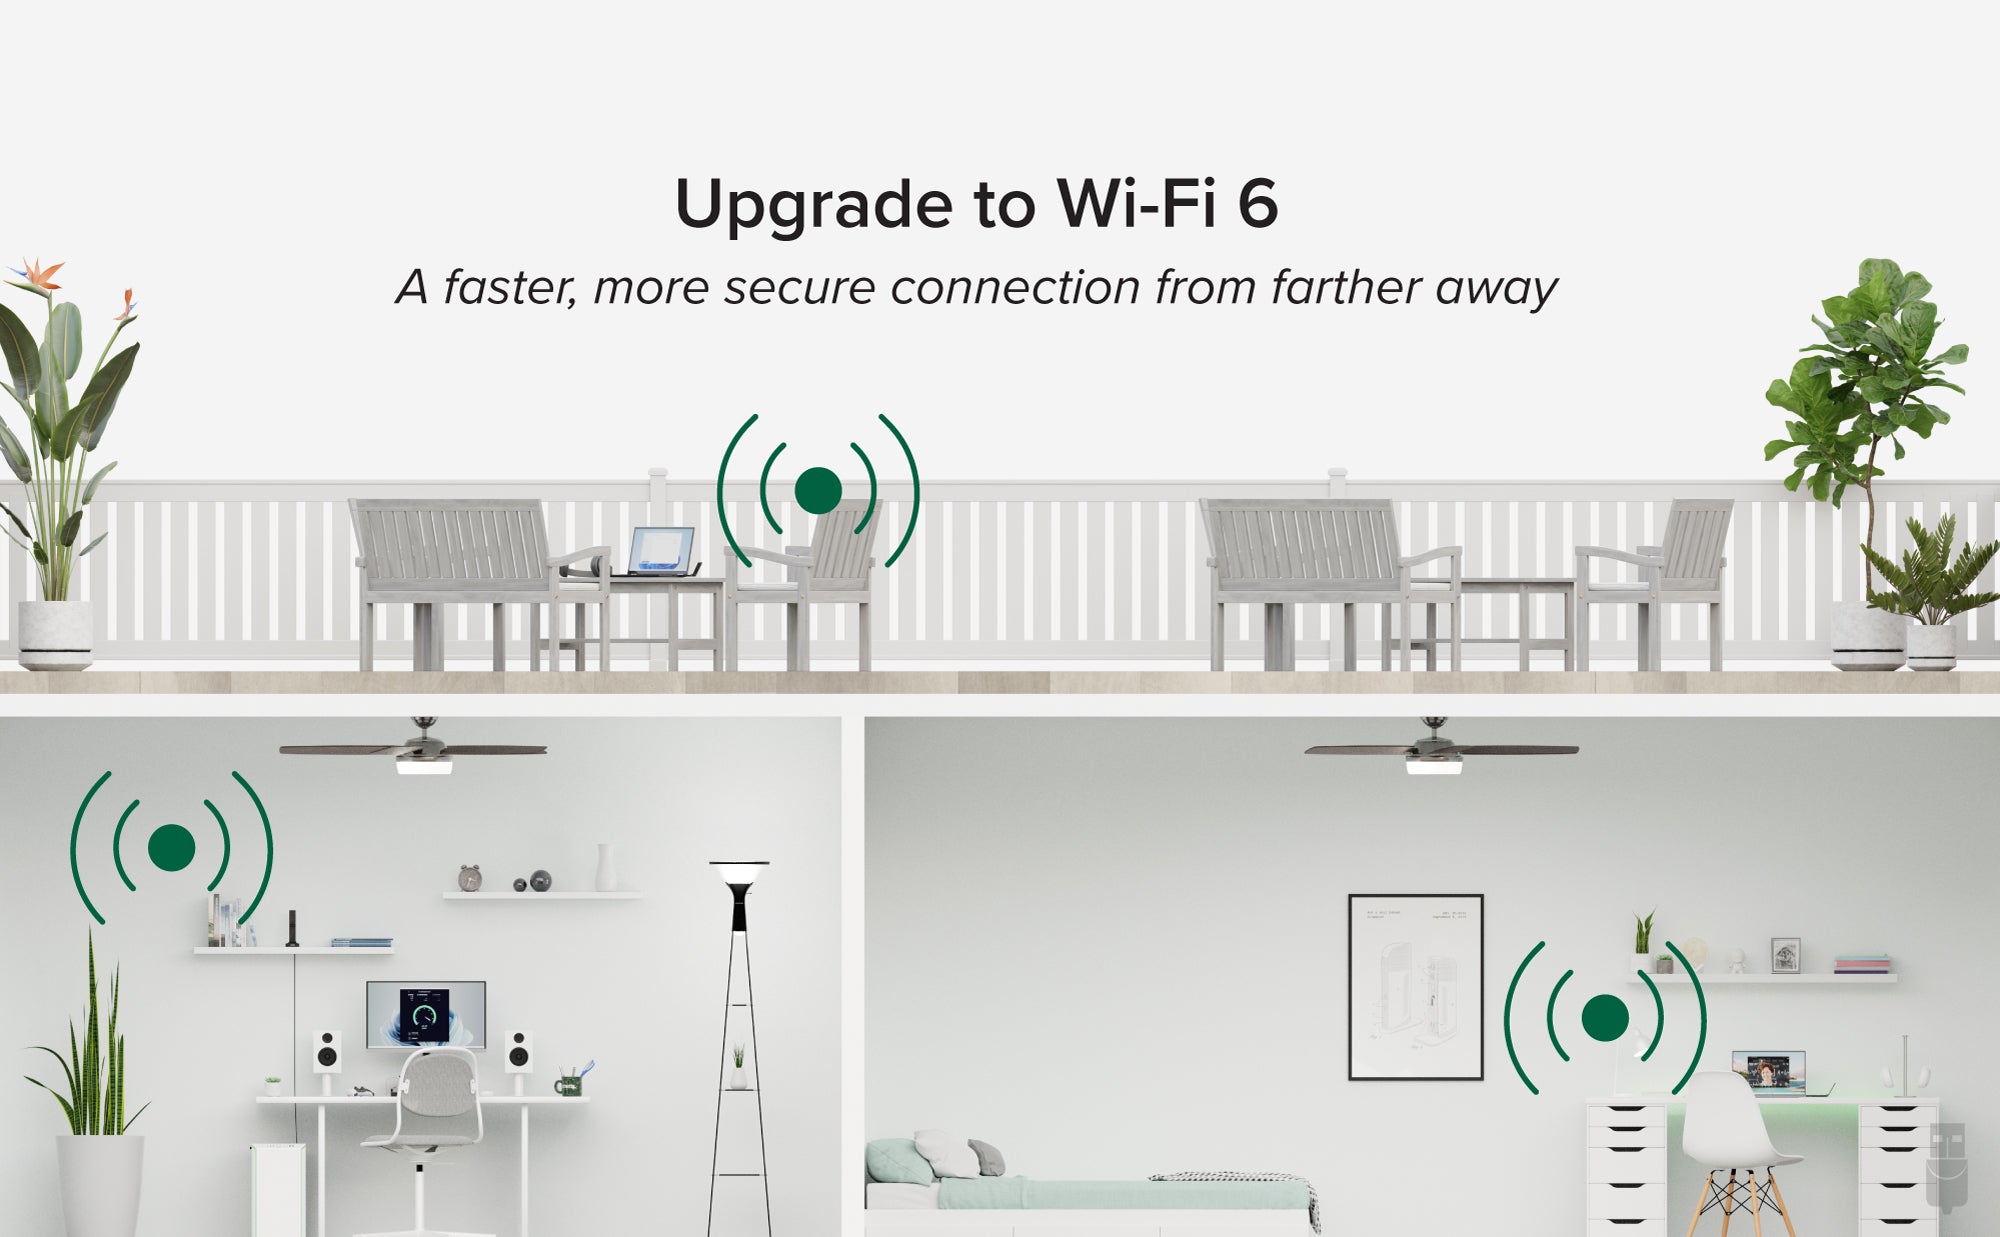
- Strong and Stable Connection—Featuring a 2x3dBi Omni Directional Antenna with multiple arrays, the USB Wi-Fi adapter for PC ensures a stronger, more stable connection than you’ll find on Wi-Fi 5 or older. That means faster surfing with fewer dips in data rates
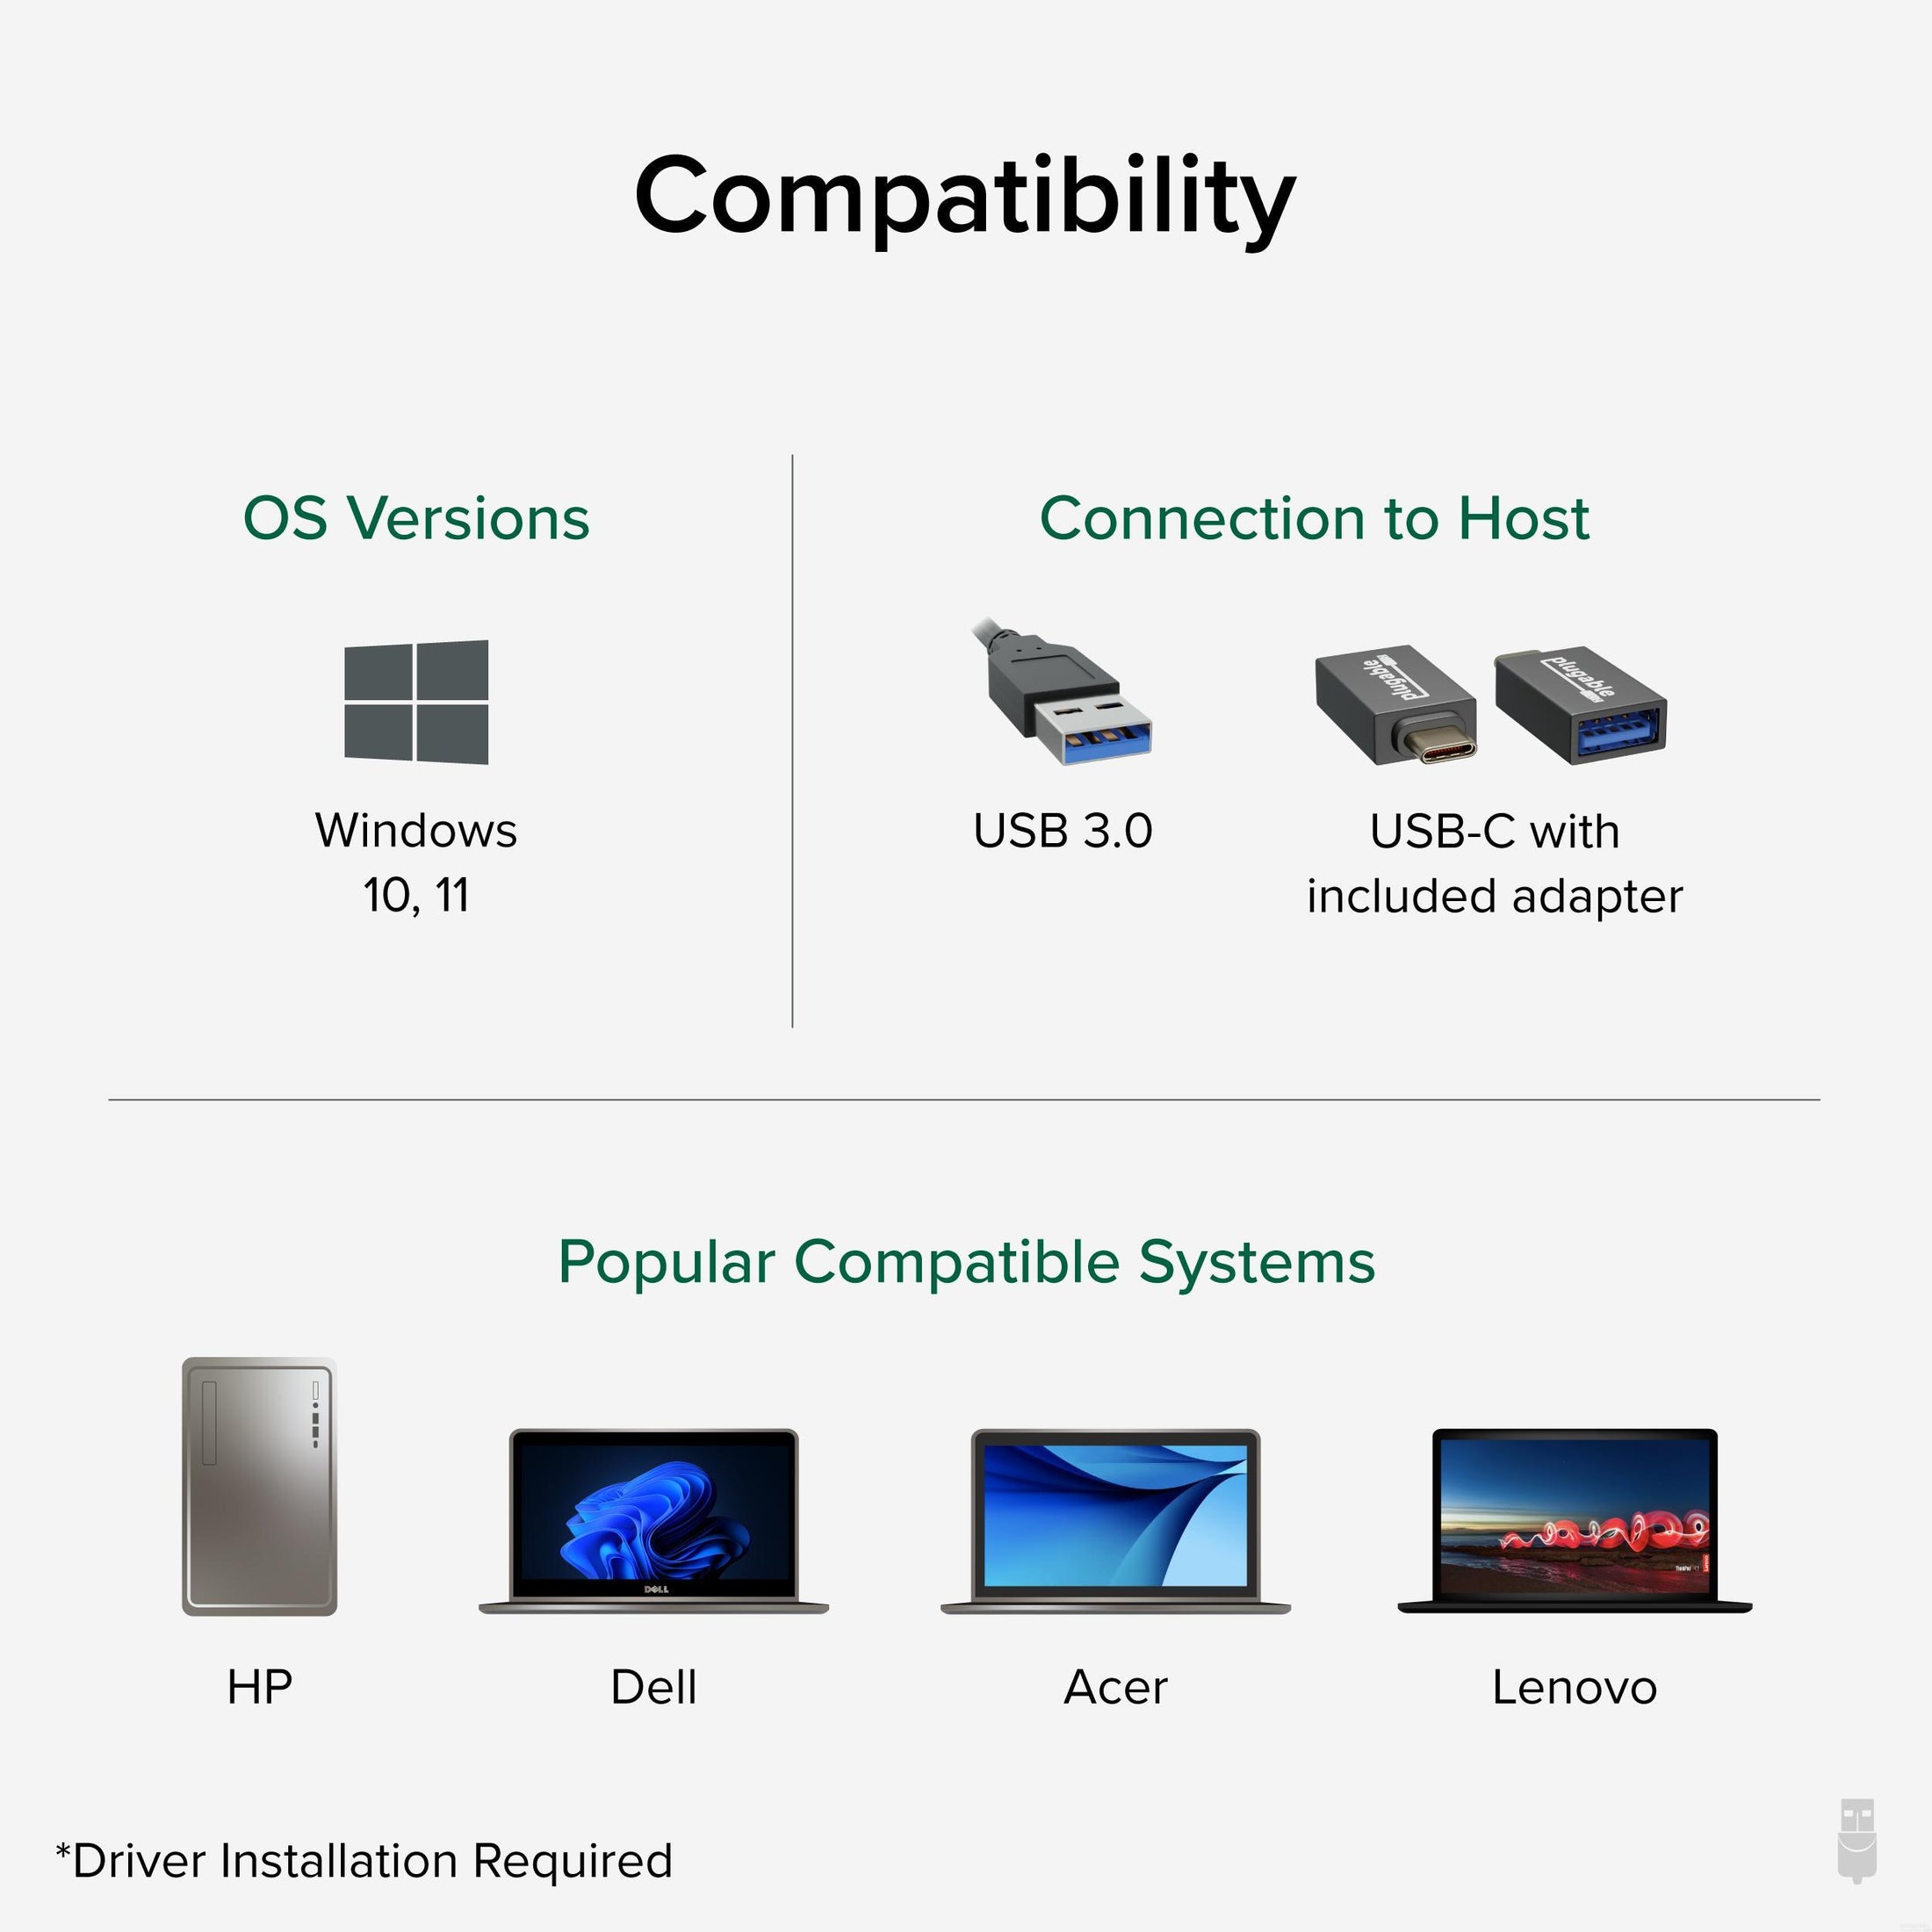
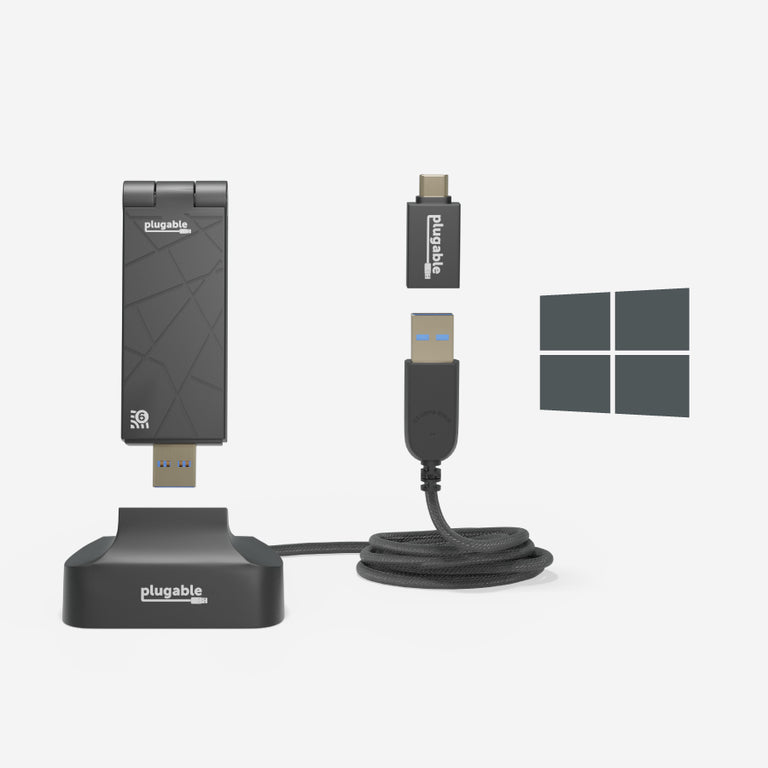
- Compatibility—USB wireless adapter is compatible with Windows 10 and newer. Not compatible with macOS or Linux. Driver download required
- 2-Year Coverage, Lifetime Support—Every Plugable product, including this Wi-Fi Adapter, is covered against defects for 2 years and comes with lifetime support. If you ever have questions, contact our North American-based team - even before purchase
Free 3-Day Shipping When Buying Direct!
All Buying Options
It doesn’t matter if you need a Wi-Fi adapter for a PC you’re building, or you just want to upgrade to the latest Wi-Fi standard on your laptop for a jump in performance, the Plugable USB-WIFIAX is your simple solution for upgrading to Wi-Fi 6. And with more of our work being done online, upgrading with a USB WiFi 6 adapter is a cost-effective way to extend the life of a computer.
Get speeds up 1,201Mbps when you connect to a 5GHz network, and 573.5Mbps on a 2.4GHz network. Connect directly to your computer through USB, or USB-C. If interference is an issue, an included 45-inch (115 cm) extension cable lets you move your adapter to find the strongest signal. It even folds flat so you can take it with you.
Go Fast with Wi-Fi 6
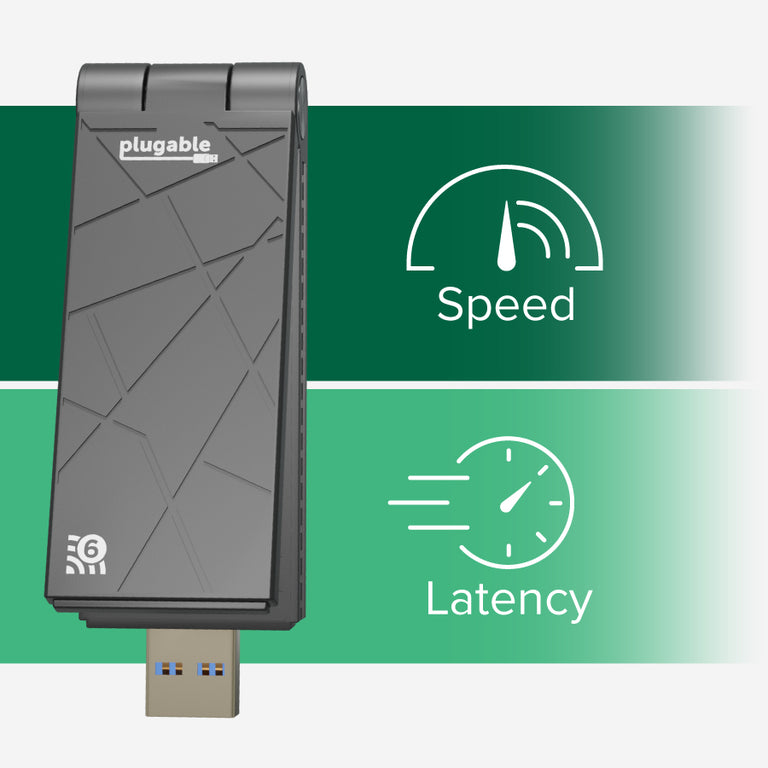
The first thing you’ll notice when upgrading to Wi-Fi 6 with this wireless adapter for desktop computer is speed—and a lot of it.
When connected to a 5GHz network, work, play, and stream to your heart’s content with speeds up to 1,201Mbps. And should you find yourself connecting to a 2.4GHz network, you’ll still be humming along with up to 573.5Mbps.
Features
Upgrading to Wi-Fi 6 with this Plugable WiFi 6 adapter isn’t just about speed.
You also get a more stable connection over Wi-Fi 5 protocols.
With the included 45-inch (115 cm) extension cable, you can elevate the WiFi USB adapter for a better signal.
The WiFi 6 USB adapter folds flat so you can get connected on the go.
Plus, it looks pretty cool, something you don’t usually expect from a Wi-Fi adapter.
Compatibility
The USB-WIFIAX is a USB network adapter compatible with Windows 10 and newer. It is not compatible with macOS or Linux.
Connect to host through USB 3.0 or USB-C (USB-A to USB-C adapter included).
As is the case with any wireless technology, your actual speed will depend on environmental factors, your host system, and your access point (router).
Driver download is required.
Supported Features
OFDMA | Allows your router to efficiently communicate with multiple devices simultaneously, reducing latency on networks with multiple devices |
MIMO | Allows the adapter's two antennas—and multiple antennas of your router—to work together for sending and receiving more data, more reliably, over greater distances compared to single-antenna solutions |
1024-QAM | Packs more data into each radio transmission, increasing data throughput by 25% compared to the 256-QAM of Wi-Fi 5, when using the same radio channels |
45 in (115 cm) Extension Cable | Moving adapter away from potential interference can result in a better signal |
In The Box
Item and Quantity | Item Notes |
---|---|
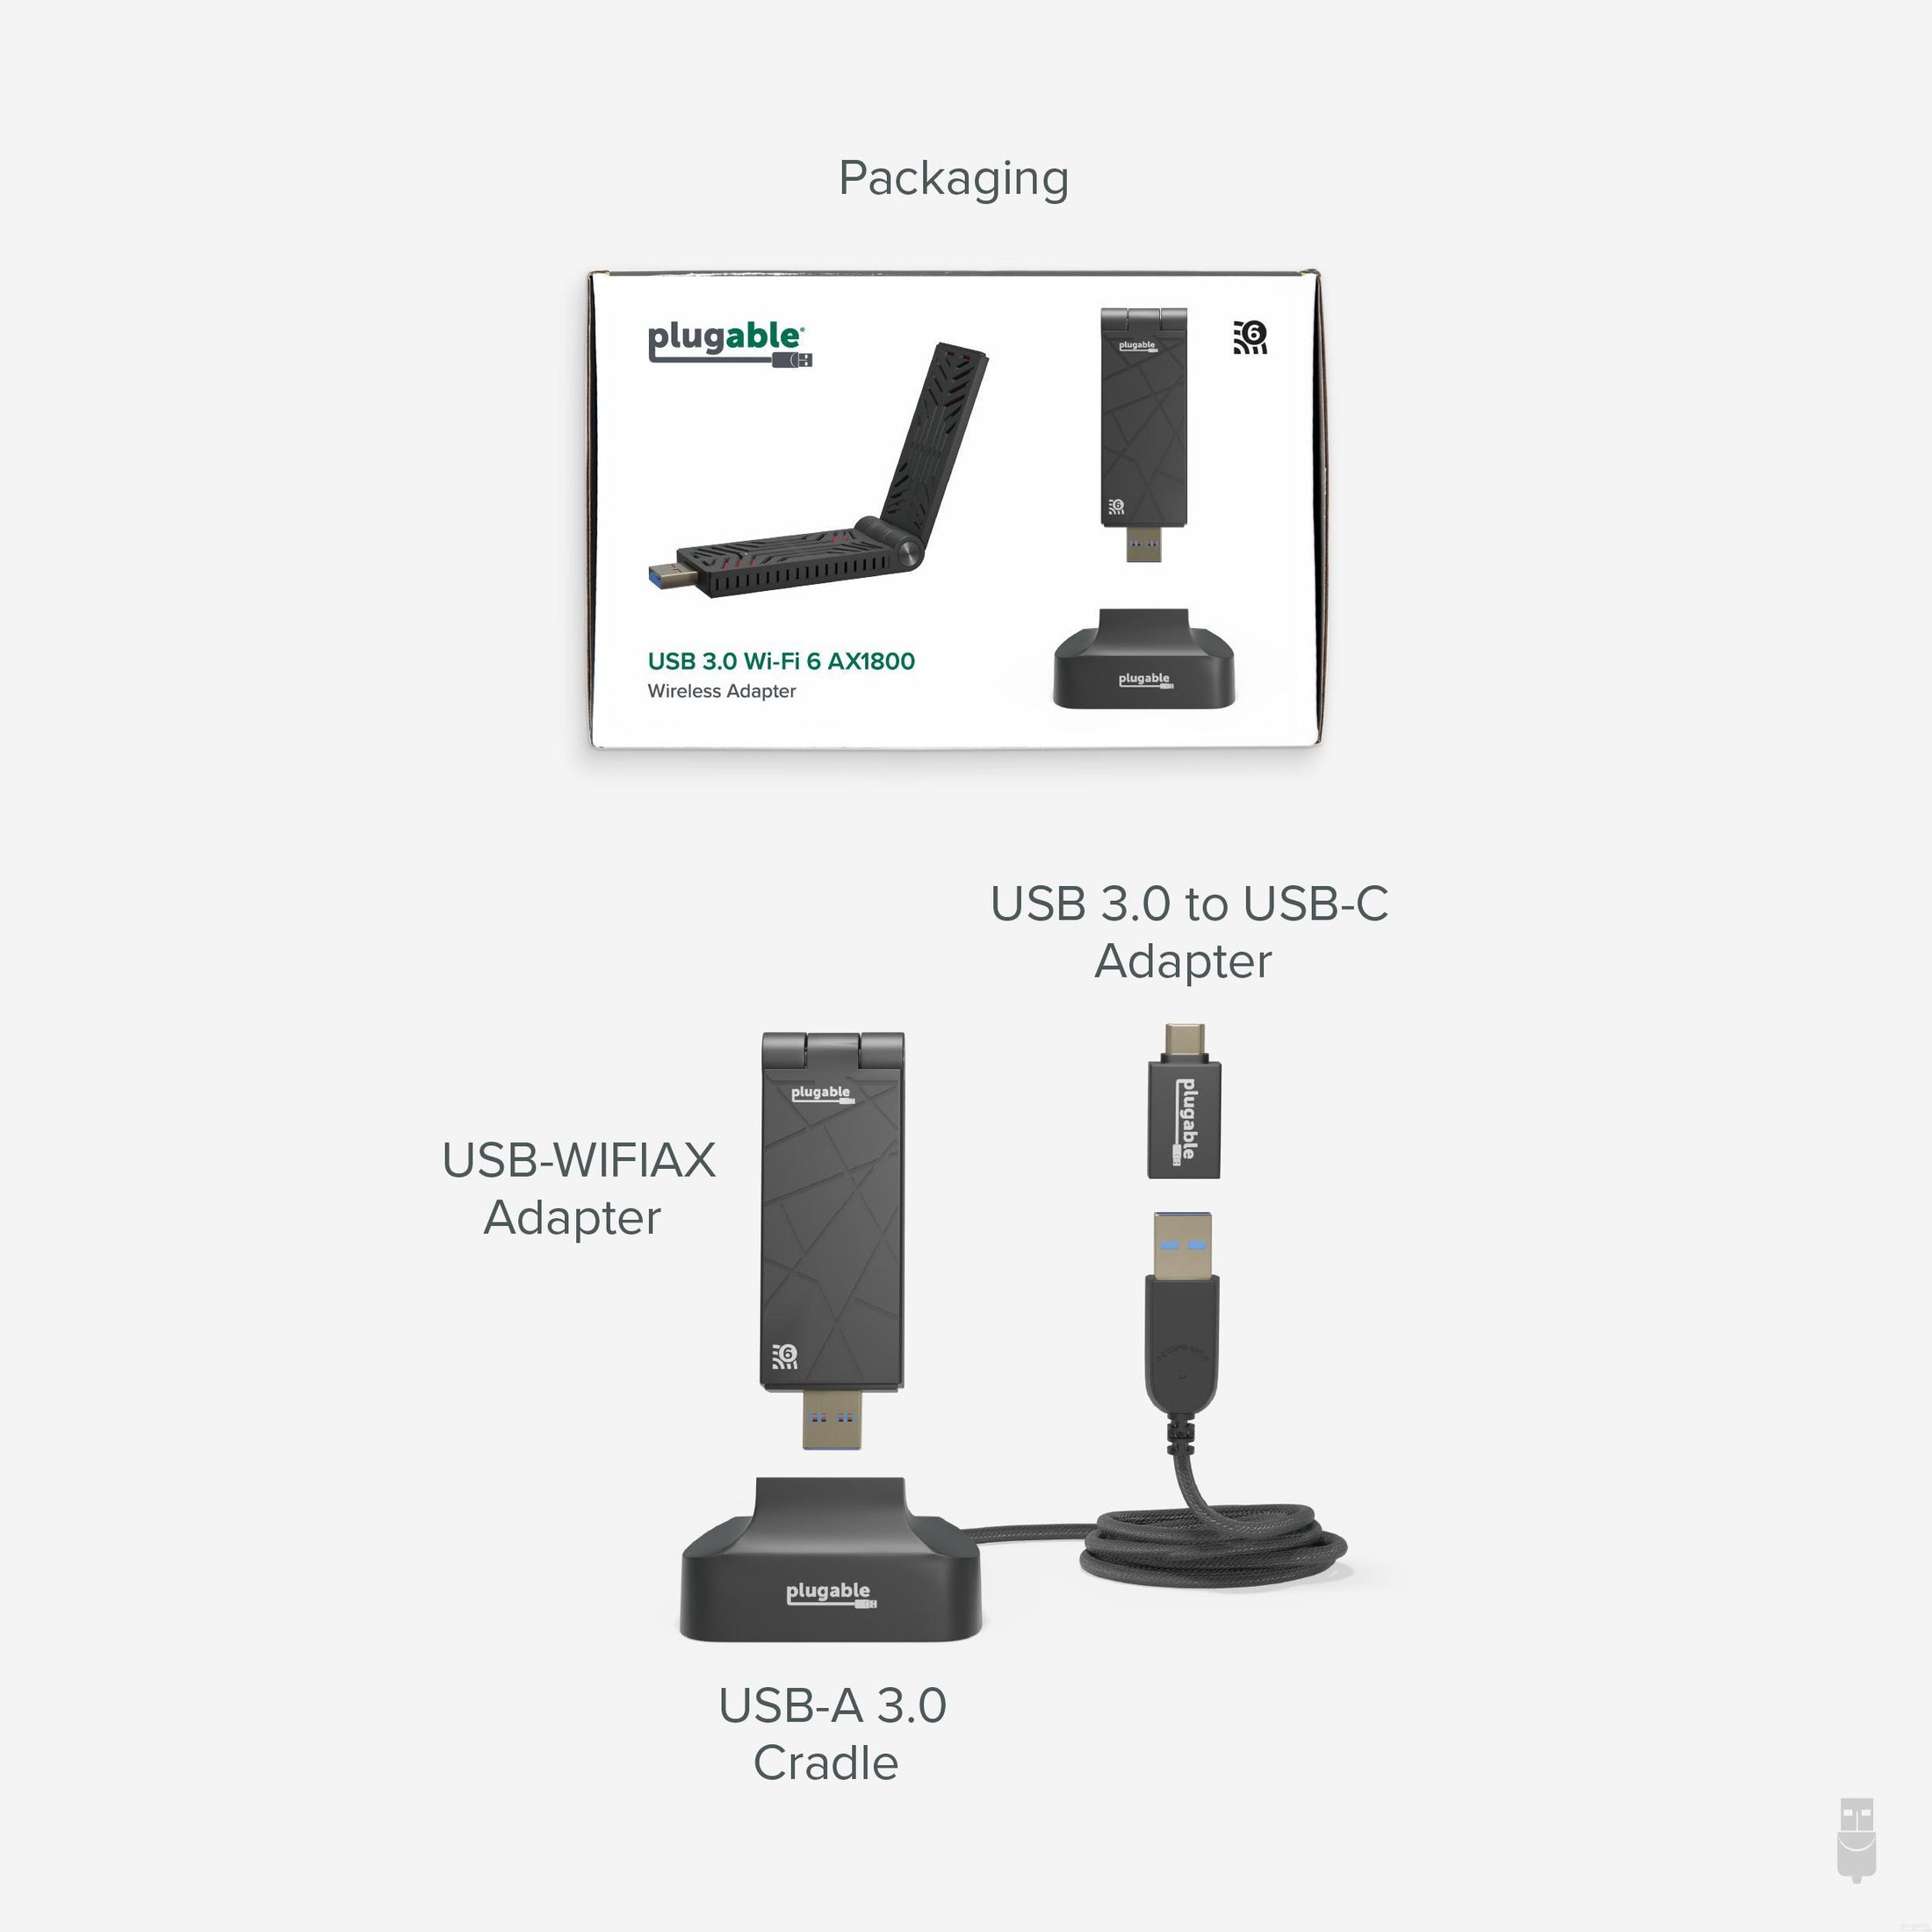
1x USB Wi-Fi Adapter | |
1x USB-A 3.0 Cradle | |
1x USB A-to-C Adapter | |
1x Quick Start Guide |
Power
Port | Placement | Power Host / Device | Connection Type | Notes | Voltage | Amperage | Wattage |
---|---|---|---|---|---|---|---|
USB-A to Host | Bottom | Device | Bus Powered (No Power Adapter) | 5.0V | 480mA | 2.4W |
Connection To Host
Port | Placement | Version and Link Rate | Features |
---|---|---|---|
1x USB-A | Bottom | USB 3.0 (5Gbps) |
Wireless Network
Port Type | Port Specification | Supported Channel Width | Antenna Design | Features | Chipset |
---|---|---|---|---|---|
USB-A | USB 3.0 (5Gbps) | 80 MHz (1201Mbps) | 2x2 (5.0 GHz and 2.4GHz) | WPS | Realtek RTL8832BU |
Physical Stats
Item | Size (H x W x D) or Length | Weight | SKU or Part Number |
---|---|---|---|
USB Wifi Adapter | 1.25 x 9 x 3 centimeters 0.5 x 3.5 x 1.2 inches |
30 grams 1.1 ounces |
USB-WIFIAX |
Get Started
Before configuring the Plugable Wi-Fi 6 adapter please download the drivers
Getting Started on Windows
Follow the steps below to install the Wi-Fi 6 adapter on your Windows PC.
Windows 10 and 11
- Plug the Wi-Fi 6 adapter into your PC
- To start plug in the Wi-Fi 6 adapter into your PC. You can either plug it in directly to your computer's USB 3.0 port or use the USB Cradle to position the Wi-Fi 6 adapter in an elevated position such as a shelf or the edge of a table for optimal reception.
- Extract the files from the driver .zip file.
- Find the setup.exe in the files that were extracted, and run it with administrator privileges.
- Continue through the install process of setup.exe
- Once driver installation is complete you will need to restart your computer and you will be able to connect to a wireless network
- If you get an error, please contact Plugable Support. If there are still issues, please contact us so we can help.
Platform | Important Notes | Date | Version and Download |
---|---|---|---|
Windows 11 and 10 | Please be sure to extract the contents of the .zip file prior to running the setup.exe. Setup.exe requires administrator privileges. If you are having trouble installing the adapter with this installer, please contact support. |
April 10, 2023 | 5001.15.134.0 |
Filter Help Articles and Frequent Questions by Category
Choose one or more filters within each category to narrow down the articles. Each selection will result in only displaying articles that include all of your choices.
Articles
Well how about that, it looks like we don't have any articles matching your filters! Try removing one of your choices or clear the filters to show all articles.
You can always contact support if you need help too!
How to install the drivers for Plugable USB-WIFIAX Wi-Fi 6 adapter
How to install the drivers for the USB-WIFIAX:
1. Download the following drivers here.
2. Connect the USB-WIFIAX to your computer
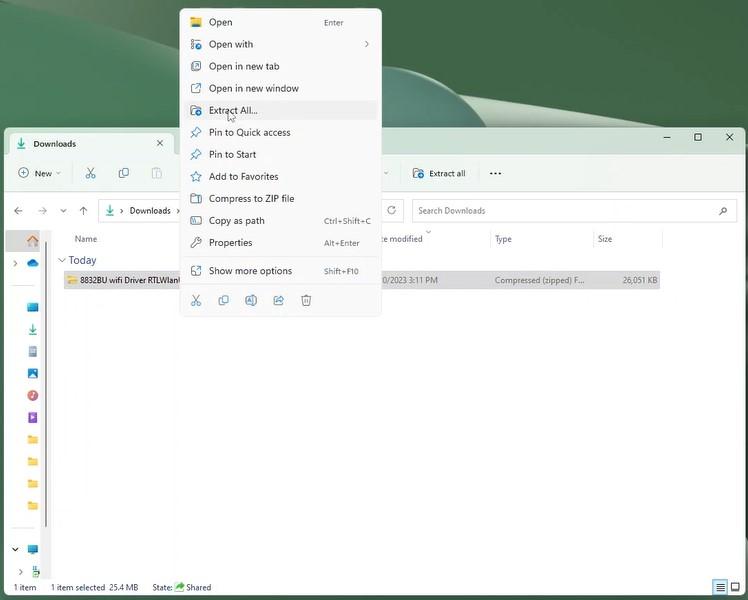
3. Extract the compressed folder, you can Right Click then select the "Extract All..." option
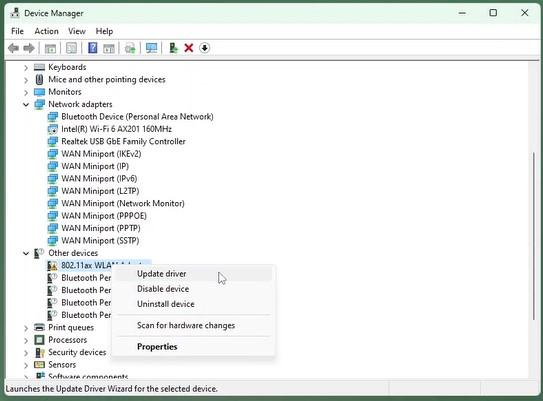
4. Next we will want to navigate to the Device Manager application and expand the Other devices section. To open the Device Manager application you can simply type this in to the Windows Search Bar
5. Right Click the "802.11ax WLAN adapter" and select "Update Driver"
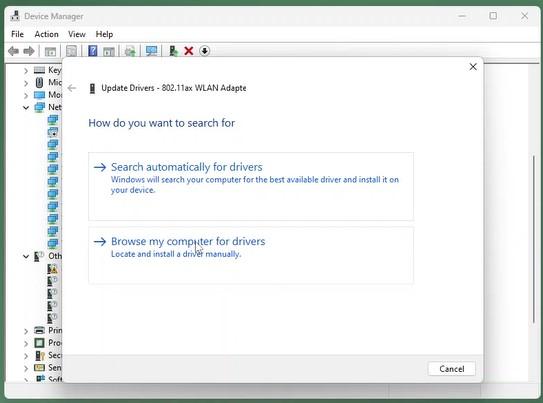
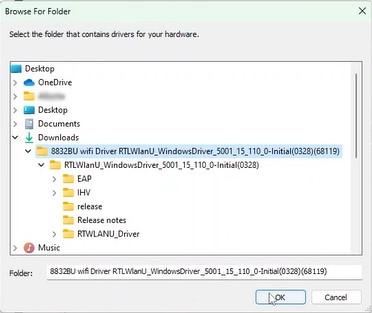
6. Select "Browse my computer for drivers" then navigate and select the folder that we de-compressed in Step #3
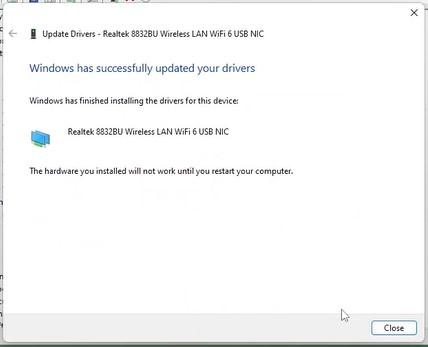
7. Windows will then proceed to install the drivers and prompt you to restart your PC, go ahead and restart the computer and you should see the ability to connect to a wireless network upon reboot.
Understanding and Troubleshooting Network Performance
Computer networking is a complex topic. In this article, we'll be taking a deep dive on the nuances of network performance for those who need some additional explanation while striving to be concise, and to educate users of various experience levels relating computer hardware and computer networking.
If you just need to know how to perform a network performance test/benchmark, jump down to configuring iPerf.
Core Network Concepts
LAN vs WAN
With regards to network performance, it is crucial to first separate whether an issue is with Wide Area Network (WAN) performance, or if the issue is with Local Area Network (LAN) performance.
Your LAN is essentially the network inside your home or business. Many homes use a combination modem/router device provided by their Internet Service Provider (ISP). In some cases, especially in businesses, you may have a separate modem and router, along with other equipment connecting to the router such as a network switch.
Your modem, and the connection it establishes to your ISP—whether through coaxial cable, fiber, phone lines, or long-range wireless—essentially marks the point between the WAN and the LAN. The connection your modem makes to your ISP is the WAN, and any devices you connect through your router behind that modem belong to the LAN.
Link Rate
Almost every type of connection your computer makes to any piece of hardware will have a link rate of some kind. The link rate establishes how fast data can possibly be transferred across any given connection, but it does not guarantee how fast the hardware on either end of the connection will actually transfer data.
The concept of link rates, and their related bottlenecks, is likely best conveyed by giving an example of what connections might be involved in transferring a file from one computer on your LAN to another.
- 800Mbps—The file source is a USB 3.0 thumb drive capable of 100MB/s (800Mbps) read/write.
- 480Mbps—The USB 3.0 thumb drive is plugged into a USB 2.0 port on the PC, which has a maximum throughput of 480Mbps
- 1000Mbps—PC1's Ethernet connection establishes 1Gbps (1000Mbps) link to the router via Ethernet
- 300Mbps—The router connects to a second PC (we'll refer to this as PC2) via Wi-Fi, and it has established a 300Mbps link to the Wi-Fi adapter on PC2
- 480Mbps—The Wi-Fi adapter on PC2 is connected via a USB 2.0 port. The link rate of the USB connection to PC2 is at 480Mbps
- 6000Mbps—PC2 is going to store the file on an internal hard drive with a link rate of 6Gbps
- 1600Mbps—File Destination: SATA hard drive capable of 200MB/s (1600Mbps) read/write.
Following this chain, we see that 300Mbps is the slowest link rate established. This means that, regardless of the link rates established elsewhere, the absolute maximum the data can possibly be transferred is 300Mbps.
if we were to change the Wi-Fi connection to a wired Ethernet connection capable of 1Gbps, our performance bottleneck would then become the USB 2.0 connection to the USB drive where the file is stored.
Ports and Interfaces
Interfaces
A network interface represents connections, whether wired or wireless, that are made to form a network between devices.
Ports
Some may refer to physical hardware connections as "ports". For the purposes of networking, ports are logical constructs that can also be referred to as "network ports". Each network interface has 65,535 of these logical ports. Each port on a network interface is a separate data connection.
Benchmarking Network Adapter Performance
To properly benchmark network adapter performance, we need to:
- Use a simple LAN configuration
- Eliminate bottlenecks, especially link rate bottlenecks
Websites like speedtest.net, fast.com, and other performance tools in your web browser are going to use your WAN connection, and are not appropriate for determining if a network adapter is working well.
Transferring files from one computer to another on your LAN is typically not the best way to benchmark a network adapter. File transfers are bottlenecked by a number of things, including performance limitations of the disk the data is on, and often times a lack of establishing parallel network connections to perform the task.
One of the most accurate ways to benchmark network performance on a LAN is by using iPerf . To more effectively benchmark network adapter performance, it is best to establish a point-to-point connection between two PCs, rather than connecting through a router or switch.
Configuring iPerf
To test a connection using iPerf, you'll need at least two network interfaces, and preferably two computers. You'll also need to know the IP (Internet Protocol) address assigned to each network interface . One network interface will function as an iPerf server, and the other network interface will function as an iPerf client. Lastly, you'll need to download the version of iPerf 3.x that's appropriate for your computer's operating system and extract/install it .
Windows
- Make sure the drivers for both network interfaces involved in the test are using up-to-date drivers. Drivers for Plugable products can be found here.
- Download and extract iPerf for Windows
- Open Command Prompt
- Press Windows Key + R or + R, then enter
cmd
in the window that appears - Search the Start Menu for
Command Prompt
, and open it
- Press Windows Key + R or + R, then enter
- Navigate Command Prompt to the directory the directory where iPerf is located
- The
cd
command is for 'change directory'- If you have a folder named 'iperf' on your Windows desktop, you can reach it in command prompt with the command
cd %USERPROFILE%\Desktop\iperf
- If you have a folder named 'iperf' on your Windows desktop, you can reach it in command prompt with the command
- The
- Run iperf in server mode via Command Prompt
iperf3.exe -s
macOS
- Usually it is best to install iperf on macOS using brew in Terminal
- Make sure the drivers for both network interfaces involved in the test are using up-to-date drivers
- Open Terminal
- Run iPerf in server mode
iperf3 -s
Linux
- Usually it is best to install iperf using the package manager in your Linux distro. For example, in Ubuntu, use
apt
: sudo apt install iperf3
- Make sure the drivers for both network interfaces involved in the test are using up-to-date Drivers
- Open Terminal
- Run iPerf in server mode
iperf3 -s
Next, you'll need to run iPerf in client mode, targeting the IP address of the server/interface where iPerf is running in server mode. Additionally, we'll run the test for 30 seconds using -t 30
and with four parallel connections using -P 4
. Running 4 parallel connections is optimal for saturating a network link.
Windows
- Open Command Prompt
- Press Windows Key + R or + R, then enter
cmd
in the window that appears - Search the Start Menu for
Command Prompt
, and open it
- Press Windows Key + R or + R, then enter
- Navigate Command Prompt to the directory the directory where iPerf is located
- The
cd
command is for 'change directory'- If you have a folder named 'iperf' on your Windows desktop, you can reach it in command prompt with the command
cd %USERPROFILE%\Desktop\iperf
- If you have a folder named 'iperf' on your Windows desktop, you can reach it in command prompt with the command
- The
- Run iperf in client mode via Command Prompt (replace 192.168.0.200 with the IP address of the server/interface where iPerf is running in server mode)
iperf3.exe -c 192.168.0.200 -t 30 -P 4
macOS / Linux
- Open Terminal
- Run iPerf in client mode (replace 192.168.0.200 with the IP address of the server/interface where iPerf is running in server mode)
iperf3 -c 192.168.0.200 -t 30 -P 4
iPerf should start performing a network performance test. If the test fails to start, make sure that iPerf is not being blocked by your PC's/Mac's firewall.
Why iPerf is Ideal for Benchmarking
Unlike a file transfer, iPerf runs in memory on the PC and generates data to send using the CPU directly. This alleviates potential bottlenecks generated by storage devices, and allows you to explicitly control how many parallel connections are being used to transfer data rather than being unsure if parallel network connections are being used by other means.
Conclusion
There's a lot more to networking that isn't covered in this article, but we hope this helps explain enough to get an accurate measure of your network performance.
If you need assistance with your Plugable product that features network connectivity, please contact us for further assistance.
How To - Set a Network to Private or Public in Windows 10 & 11
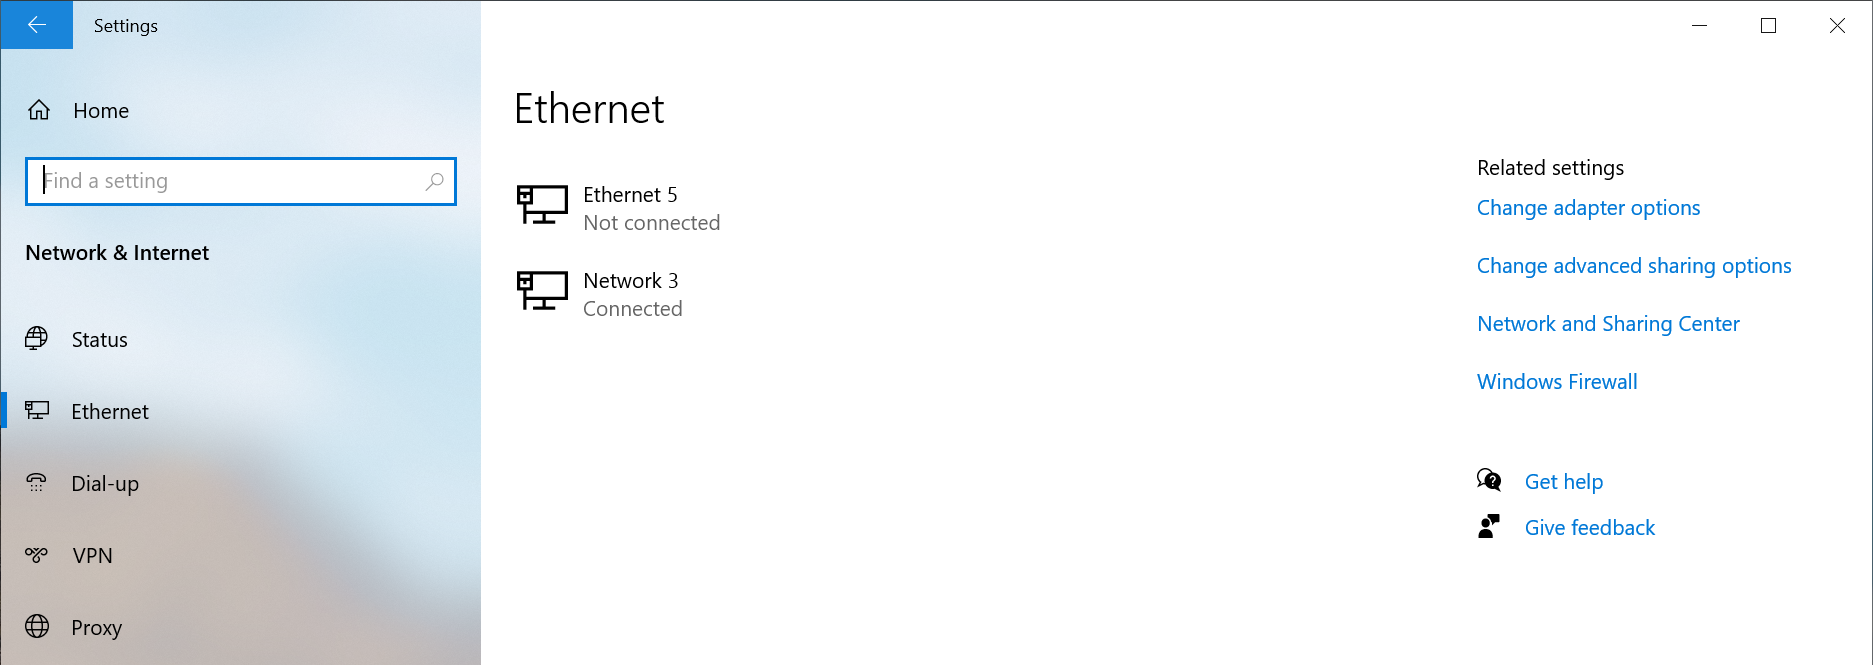
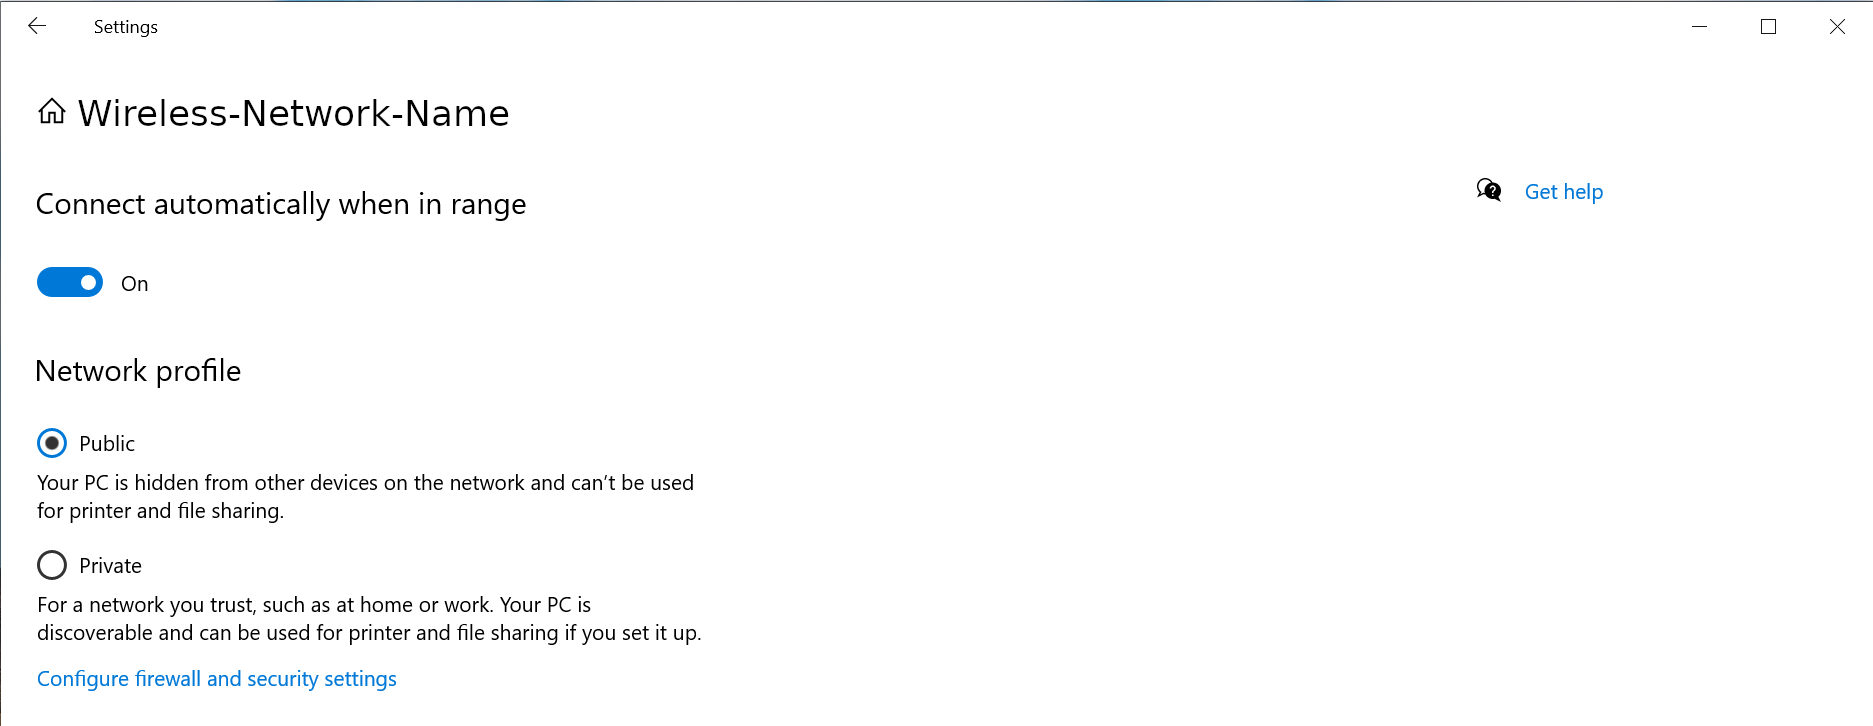
The Windows Firewall may block some networking features when the local network is not set to Private. This article will describe the process for setting the local network, either wired Ethernet or Wi-Fi to be a Private network.
Windows 11
1 - Connect the computer to the network, either wired or wireless
2 - Open the Windows Settings - right-click on the Start Menu and select “Settings” from the pop-up menu
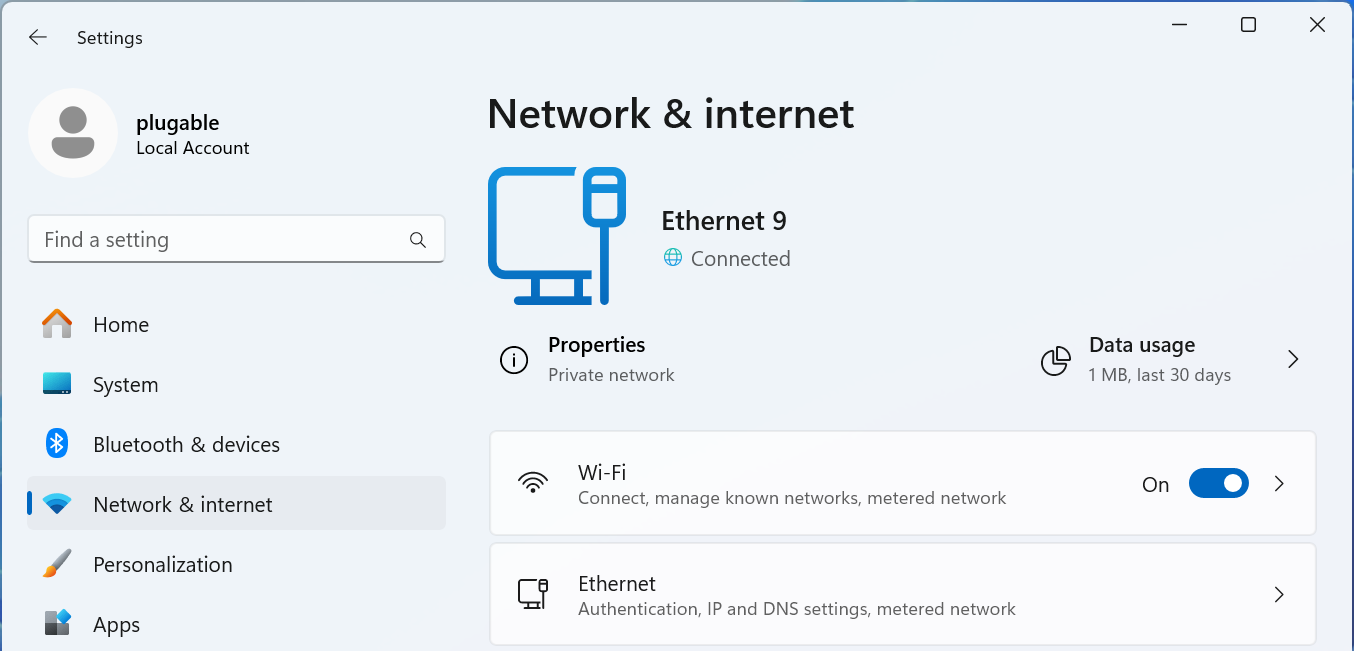
3 - On the left column select “Network & internet”
For Wired Networks
4 - Select the “Ethernet” option
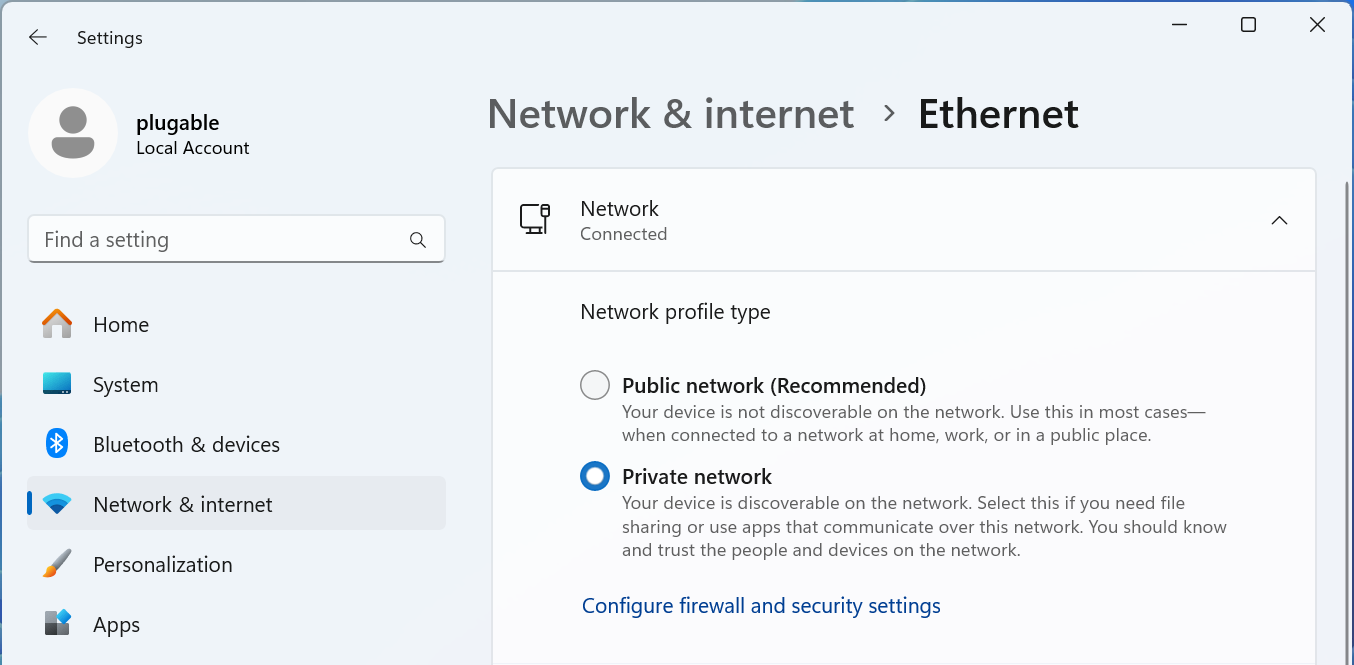
5 - The connected network should be expanded, if not click on “Network Connected" to expand the section
6 - Select the “Network profile type” either “Public network” or “Private network” to suite your needs
For Wi-Fi Networks
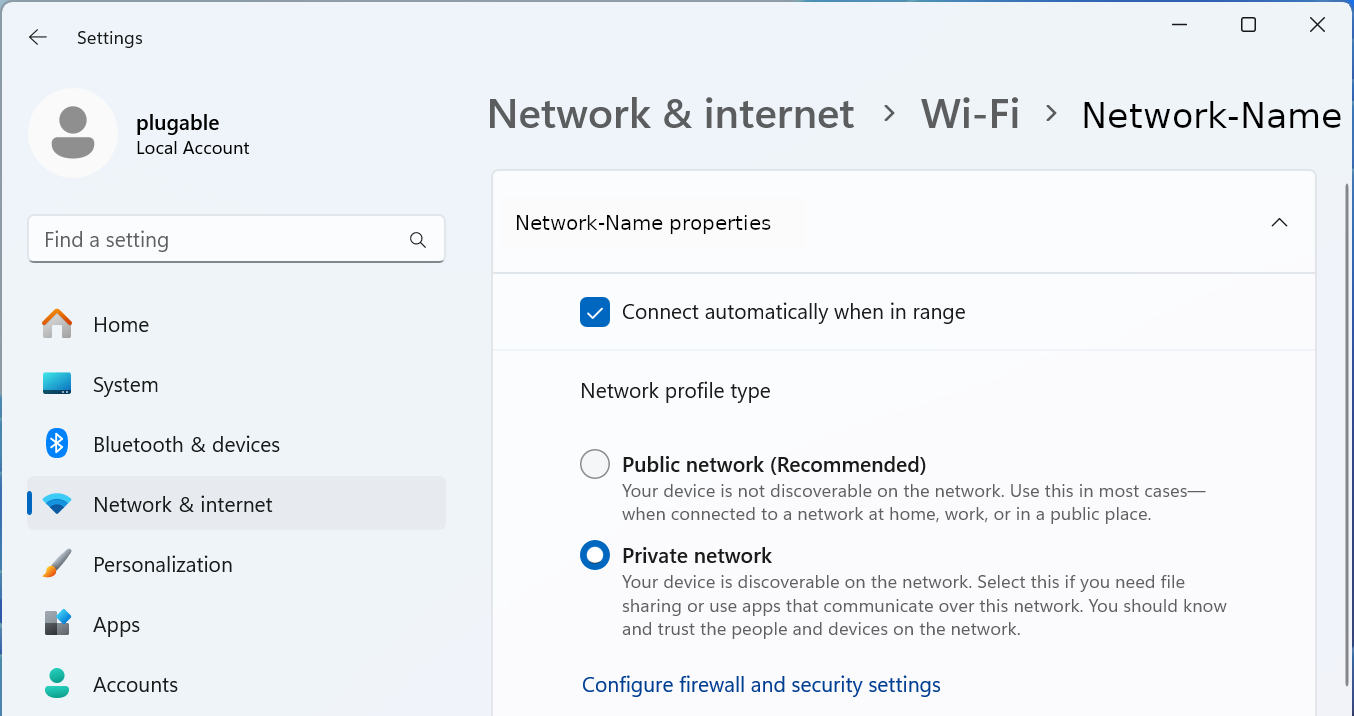
4 - Select the “Wi-Fi” option
5 - Select your Wi-Fi network name “properties”
6 - Select the “Network profile type” either “Public network” or “Private network” to suite your needs
Windows 10
1 - Connect the computer to the network, either wired or wireless
2 - Open the Windows Settings - right-click on the Start Menu and select “Settings” from the pop-up menu
3 - Select “Network & Internet” fro the bottom section
4 - Select the “Ethernet” option from the left pane
5 - Select the “Connected” network from the right pane
6 - Select the “Network profile type” either “Public network” or “Private network” to suite your needs
Windows PowerShell
If the option does not show up in the Windows Settings GUI, or if you prefer to use the terminal.
1 - Open a new terminal: Right-click on the Start Menu and select “Terminal”
2 - Run the following command to list the available networks
Get-NetConnectionProfile
PS C:\Users\plugable> Get-NetConnectionProfile Name : Network InterfaceAlias : Ethernet Instance 0 InterfaceIndex : 7 NetworkCategory : Private DomainAuthenticationKind : None IPv4Connectivity : Internet IPv6Connectivity : NoTraffic
3 - Run the following command to set the network to Private
Set-NetConnectionProfile -Name Network -NetworkCategory Private
Where “Network” is the network name from step #2 and “Private” can be either “Public" or “Private”
How to Use Two External Displays with the Lid Closed on MacBook Air and MacBook Pro M3
Overview
With the release of Apple’s M3 CPU chips and the Sonoma 14.6 update your base MacBook Air and MacBook Pro systems with M3 chips can now host two external displays natively in clamshell mode. This guide will walk you through the process of setting up and using two external displays with the lid closed on your MacBook Air or MacBook Pro equipped with an Apple M3 chip.
Requirements
Before getting started, ensure you have the following:
- MacBook Air or MacBook Pro with an Apple M3 chip.
- macOS Sonoma 14.3 or later for an M3 MacBook Air or macOS Sonoma 14.6 or later for an M3 MacBook Pro.
- Two external displays with compatible video inputs (e.g., HDMI, DisplayPort, USB-C).
- A dock or graphics adapter can be used as well.
- External keyboard and mouse (wired or wireless).
- Power adapter or power source for your MacBook
- A docking station that provides adequate charge can be used in place of the native power adapter, be sure to check the wattage your dock provides.
Steps to Set Up Dual External Displays with the Lid Closed
1. Set Up Your External Keyboard and Mouse
- If you’re using a wired keyboard and mouse, connect them directly to your MacBook or Plugable dock.
- For wireless peripherals, ensure they are paired with your MacBook and functioning properly.
- An AC adapter/power cable of some kind will also need to be connected for clamshell mode to function properly. This adapter can be one from a docking station or the included Apple adapter.
2. Connect Your Displays
- Connect the first external display to your MacBook using the appropriate cable (e.g., HDMI, DisplayPort, USB-C)
- Close your laptop’s lid.
- Connect the second external display using a similar method.
- Ensure both displays are powered on and set to the correct input source.
3. Configure Display Settings
- Open System Settings on your MacBook.
- Go to Displays.
- You should see both external displays listed. Arrange them according to your preference by dragging the display icons.
- Adjust the resolution, refresh rate, and other settings as needed.
4. Enable "Clamshell Mode" (Lid Closed Mode)
- With your external displays connected and set up, close the lid of your MacBook.
- Your MacBook will automatically switch to "Clamshell Mode," where the internal display turns off, and the external displays become your primary screens.
- Ensure your MacBook is connected to a power source to prevent it from entering sleep mode.
5. Check the Display Arrangement
- With the lid closed, check that the external displays are functioning as expected.
- If necessary, re-open the Displays settings to adjust the arrangement, resolution, or other preferences.
Troubleshooting Tips
- No Display on External Monitors: If the external displays are not showing anything, open the lid of your MacBook and check the connections.
- MacBook Sleeps When Lid Is Closed: Make sure your MacBook is connected to a power adapter. Clamshell Mode requires the MacBook to be plugged into an external power source.
- Performance Issues: If you experience lag or performance drops, try lowering the resolution or refresh rate of the external displays.
Thunderbolt Dock Users
With these steps, one can use Plugable Thunderbolt docks to enjoy a dual-display setup without the need for additional software installation. The dock leverages the native capabilities of the MacBook Air M3 and MacBook Pro M3, providing a straightforward and efficient solution for expanding your workspace with additional USB ports, audio, and ethernet (as well as the dual displays).
Additional Resources
If you should need any assistance with your setup, please feel free to reach out to our support team at support@plugable.com.