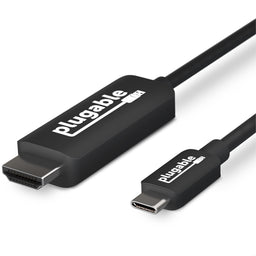
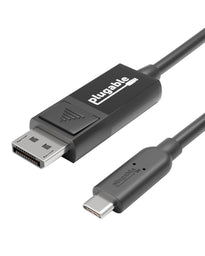
Plugable USB 3.1 Type-C to HDMI 2.0 Cable
$29.95 USD
SKU: USBC-HDMI-CABLEAmazon Rating : (280 Reviews)
Features
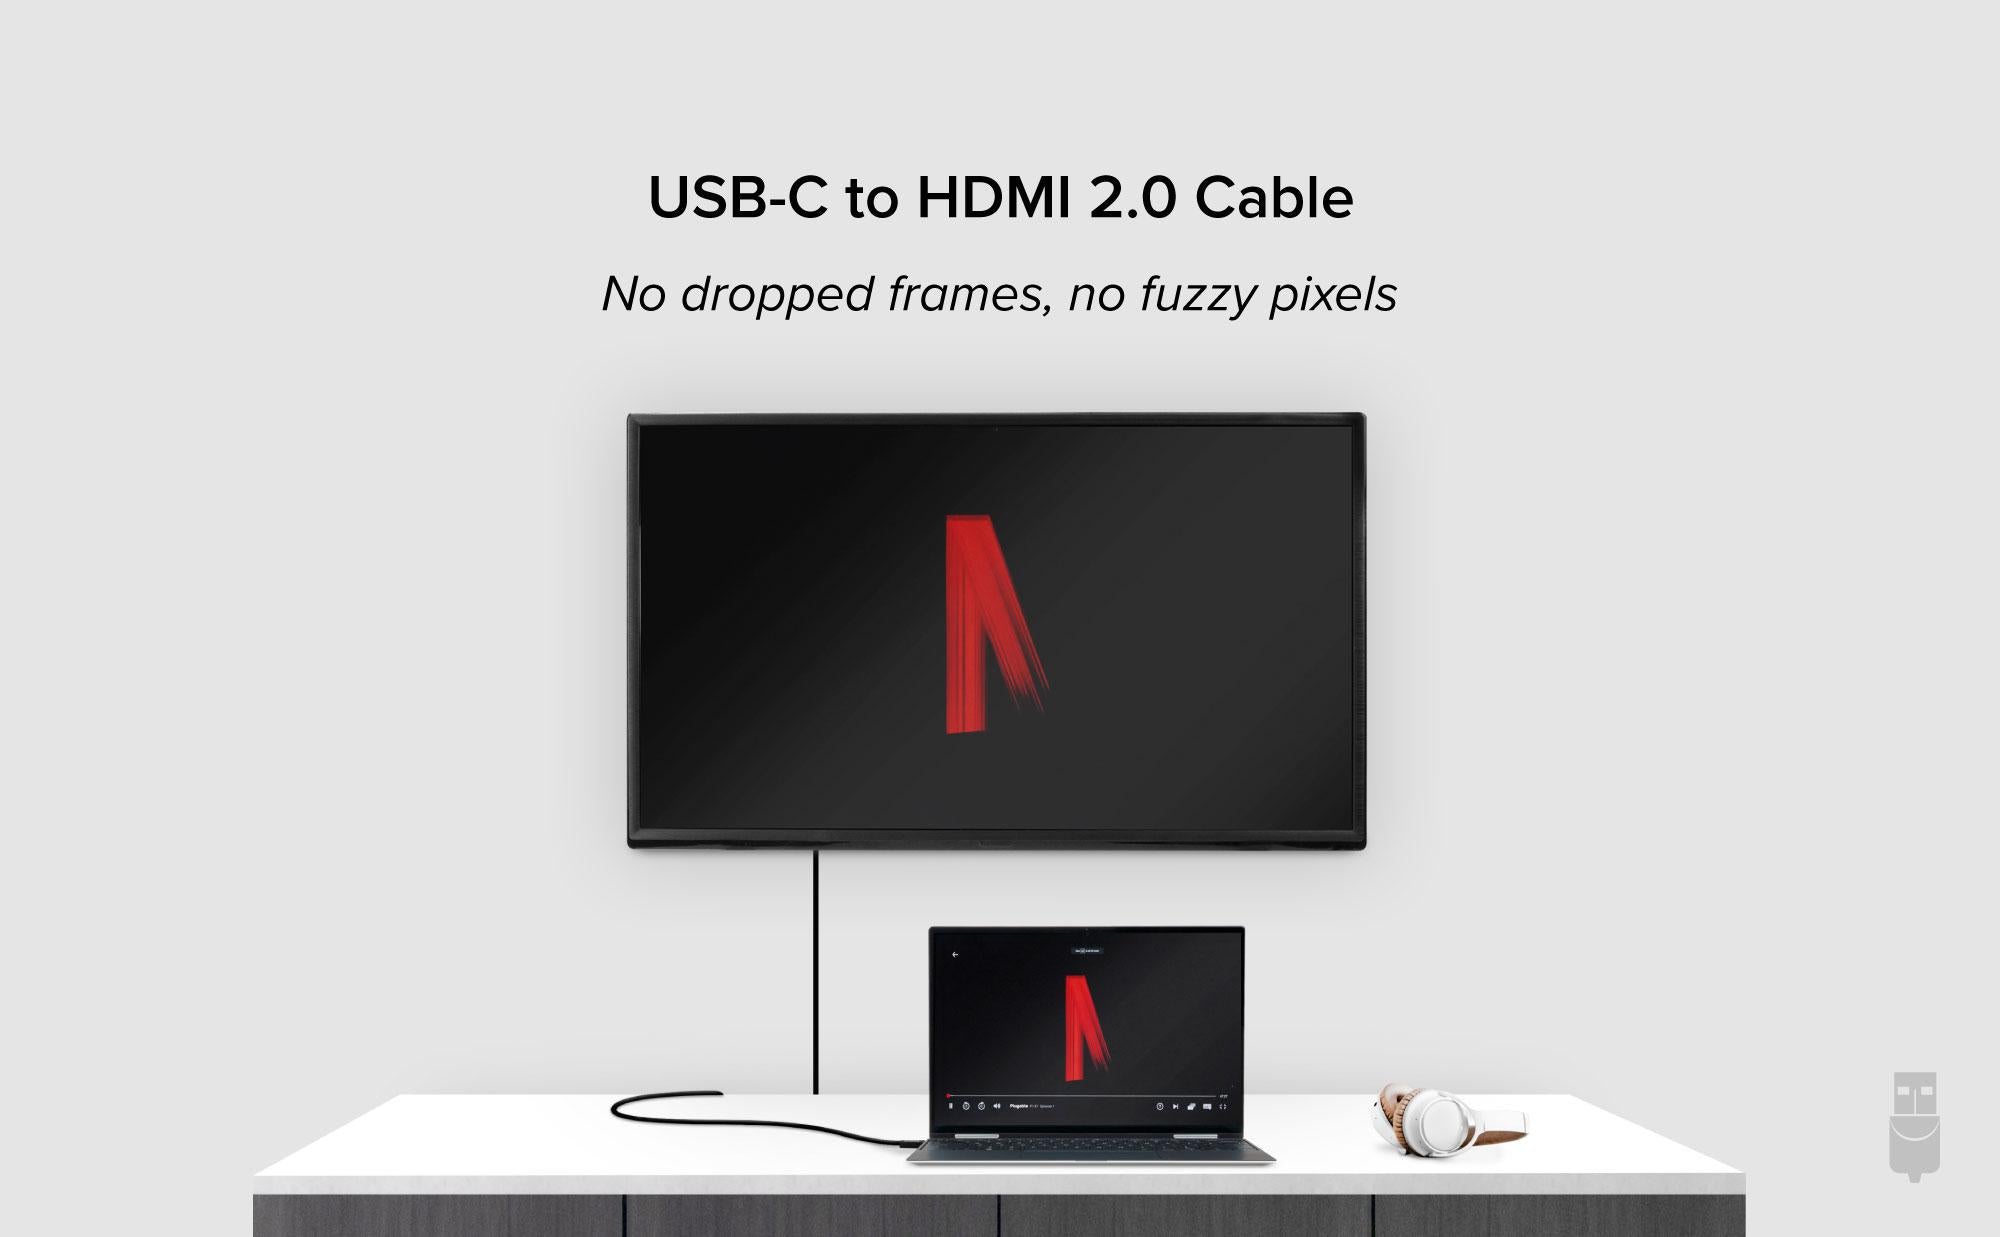
- USB-C to HDMI Cable—Utilizes the native video capabilities of USB-C ports on supported computers to drive a HDMI monitor with resolutions up to 3840x2160 @ 60Hz (4K) with this 6ft/1.8m adapter cable
- Resolutions—Cable utilizes USB-C and HDMI 2.0 bandwidth for HDR support and resolutions up to 3840x2160 @ 60Hz (4K). Also supports HDMI 1.4 displays and common resolutions below 4K such as 3840x1440, 2560x1440, 2560x1080, 1920x1080 (1080p) and more
- Important Note—Requires USB-C port which supports DisplayPort Alternate Mode, or Thunderbolt 3 port. Please note that an HDMI 2.0 capable system and display are required for 4K 60Hz
- Compatibility—HDMI to USB C adapter works with iPad Pro, modern Mac computers, Dell XPS, Microsoft Surface tablets and laptops, and other systems with Thunderbolt 3, Thunderbolt 4, or USB4 ports which support DisplayPort Alternate Mode over USB-C
- 2 Year Warranty—We love our Plugable products, and hope you will too. All of our products are backed with a 2-year limited parts and labor warranty as well as Seattle-based email support


Plugable USB-C to HDMI 2.0 Adapter Cable
The Plugable USB-C to HDMI 2.0 Adapter Cable enables an HDMI display to be connected to a computer via a USB-C port or Thunderbolt 3 port which supports “VESA DisplayPort Alternate Mode over USB-C" ("Alt Mode"). DisplayPort signaling is converted to HDMI 2.0 by a chip in the adapter cable.
6 foot/1.8m cable is a seamless, single cable solution for connectiing from your Thunderbolt 3 or USB-C system to your HDMI display, allowing for tidy installation and cable management without the need for additional dongles and HDMI extension cables.
Utilizes USB-C and HDMI 2.0 bandwidth to enable resolutions up to 3840x2160@60Hz (4K 60) and is backwards compatible with HDMi 1.4 displays and common resolutions below 4K such as: 3840x1440, 2560x1440, 2560x1080, 1920x1080 (1080P) and more.
4K at 60Hz Support Note: The host system must be able to support 3840x2160@60Hz and the connected monitor must comply with HDMI 2.0 standards in order to display 4K resolutions at a 60Hz refresh rate.

Uncompromising Performance
Alt Mode adapters like this USB-C to DisplayPort cable are a convenient option for adding an additional display output on supported systems. Since DisplayPort Alternate Mode is a direct pipeline to the host graphics processor (GPU) in your system, the connected display will function with the same performance as a natively attached display.
Video and photo editing, gaming, and other resource-intensive tasks are possible assuming that the system's GPU capabilities are sufficient for the application being used.

Compatibility & Details
Compatible Systems
Plug and Play installation on any Windows, Mac, or Linux host which supports DisplayPort Alternate Mode (Alt Mode) video output functionality.
Adapter has been fully tested for functionality on the 2018 iPad Pro (mirroring only), 2018 MacBook Air, 2017 iMac/iMac Pro, 2017 & 2018 MacBook/MacBook Pro, MacBook Retina 12" 2016 / 2017, Google Pixelbook, Chromebook Pixel 2015, Dell XPS 13 9360 / 9370 & XPS 15 9560 / 9570, and Samsung Galaxy S8 / S8+.
Audio is supported on HDMI-equipped TVs and monitors with built-in speakers. Multi-channel audio supported via LPCM encoding only.
Late 2016 MacBook Pro can support multiple displays via Alt Mode adapters. (Up to 2 external displays on MBP with Intel graphics, and 4 external displays on MBP with AMD graphics.)
Note: The 2015 12" MacBook Retina supports maximum resolution of 4K@30Hz.
Incompatible Systems
Most current phones and tablets with USB-C ports do not support Alt Mode video output.
ASMedia USB 3.1 controllers do not support Alt Mode video at this time.
Most motherboards with dual USB-C/Thunderbolt 3 ports are limited to a single Alt Mode output, and typically only support 1 USB-C Alt Mode adapter per system.
In The Box
Item and Quantity | Item Notes |
---|---|
1x USB-C to HDMI Active Adapter Cable |
Video
Port | Placement | Specification | Max Resolution and Refresh Rate | HDCP | Chipset |
---|---|---|---|---|---|
1x USB-C (Input) |
Cable End | Host Dependent | 3840x2160 @ 30Hz 3840x2160 @ 60Hz3840x1600 @ 30Hz 3440x1440 @ 30Hz 2560x2160 @ 60Hz 1920x1080 @ 60Hz 1600x900 @ 60Hz 1280x1024 @ 60Hz 1280x800 @ 60Hz 1280x720 @ 60Hz 1152x864 @ 60Hz 1024x768 @ 60Hz 800x600 @ 60Hz 640x480 @ 60Hz |
Supported | |
1x HDMI 4K HDR (Output) |
Cable End | HDMI 2.0 | 3840x2160 @ 30Hz 3840x2160 @ 60Hz3840x1600 @ 30Hz 3440x1440 @ 30Hz 2560x2160 @ 60Hz 1920x1080 @ 60Hz 1600x900 @ 60Hz 1280x1024 @ 60Hz 1280x800 @ 60Hz 1280x720 @ 60Hz 1152x864 @ 60Hz 1024x768 @ 60Hz 800x600 @ 60Hz 640x480 @ 60Hz |
Supported | PS186 Parade |
Video Output Modes
Host Stream Specification | Host Port Type | Number of Displays Used | Max Resolution at Display Count |
---|---|---|---|
DisplayPort 1.2 | Thunderbolt™ 3 or USB-C | 1 | 3840x1600 @ 60Hz 3840x2160 @ 60Hz3440x1440 @ 60Hz 2560x1440 @ 60Hz 1920x1080 @ 60Hz 1600x900 @ 60Hz 1280x1024 @ 60Hz 1280x800 @ 60Hz 1280x720 @ 60Hz 1152x864 @ 60Hz 1024x768 @ 60Hz 800x600 @ 60Hz 640x480 @ 60Hz |
Audio
Port | Placement | Connection | Max Bit Depth and Sample Rate | Signal Output | Channels | Chipset |
---|---|---|---|---|---|---|
HDMI Output |
Cable End | HDMI | Host Dependent | Digital | Host Dependent | Alt Mode |
Included Cables
Port Type (Side 1) | Cable Specification | Port Type (Side 2) | Cable Length | External Power for Cable |
---|---|---|---|---|
1x Male HDMI | USB 3.0 (5Gbps) | 1x Male USB-C | 1.8m/6.0ft | No |
Get Started
This device is fully Plug and Play. Simply;
1. Insert the USB-C end of the adapter cable into the host system.
2. Plug the HDMI end of the adapter cable into your desired display.
Questions? We're here to help! Please reach out to us at support@plugable.com
Filter Help Articles and Frequent Questions by Category
Articles
Well how about that, it looks like we don't have any articles matching your filters! Try removing one of your choices or clear the filters to show all articles.
You can always contact support if you need help too!
Can I Connect a DisplayPort (DP) Monitor to the HDMI Port on This Device Using an Adapter or Cable?
No, this is not possible. Please note that DisplayPort to HDMI cables (as with most cables involving protocol/signal conversion) are not bidirectional adapters, which means they only work in one direction -- from a DisplayPort output to a HDMI input.
Connecting these type of cables backwards will not allow an HDMI output port (such as those on a dock) to function with a DisplayPort input on a monitor.
No Sound? How to Change Your Default Audio Device to Your Plugable Product
Whether you're on Windows, macOS, or Linux, it's common to add new audio devices to your computer.
Some examples of additional audio devices you may want to switch to include:
- Bluetooth headsets, headphones, and speakers
- Speakers built into a display, such as a TV or monitor
- A USB sound card, digital audio converter (DAC), or analog to digital converter (ADC)
- USB microphones
- Audio jacks on a docking station
These steps don't apply to the Plugable Performance NIX HDMI Capture Card (USBC-CAP60).
Here are the steps that you need to set a new default audio recording or output device on different operating systems.
Set Audio Output Device
Set Audio Recording Device
Set Default Playback Device in Windows
- Check that your device is properly connected, and that any necessary drivers are installed
- It is also a good idea to make sure that your sound device is turned on, and that the device's volume control is not at the absolute minimum setting
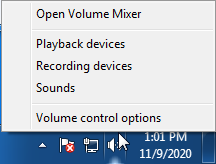
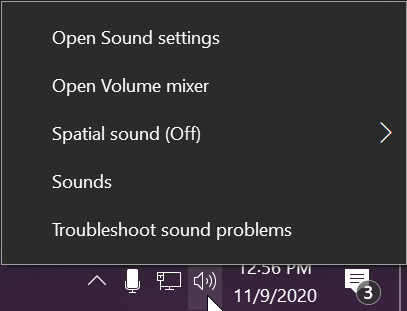
- Right-click on the speaker symbol in the Windows taskbar/system tray
-
Windows 7/8.x—Select Playback Devices. The Sound window will open with the Playback tab highlighted
-
Windows 10/11—Select Open Sound Settings then click the link under 'Related Settings' for Sound Control Panel, then click the Playback tab
- Alternatively, after selecting Open Sound Settings, use the dropdowns under the Output header
-
Windows 7/8.x—Select Playback Devices. The Sound window will open with the Playback tab highlighted
- Find your device in the window
- A Plugable USB 3.0 docking station or sound-enabled display adapter will appear as Plugable Audio
- A Plugable USB 3.0 Silicon Motion docking station or sound-enabled display adapter will appear as SMI USB Audio
- A Plugable USB 2.0 docking station will appear as USB Multimedia Audio Device
- A Plugable USB Audio adapter will appear as USB Audio Device
- Right-click on the device you found in step 3 and select Set as Default Device. A check mark should appear next to your device, and sound should now play through it
- Click OK to exit the window
Additional Configuration for Bluetooth
Please see our pairing and configuration guide for Bluetooth devices.
Set Default Playback Device in macOS
- Open System Preferences
- Click Sound
- Select Output
- Select the most appropriate device
- A Plugable USB Audio adapter will appear as USB Audio Device
Set Default Playback Device in Linux
- Ensure that you audio device is connected to the PC
- If the audio device is self-powered, it is a good idea to make sure that it is powered on, and that the device's volume control is not at the absolute minimum setting
- Launch the 'Settings' application in your distro
- Go to the 'Sound' option
- Find the dropdown for your 'Output Device', and change it to your preferred output device
- For additional sound device controls, you may want to consider using Pulseaudio Volume Controls (package name pavucontrol)
Set Default Recording Device in Windows
- Check that your device is properly connected, and that any necessary drivers are installed
- It is also a good idea to make sure that your sound device is turned on, and that the device's volume control is not at the absolute minimum setting
- Right-click on the speaker symbol in the Windows taskbar/system tray
-
Windows 7/8.x—Select Recording Devices. The Sound window will open with the Recording tab highlighted
-
Windows 10/11—Select Open Sound Settings then click the link under 'Related Settings' for Sound Control Panel, then click the Recording tab
- Alternatively, after selecting Open Sound Settings, use the dropdowns under the Input header
-
Windows 7/8.x—Select Recording Devices. The Sound window will open with the Recording tab highlighted
- Find your device in the window
- A Plugable USB 3.0 DisplayLink docking station or sound-enabled display adapter will appear as Plugable Audio
- A Plugable USB 2.0 docking station will appear as USB Multimedia Audio Device
- A Plugable USB Audio adapter will appear as USB Audio Device
- Right-click on the device you found in step 3 and select Set as Default Device. A check mark should appear next to your device, and sound should now play through it
- Click OK to exit the window
Additional Configuration for Bluetooth
Please see our pairing and configuration guide for Bluetooth devices.
Set Default Recording Device in macOS
- Open System Preferences
- Click Sound
- Select Input
- Select the most appropriate device
- A Plugable USB Audio adapter will appear as USB Audio Device
Set Default Recording Device in Linux
- Ensure that you audio device is connected to the PC
- If the audio device is self-powered, it is a good idea to make sure that it is powered on, and that the device's volume control is not at the absolute minimum setting
- Launch the 'Settings' application in your distro
- Go to the 'Sound' option
- Find the dropdown for your 'Input Device', and change it to your preferred input device
- For additional sound device controls, you may want to consider using Pulseaudio Volume Controls (package name pavucontrol)
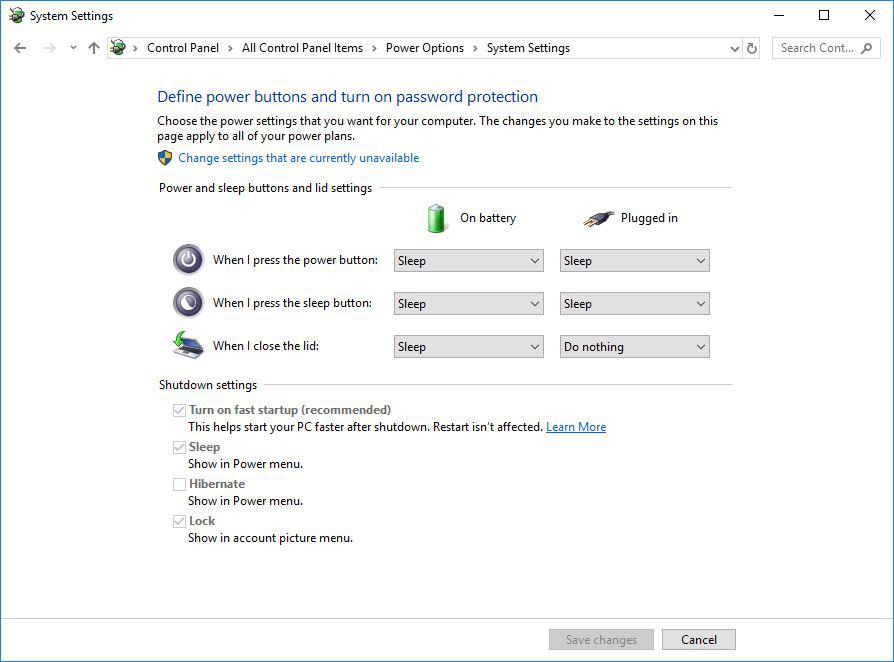
My Docking Station/Adapter Works Well With My Windows Laptop, but When I Close the Lid the Displays and Laptop Turn Off or Sleep. How Do I Fix This?
Most Windows notebook computers power management settings will default to putting the computer to sleep with the lid closed, regardless of any external displays, keyboard, or mouse connected to the computer. If this is happening but you would prefer the system to remain active with the lid closed utilizing the external display or displays, these settings can be changed by performing the following:
For Windows 10:
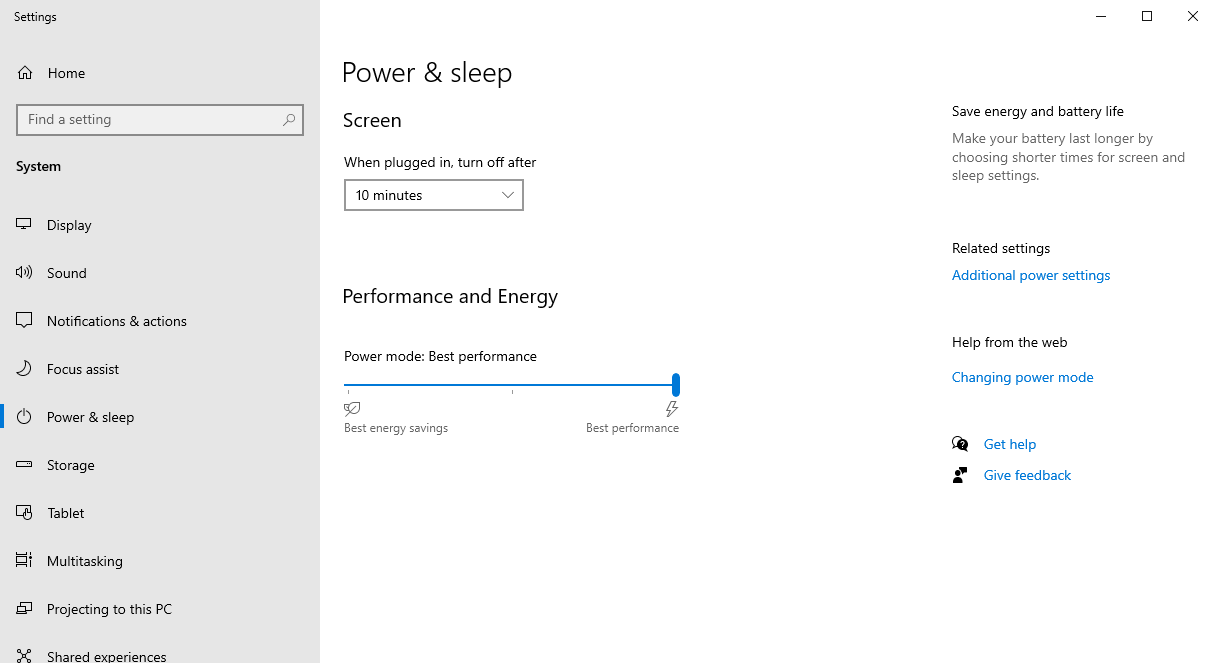
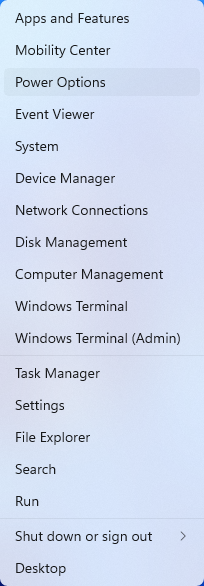
- Start by right-clicking on the Start button and select Power Options from the menu.
- From the right side of the Power Options settings page, select the blue link for Additional power settings
- From the choices present on the left-hand side of the Power Options window, please click on Choose what closing the lid does
- Make sure the setting for When I close the lid under the Plugged In column is set to Do Nothing
- Click the Save Changes button and restart the system (making sure that the laptop’s power adapter is also connected) and test the behavior again.
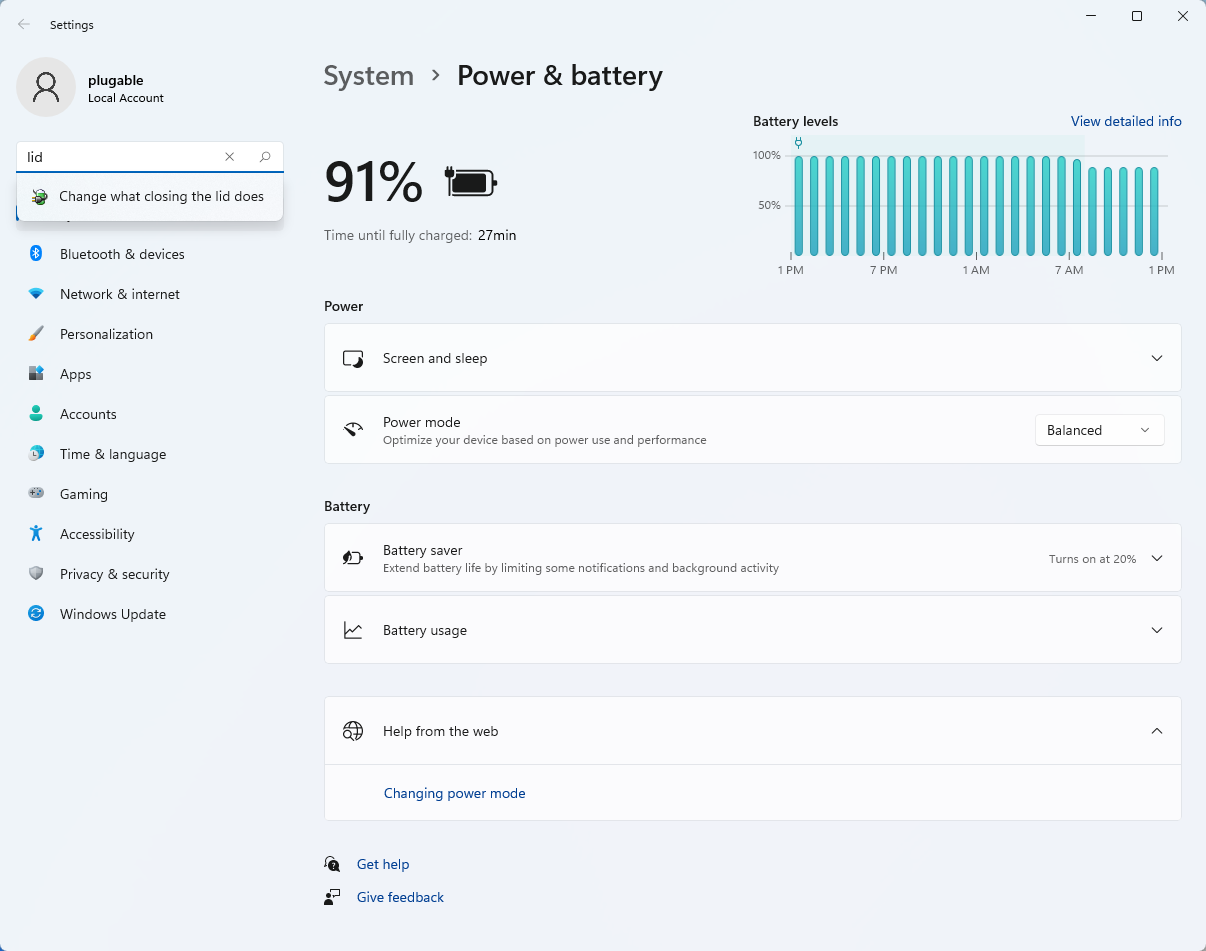
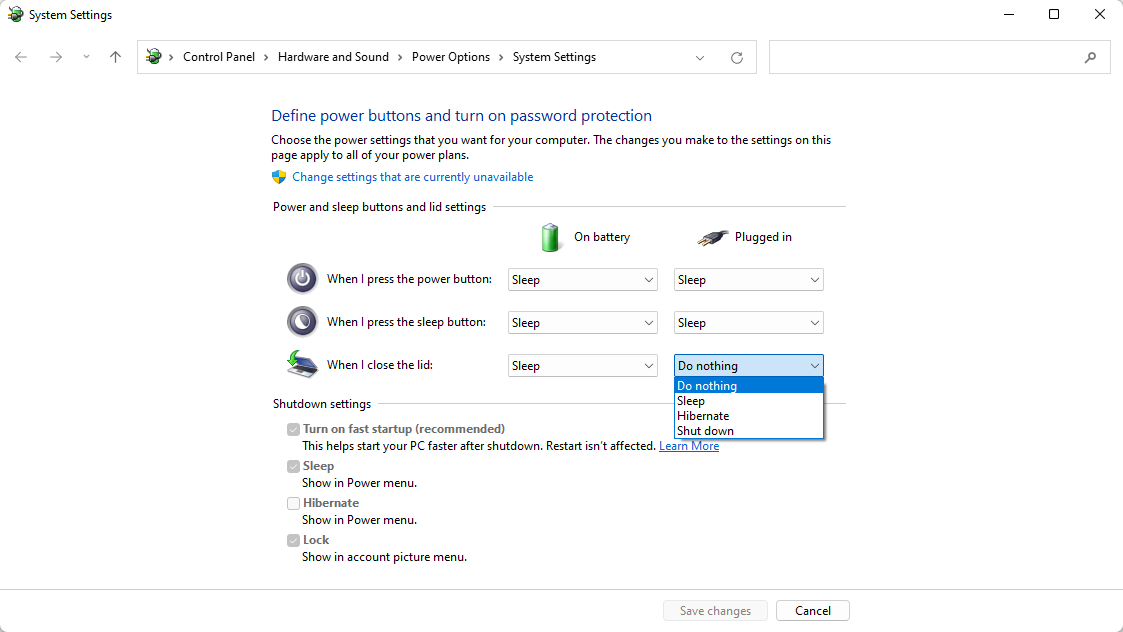
For Windows 11:
- Start by right-clicking on the Start button and select Power Options from the menu.
- In the upper left corner of the settings window, in the search box, type "lid" then select Change what closing the lid does from the search results
- Make sure the setting for When I close the lid under the Plugged In column is set to Do Nothing
- Click the Save Changes button to apply the new settings.
Closing the lid should no longer put the computer into sleep mode when an external display and power source is connected, instead one of the external displays should now become the Primary display with the desktop icons instead of the laptop's built-in display.
The lid may still need to be opened to perform the following tasks:
- To power on the computer from a fully powered off state
- To log into the computer if logged out or if the computer is restarted with the lid closed
- To wake the computer from a deep sleep state ( hibernation, or Windows hybrid sleep states )
My System Has Multiple USB-C and/or Thunderbolt 3 Ports. Can I Add Multiple Alt Mode Adapters for Multiple Displays?
If your system supports multiple Thunderbolt 3 or USB-C Alt Mode outputs, then you will be able to use multiple adapters on one system. However, there are some Thunderbolt 3/USB-C Alt Mode systems that limit the video output to one port.