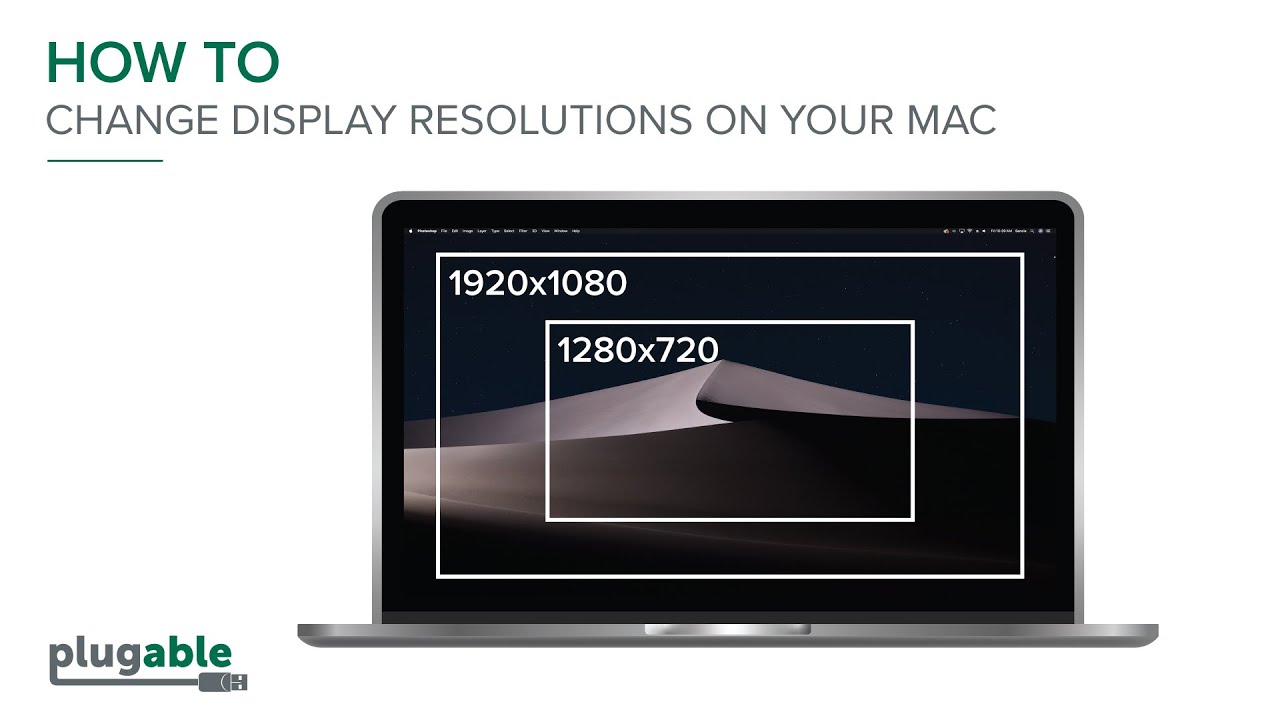
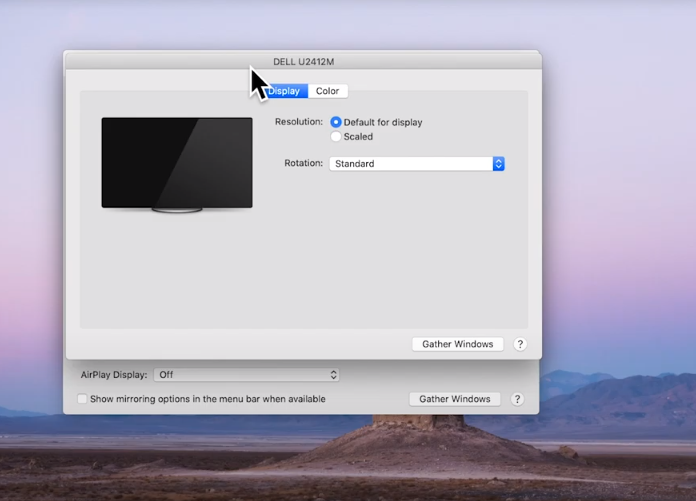
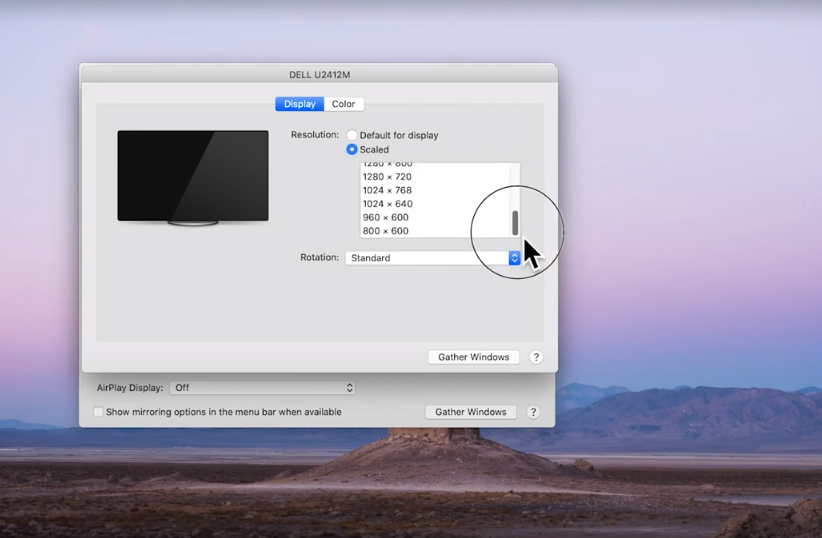
As more people have shifted to working from home, adding one or two external displays has become more common than ever. When adding external displays to a Mac system, the image within the displays may not always look ‘proper’ or ‘correct’ to one’s eyes. There can be several different causes for such behavior, however in many cases the cause is macOS automatically selecting a resolution or scaling factor for the external display(s) that may not be visually pleasing.

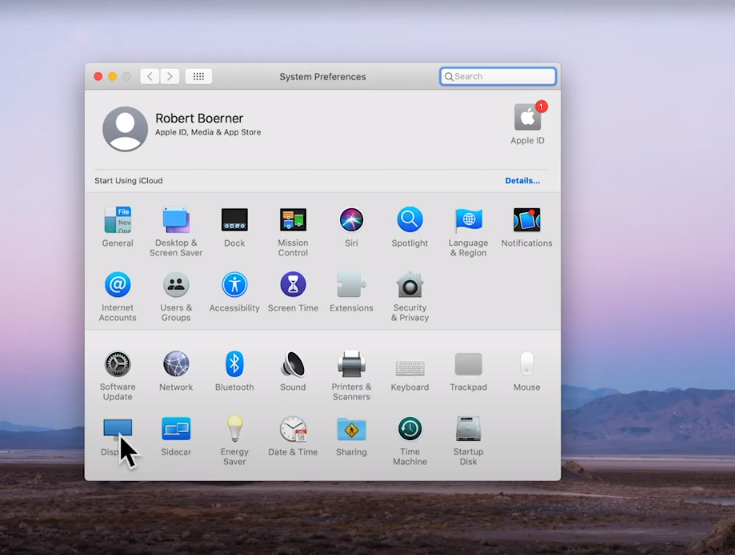
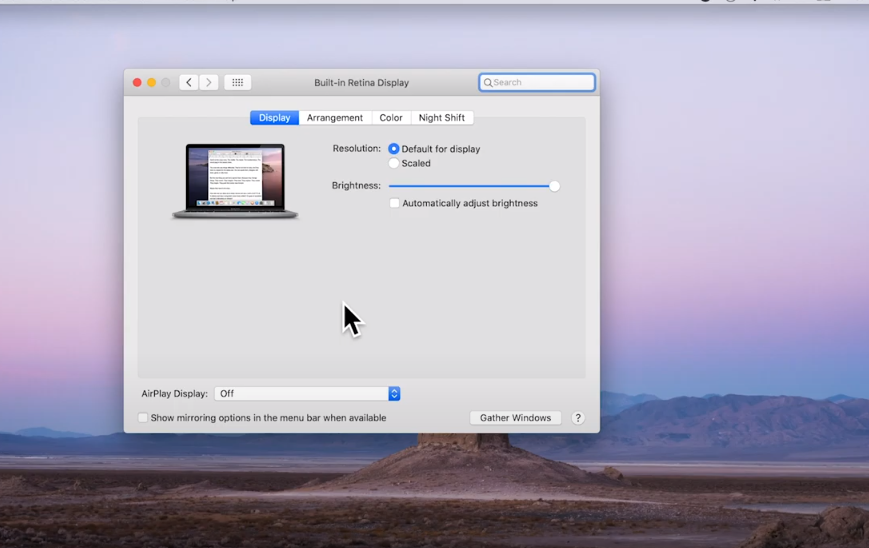
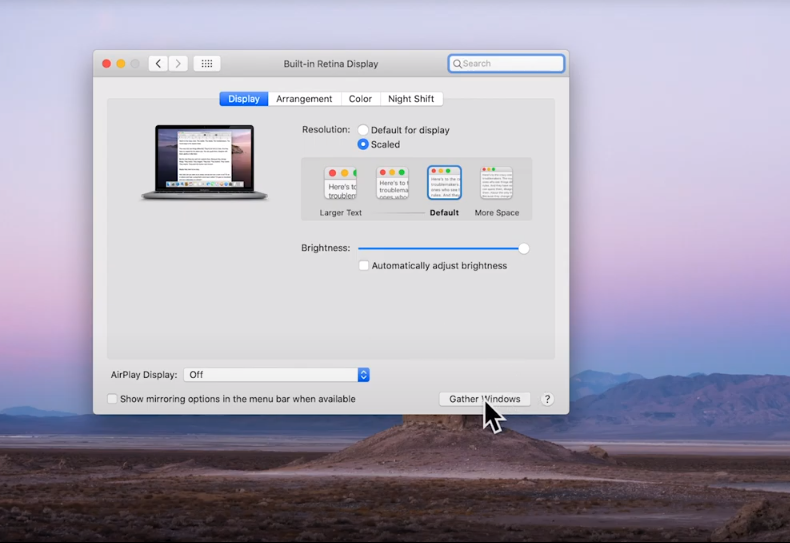
Should that occur, this quick tutorial will demonstrate how to access the ‘hidden’ resolution options for external displays within macOS that in some cases will help make the image more pleasing. If you would rather see a video demonstration, click on the video link below to see the process in action.

YouTube embed placeholder image

Step 1

From within the desktop of your Apple Mac system that has an external display connected to it, access the ‘System Preferences’ application (gear icon within the macOS Dock at the bottom of the screen) and then click on the ‘Displays’ option.

Opening System Preferences and selecting Displays

Step 2

When the Display Settings application appears, it will place separate application windows within each external display connected to the system. When this is done on a laptop system, the ‘primary’ application window will appear within the laptop’s built-in internal display. Secondary application windows will appear on each external display connected to the system.  

The ‘primary’ application window is shown in the example screenshot below. The ‘Resolution’ section has two options, ‘Default for display’ and ‘Scaled’. The ‘Default’ option is as the name implies, the default resolution that Apple decides is appropriate for the laptop’s built-in internal display. The ‘Scaled’ option allows you to make choices that can make content within the display appear to be bigger or smaller as desired.

Display options in Mac's System Preferences

Step 3

If you wish to make changes to the external displays connected to the system, you can move the mouse pointer to the secondary Display Settings windows that opened within each of the external displays. The intent of having the windows open on all of the displays is to provide an obvious physical relationship between the secondary application windows and the display that is being changed. However, a quick tip that can save you from having to move the mouse across all of the displays is to click on the ‘Gather Windows’ button at the bottom of the primary application window, as shown below.

How to gather all Display Settings windows onto one screen

Step 4

Once the application windows have been gathered together, select the secondary window that represents the external display that you wish to adjust. The secondary application windows have the external displays’ names on the tops of the windows to help you identify which window represents which display.

A Secondary Display window

Step 5

You will notice that you have similar options to what you saw when changing the settings for the laptop’s internal display, however when you click the ‘Scaled’ option you will see a list of resolution choices. This list of choices may not provide an option that results in the image within the display appearing to your liking.  

Should that prove to be the case, a trick is to hold down the ‘Option’ key on your keyboard while clicking on the ‘Scaled’ option. This will show all of the possible resolution options available for the display, some of which may prove more pleasing to the eye when chosen.

List of resolution options for a particular secondary display

In summary, when connecting external displays to an Apple Mac system the image within the display may not always appear as desired. Should the default resolution options for the external displays not be to your liking, you can access all of the resolution options by holding down the ‘Option’ key while clicking on the ‘Scaled’ option within the ‘Display’ System Preferences application.

We hope you find this information useful! If you have any questions or need help using any of our Plugable products, please reach out to us directly via support@plugable.com or comment below and we will be happy to help.


Loading Comments

Article ID: 392015872165