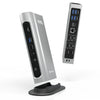
Plugable Thunderbolt™ and USB-C Dual Monitor Docking Station, 96W Laptop Charging
$315.00 USD
SKU: TBT3-UDZAmazon Rating : (727 Reviews)
Features
- 100W Max Power—up to 100W (96W certified), while also safely charging laptops needing 85W or less. Maximize compatibility with Thunderbolt 3 and USB-C systems
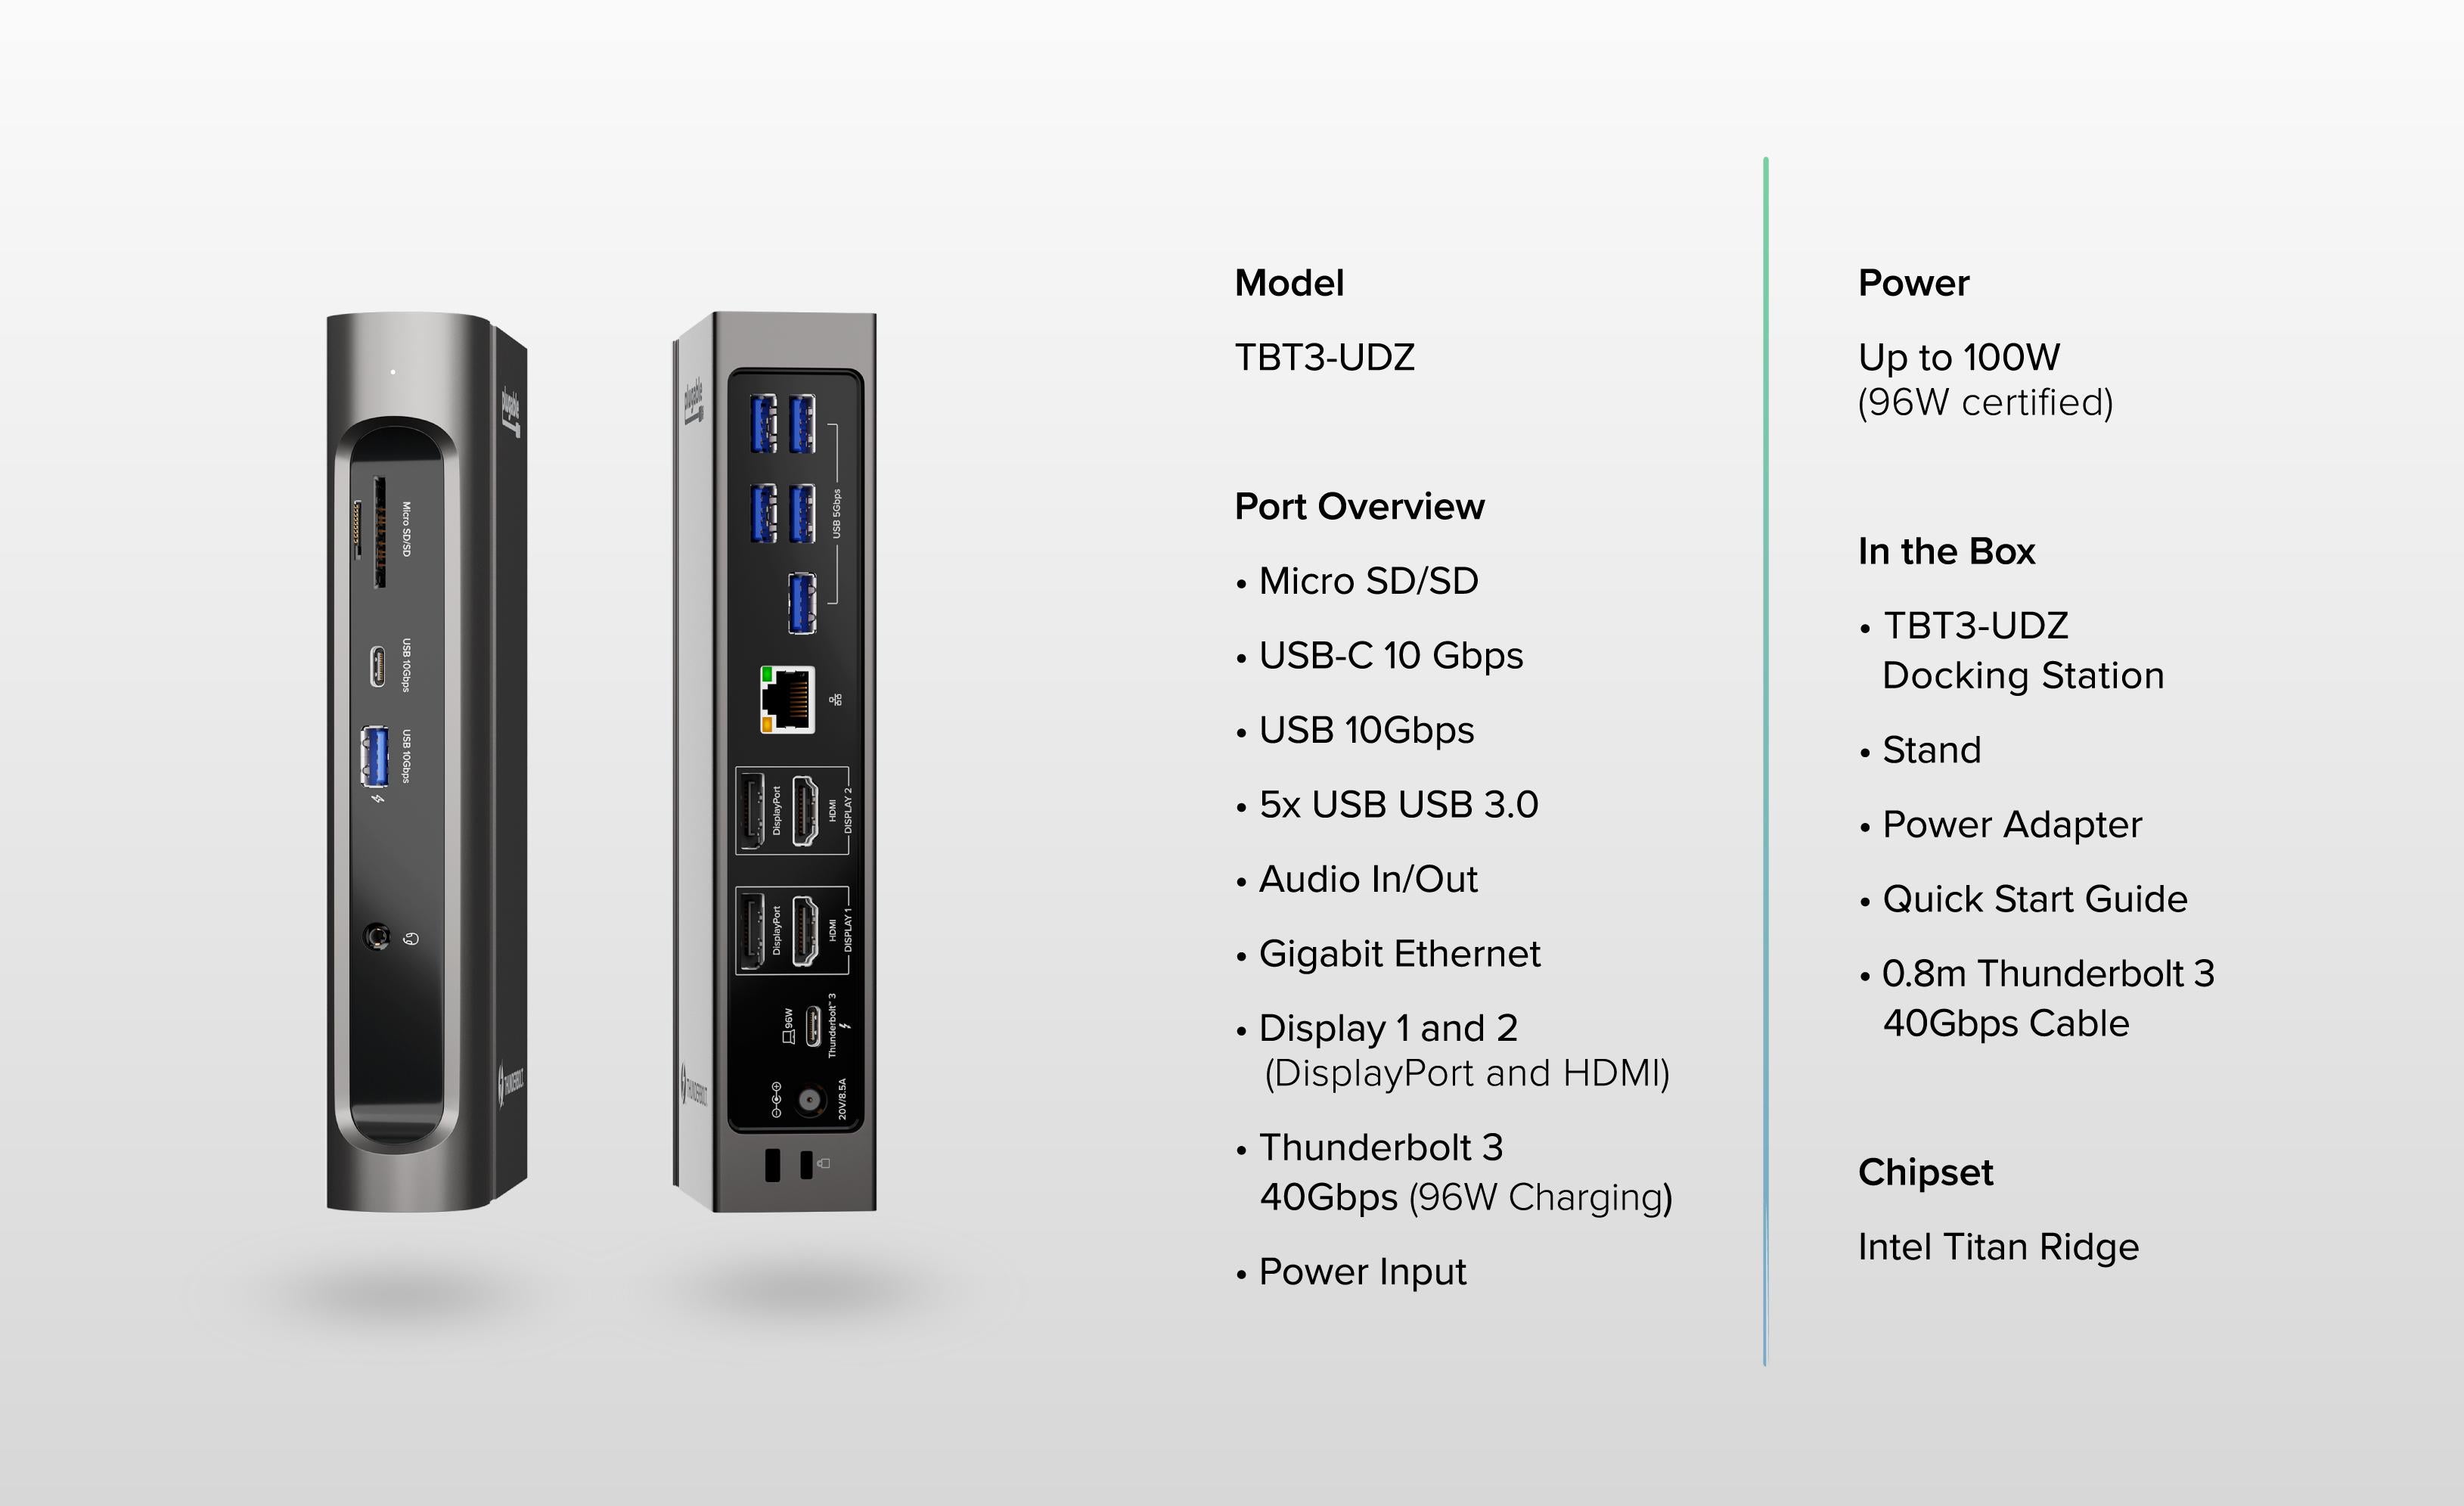
- 14-in-1 Expansion—Thunderbolt 3 dock expands to 2x HDMI or DisplayPort monitors, 1x USB-C (10Gbps), 1x USB-A (10Gbps), 5x USB 3.0 (5Gbps), Gigabit Ethernet, Audio In/Out, SD/microSD all through a single 2.6ft Thunderbolt 3 cable (40Gbps)
- Versatile Dual 4K Displays—This laptop docking station's dual monitor design is the first Thunderbolt dock to offer a choice between dual HDMI and DisplayPort displays. Drive up to two 4k 60Hz displays via Thunderbolt 3 or two 1080p 60Hz displays via USB-C
- Mac and Windows—Compatible with Intel CPU Thunderbolt 3 Macs like the MacBook Pro 16" and Windows systems with Thunderbolt 3 or USB Type-C like the Surface Pro 7, Surface Laptop 3, Lenovo Yoga, HP Spectre, Dell XPS (USB-C and Apple M1 systems will operate at reduced functionality)
- 2 Year Warranty—We love our Plugable products, and hope you will too. All of our products are backed with a 2-year limited parts and labor warranty as well as Seattle-based email support

Plugable's Thunderbolt 3 and USB-C Dual Display Dock with 100W Host Charging (TBT3-UDZ)
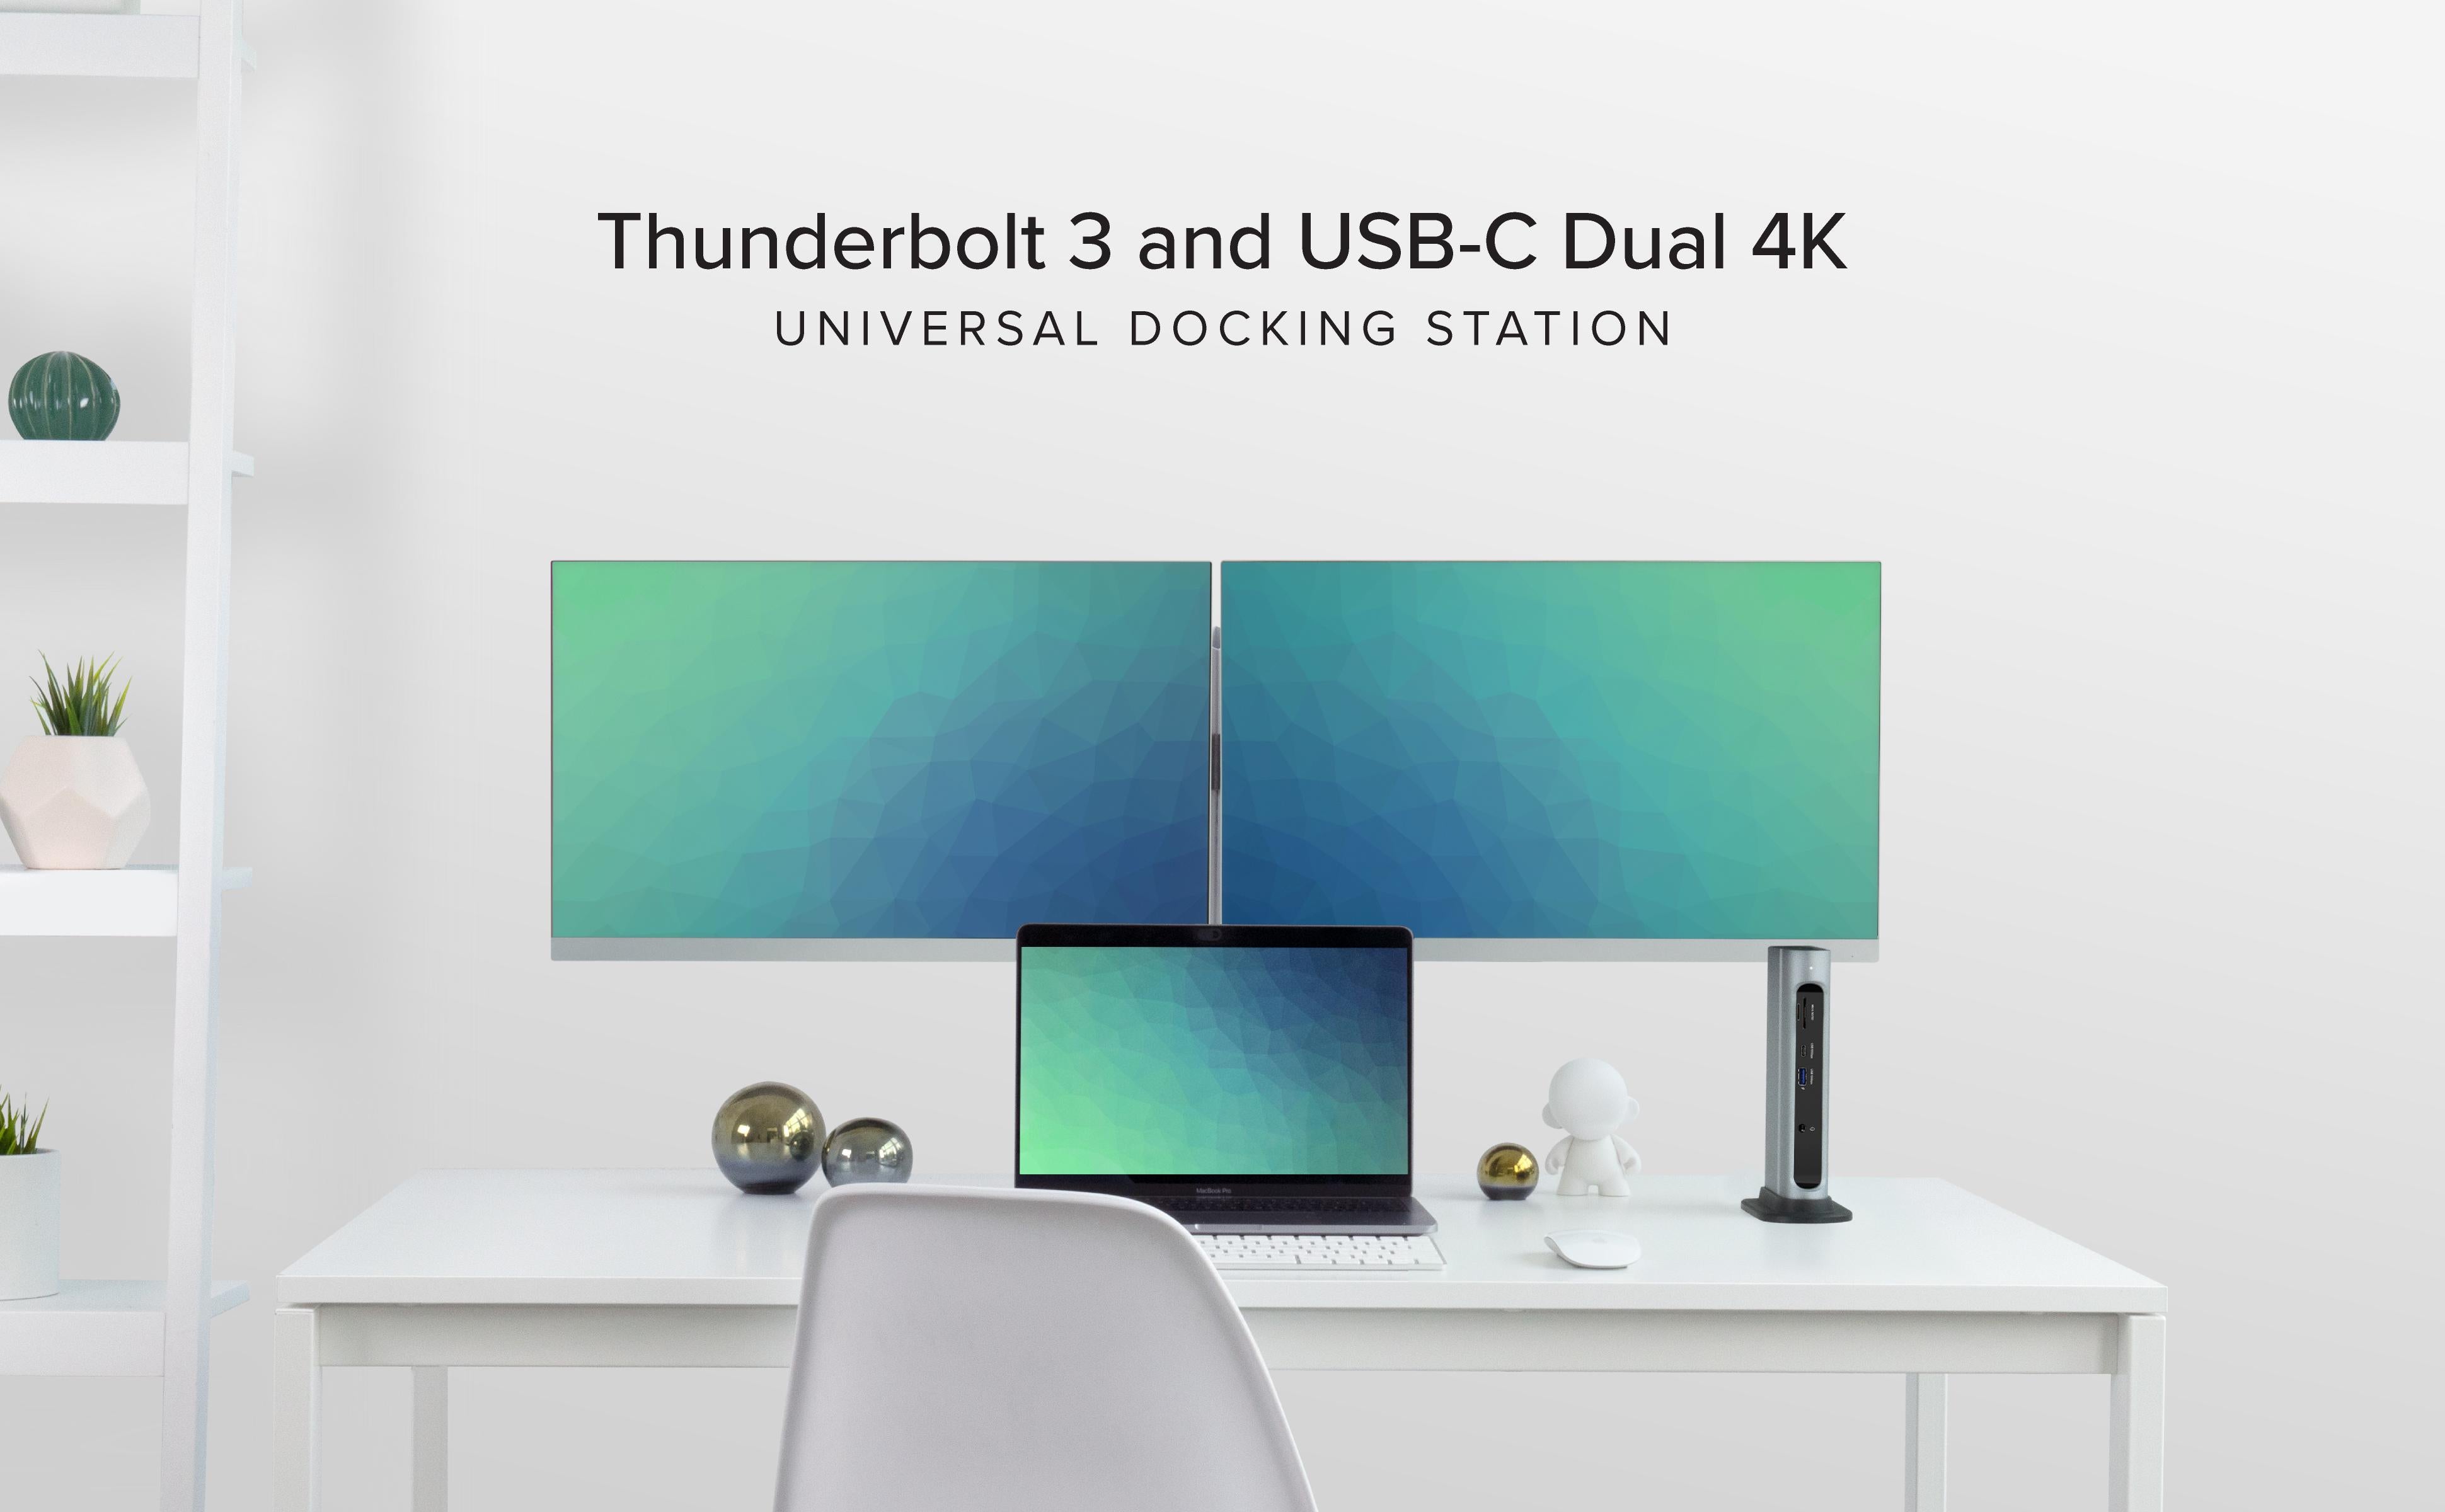
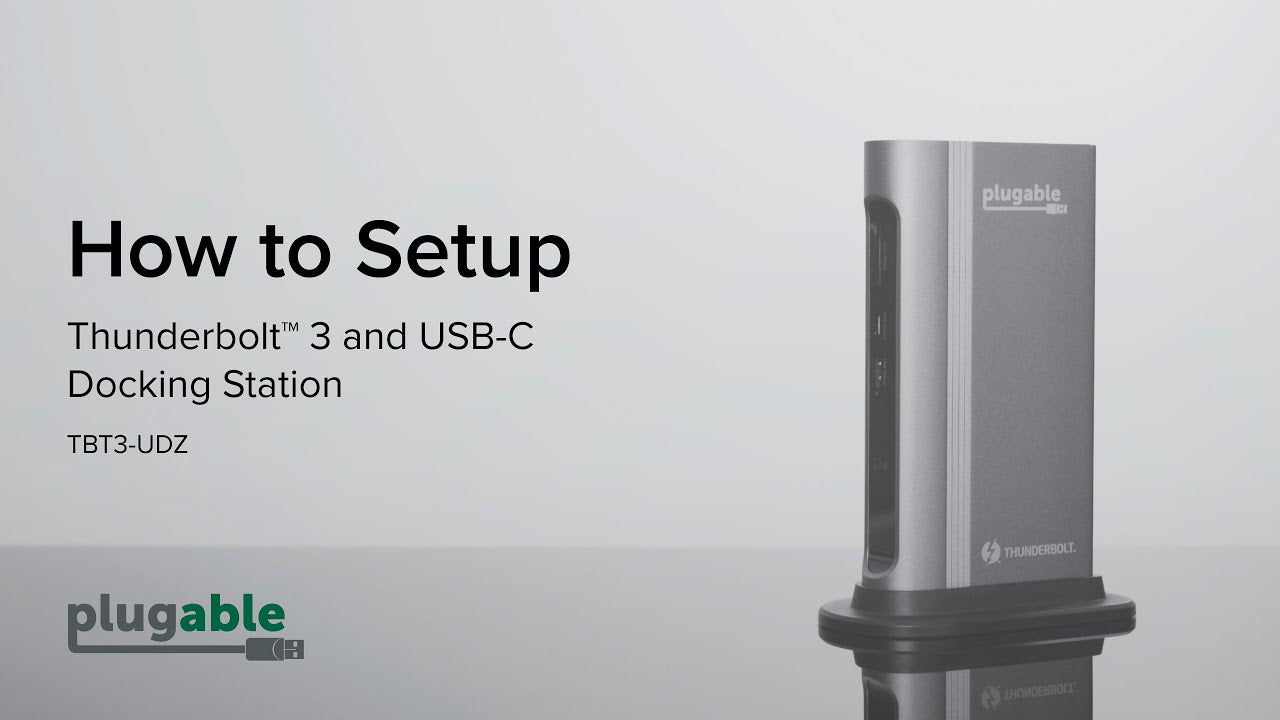
The TBT3-UDZ is Plugable’s most versatile, powerful and accessible docking station yet. Its unique, exclusive design allows users to connect up to two 4K displays using either HDMI or DisplayPort without the need of external adapters - the first Thunderbolt 3 docking station to offer this flexibility of display types. Using the Intel Titan Ridge chipset and Plugable's custom design, the TBT3-UDZ delivers a combination of more port options, fastest charging up to 100W, and widest PC and Mac compatibility of any dock on the market.
- Up to 100W Power Delivery to host (96W Certified)
- 2x DisplayPort and 2x HDMI ports (for a total of two displays)
- 7x USB ports: 1x USB-C 10Gbps port, 1x USB 10Gbps port, 5x USB 5Gbps ports
- 1x SD card slot
- 1x MicroSD card slot
- 1x Gigabit Ethernet port
- 1x Combination audio input/output jack
With this dock, we set out to solve customer pain points that users have been dealing with for a long time now. These include the difference between Thunderbolt 3 and USB-C, which have identical looking ports, HDMI versus DisplayPort, USB-C or USB-A peripheral ports, and the different levels of charging wattage offered. The TBT3-UDZ eliminates any confusion between these different types of technologies by offering a simplified solution that answers these questions for you.

DisplayPort and HDMI
Plugable's unique design allows users to connect up to two additional 4K displays with your port of choice using either HDMI or DisplayPort without the need of external adapters.
This is the first Thunderbolt 3 docking station to offer this flexibility of display types. Made to adapt to the user's setup, the TBT3-UDZ is unparalleled in flexibility.

Vertical and Horizontal
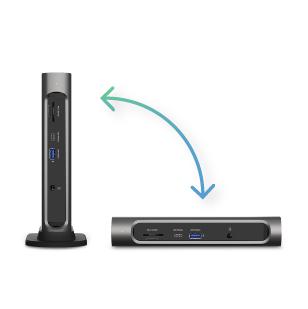
The horizontal or vertical design of the TBT3-UDZ goes against the grain of other docking stations. Fit the dock in any space standing up or lying flat so there's more room for monitors and peripherals, while keeping a productive and clean workspace.
The dock includes a sturdy, detachable base for vertical orientation, which ensures a stable, sturdy setup no matter how many cables you connect.

Thunderbolt 3 and USB-C
The TBT3-UDZ is built upon the latest Intel Titan Ridge chipset, enabling the widest compatibility with Thunderbolt 3 and USB-C laptops on the market. Thunderbolt 4 laptops are also supported.
Its dual connectivity removes frustrations from having to pick a docking station for either type of laptop while delivering unrivaled performance.

100W Charging
The TBT3-UDZ’s 100W* Power Delivery is the highest charging wattage to be implemented in any universal Thunderbolt 3 docking station. With Apple now releasing notebooks with 96W chargers, such as the Intel based 16” MacBook Pro, the TBT3-UDZ is the best docking station to pair with these devices for unrivaled performance.
Charge your laptop at noticeably faster speeds - so you’ll have one less thing to think about and you can say goodbye to your other power supply.
*To strictly comply with 100W regulatory limits with margin, Thunderbolt certification limits to charging to 96W.

Dual 4K Displays
Expand your workspace with 40Gbps Thunderbolt speeds and drive any combination of two DisplayPort or HDMI monitors. When connected to a compatible Thunderbolt 3 or 4 Windows or Mac* system:- Drive up to two 4096x2160 @ 60Hz displays (lower resolutions also supported)
- *M1/M2 base model Macs are limited to a single extended display (M1 Pro/M1 Max support dual displays). Not DisplayLink compatible
- Windows: Drive two 1920x1080 @ 60Hz displays or drive one 4096x2160 @ 30Hz display
- 12” MacBook Retina: Drive up to two 4096 x 2160 @ 30Hz mirrored displays

Flexible Connectivity
The docking station features 14 ports making it one of the most comprehensive docking stations available, ideal for the most demanding of professions that require multiple inputs and peripherals.
With a mix of five USB 3.0 (5Gbps), one USB-A (10Gbps) and one USB-C (10Gbps) ports, you’ll be able to connect your phone or USB flash drive to the easily accessible front USB and USB-C ports, then connect other USB peripherals such as a keyboard or mouse to the back of the dock.
Note: The USB-C port on the front of the dock supports data transfer only (no video). When connected to a USB-C laptop the front USB-C and USB-A port may be limited to 5Gbps depending on host specifications.
In The Box
Item and Quantity | Item Notes |
---|---|
1x Plugable TBT3-UDZ Thunderbolt 3 and USB-C Dual Display Dock with 96W Host Charging | |
1x Quick Start Guide | |
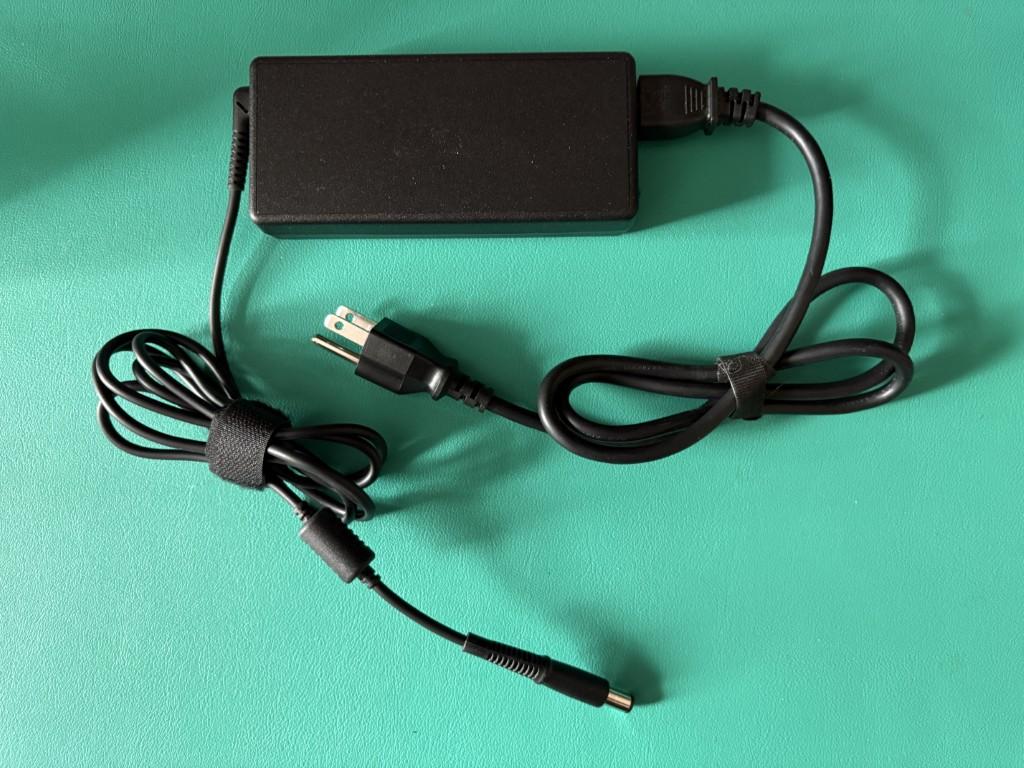
1x Power supply | |
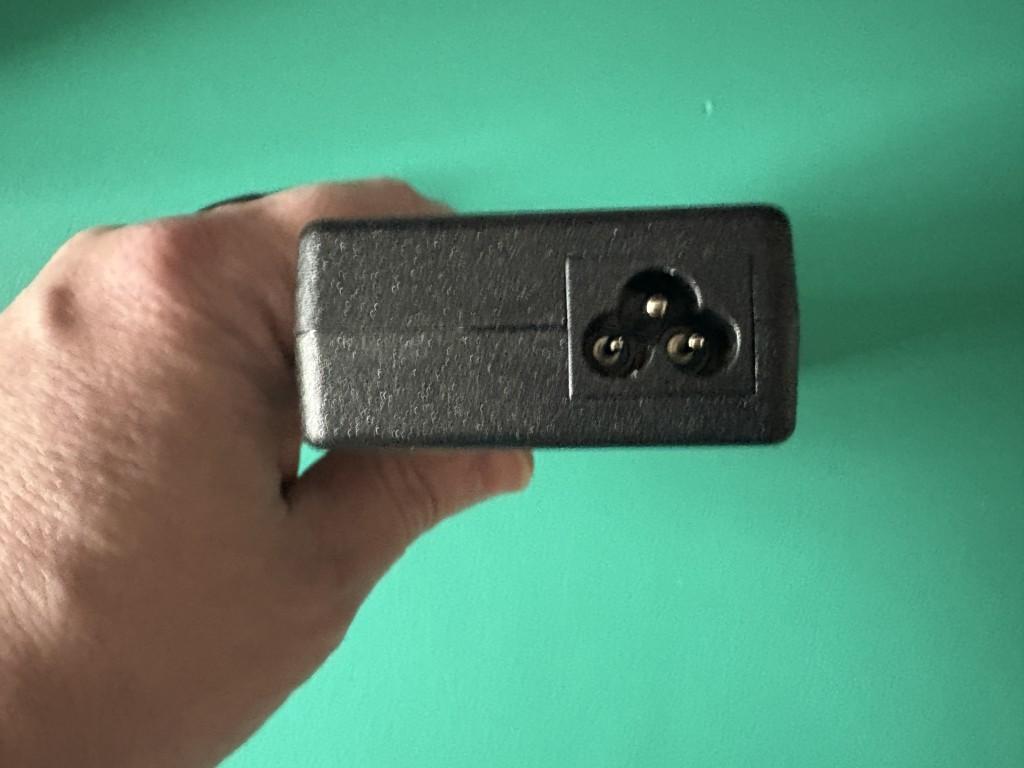
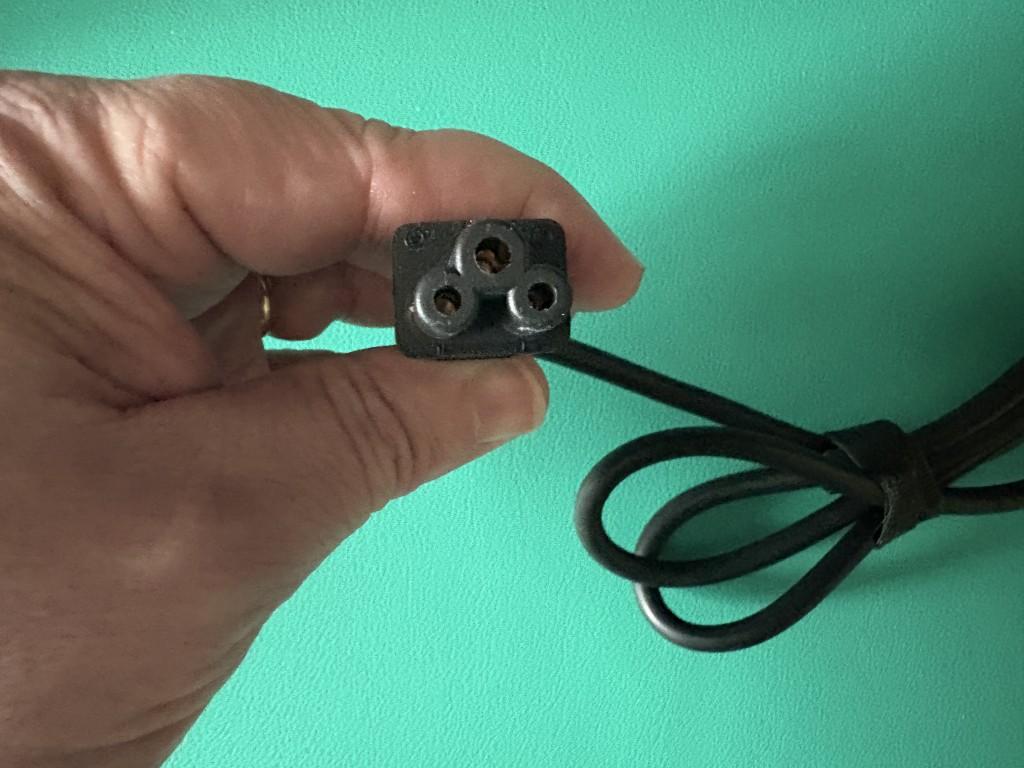
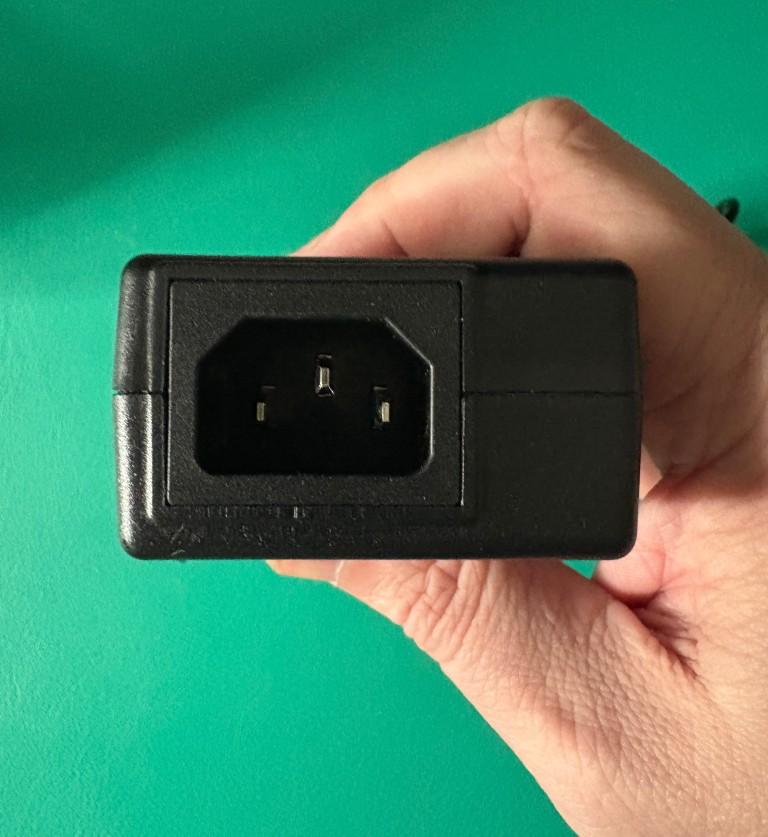
1x Power cable | |
1x Vertical stand | |
1x 0.8m 40 Gbps Thunderbolt 3 Cable |
Video
Port | Placement | Specification | Max Resolution and Refresh Rate | HDCP | Chipset |
---|---|---|---|---|---|
2x HDMI 4K or
DisplayPort (Output) |
Rear | DisplayPort 1.2 or HDMI 2.0 | 4096x2160 @ 60Hz 4096x2160 @ 60Hz3840x2160 @ 60Hz 3840x1600 @ 60Hz 3440x1440 @ 60Hz 2560x1440 @ 60Hz 1920x1080 @ 60Hz 1600x900 @ 60Hz 1280x1024 @ 60Hz 1280x800 @ 60Hz 1280x720 @ 60Hz 1152x864 @ 60Hz 1024x768 @ 60Hz 800x600 @ 60Hz 640x480 @ 60Hz |
Supported |
Video Output Modes
Host Stream Specification | Host Port Type | Number of Displays Used | Max Resolution at Display Count |
---|---|---|---|
DisplayPort 1.4 | Thunderbolt™ 3 or USB-C | 2 | 3840x2160 @ 60Hz 4096x2160 @ 60Hz3840x1600 @ 60Hz 3440x1440 @ 60Hz 2560x1440 @ 60Hz 2560x1080 @ 60Hz 1920x1080 @ 60Hz 1600x900 @ 60Hz 1280x1024 @ 60Hz 1280x800 @ 60Hz 1280x720 @ 60Hz 1152x864 @ 60Hz 1024x768 @ 60Hz 800x600 @ 60Hz 640x480 @ 60Hz |
Audio
Port | Placement | Connection | Max Bit Depth and Sample Rate | Signal Output | Channels | Chipset |
---|---|---|---|---|---|---|
Headset Jack Bi-Directional |
Front | 3.5mm (TRRS) | 16-bit 48KHz | Analog | 2 | |
DisplayPort Output |
Rear | DisplayPort | Host Dependent | Digital | Host Dependent | |
HDMI 4K Output |
Rear | DisplayPort | Host Dependent | Digital | Host Dependent |
Power
Port | Placement | Power Host / Device | Connection Type | Notes | Voltage | Amperage | Wattage |
---|---|---|---|---|---|---|---|
Power Supply | Rear | Device | Region-specific Power Adapter | UL 60950-1 Certified | 20.0V | 8.5A | 170.0W |
Thunderbolt™ 3 to Host | Rear | Host | USB-C Power Delivery | 20.0V | 4.8A | 96.0W |
USB To Devices
Port | Placement | Version and Link Rate | Features | Voltage | Amperage | Wattage |
---|---|---|---|---|---|---|
5x USB-A | Rear | USB 3.0 (5Gbps) | 5V | 900mA | 4.5W | |
1x USB-A | Front | USB 3.2 Gen 2 (10Gbps) | Battery Charging 1.2 | 5V | 1500mA | 7.5W |
1x USB-C | Front | USB 3.2 Gen 2 (10Gbps) | 5V | 1500mA | 7.5W |
Connection To Host
Port | Placement | Version and Link Rate | Features |
---|---|---|---|
1x Thunderbolt™ 3 or USB-C | Rear | Thunderbolt™ 3 (40Gbps) | 4x PCIe 3.0 Lanes or USB Power Delivery or Alternate Mode Video |
Wired Network
Port | Placement | Version and Link Rate | Features | Chipset |
---|---|---|---|---|
Gigabit Ethernet | Rear | 1000BASE-T | Wake-on-LAN (WoL) or Energy-Efficient Ethernet (EEE) or 9K Jumbo Frames | RTL8153 Realtek |
Storage
Storage Port Location | Host Connection | Host Connecton Port Specification | Attached Cable (Port Type if No) | Slot and Media Type | Capacity (If Media Included) or Max Supported Capacity | Chipset |
---|---|---|---|---|---|---|
Slot 1 | MicroSD (Trans-Flash) or
MicroSDHC or
MicroSDXC Micro SD |
GL3226 Genesys Logic |
||||
Slot 2 | SD or
SDHC or
SDXC SD or
SDHC or
SDXC or
MMC |
GL3226 Genesys Logic |
Included Cables
Port Type (Side 1) | Cable Specification | Port Type (Side 2) | Cable Length | External Power for Cable |
---|---|---|---|---|
1x Male Thunderbolt™ 3 | Thunderbolt™ 3 (40Gbps) | 1x Male Thunderbolt™ 3 | 0.8m/2.6ft | No |

Please note, dock capabilities are reduced when connected to USB-C only systems compared to Thunderbolt 3 systems:
Thunderbolt 3, Thunderbolt 4, and USB4 Systems:
- PC: Windows 10 or 11 with Thunderbolt 3 or 4 and Power Delivery support (PD required for charging)
- MAC: macOS High Sierra 10.13 or later with Thunderbolt 3 or 4 (M1/M2 base model Macs are limited to a single extended display, M1 Pro/M1 Max support dual displays)
- LINUX: Not supported
USB-C Systems (No Thunderbolt):
- PC: Windows 10 or Windows 11 with USB-C DisplayPort Alternate Mode video output support (required for video functionality) and Power Delivery charging support (required for charging)
- Multi-display capabilities will vary depending on host system graphics card support. For more information see: What are the display output capabilities for the TBT3-UDZ?
- MAC: 12" MacBook Retina models (limited to a single extended display or dual mirrored displays up to 4096x2160 @ 30Hz)
- LINUX: Not supported
- CHROME: Not supported
Important Notes:
- Apple M1/M2 (base model) based MacBook, Mac Mini, and iMac systems (non-Intel processors) only support a single external display via Thunderbolt ports (this is a limitation of the M1/M2 base model graphics card, M1 Pro/M1 Max support dual displays)
- Some Thunderbolt 3 Windows systems will not support dual displays (only one DisplayPort stream). Please check with your system manufacturer to verify dual displays via Thunderbolt 3 are supported
- Not all systems with USB-C or Thunderbolt 3 support charging from these ports. Use of separate laptop power adapter may be required. Please check with your system manufacturer to verify Power Delivery charging is supported
- Dock capabilities are reduced when connected to USB-C only systems. When using the dock in USB-C mode (no Thunderbolt support from system) the front 10Gbps USB-C and USB-A ports will be limited to 5Gbps operation. Display support may also be limited to a maximum of two 1080p @ 60Hz displays (dependent upon system graphics card DisplayPort implementation)
- Windows systems may require updated Thunderbolt drivers, Thunderbolt NVM firmware, system UEFI BIOS, and graphics card drivers from the system manufacturer (Apple systems provide this automatically)

- Connect power cable to Thunderbolt 3 dock.
- Connect the included Thunderbolt 3 cable to the dock port with the computer icon, and then connect the other end to the Thunderbolt 3/USB-C port of your host system.
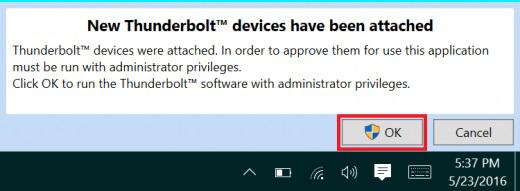
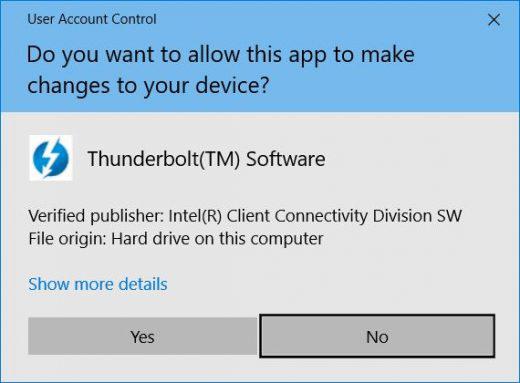
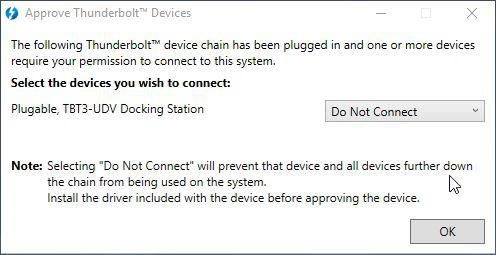
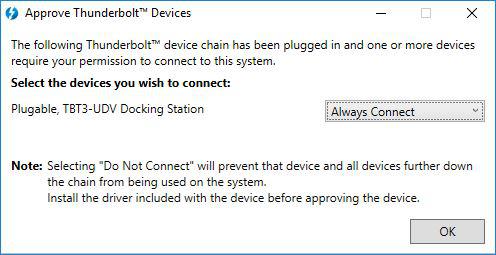
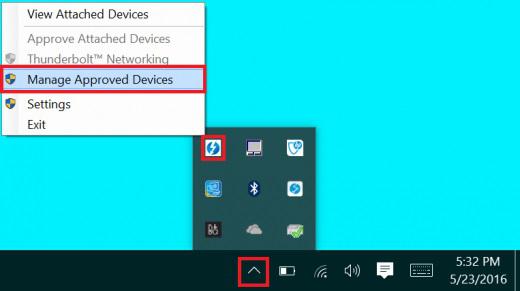
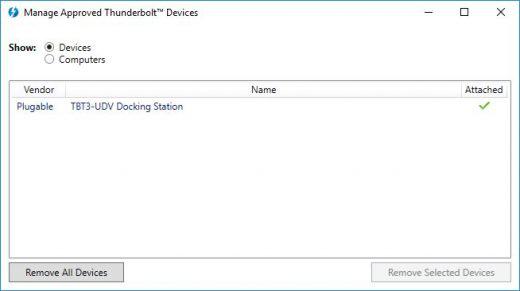
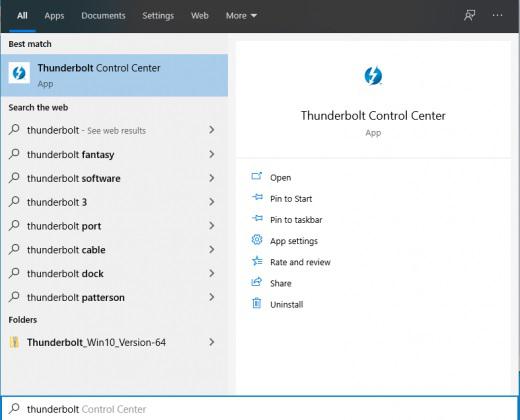
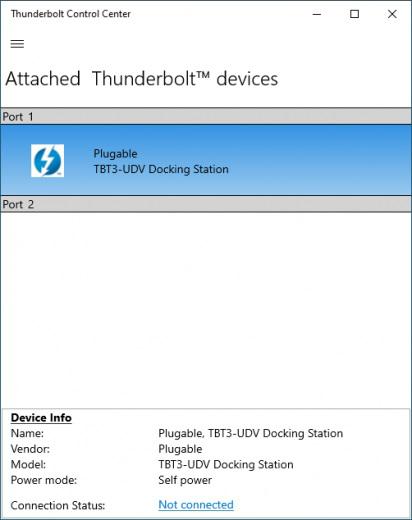
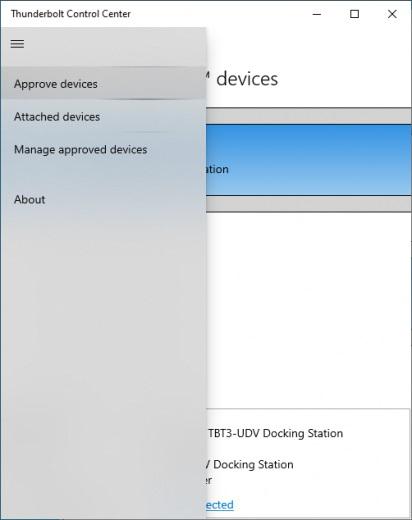
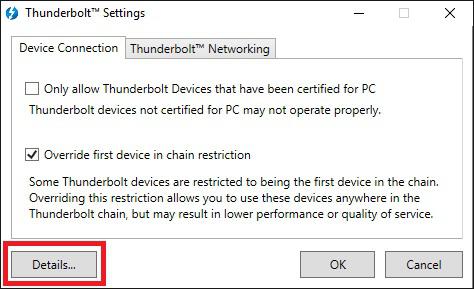
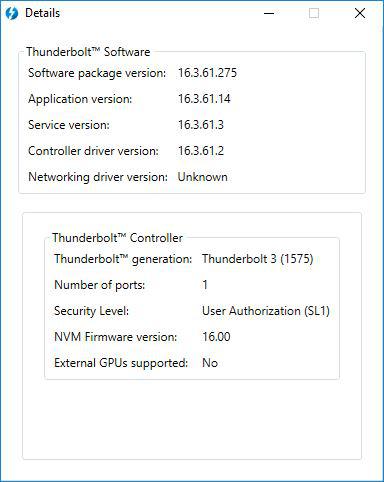
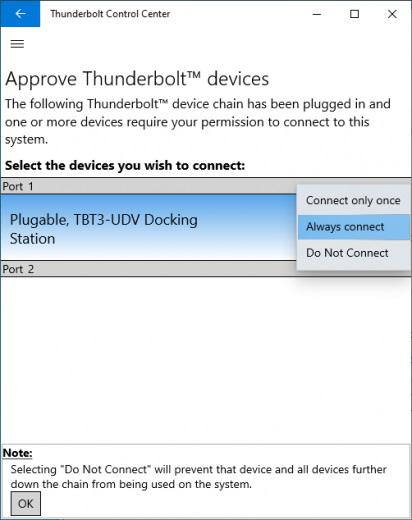
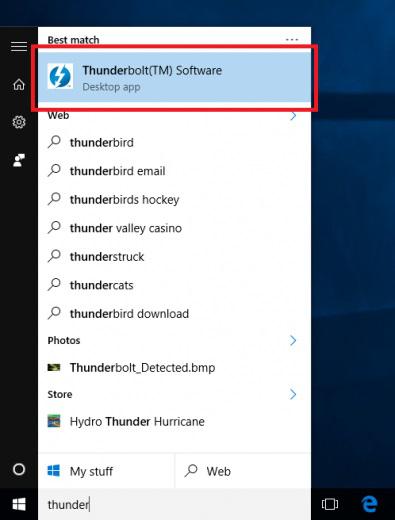
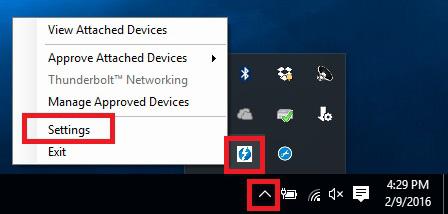
- (Windows only) Approve the new device with the Thunderbolt utility on your computer. Click here for more information.
Questions? We're here to help! Please reach out to us at support@plugable.com
Windows PCs with internet access via another network adapter should automatically download and install drivers from Windows Update without a separate download.
Drivers should not be needed on macOS 10.6 or above. However, they are available for separate download.
Platform | Important Notes | Date | Version and Download |
---|---|---|---|
Windows 10 and 11 | July 25, 2018 | Download | |
Windows 8.x | July 30, 2018 | Download | |
Windows 7 | July 26, 2018 | Download | |
Windows Vista | January 10, 2018 | Download | |
Windows XP | January 26, 2018 | Download | |
macOS 10.6 to 10.14 | December 19, 2017 | 1.0.17 | |
Linux Kernel 2.6 and Above | Compile required. Linux kernels 3.8 and earlier require rebuild of kernel module from source. Recent distributions running 3.9 or later should have the driver built-into kernel. |
2.10.0 | |
Chrome OS | Chrome OS supported with latest software updates installed. The drivers are included as part of the kernel used by Chrome OS. |
Filter Help Articles and Frequent Questions by Category
Articles
Well how about that, it looks like we don't have any articles matching your filters! Try removing one of your choices or clear the filters to show all articles.
You can always contact support if you need help too!
USB Port Types
USB-A
pietz, CC BY-SA 3.0 , via Wikimedia Commons
This is the standard USB connection that most computers offered prior to the introduction of USB Type-C (USB-C). Even after the introduction of USB Type-C, this is still quite common.
It can provide data transfer rates up to the USB 3.1 Gen 2 (10 gbps) specification depending on the host and device, but does not directly support video in the way that USB-C Alternate Mode does. This limitation makes DisplayLink USB graphics adapters and docking stations ideal on systems that do not have USB-C, or in instances where more displays are needed beyond available video outputs of a PC.
USB-B
Fred the Oyster, CC BY-SA 4.0 , via Wikimedia Commons
IngenieroLoco, CC BY-SA 4.0, via Wikimedia Commons
This type of connection comes in a couple different styles depending on whether USB 3.0 and higher transfer rates are supported (bottom graphic). Usually this type of connection is used to plug into USB devices that do not have a fixed cable connected, such as USB docking stations, USB hubs, printers, and others.
USB Mini-B
Fred the Oyster, CC BY-SA 4.0 , via Wikimedia Commons
One of the first connectors for charging a smartphone, wireless game controller (such as the Sixaxis and DualShock 3), and other small devices such as external hard drives. Not commonly used today, but is still used in some cases. Most devices using USB Mini B are using USB 2.0, though a USB 3.0 variant does exist. This specification also added USB On-The-Go (OTG) functionality, though it is more commonly implemented with Micro USB.
USB Micro-B
Fred the Oyster, CC BY-SA 4.0, via Wikimedia Commons
IngenieroLoco, CC BY-SA 4.0 , via Wikimedia Commons
A smaller connector that serves many of the same uses as the Mini B connector, with added optional features such as Mobile High-Definition Link (MHL) to allow devices like smartphones to output video to larger displays without requiring a dedicated port for video output.
The larger variant of USB-B is most commonly used for external hard drives for higher 5Gbps transfer rates.
USB-C, Thunderbolt™ 3, and Thunderbolt™ 4
Niridya , CC0, via Wikimedia Commons
The most recent USB connection, USB Type-C (USB-C), represents a major change in what USB can do. The connector is smaller, can be connected in two orientations, is able to carry substantially more power and data, and can directly carry video signals of multiple types (HDMI, DisplayPort, etc.) Intel has also adapted the USB-C connector for use with Thunderbolt 3 and Thunderbolt 4.
It is important to note that while all Thunderbolt 3 and Thunderbolt 4 connections are USB-C, not all USB-C connections can be used with Thunderbolt 3 or Thunderbolt 4 devices.
More details regarding physical USB connections can be found on Wikipedia . The graphics depicted here are adapted from Wikimedia Commons by various artists under the Creative Commons Attribution-Share Alike 3.0 Unported license.
What are the details regarding 96W Thunderbolt-certified Power Delivery and 100W peak charging rate?
IEC power requirements for this class of device require that charging via USB not exceed 100W peak charge rate for more than 5 seconds, and so Thunderbolt certification requires a 4W margin to maintain this IEC compliance. Because charging output from any device will always have some amount of variance, implementing a 96W Power Delivery profile combined with robust circuit design ensures the TBT3-UDZ will meet these requirements and achieve 96W sustained charging, with a peak rate of 100W. We are unaware of any real-world scenarios where this will affect charging behavior, but will certainly provide updates if we learn of any edge cases.
Understanding and Troubleshooting Network Performance
Computer networking is a complex topic. In this article, we'll be taking a deep dive on the nuances of network performance for those who need some additional explanation while striving to be concise, and to educate users of various experience levels relating computer hardware and computer networking.
If you just need to know how to perform a network performance test/benchmark, jump down to configuring iPerf.
Core Network Concepts
LAN vs WAN
With regards to network performance, it is crucial to first separate whether an issue is with Wide Area Network (WAN) performance, or if the issue is with Local Area Network (LAN) performance.
Your LAN is essentially the network inside your home or business. Many homes use a combination modem/router device provided by their Internet Service Provider (ISP). In some cases, especially in businesses, you may have a separate modem and router, along with other equipment connecting to the router such as a network switch.
Your modem, and the connection it establishes to your ISP—whether through coaxial cable, fiber, phone lines, or long-range wireless—essentially marks the point between the WAN and the LAN. The connection your modem makes to your ISP is the WAN, and any devices you connect through your router behind that modem belong to the LAN.
Link Rate
Almost every type of connection your computer makes to any piece of hardware will have a link rate of some kind. The link rate establishes how fast data can possibly be transferred across any given connection, but it does not guarantee how fast the hardware on either end of the connection will actually transfer data.
The concept of link rates, and their related bottlenecks, is likely best conveyed by giving an example of what connections might be involved in transferring a file from one computer on your LAN to another.
- 800Mbps—The file source is a USB 3.0 thumb drive capable of 100MB/s (800Mbps) read/write.
- 480Mbps—The USB 3.0 thumb drive is plugged into a USB 2.0 port on the PC, which has a maximum throughput of 480Mbps
- 1000Mbps—PC1's Ethernet connection establishes 1Gbps (1000Mbps) link to the router via Ethernet
- 300Mbps—The router connects to a second PC (we'll refer to this as PC2) via Wi-Fi, and it has established a 300Mbps link to the Wi-Fi adapter on PC2
- 480Mbps—The Wi-Fi adapter on PC2 is connected via a USB 2.0 port. The link rate of the USB connection to PC2 is at 480Mbps
- 6000Mbps—PC2 is going to store the file on an internal hard drive with a link rate of 6Gbps
- 1600Mbps—File Destination: SATA hard drive capable of 200MB/s (1600Mbps) read/write.
Following this chain, we see that 300Mbps is the slowest link rate established. This means that, regardless of the link rates established elsewhere, the absolute maximum the data can possibly be transferred is 300Mbps.
if we were to change the Wi-Fi connection to a wired Ethernet connection capable of 1Gbps, our performance bottleneck would then become the USB 2.0 connection to the USB drive where the file is stored.
Ports and Interfaces
Interfaces
A network interface represents connections, whether wired or wireless, that are made to form a network between devices.
Ports
Some may refer to physical hardware connections as "ports". For the purposes of networking, ports are logical constructs that can also be referred to as "network ports". Each network interface has 65,535 of these logical ports. Each port on a network interface is a separate data connection.
Benchmarking Network Adapter Performance
To properly benchmark network adapter performance, we need to:
- Use a simple LAN configuration
- Eliminate bottlenecks, especially link rate bottlenecks
Websites like speedtest.net, fast.com, and other performance tools in your web browser are going to use your WAN connection, and are not appropriate for determining if a network adapter is working well.
Transferring files from one computer to another on your LAN is typically not the best way to benchmark a network adapter. File transfers are bottlenecked by a number of things, including performance limitations of the disk the data is on, and often times a lack of establishing parallel network connections to perform the task.
One of the most accurate ways to benchmark network performance on a LAN is by using iPerf . To more effectively benchmark network adapter performance, it is best to establish a point-to-point connection between two PCs, rather than connecting through a router or switch.
Configuring iPerf
To test a connection using iPerf, you'll need at least two network interfaces, and preferably two computers. You'll also need to know the IP (Internet Protocol) address assigned to each network interface . One network interface will function as an iPerf server, and the other network interface will function as an iPerf client. Lastly, you'll need to download the version of iPerf 3.x that's appropriate for your computer's operating system and extract/install it .
Windows
- Make sure the drivers for both network interfaces involved in the test are using up-to-date drivers. Drivers for Plugable products can be found here.
- Download and extract iPerf for Windows
- Open Command Prompt
- Press Windows Key + R or + R, then enter
cmd
in the window that appears - Search the Start Menu for
Command Prompt
, and open it
- Press Windows Key + R or + R, then enter
- Navigate Command Prompt to the directory the directory where iPerf is located
- The
cd
command is for 'change directory'- If you have a folder named 'iperf' on your Windows desktop, you can reach it in command prompt with the command
cd %USERPROFILE%\Desktop\iperf
- If you have a folder named 'iperf' on your Windows desktop, you can reach it in command prompt with the command
- The
- Run iperf in server mode via Command Prompt
iperf3.exe -s
macOS
- Usually it is best to install iperf on macOS using brew in Terminal
- Make sure the drivers for both network interfaces involved in the test are using up-to-date drivers
- Open Terminal
- Run iPerf in server mode
iperf3 -s
Linux
- Usually it is best to install iperf using the package manager in your Linux distro. For example, in Ubuntu, use
apt
: sudo apt install iperf3
- Make sure the drivers for both network interfaces involved in the test are using up-to-date Drivers
- Open Terminal
- Run iPerf in server mode
iperf3 -s
Next, you'll need to run iPerf in client mode, targeting the IP address of the server/interface where iPerf is running in server mode. Additionally, we'll run the test for 30 seconds using -t 30
and with four parallel connections using -P 4
. Running 4 parallel connections is optimal for saturating a network link.
Windows
- Open Command Prompt
- Press Windows Key + R or + R, then enter
cmd
in the window that appears - Search the Start Menu for
Command Prompt
, and open it
- Press Windows Key + R or + R, then enter
- Navigate Command Prompt to the directory the directory where iPerf is located
- The
cd
command is for 'change directory'- If you have a folder named 'iperf' on your Windows desktop, you can reach it in command prompt with the command
cd %USERPROFILE%\Desktop\iperf
- If you have a folder named 'iperf' on your Windows desktop, you can reach it in command prompt with the command
- The
- Run iperf in client mode via Command Prompt (replace 192.168.0.200 with the IP address of the server/interface where iPerf is running in server mode)
iperf3.exe -c 192.168.0.200 -t 30 -P 4
macOS / Linux
- Open Terminal
- Run iPerf in client mode (replace 192.168.0.200 with the IP address of the server/interface where iPerf is running in server mode)
iperf3 -c 192.168.0.200 -t 30 -P 4
iPerf should start performing a network performance test. If the test fails to start, make sure that iPerf is not being blocked by your PC's/Mac's firewall.
Why iPerf is Ideal for Benchmarking
Unlike a file transfer, iPerf runs in memory on the PC and generates data to send using the CPU directly. This alleviates potential bottlenecks generated by storage devices, and allows you to explicitly control how many parallel connections are being used to transfer data rather than being unsure if parallel network connections are being used by other means.
Conclusion
There's a lot more to networking that isn't covered in this article, but we hope this helps explain enough to get an accurate measure of your network performance.
If you need assistance with your Plugable product that features network connectivity, please contact us for further assistance.
No Sound? How to Change Your Default Audio Device to Your Plugable Product
Whether you're on Windows, macOS, or Linux, it's common to add new audio devices to your computer.
Some examples of additional audio devices you may want to switch to include:
- Bluetooth headsets, headphones, and speakers
- Speakers built into a display, such as a TV or monitor
- A USB sound card, digital audio converter (DAC), or analog to digital converter (ADC)
- USB microphones
- Audio jacks on a docking station
These steps don't apply to the Plugable Performance NIX HDMI Capture Card (USBC-CAP60).
Here are the steps that you need to set a new default audio recording or output device on different operating systems.
Set Audio Output Device
Set Audio Recording Device
Set Default Playback Device in Windows
- Check that your device is properly connected, and that any necessary drivers are installed
- It is also a good idea to make sure that your sound device is turned on, and that the device's volume control is not at the absolute minimum setting
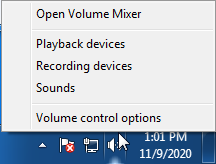
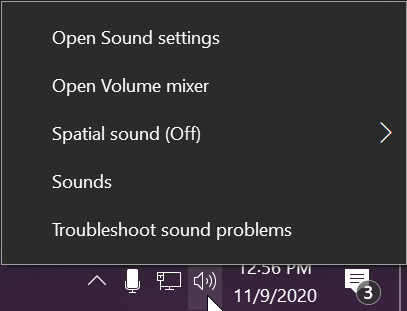
- Right-click on the speaker symbol in the Windows taskbar/system tray
-
Windows 7/8.x—Select Playback Devices. The Sound window will open with the Playback tab highlighted
-
Windows 10/11—Select Open Sound Settings then click the link under 'Related Settings' for Sound Control Panel, then click the Playback tab
- Alternatively, after selecting Open Sound Settings, use the dropdowns under the Output header
-
Windows 7/8.x—Select Playback Devices. The Sound window will open with the Playback tab highlighted
- Find your device in the window
- A Plugable USB 3.0 docking station or sound-enabled display adapter will appear as Plugable Audio
- A Plugable USB 3.0 Silicon Motion docking station or sound-enabled display adapter will appear as SMI USB Audio
- A Plugable USB 2.0 docking station will appear as USB Multimedia Audio Device
- A Plugable USB Audio adapter will appear as USB Audio Device
- Right-click on the device you found in step 3 and select Set as Default Device. A check mark should appear next to your device, and sound should now play through it
- Click OK to exit the window
Additional Configuration for Bluetooth
Please see our pairing and configuration guide for Bluetooth devices.
Set Default Playback Device in macOS
- Open System Preferences
- Click Sound
- Select Output
- Select the most appropriate device
- A Plugable USB Audio adapter will appear as USB Audio Device
Set Default Playback Device in Linux
- Ensure that you audio device is connected to the PC
- If the audio device is self-powered, it is a good idea to make sure that it is powered on, and that the device's volume control is not at the absolute minimum setting
- Launch the 'Settings' application in your distro
- Go to the 'Sound' option
- Find the dropdown for your 'Output Device', and change it to your preferred output device
- For additional sound device controls, you may want to consider using Pulseaudio Volume Controls (package name pavucontrol)
Set Default Recording Device in Windows
- Check that your device is properly connected, and that any necessary drivers are installed
- It is also a good idea to make sure that your sound device is turned on, and that the device's volume control is not at the absolute minimum setting
- Right-click on the speaker symbol in the Windows taskbar/system tray
-
Windows 7/8.x—Select Recording Devices. The Sound window will open with the Recording tab highlighted
-
Windows 10/11—Select Open Sound Settings then click the link under 'Related Settings' for Sound Control Panel, then click the Recording tab
- Alternatively, after selecting Open Sound Settings, use the dropdowns under the Input header
-
Windows 7/8.x—Select Recording Devices. The Sound window will open with the Recording tab highlighted
- Find your device in the window
- A Plugable USB 3.0 DisplayLink docking station or sound-enabled display adapter will appear as Plugable Audio
- A Plugable USB 2.0 docking station will appear as USB Multimedia Audio Device
- A Plugable USB Audio adapter will appear as USB Audio Device
- Right-click on the device you found in step 3 and select Set as Default Device. A check mark should appear next to your device, and sound should now play through it
- Click OK to exit the window
Additional Configuration for Bluetooth
Please see our pairing and configuration guide for Bluetooth devices.
Set Default Recording Device in macOS
- Open System Preferences
- Click Sound
- Select Input
- Select the most appropriate device
- A Plugable USB Audio adapter will appear as USB Audio Device
Set Default Recording Device in Linux
- Ensure that you audio device is connected to the PC
- If the audio device is self-powered, it is a good idea to make sure that it is powered on, and that the device's volume control is not at the absolute minimum setting
- Launch the 'Settings' application in your distro
- Go to the 'Sound' option
- Find the dropdown for your 'Input Device', and change it to your preferred input device
- For additional sound device controls, you may want to consider using Pulseaudio Volume Controls (package name pavucontrol)
My Docking Station/Adapter Works Well With My Windows Laptop, but When I Close the Lid the Displays and Laptop Turn Off or Sleep. How Do I Fix This?
Most Windows notebook computers power management settings will default to putting the computer to sleep with the lid closed, regardless of any external displays, keyboard, or mouse connected to the computer. If this is happening but you would prefer the system to remain active with the lid closed utilizing the external display or displays, these settings can be changed by performing the following:
For Windows 10:
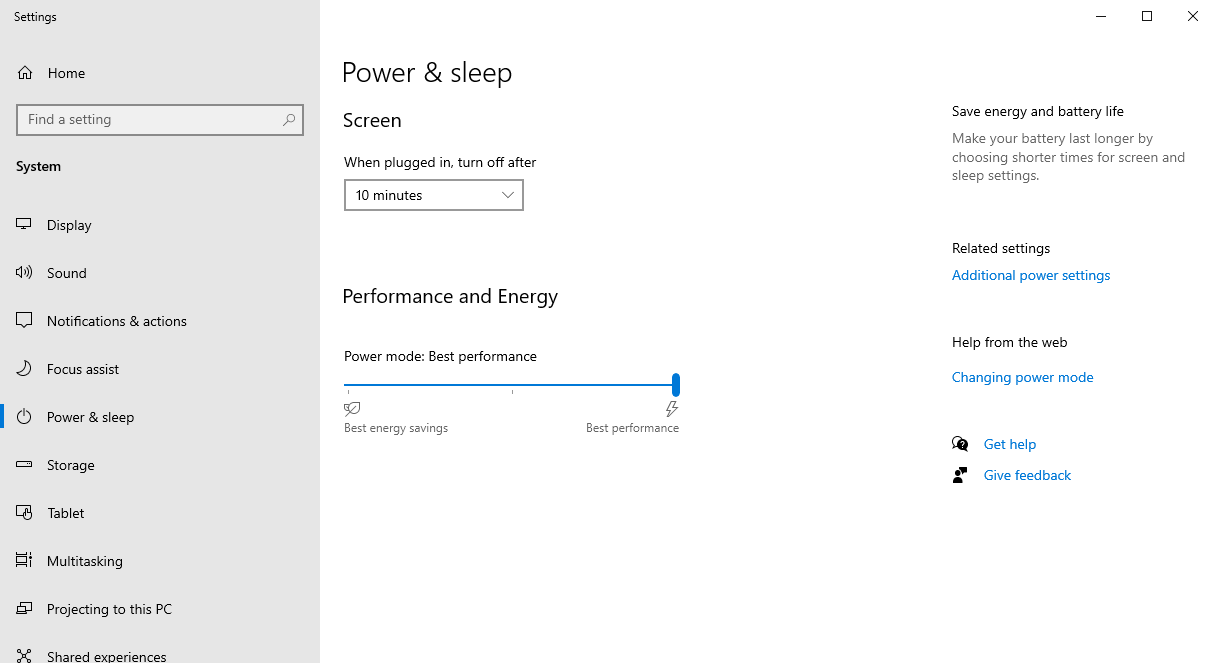
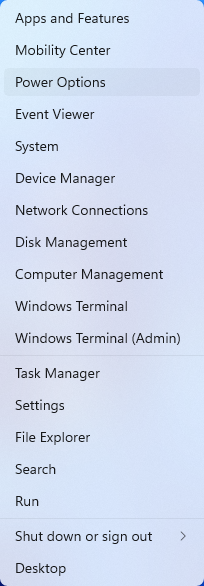
- Start by right-clicking on the Start button and select Power Options from the menu.
- From the right side of the Power Options settings page, select the blue link for Additional power settings
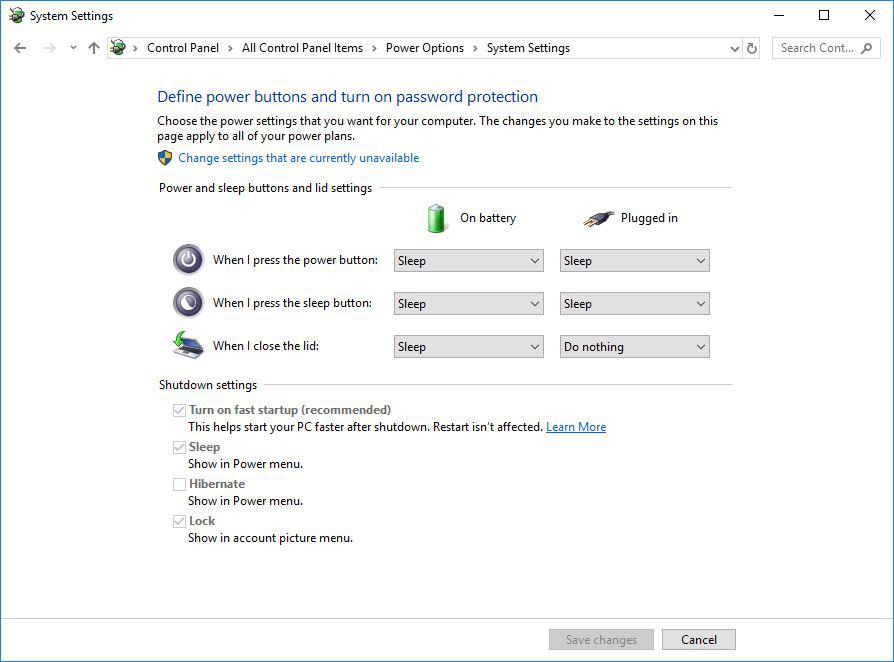
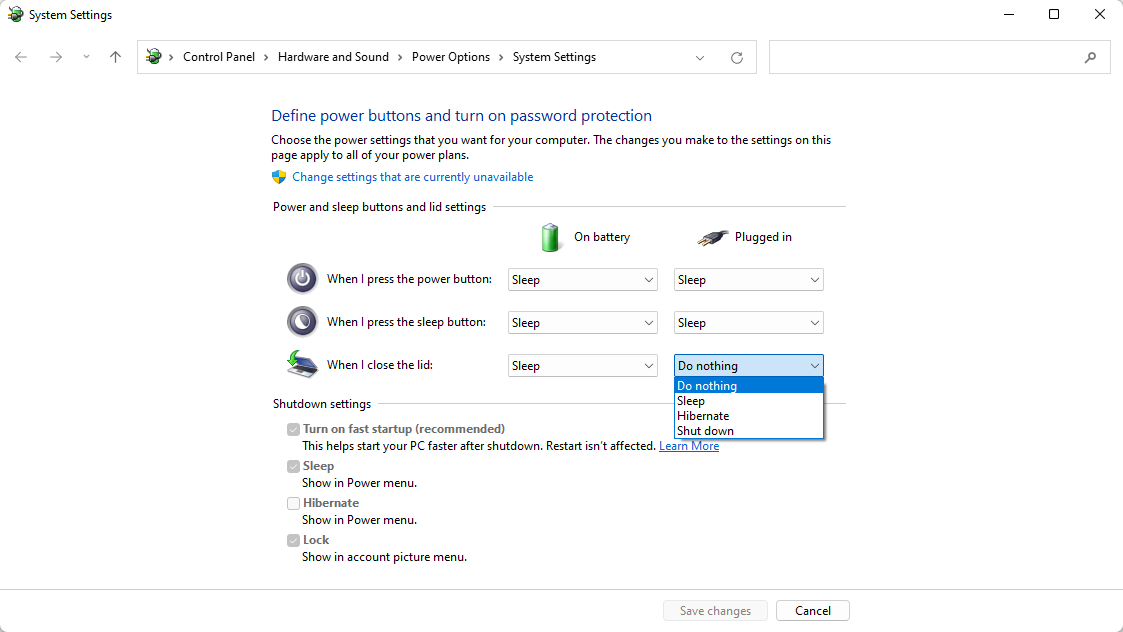
- From the choices present on the left-hand side of the Power Options window, please click on Choose what closing the lid does
- Make sure the setting for When I close the lid under the Plugged In column is set to Do Nothing
- Click the Save Changes button and restart the system (making sure that the laptop’s power adapter is also connected) and test the behavior again.
For Windows 11:
- Start by right-clicking on the Start button and select Power Options from the menu.
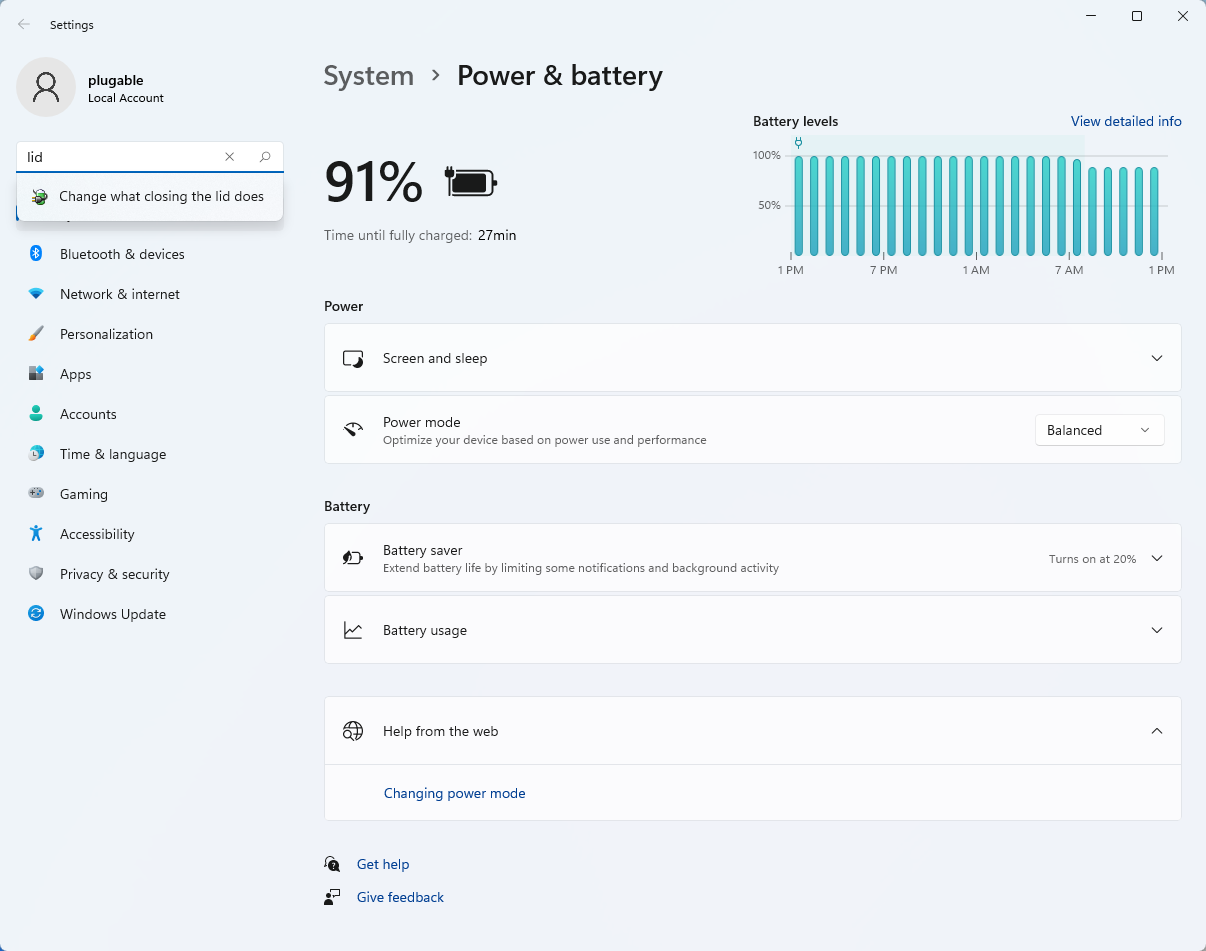
- In the upper left corner of the settings window, in the search box, type "lid" then select Change what closing the lid does from the search results
- Make sure the setting for When I close the lid under the Plugged In column is set to Do Nothing
- Click the Save Changes button to apply the new settings.
Closing the lid should no longer put the computer into sleep mode when an external display and power source is connected, instead one of the external displays should now become the Primary display with the desktop icons instead of the laptop's built-in display.
The lid may still need to be opened to perform the following tasks:
- To power on the computer from a fully powered off state
- To log into the computer if logged out or if the computer is restarted with the lid closed
- To wake the computer from a deep sleep state ( hibernation, or Windows hybrid sleep states )
Does the TBT3-UDZ front USB-C port support video?
No, the front USB-C port on the TBT3-UDZ is for data only and does not support USB-C VESA DisplayPort Alternate Mode video output. Displays attached through this dock must be connected to the rear HDMI or DisplayPorts.
Does the TBT3-UDZ front USB-C port support charging?
No, the front USB-C port on the TBT3-UDZ supports standard USB 3.x 900mA (4.5W) power output. The only USB port on this dock capable of charging a device like a phone or tablet is the front USB-A port which can offer 1.5A (7.5W) via the BC 1.2 CDP charging standard.
Can I connect four monitors to the TBT3-UDZ?
No, the TBT3-UDZ supports a maximum of two monitors via "Display 1" and "Display 2" video output "banks" in the following configurations:
- DisplayPort + DisplayPort
- HDMI + HDMI
- DisplayPort + HDMI (cannot be both connected to the same "bank")
For additional details about supported displays, see here: https://kb.plugable.com/en_US/docking-stations-and-video/what-are-the-display-output-capabilities-for-the-tbt3-udz
Only one monitor is working, what can I do to fix this?
For Thunderbolt 3 systems:
Some systems with Thunderbolt 3 support may only have the ability to connect a single display through the Thunderbolt 3 port. This is due to how the system manufacturer has configured the internal circuitry of the computer between the system graphics card and the system Thunderbolt 3 controller. To be specific, they have only routed one DisplayPort video line/stream from the graphics card to the TBT3 controller.
As an example of this, many Intel NUC systems only support a single display, see here for reference: https://www.intel.com/content/www/us/en/support/articles/000021752/intel-nuc.html
We also see this configuration on many high end gaming laptops or desktop replacement workstation laptops that have one or more dedicated onboard video outputs. Unfortunately, this is often undocumented and you may need to contact your system manufacture to verify if they expect dual monitors will be supported over Thunderbolt 3.
Apple M1 based Macs (MacBook Air, Mac Mini, and MacBook Pro) only support a single display through Thunderbolt 3 or USB-C. (This is a limitation of the M1 graphics card design.)
For USB-C systems:
Apple USB-C only systems (without Thunderbolt 3 support) like the 2015 MacBook Retina 12" can only support a single display or will show two screens with mirrored images. This is because Apple does not support DisplayPort MST (multi-stream) which our dock uses to take a single USB-C DisplayPort Alternate Mode video line and connect two displays through it.
Windows USB-C systems should support MST in most cases, if you're only able to connect a single display, please contact us via support@plugable.com for further assistance!
I updated to macOS Big Sur 11.1 and now cannot connect dual displays or my displays are operating incorrectly.
Based on customer reports and information online found after this update, it appears that there is a regression in macOS Big Sur 11.1 that is causing video output issues through Thunderbolt 3 devices like our dock such as only a single display works versus two working prior with macOS Big Sur 11.0.1, or video resolutions and/or refresh rates are incorrect (example: only 4K @ 30Hz possible vs expected 4K @ 60Hz).
We encourage you to report these issue to Apple using their feedback form located here: https://www.apple.com/feedback/macos.html
Unfortunately, to resolve this issue you'll need to restore to a previous backup of your system if available for macOS Big Sur 11.0.1 or wait until the next update from Apple.
When I put my Mac to sleep it causes my entire network to stop functioning.
There is a known issue with the Apple provided built in macOS Ethernet drivers for the Realtek RTL8153 USB 3.0 Ethernet chipset used in our dock (and many other docks and USB Ethernet adapters on the market). When put to sleep, the problematic driver creates an Ethernet broadcast storm which can overwhelm some Ethernet routers.
For macOS Catalina 10.15.x users, please contact us via support@plugable.com and we can provide you with an updated driver and installation instructions.
For macOS Big Sur 11.x users, this behavior can be rectified by updating the host system to macOS Big Sur version 11.3 (released by Apple on 4/26/2021).
If you are unable to install third party drivers for macOS 10.15.x or are unable to upgrade from macOS Big Sur 11.x to 11.3, we recommend to disable your Mac from sleeping to prevent this issue, or use WiFi instead of Ethernet until you are able to install the driver at a later date or upgrade to the new macOS version.
If you need further assistance feel free to contact us via support@plugable.com and we'll be happy to help!
Can I use a longer Thunderbolt 3 or USB-C cable to connect the dock to my system?
For Thunderbolt 3 systems a longer cable can be used, but there are some important factors to consider. The longest passive Thunderbolt 3 cable rated for 40Gbps (required for dual displays via TBT3) at this time is already included and is 0.8m in length. Longer cables will need to be active cables. We don't sell any active cables but they are available at up to two meters.
For users with USB-C only systems a Thunderbolt 3 cable is not required. Instead, a longer USB 3.1 Gen 2 cable rated for 10Gbps can be used. We recommend no longer than 2m in length. However, due to the varying quality of USB-C cables on the market, a better alternative would be a 2m 20Gbps passive Thunderbolt 3 cable like our TBT3-20G2M: http://plugable.com/products/tbt3-20g2m
Please note: For docks with 60W (watts) Power Delivery charging capabilities a cable that supports 3A (amps) minimum is required. For docks that support greater than 60W (65W, 85W, 96W, 100W) charging, a 5A cable is required.
Kernel Panic When Connecting the Dock to My MacBook Pro 16″ (Intel)
Update 11/1/2021: We're happy to report this issue can now be resolved by updating from macOS Big Sur 11.x to macOS Monterey 12.0.1.
Plugable has been able to reproduce this problem internally and it has been raised to Apple for closer investigation. This issue appears to be from a regression introduced with the macOS Big Sur 11.4 update and is still present through 11.6.
This problem can occur when displays are connected to the docking station while the dock is reconnected to a Thunderbolt 3 port on a MacBook Pro 16" using the host Thunderbolt 3 cable (hot-plugged).
This kernel panic issue currently affects any docking station (Plugable-branded or otherwise) that uses what is known as DisplayPort Multi-Stream Transport (MST) to power one or more of the video outputs on a docking station. It is also specific to the MacBook Pro 16" system—other Mac systems do not exhibit the same problem.
To workaround this issue, we recommend disconnecting any HDMI displays from the dock before plugging the Thunderbolt 3 cable into the computer. Then, once connected, you may reconnect the HDMI display(s) to the dock.
My Windows Laptop Will Not Boot Properly When My Docking Station Is Connected
If your Windows laptop will not boot properly when a docking station is connected to the laptop, most often the cause is an external device connected to the docking station (for example an external USB storage drive) as opposed to the dock itself.
If you are affected by this condition, please follow these steps in order to isolate the behavior further:
- Disconnect all USB devices from the docking station and put them aside for the moment.
- Disconnect any displays connected to the dock's video outputs.
- Disconnect any audio devices connected to the dock's audio ports (if present).
- Disconnect the Ethernet network cable from the dock's Ethernet port (if present).
- The only remaining connections should be the dock's power adapter cable and the USB cable used to connect it to the laptop. No other external devices should be connected to the dock.
- While in this state, reboot the laptop to test the behavior.
- Assuming the laptop boots as expected, please reconnect each device back to the dock one at a time and reboot after each one to test the behavior again. Please reconnect the displays first, then the audio devices, then the Ethernet cable. Please reconnect any USB devices to the dock last, again rebooting after each one is added to test the behavior.
In our experience helping others, the most common cause of this behavior is an external USB storage drive connected to one of the dock's USB ports. In some cases, a laptop may try to boot from an external storage drive by mistake as opposed to the laptop's built-in storage drive. Since most external USB storage drives are not 'bootable', this can interrupt the boot process.
If this behavior occurs, the most common way to mitigate the behavior is to access the laptop's System BIOS (also known as UEFI firmware) to change the 'boot order' settings to ensure that the laptop's internal storage drive is the first boot option. Doing so helps ensure that the laptop will not try to boot from an external USB storage device.
Every laptop system is different, so the best resource for accessing the System BIOS and changing the settings is the manual for the laptop provided by the laptop manufacturer.
USB devices and/or displays are not detected after waking from sleep or after rebooting on macOS.
We have been tracking reported issues where externally connected USB devices and/or internal USB devices within the TBT3-UDZ docking station (Ethernet, audio, and card reader) may not be detected after waking the system from sleep or after rebooting on some macOS systems (typically only with M1 based Macs).
Some users may also experience one or both displays attached to the dock not waking from a low power sleep state as well (can affect both M1 and Intel based Macs).
If running macOS Catalina 10.15.x or macOS Big Sur (prior to 11.3) and are experiencing issues with the Ethernet only, please see: https://kb.plugable.com/776031
To begin troubleshooting USB device and/or display issues:
If using an Intel based Mac we recommend the following steps:
- Unplug the dock from the Mac and unplug power from the dock. Please leave the dock disconnected until the final step.
- Perform an SMC reset: https://support.apple.com/en-us/HT201295
- Perform an NVRAM/PRAM reset: https://support.apple.com/en-us/HT204063
- After logging back in, wait about 30-60 seconds, then plug power into the dock first and plug the dock into the Mac next (using the provided Thunderbolt 3 cable the dock shipped with) and see if the behavior has improved.
If using an M1 based Mac we recommend the following steps:
- Unplug the dock from the Mac and unplug power from the dock. Please leave the dock disconnected until the final step.
- Fully shutdown the Mac. (On your Mac, click the "Apple" menu and select "Shut Down")
- After the Mac has shutdown, wait for 60-90 seconds, then turn the Mac back on.
- After logging back in, wait about 30-60 seconds, then plug power into the dock first and plug the dock into the Mac next (using the provided Thunderbolt 3 cable the dock shipped with) and see if the behavior has improved.
If these initial troubleshooting steps do not help, please contact us at support@plugable.com and we'll be happy to assist you.
What side of my MacBook should I connect my dock to? Does this affect the dock performance or technical abilities?
For Intel based MacBook Pro models with four Thunderbolt 3 ports, some users have found connecting the dock to the left or right side to be more stable than the other. Due to some variance in MacBook designs, we've found it is best to experiment with your particular setup to find what works well for you. With that said, there are some specific situations where a particular side may be inherently better:
1) Older MacBook Pro models have had varying capabilities depending on the side used:
- MacBook Pro (15-inch, 2016) delivers full Thunderbolt 3 performance on all four ports.
- MacBook Pro (13-inch,2016, Four Thunderbolt 3 Ports) supports Thunderbolt 3 at full performance using the two left-hand ports. The two right-hand ports deliver Thunderbolt 3 functionality, but have reduced PCI Express bandwidth. Always plug higher-performance devices into the left-hand ports on MacBook Pro (13-inch, 2016, Four Thunderbolt 3 Ports) for maximum data throughput.
- MacBook Pro (13-inch, 2016, Two Thunderbolt 3 Ports) delivers full Thunderbolt 3 performance on both ports.
2) It has been suggested for 16" MacBook Pro owners to connect to the right side for the best performance. ExtremeTech has a great article about why this is here: http://extremetech.com/computing/309802-charging-a-macbook-on-the-wrong-side-can-significantly-lower-its-performance
3) It is also worth mentioning that per side of Thunderbolt 3 Intel based MacBooks, a maximum of two displays are supported. If using the dock on one side of the system for two displays, another display cannot be connected to the second Thunderbolt 3 port on that same side (this means Intel based MacBook Pros with only two ports will support only two displays).
Thunderbolt 3 MacBook Pros with four ports (two on each side) can support either two or four displays maximum depending on the system configuration. Intel graphics based four port models are limited to two displays only whereas AMD based graphics four port models can support four displays.
Example: You want to connect three or four displays to your four port AMD graphics based MacBook Pro, you will need to connect the dock to one side for two displays and the third or fourth displays must be connected to the opposite side of the system.
Note: Currently, M1 based Macs (MacBook Air, Mac Mini, and MacBook Pro) only support a single display through Thunderbolt 3 or USB-C. This is a limitation of the M1 graphics card design.
Please feel free to contact us at support@plugable.com if you have any questions!
What are the display output capabilities for the TBT3-UDZ?
The TBT3-UDZ docking station offers two primary modes to output video to attached displays via the dual HDMI 2.0 and dual DisplayPort 1.2 outputs: Thunderbolt 3 mode and USB-C DisplayPort Alternate mode.
Systems with Thunderbolt 3 (or 4) support and USB-C only systems without Thunderbolt support will have differing capabilities. In addition, some Thunderbolt 3 systems may only support a single display and some USB-C only systems may lack USB-C DisplayPort Alternate Mode video output entirely (no displays will work).
In either TBT3 or USB-C DP Alt modes, a maximum of two displays are supported and can be connected in any combination of HDMI + HDMI, DP + DP, or a mix of HDMI + DP to the "Display 1" and "Display 2" output groups. See below for more details:
Multiple display capabilities for Thunderbolt 3:
- Systems that support two DisplayPort streams over Thunderbolt 3 can offer up to two displays at 4K (3840x2160) at 60Hz via HDMI 2.0 or DisplayPort 1.2.
- Systems that support one DisplayPort stream over Thunderbolt 3 can offer up to one display at 4K (3840x2160) at 60Hz via HDMI 2.0 or DisplayPort 1.2.
Multiple display capabilities for USB-C only systems (no Thunderbolt 3 support, operating in USB-C MFDP (Multifunction DisplayPort) mode):
- Systems that support DisplayPort 1.2 HBR2 (High Bit Rate 2) can offer one display up to 4K (3840x2160) at 30Hz or two displays 1080p (1920x1080) at 60Hz via HDMI 2.0 or DisplayPort 1.2.
- Systems that support DisplayPort 1.4 HBR3 (High Bit Rate 3) can offer one display up to 4K (3840x2160) at 60Hz or two displays 1440p (2560x1440) at 60Hz via HDMI 2.0 or DisplayPort 1.2.
- Systems that support DisplayPort 1.4 HBR3 with DSC (High Bit Rate 3 with Display Stream Compression) can offer up to two displays at 4K (3840x2160) at 60Hz via HDMI 2.0 or DisplayPort 1.2.
Important Notes:
- Apple M1 based Macs (non-Intel processor MacBook Air, MacBook Pro, Mac Mini, and iMac) only support a single display through Thunderbolt 3 or USB-C. This is a limitation of the M1 graphics card design. (M1 Pro and M1 Max based Macs do not have this limitation.)
- We do not support HDR (High Dynamic Range) or adaptive sync (AMD FreeSync or Nvidia G-Sync).
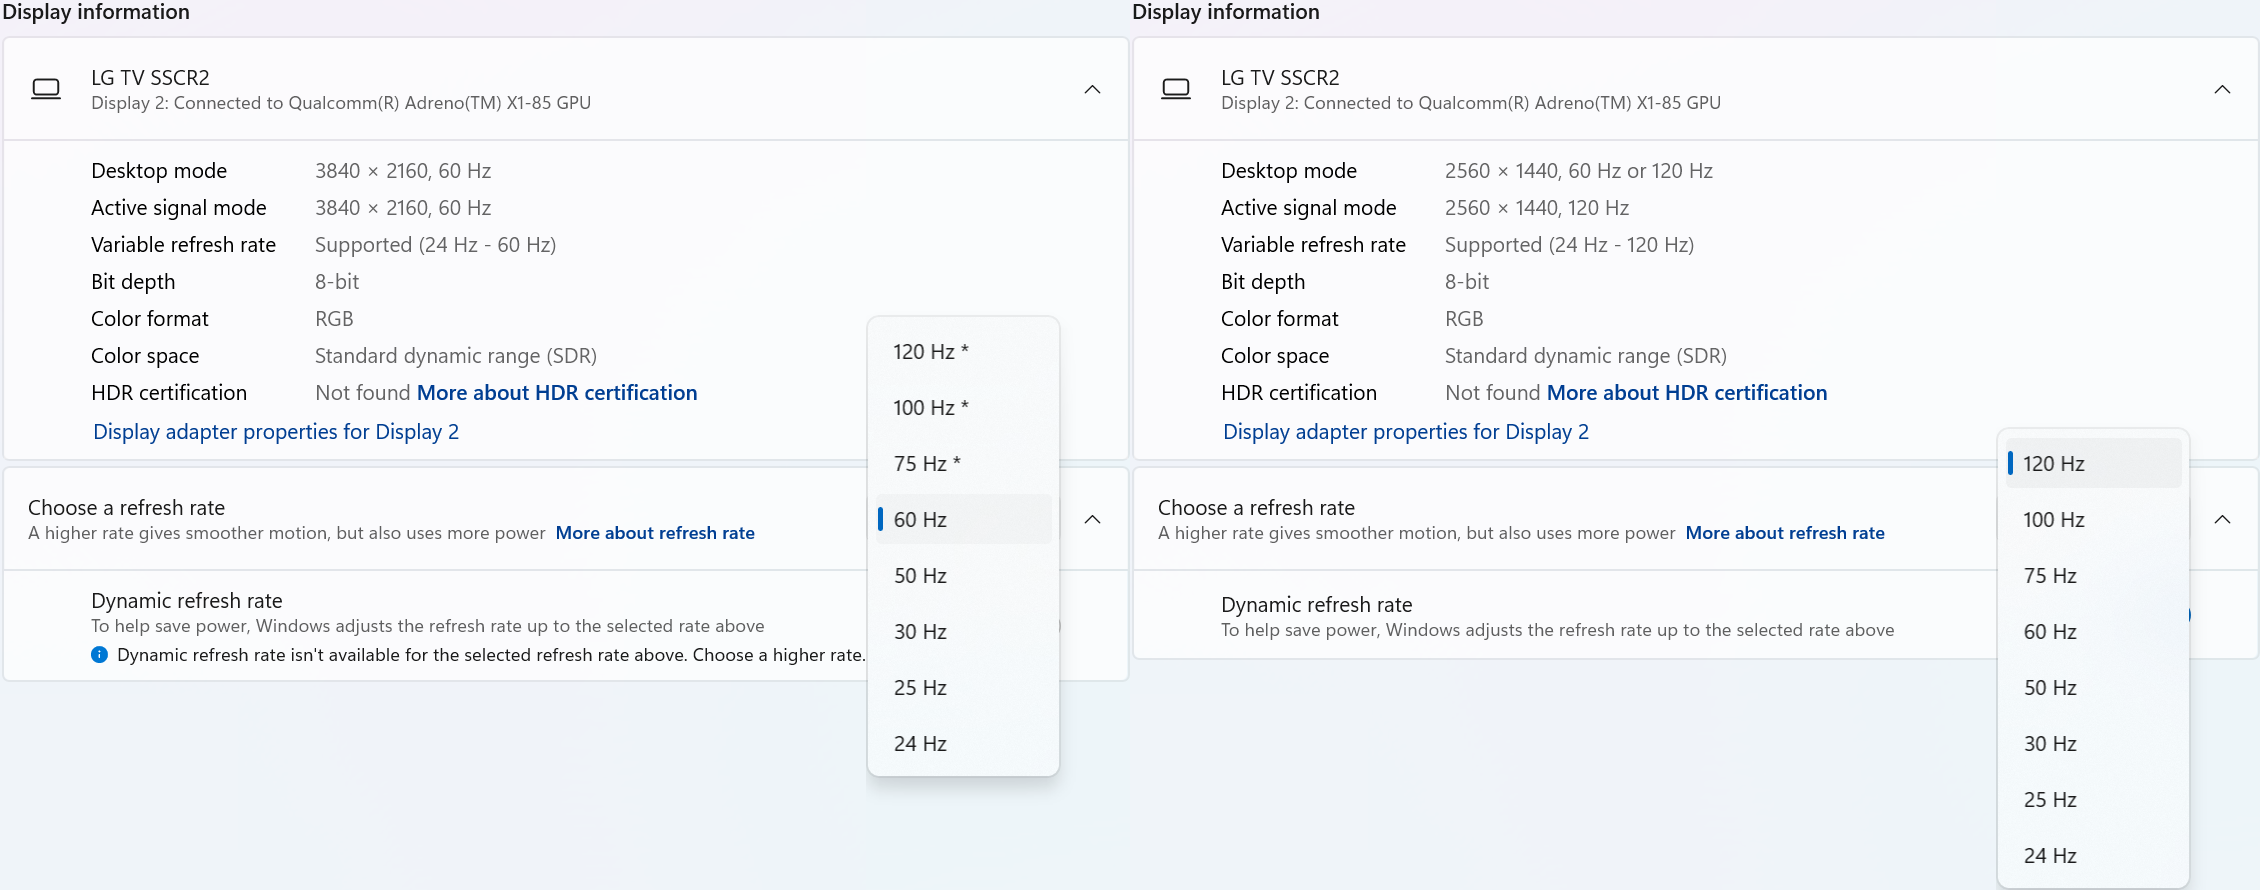
- We do not officially support high refresh rate displays above 60Hz. (Higher refresh rates may be selected but performance and stability above 60Hz is not guaranteed.)
- If converting the DisplayPort outputs to a different connector type, an active DisplayPort adapter is required. Passive DisplayPort adapters are not supported. (Dock DisplayPorts do not offer DP++ capabilities required for passive adapters.)
- Users with legacy DVI displays should use passive HDMI to DVI adapters.
- Users with legacy VGA displays should use active DisplayPort to VGA adapters or active HDMI to VGA adapters.
- Thunderbolt and USB-C DisplayPort Alternate Mode displays are not supported.
- Legacy Apple ADC displays are not supported.
- 5K or 6K displays are not supported as they require a higher resolution output than what this dock can offer.
- The use of multiple DisplayPort displays daisy-chained via MST (Multi-Stream) is not supported.
- Older 4K displays that require MST to operate at 4K 60Hz are not supported. (These displays use two 1920x2160 vertical panels in the display via MST to achieve 3840x2160.)
- Apple 12” MacBook Retina USB-C models without Thunderbolt 3 are limited to a single extended display or dual mirrored displays up to 4096x2160 @ 30Hz.
- Legacy Apple Thunderbolt (1 or 2) systems being converted to Thunderbolt 3 using Apple's bi-directional Thunderbolt adapter are not officially supported. (Some users have reported success, however, the dock is limited to a single display in this configuration and we cannot guarantee performance or stability.)
If you have any questions please feel free to contact us at support@plugable.com and we'll be happy to assist!
Is the TBT3-UDZ Supported Within Operating Systems Running in a Boot Camp Environment on a Mac?
The TBT3-UDZ is not officially supported within the Apple Boot Camp environment and may not perform as expected. We do not recommend the purchase of this docking station for Boot Camp users.
Are the Thunderbolt 3 Docks Compatible With Thunderbolt Add-In Cards (AIC's)?
From our testing as well as customers' experiences, our Thunderbolt 3 docks are not compatible with Thunderbolt add-in cards and often result in USB devices being not detected when connected to a Thunderbolt add-in card on a desktop PC.
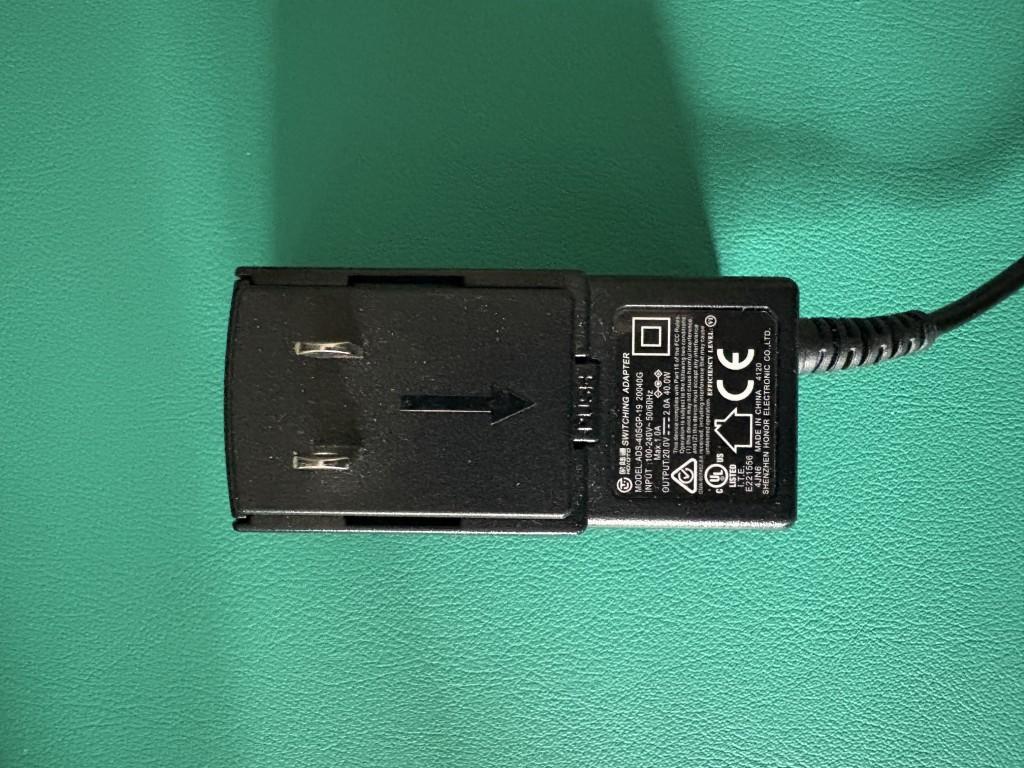
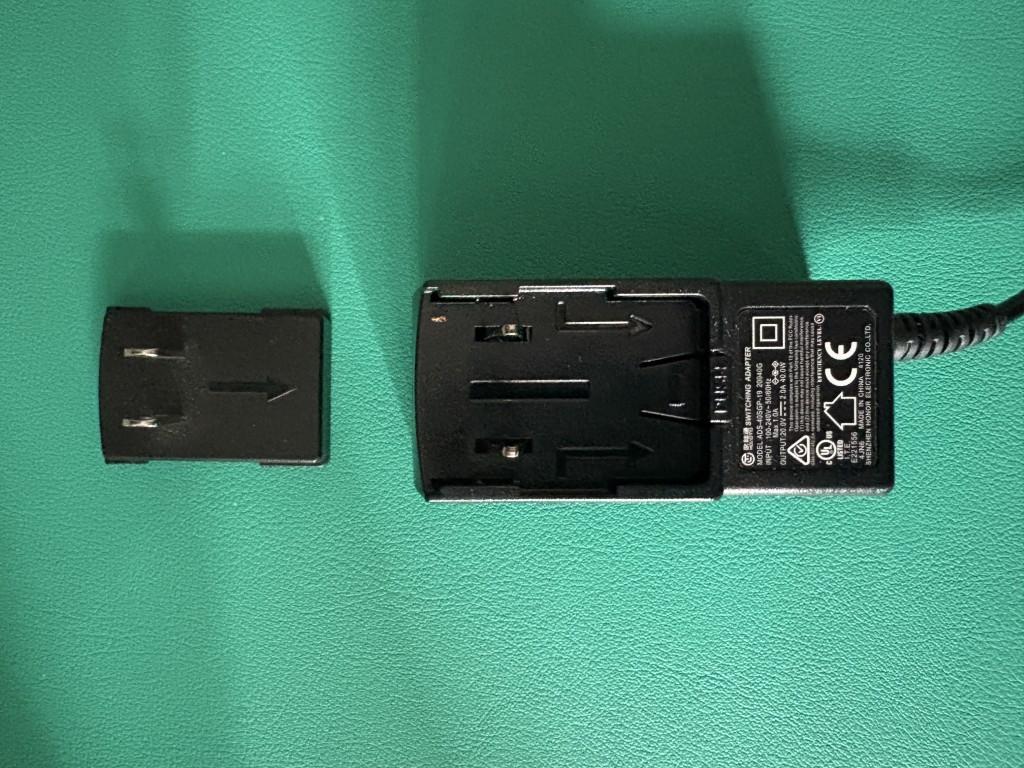
Replacement Docking Station Power Adapters
Below is a list of pre-tested power adapters and corresponding power prongs/cables for Plugable docking stations that can be purchased on eBay if a replacement is needed.
If the power adapter for your docking station or region is not listed or if it out of stock on eBay please contact us at support@plugable.com and we will be happy to assist further.
We offer a 30-day return period for our replacement power adapters listed on eBay.
Dock Models | Power Supplies |
---|---|
USB Products | |
UD-3900 UD-3000 UD-5900 UD-PRO8 |
|
UD-3900H | |
UD-3900PDZ | |
UD-3900Z | |
UD-6950 | |
UD-6950H | |
UD-6950Z | |
UD-CA1 UD-CA1A |
|
UD-ULTCDL (MK1 original and MK2 updated version) |
|
UD-ULTC4K (MK1 original and MK2 updated version) | |
USB4-HUB3A | |
Thunderbolt Products | |
TBT4-UDZ |
North America plug |
TBT3-UDC1 | |
TBT3-UDV | |
TBT3-UDZ | |
TBT3-UDC3 | |
TBT4-HUB3C |
Why do I not see any video when using a USB-C to DisplayPort cable?
When connecting to a monitor that accepts a USB-C input, from a docking station that outputs DisplayPort (such as the UD-6950, UD-6950Z, UD-6950H, TBT3-UDZ, TBT3-UDC3), you will need to use a DisplayPort to USB-C "Bi-Directional" cable. This is because many USB-C to DisplayPort cables are unidirectional and only send data in one direction, from USB-C source device to a DisplayPort input port on a monitor.
Additional information:
- Be sure to use a DisplayPort to USB-C cable that supports the 1.2 DisplayPort standard (or higher).
- To ensure optimal performance the maximum recommended cable length should be no longer than 1.8 meters (6 feet).
An example of a DisplayPort to USB-C "Bi-Directional" cable can be seen here: https://www.amazon.com/dp/B081VK1KHV
Can I Connect a USB-C Monitor or USB-C Video Adapter to My Thunderbolt 3 Dock?
The USB-C ports (excluding the host connection) on our TBT3-UDZ, TBT3-UDC3, and TBT3-UDC1 do not support video output. This means that USB-C/Thunderbolt monitors as well as USB-C video adapters will not output a display when connected to these ports.
Our TBT3-UD1-85W and TBT3-UD1-83 docks have a downstream Thunderbolt 3 port that can support video output up to 4K resolution @ 60Hz, so USB-C/Thunderbolt monitors as well as USB-C video adapters should output a display when connected to these ports.
My Plugable Dock Is Missing a Component Such As the Power Supply, USB Cable, or Other Adapter.
If your package is missing one or more of the items that should be included with your Plugable dock (included items are listed on a chart on the side of the box), start by double checking if the part is still in the packaging. Pieces can occasionally get stuck in the corners under the main insert in the box.
If you are still unable to locate the piece, please contact support@plugable.com with the following information:
1. Amazon Order ID (or other proof of purchase) associated with your Plugable device.
2. A description of the parts that are missing from your order.
3. Your preferred shipping address (and a phone number associated with that address).
4. The serial number of your Plugable Dock.
Can I Connect My High Refresh Rate Monitor (e.g. 120Hz, 144Hz) to a Plugable Dock?
Most Plugable docks do not officially support monitors over 60Hz including 120Hz or 144Hz refresh rate unless otherwise specified on the Plugable product page or listing.
DisplayLink USB Graphics technology and Silicon Motion based docking stations and graphics adapters, like our USB 3.0 dual display and USB Type-C triple display docking stations, are limited to 60Hz fresh rate by the USB graphics controller hardware.
USB Type-C DisplayPort Alternate Mode docking station and ports on our USB Type-C Triple Display Docking Stations can support higher refresh rates, but may be limited by the computer's capability and available bandwidth to the docking station. Additionally, when paired with DisplayLink or Silicon Motion USB graphics, having displays at different refresh rates may reduce overall system performance. Due to this we normally recommend limiting all connected displays to 60Hz refresh rate when using DisplayLink and Silicon Motion graphics technology with directly connected, or USB Type-C DisplayPort Alternate Mode controlled displays.
Monitors with refresh rates higher then 60Hz may be connected to a docking station operating at up to 60Hz, or connected directly on the computer's HDMI or DisplayPort to ensure the display is powered by the system's native GPU.
Does My TBT3-UDZ Need Updated Firmware?
The TBT3-UDZ docking station may need updated firmware if you are experiencing any of the following issues, and after standard troubleshooting (such as driver updates and firmware updates to the host system) has not helped:
- One or both monitors flicker or black out intermittently.
- One or both monitors do not wake from sleep, after a reboot, or cold boot.
- A second monitor is detected but displaying no image on screen. (can be connected via either "Display 1" or "Display 2" DP or HDMI output groups)
- Some displays that have built-in audio capabilities may not work as expected. (no audio, or inconsistent audio performance)
Note: Updating the dock firmware will not help with other non-video related issues, if experiencing other issues please contact us at support@plugable.com and we'll be happy to assist.
If you are experiencing any of the above issues, to update the firmware you will need access to a Windows 10 or Windows 11 system with Thunderbolt 3, Thunderbolt 4, or USB4. (Standard USB-C systems may also support the update process if they support USB-C DisplayPort Alternate Mode.
The firmware update cannot be performed on a Mac system, or systems running Linux. If you do not have access to a compatible Windows system to perform the firmware update please contact us for assistance.
To update the TBT3-UDZ dock firmware you must first identify which hardware revision of the dock you have (there are two currently). To determine what version you have and then update the firmware you can follow the below steps:
- Please connect the TBT3-UDZ dock that is to be updated to a Windows 10 or 11 system with Thunderbolt 3, 4, or USB4.
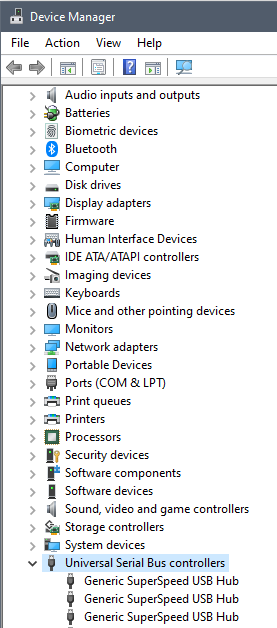
- Once confirmed that the dock is recognized by the system please navigate to the Device Manager.
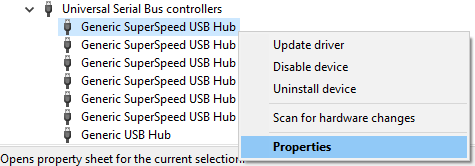
- Once Device Manager is open scroll down to "Universal Serial Bus controllers" and expand the list:
- The TBT3-UDZ dock has three "Generic SuperSpeed USB Hub" entries that should show up. (If you do not see any entries at all then the dock is not being detected properly. Please feel free to contact us for assistance if this occurs.)
Note: If you see more than three entries then the system may have another USB hub, etc attached. If so, you may wish to disconnect the additional device(s) as it will make this process easier to identify the dock.
- Right click on the first entry and choose "Properties":
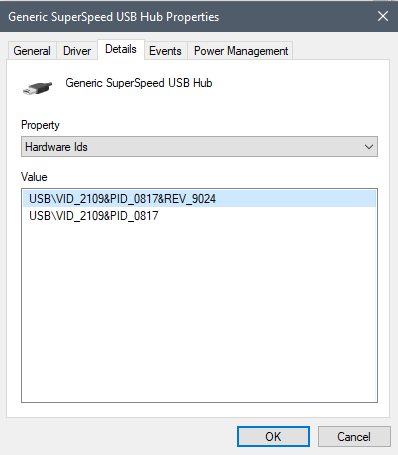
- Now navigate to the "Details" tab, and below where it says "Property" click the drop down menu and choose "Hardware Ids":
- Make note of the "USB\VID_xxxx" value. Then check the additional two Generic SuperSpeed USB Hub entries, also noting their USB\VID_xxxx values.
- If all three start with USB\VID_2109... please follow these PDF instructions to download and perform the firmware update:
TBT3-UDZ firmware update procedure (VIA USB hub models).pdf
- If all three start with USB\VID_05e3... please follow these PDF instructions to download and perform the firmware update:
TBT3-UDZ firmware update procedure (Genesys Logic USB hub models).pdf
If you encounter any issues during the firmware update process, or have any additional questions please contact us at support@plugable.com and we'll be happy to assist.
Do Plugable products support the Apple SuperDrive?
Unfortunately Plugable products do not support the Apple SuperDrive.
The Apple SuperDrive has stringent power requirements that can only be met by directly connecting the SuperDrive to your host laptop. As a result at this time Apple recommends only using their USB-C adapter cables. You can find more information on that here -→ How to connect the Apple USB SuperDrive
If you have purchased a Plugable product to use with your Apple SuperDrive, and would like some additional assistance please do not hesitate to reach out. You can do so by emailing support@plugable.com, or going to Plugable.com/Support.
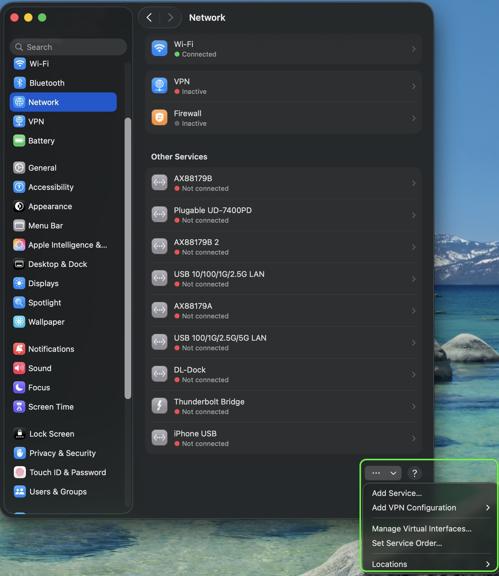
My Plugable product with wired Ethernet is no longer working on macOS. What can I do?
Please Note
The below guide is an advanced troubleshooting step, and we do not recommend doing so unless you are comfortable manually altering files on your Apple product running macOS. You may not be able to perform the below troubleshooting step if you are unable to execute administrative credentials on your laptop. Please reach out to our support first if you do not wish to attempt the below instructions. You can do so at Plugable.com/Support
How to delete a specific Ethernet adapter from your Network devices on macOS
- Click on the Apple logo in the top left corner of your primary monitor, and select ‘System Preferences’
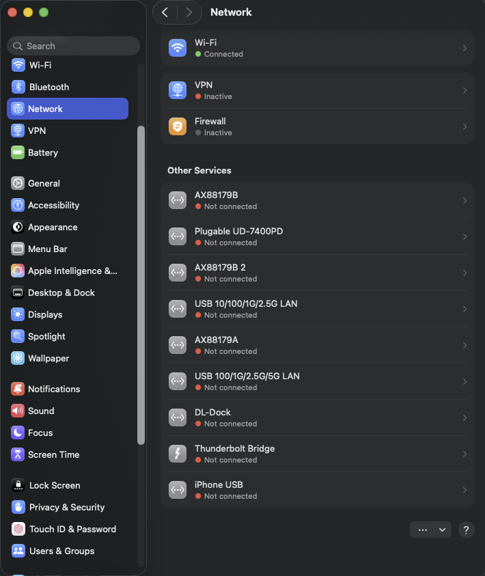
- Next select ‘Network’ in the ‘System Preferences' window.
- In the now visible list, please select the Plugable Ethernet, or Thunderbolt Ethernet device that may not be working as expected.
- Once selected click on the minus button in the bottom left of the network window.
- Click on Apply in the bottom right.
- Next click on the plus button in the bottom left of the network window, and add the previously removed device.
- Click on Apply in the bottom right.
- Test to see if this has resolved the unexpected behavior, and assure that your Ethernet is now working.
- If this does not resolve the problem, please proceed to the next section (As noted previously the next section is for advanced users only!)
Manually erase your macOS Network Settings to fully reset the Network configuration
(Advanced! Click to reveal)
Warning!
This will fully erase all of your Network configuration! Do not skip any steps, and proceed only if you are comfortable with each step!
- Open the ‘Finder’ app, then in the ‘Go’ menu at the top of your screen select ‘Computer’
- Click on ‘Macintosh HD’ then Library, Preferences, SystemConfiguration
- Copy the file named ‘NetworkInterfaces.plist’ to your desktop as a backup of your current configuration.
- Delete the original version of the ‘NetworkInterfaces.plist’ located in the SystemConfiguration directory.
- Restart your Mac
- Login to your Mac, and return to System Preferences → Network
- If the list is now empty, please re-add the Plugable or Thunderbolt network adapter by clicking on the plus button in the bottom left of the Network window. Once done click on 'Apply'.
- Test to see if this has resolved the unexpected network behavior
I am still unable to get my Ethernet connection working on my Mac
If this is the case please reach out to our support team. When you do please include a diagnostic log gathered using our PlugDebug tool (instructions are provided on the PlugDebug page). If you are not able to gather the PlugDebug diagnostics do not worry we are still here to help! Please reach out to our support team at support@plugable.com or Plugable.com/Support with a detailed description of your problem, and the model of Plugable product you are using.
The monitor I am connecting to the TBT3-UDZ has an HDMI 2.1 video input port, and the monitor is not working or not working at its maximum resolution. How do I fix this?
The HDMI video output ports of the TBT3-UDZ dock support the HDMI 2.0 standard.
If a monitor supporting HDMI 2.1 is not working or not working at the maximum resolution when connected to the TBT3-UDZ via a HDMI video cable, please consult your monitor's user manual in order to see if the HDMI version setting can be changed to version 2.0 or 1.4.
If the HDMI version can be changed, please change the HDMI version setting to a lower version number and then test the behavior again.
Can I leave my notebook computer connected to a charging dock overnight, or should I discharge and recharge the notebook battery regularly?
We are often asked if it is okay to leave a notebook computer connected to one of our USB-C docking stations with Power Delivery for extended periods of time. The short answer is yes, it is no different from leaving the laptop connected to the manufacturer's original USB-C power supply for the same time. The long answer is yes for modern laptops, and maybe for older (1990s-early 2000s laptops) and involves going into the different battery technologies used in consumer electronics devices.
Another common question is if it is possible to use the docking station but to disable powering and charging the computer. When a modern notebook computer runs on battery power it will often set the system to a reduced power state which may impact performance, or connected devices and we recommend always powering the computer when using a desktop docking station. For all of our docking stations that provide power to the host computer this will not affect the lifespan of the computer's battery.
Modern Laptop Batteries: Lithium-Ion
Lithium-ion (li-ion) batteries are found in a wide range of consumer electronics from notebook computers and cell phones, to electric cars, power tools, and wearable electronics like wireless earbuds. Li-ion offers fast charging, high-current discharging, fairly long service live compared to other rechargeable battery technologies and are relatively inexpensive.
The life-span of a rechargeable battery depends on many factors including age, temperature history, charging patterns, the chemical composition of the specific battery, and usage. For example batteries stored at 100% charge will degrade faster than batteries stored at 50% charge, this is why most consumer electronics devices arrive from the manufacturer with between 25% to 75% charge.
Lithium-ion batteries are consumable components, however in most modern computers, cell phones, and tablets these are not user serviceable components. To help maintain the battery all modern computers and most consumer electronics will include battery charge and protection circuits. These can be fairly simple, charging up the battery at preset rates depending on the charge level to help maintain the battery life, or complex software controlled charging that monitors battery temperature, voltage and current draw to maintain the fastest charging while maintaining the battery longevity.
Modern notebook computers can be left connected to the original power cable or a docking station with charging capability for extended periods, and do not benefit from regular discharge/recharge cycles. Our docking stations with charging capability rely on USB Type-C Power Delivery to power and charge compatible computers. USB Type-C Power Delivery is a negotiated charging protocol between the host computer and the docking station or USB Type-C power supply, this allows the computer to draw only the power it requires, and even select the best voltage level for powering the computer. In combination with a computer's built-in battery charging controller the computer is capable of maintaining the battery's optimal state even when left connected to a power source for an extended period of time.
Legacy Laptop Batteries: NiCad and NiMH
Older laptops, from the 1990s and some early 2000s, as well as some consumer electronics, and most rechargeable AA or AAA battery replacements use Nickel-Cadmium (NiCad) or Nickel-Metal Hydride (NiMH) batteries. These batteries are slower to charge and discharge than li-ion batteries, and require very simple charge controllers, and in some cases can even be trickle-charged ( very low-current continuous charging ) if desired.
These batteries generally don't have smart charging controllers and to prolong the life of the battery required "training" or fully discharging and recharging the battery every so often. Many laptop manufacturers recommended fully charging and discharging a new laptop 2-3 times to train the battery, this is not necessary with modern laptops.
Conclusion
Modern notebook batteries are managed by the computer's built-in battery charging circuit, and require little to no user intervention to maintain optimal battery health. It does not harm the battery to leave the computer connected to an external power supply, so long as the computer is being used regularly. If the computer is to be stored for a prolonged period then discharging the battery to between 50-75% can help to maintain the battery life.
Batteries are consumable components and degrade over time, however modern notebook computers can extend the battery life generally to meet or exceed the life of the computer's other electronic components.